 FREE 1 to 3-Day Delivery on Orders $119+ Details
Best Sellers


How To Install a Pypes Off-Road X-Pipe on your 2011-2014 GT Mustang
Pypes Performance Exhaust
2705 Clemens Road Suite B103 Hatfield, PA 19440
800-421-3890 (voice) 267-638-3507 (fax)
www.pypesexhaust.com
XFM24
409 Stainless Steel
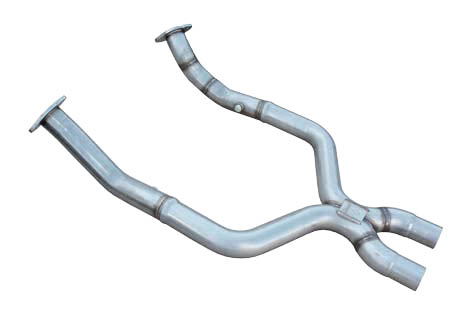
2011-14 Ford Mustang 3” Off Road X-pipes
Thanks again for purchasing your new 409 stainless steel Pypes Performance Exhaust 2011-14 Mustang 5.0 X-pipe. Please be sure to confirm all the components in the kit were received in your shipment before beginning installation. These kits will include a pair of DFM76 downpipes a new XFM45 x-pipe with 02 bungs and installation hardware. If you find any component missing, please contact our office at 800-421-3890 for replacement before you begin your installation.
Installation of this kit will require a few simple hand tools, a cutting device and penetrating oil.
For a quicker and tighter installation, air tools are recommended.
Technical assistance is available both online at www.pypesexhaust.com or 800-421-3890
PLEASE TRY TO INSTALL OUR WAY FIRST
This X-pipe is designed to replace your factory catted H-pipe and requires the use of an aftermarket tuning devise of your choice. Intended for off road use only!
1. Begin by loosening the 15mm nuts that hold the factory cats to the factory manifolds. This is best done by using a long extension from the top. Make sure you retain one nut on each side.
2. Next securely raise your car with jack stands or a lift so that you can work safely under the car.
3. Now you can unbolt the factory band clamps located at the factory midpipes. Once undone you will be able to drop the midpipes out of the way. Next loosen the two factory band clamps and remove the H-pipe from the car. Note you will need to reuse all the factory clamps.
4. In order to reuse the bell shaped clamps attached to the H-pipe. You will need to cut the tabs that hold them to the H-pipe.
5. Now you can remove the factory cat pipes retaining the gaskets because you will need to reuse them.
6. Begin your new x-pipe installation by loosely installing the DFM76 down-pipes and gaskets with the supplied hardware. Transfer the oxygen sensors from the factory cat pipes to new downpipes.
7. You can now install your new x-pipe making sure to O2 bung on the passenger side faces up. Slide the Bell shaped clamp on the X-pipe and then mate the X-pipe to the DFM76 down-pipes and loosely tighten the bell clamps. Install the butt clamps at the midpipes. You can now tighten all the clamps. Transfer the remaining two O2 sensors from the h-pipe and install them in the new x-pipe.
8. Once all the clamps are tight and O2 sensors are connected you can finish tightening the DFM76 down pipes to the factory manifolds with the new hardware. This step can be done from under the car.
9. Now is the time to install you aftermarket tuner.
10. Test drive the car for several miles and inspect for leaks or loose connections. A black residue around a connection indicates an exhaust leak. After around 50 miles of driving, re-inspect for leaks and loose connections.
Now it’s time to fire up that muscle car and enjoy your new Pypes Performance Exhaust.
