 FREE 1 to 3-Day Delivery on Orders $119+ Details
Best Sellers


How To Install QA1 Rear Lower Control Arms on your 1979-2004 Mustang; Excludes 1999-2004 Cobra
Installation Time
3 hours
Tools Required
- Floor Jack
- Grease Gun
- Jack Stands (4 Required)
- Blue Loctite™
- Tire Chocks
- Torque Wrench
- Metric Socket and Wrench Set
- ½” drive 14”-16” extension
Shop Parts in this Guide
QA1
Technical Support Line: (952) 985-5675 Fax Line: (952) 985-5679
21730 Hanover Ave.
Lakeville, MN 55044
www.QA1.net
ASSEMBLY INSTRUCTIONS
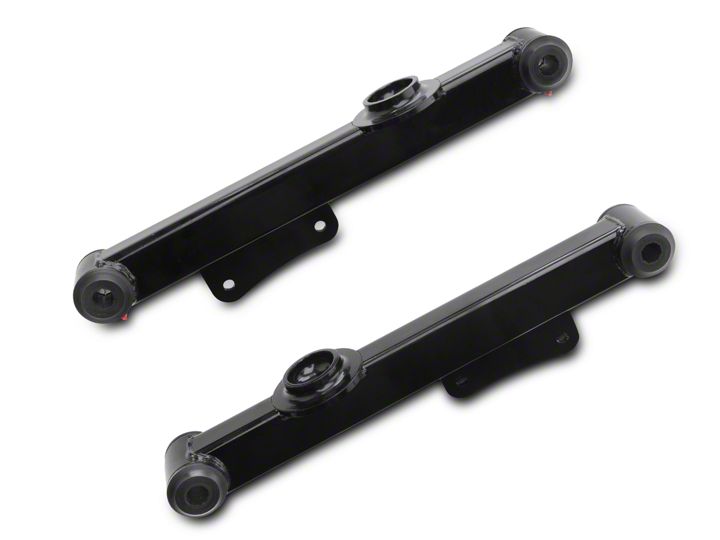
QA1 p/n 5221 Lower Trailing Arms
1979-2004 Mustang & 1979-1986 Capri
READ ALL INSTRUCTIONS CAREFULLY AND THOROUGHLY PRIOR TO STARTING INSTALLATION. PRODUCTS THAT HAVE BEEN INSTALLED ARE NOT ELIGIBLE FOR RETURN. USE THE PROPER JACKING LOCATIONS. DEATH OR SERIOUS INJURY CAN RESULT IF INSTRUCTIONS ARE NOT CORRECTLY FOLLOWED. A GOOD CHASSIS MANUAL, AVAILABLE AT YOUR LOCAL PARTS STORE, MAY ALSO AID IN YOUR INSTALLATION.
DISCLAIMER / WARRANTY
QA1 WARRANTS THAT THE PRODUCTS WILL BE FREE FROM DEFECTS IN MATERIAL AND WORKMANSHIP FOR ONE YEAR FROM DATE OF SALE TO THE ORIGINAL PURCHASER. QA1 MAKES NO OTHER WARRANTY OF ANY KIND, EXPRESS OR IMPLIED. QA1 SHALL HAVE NO OBLIGATION UNDER THE FOREGOING WARRANTY WHERE THE DEFECT IS THE RESULT OF IMPROPER OR ABNORMAL USE, YOUR NEGLIGENCE, VEHICLE ACCIDENT, IMPROPER OR INCORRECT INSTALLATION OR MAINTENANCE, NOR WHEN THE PRODUCT HAS BEEN REPAIRED OR ALTERED IN ANY WAY. QA1’S LIABILITY IN THE CASE OF DEFECTIVE PRODUCTS SUBJECT TO THE FOREGOING WARRANTY SHALL BE LIMITED TO THE REPAIR OR REPLACEMENT, AT QA1’S OPTION, OF THE DEFECTIVE PRODUCTS.
THE USER UNDERSTANDS AND RECOGNIZES THAT RACING PARTS, SPECIALIZED STREET ROD EQUIPMENT, AND ALL PARTS AND SERVICES SOLD BY QA1 ARE EXPOSED TO MANY AND VARIED CONDITIONS DUE TO THE MANNER IN WHICH THEY ARE INSTALLED AND USED. QA1 SHALL BEAR NO LIABILITY FOR ANY LOSS, DAMAGE OR INJURY, EITHER TO A PERSON OR TO PROPERTY, RESULTING FROM THE INSTALLATION, DIRECT OR INDIRECT USE OF ANY QA1 PRODUCTS OR INABILITY BY THE BUYER TO DETERMINE PROPER USE OR APPLICATION OF QA1 PRODUCTS. WITH THE EXCEPTION OF THE LIMITED LIABILITY WARRANTY SET FORTH ABOVE, QA1 SHALL NOT BE LIABLE FOR ANY CLAIMS, DEMANDS, INJURIES, DAMAGES, ACTIONS, OR CAUSES OF ACTION WHATSOEVER TO BUYER ARISING OUT OF OR CONNECTED WITH THE USE OF ANY QA1 PRODUCTS. MOTORSPORTS ARE DANGEROUS; AS SUCH, NO WARRANTY OR REPRESENTATION IS MADE AS TO THE PRODUCT’S ABILITY TO PROTECT THE USER FROM INJURY OR DEATH. THE USER ASSUMES THAT RISK!
Removal of Stock Lower Trailing Arms
1. Place the car on a level surface and place tire chocks in front of and behind front tires.
2. Support the rear of car on jack stands by the frame rails and remove the rear wheels.
3. Lift the rear axle with floor jack to approximate ride height, then support the rear axle with jack stands.
Note: Keep jack stands under the car during the complete removal and installation procedure.
Caution: Do not remove both trailing arms at the same time or axle will rotate and trailing arm installation will become much more difficult.
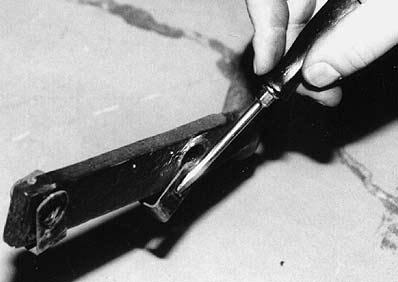
4. Remove the rear sway bar. Remove the clip nuts from the sway bar (see Figure 1). Make sure the car is still firmly supported by the jack stands.
Figure 1
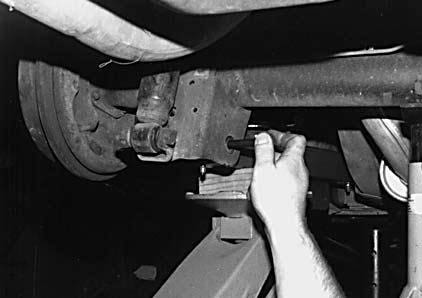
5. Lift the rear of the trailing arm with the floor jack so the bolt can be removed (see Figure 2). Remember, do one side at a time.
Figure 2
6. Carefully remove the rear trailing arm bolt. CAUTION: The trailing arm is under tremendous pressure from the rear spring. Be sure the floor jack is sturdy and able to control the release of tension in a smooth, controlled manner.
7. Carefully lower trailing arm, releasing tension on the spring. Note that the opening at the bottom coil of the spring is towards the rear of the vehicle. It must be re-installed in the same position or the ride height will be affected. Remove the spring. Inspect the rubber insulators on the spring and replace if needed.
8. Remove the front bolt and old trailing arm. A 14”-16” long extension will make it easier to reach the bolt due to interference from the muffler.
9. Clean the frame at trailing arm pivot area with a wire brush.
Installation
1. Install the steel bushing sleeve in the bushing using supplied grease. The sleeve with the small hole is for model years 1979-1998 and the sleeve with the large hole is used for 1999-2004 model years.
2. Install the new trailing arm with the grease fittings facing down and the sway bar mount toward the front of the car.
3. Install the new trailing arm by locating the front bolt first. If the fit is too tight, grease the outside edges of the bushing to help the arm slide into place. Install the nut and bolt but do not tighten at this time. The trailing arm should pivot smoothly in the chassis.
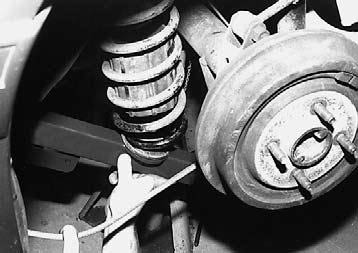
4. Re-install the spring and all rubber insulation pieces, making sure that the opening at bottom of the spring faces the rear of the car (see figure 3).
Figure 3
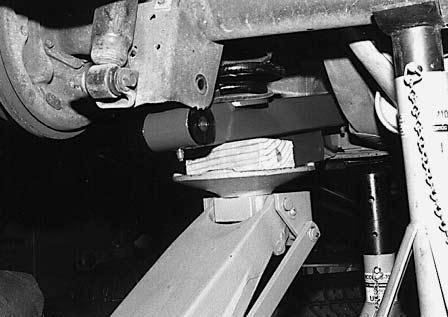
Use a block of wood or a similar support between the floor jack and the trailing arm to prevent damage to the zerk fitting (see figure 4).
Figure 4
5. Place one drop of Loctite™ on clean threads and torque the nut to 70 lb. ft. on both the front and rear trailing arm bolts.
6. Repeat for the other side.
7. Re-install sway bar with ends to outside of trailing arm sway bar mount. Use factory bolts with supplied nuts and washers. Re-install emergency brake cable clamp on the rear most sway bar bolt if equipped. The bracket may require minor modification.
8. Finish the installation by lubricating the front and rear bushings with a grease gun. Be sure to replace the dust caps on the zerk fittings to prevent dirt and corrosion from damaging the fitting.
Check all nut and bolt tightness after first 10 miles.
To further upgrade your suspension, use other QA1 suspension products such as coil-overs, shocks, struts, springs,
K-members, torque arms, panhard rods, sub-frame connectors, strut tower braces, rod ends, sway bars, tubular control arms, spherical bearings, carbon fiber driveshafts and more. For more information, please visit www.QA1.net.
