 FREE 1 to 3-Day Delivery on Orders $119+ Details
Best Sellers


How to Install a Replacement Radator Fain in your 2001-2004 Mustang GT, Mach 1 and Cobra
Installation Time
2 hours
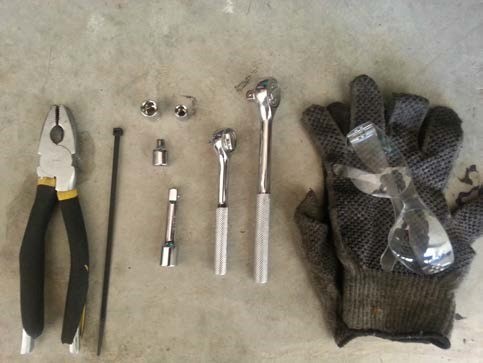
Tools Required
- Flat Head Screwdriver
- 7/16 Socket
- 5/16 Socket
- Socket Wrench
- Socket Wrench Extension Adapter
- Pliers (Optional)
- (1) 7" Standard Cable Ties (40 lb.)
- Chock Blocks or Bricks
- Safety Glasses (Optional)
- Mechanics Gloves(Optional)
Shop Parts in this Guide
Installation
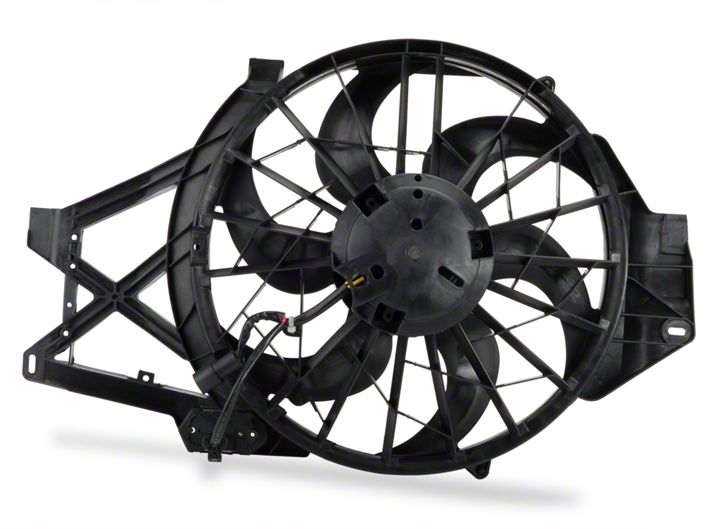
Please Note: This install was completed on the Item# 94457 Radiator Fan Assembly (01-04 GT,V6,Mach 1,Cobra) but the installation instructions can be referenced for any brand radiator fan assembly.
WARNING: Allow the vehicle to cool completely 3-4 hours after use, before touching and working under the hood of your vehicle!
CAUTION: It is recommended for safety to disconnect your negative battery cable from the battery before touching electrical cables underneath the hood!
1. Engage emergency brake and put transmission in gear; automatics use Park.
2. Place bricks or wheel chocks in front of and behind each of the front wheels, and open hood.
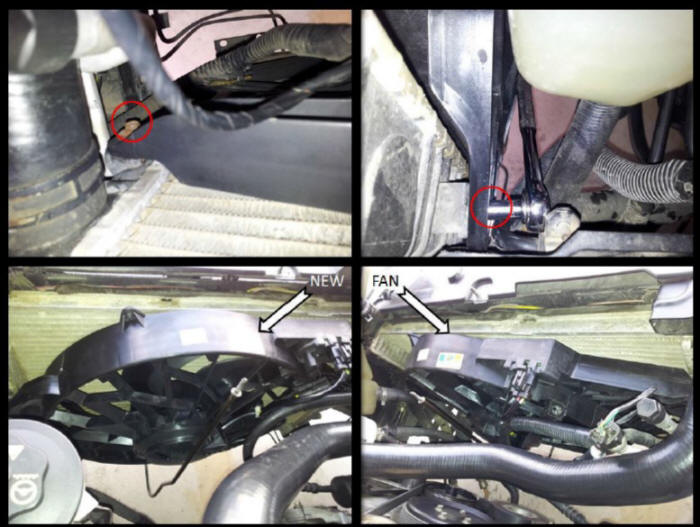
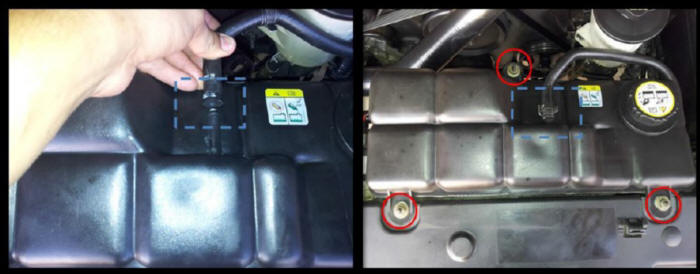
3. Begin by removing the (3) nut fasteners securing the radiator fluid reservoir to the vehicle. (Red Circles)
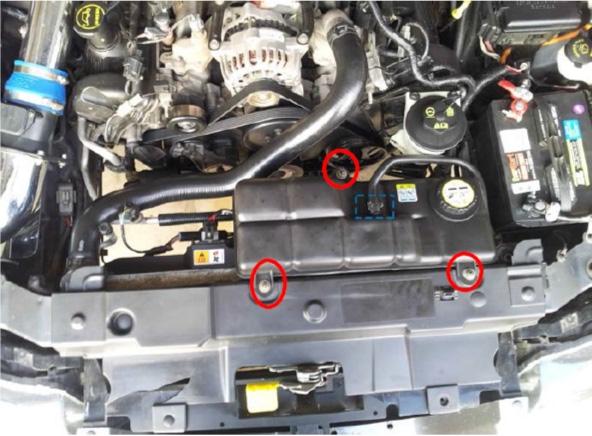
4. Remove the overflow hose by removing the fastening clip by hand or with pliers. (Blue Square)
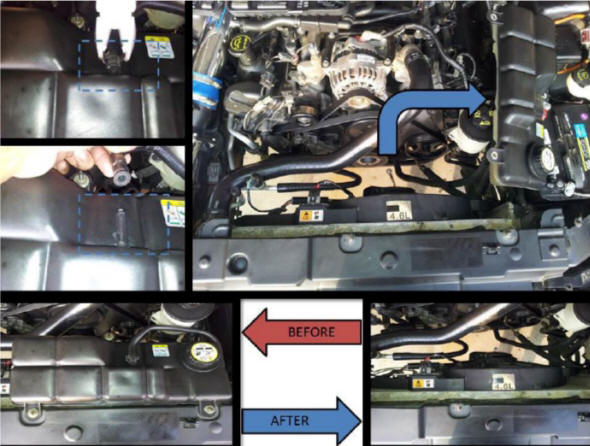
5. Move the overflow hose out of the way; be careful as fluid may come out. Maneuver the reservoir over to the battery area.
Note: You can remove the outlet hose underneath the reservoir and drain the reservoir in order to remove the entire reservoir. In my installation I just moved the reservoir out of the way.
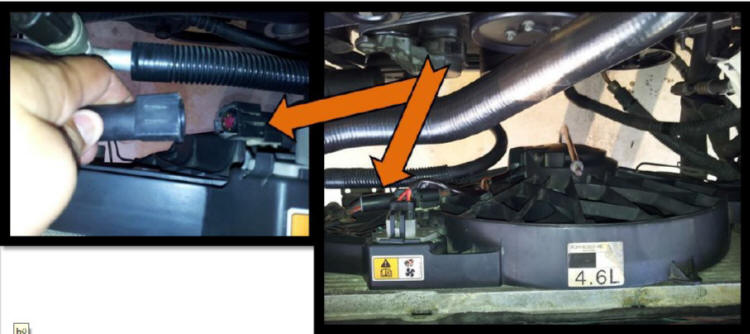
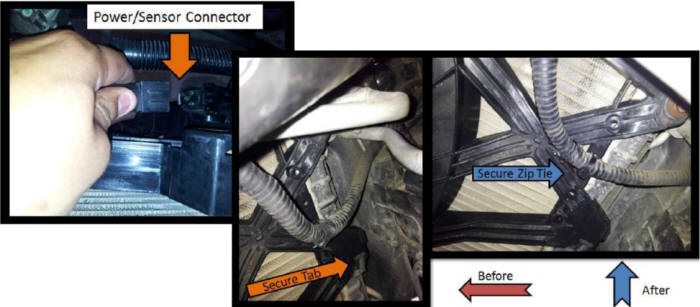
6. Disconnect the power/sensor connector from fan assembly (Orange Arrow)
7. Remove mounting bolts (2) securing the fan assembly to the radiator. (Orange Arrows)
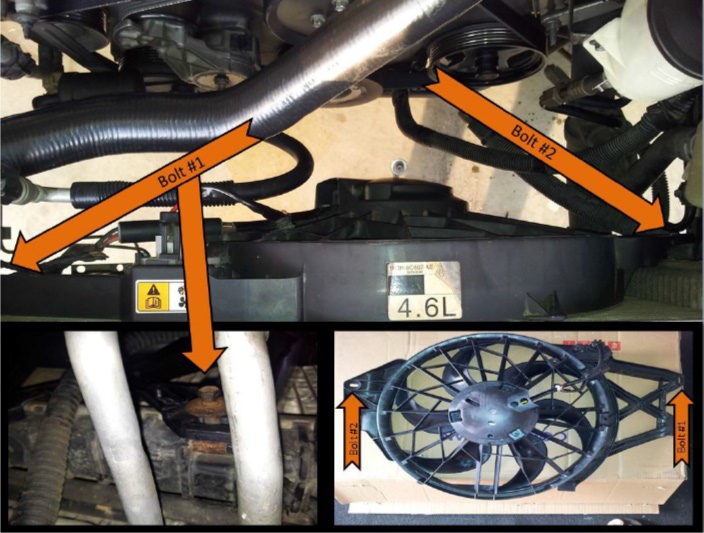
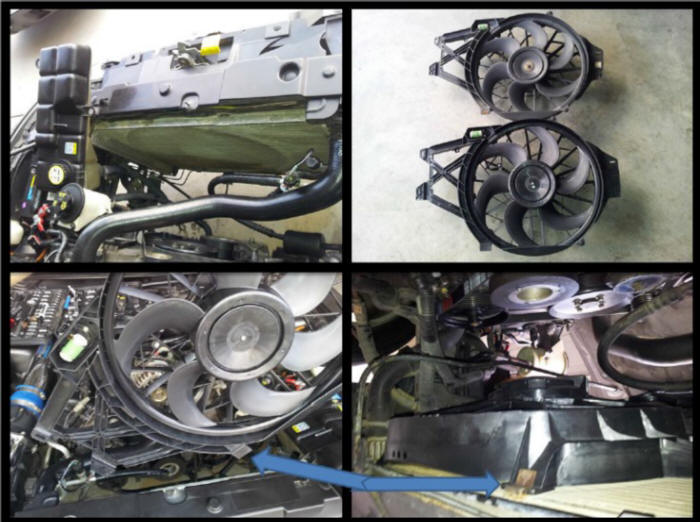
8. Remove the fan assembly from the engine compartment by lifting straight up from the top of the fan assembly.
Installation Procedures:
1. With fan assembly removed you can inspect the radiator for objects or debris that would be blocking the radiator. After area is clear of debris you can installed the new radiator fan assembly. Make sure the bottom tab of the fan assembly is secured inside the clip on the bottom of the radiator. (Blue Arrows)
2. Once the fan assembly is in the secured position with the bolt holes lined up, use the 5/16 socket and re-install the (2) mounting bolts. Torque to approximately to 18-22 ft. lbs., or hand tight. (Red Circles)
3. Re-connect the power /sensor connector, once connected use the zip tie to secure the excess wire to the fan assembly. Once this is complete double check the fan assembly to make ensure the fan assembly tabs are secured on the radiator. Ensure the bolts (2) secure the fan assembly tightly to the radiator, and ensure the power/sensor cable is secured and is away from the moving drive belt.
4. Re-Install the radiator reservoir, secure the reservoir with the bolts (3) using the 7/16 socket. Once the radiator reservoir is secured, Re-place the over flow hose and ensure it is secured with the hose clamp.
5. Ensure everything is secured; ensure there is nothing obstructing the drive belt area. Once this is confirmed you can now remove the chock blocks or bricks from the wheels. If the negative battery cable was disconnected this would be the best time to re-install and secure the negative battery cable.
Installation Instructions written by American Muscle customer David Samaniego 07.09.13
