 FREE 1 to 3-Day Delivery on Orders $119+ Details
Best Sellers


How to install a Raxiom Icon LED Tail Light on your 1999-2004 Mustang, Excludes 99-01 Cobra
Installation Time
2 hours
Tools Required
- Socket wrench
- 11mm socket
- small regular screwdriver
- razor blade
- electric tape
Shop Parts in this Guide
1999-2004 Icon LED Tail Lights
CONTENTS:
(2) - Tail Lights
(2) - Wire Harness connector
TOOLS REQUIRED:
Socket wrench
11mm socket
small regular screwdriver
razor blade
electric tape
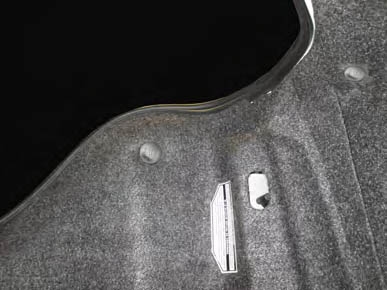
STEP 1:
Open the trunk lid and access one side of the trunk. Remove the (2) plastic, trunk liner retainers using a small regular screwdriver.
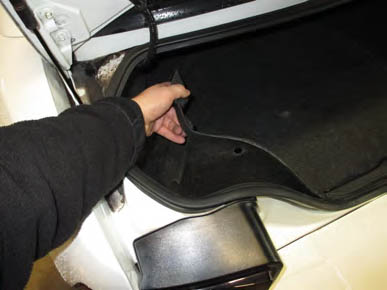
STEP 2:
Carefully pull back the rear trunk liner, then pull the side trunk liner down and over the stud then out of the way. Do not pull the liner far, it is brittle and will
break.
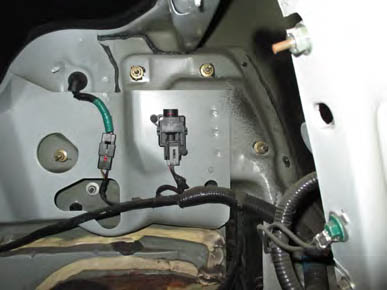
STEP 3:
From inside the trunk, remove the (4) 11mm nuts from the tail light studs. Push the rubber wire grommet through the rear of the car and unplug the
tail ligth connector. The tail light can now be removed from the car. (trunk liner has been removed from car for illustration purposes.)

STEP 4:
Lay the old and new lights next to each other and swap the (3) tail light bulbs. The reverse socket will not be reused, remove the bulb place it out of the
way.
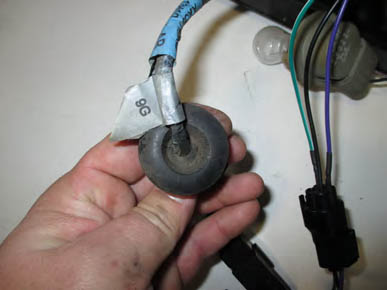
STEP 5:
Carefully cut a slot in the tail light wire harness grommet and insert the LED back up light wires through the rubber. The LED back up light harness plug will be mounted on the inside of the car.
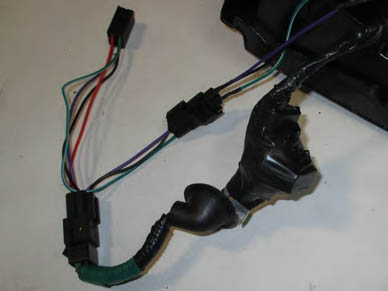
STEP 6:
Plug the wires harnesses together as shown. Tape the originial reverse bulb socket to the main tail light harness and cover it with electrical tape; this
will keep it from making noise by moving around in the tail light. Tuck the old reverse socket and/or sequential harness box (if installing sequentials)
into the upper inside corner of the tail light housing. Securely place the tail light housing back into the car and test its functionality. If everything is
functioning properly reinstall everything and repeat the process on the opposite side of the car.
STEP 7:
Care for your new tail lights by keeping them clean
with spray detailer and a clean microfiber cloth. Do
not use harsh solvents or buffing compounds on
the lenses.
If your car will not start after install, you may have
tripped the inertia switch during the passenger side
light installation; simply press the red button on the
top of the inertia switch seen in STEP 3 and the
fuel pump will begin funtioning normally.
