 FREE 1 to 3-Day Delivery on Orders $119+ Details
Best Sellers


How to Install a Rear Seat Delete - Fastback - Black on a 2015-2017 Mustang
Installation Time
2 hours
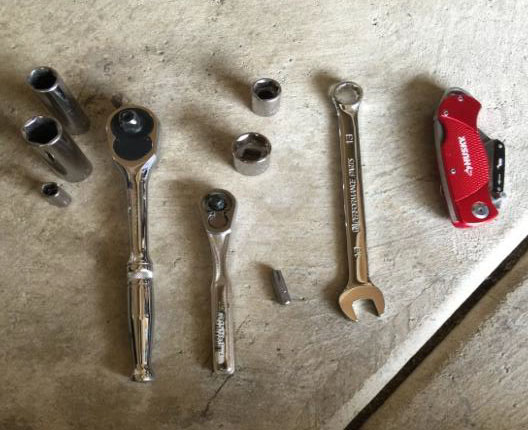
Tools Required
- 1/4in and 3/8in Socket wrench
- Box cutter
- 13mm open-end wrench
- T40 and T45 torx bits, with driver
- 8mm, 13mm, 15mm, 17mm sockets – may prefer to use deep sockets, but not necessary.
Shop Parts in this Guide
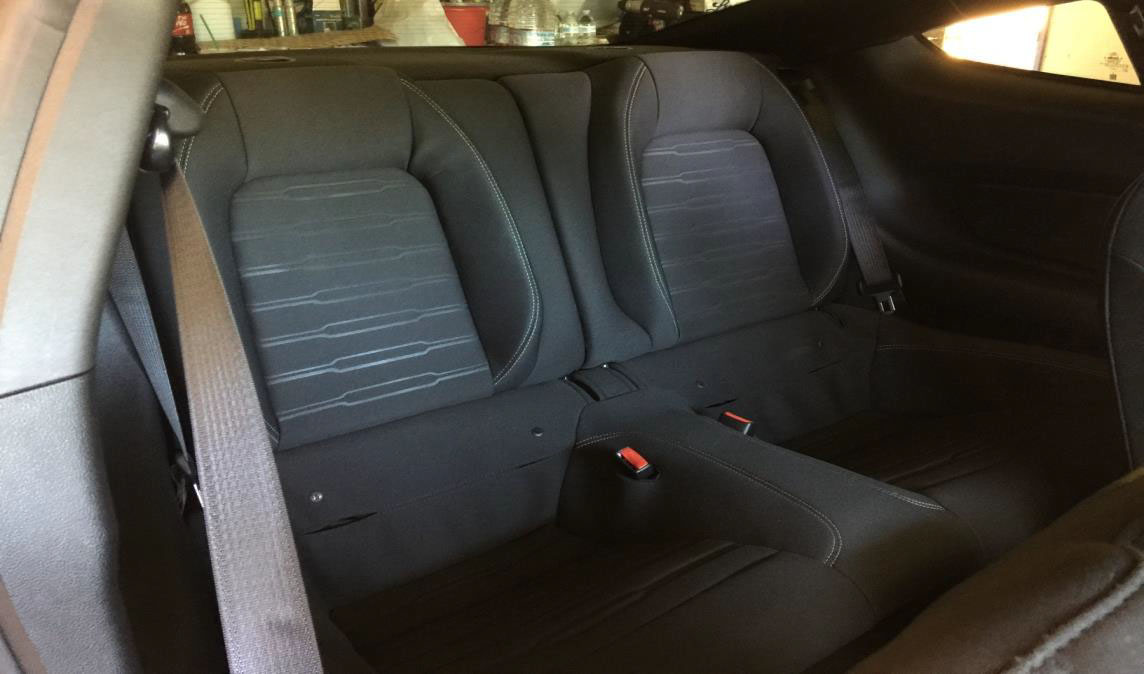
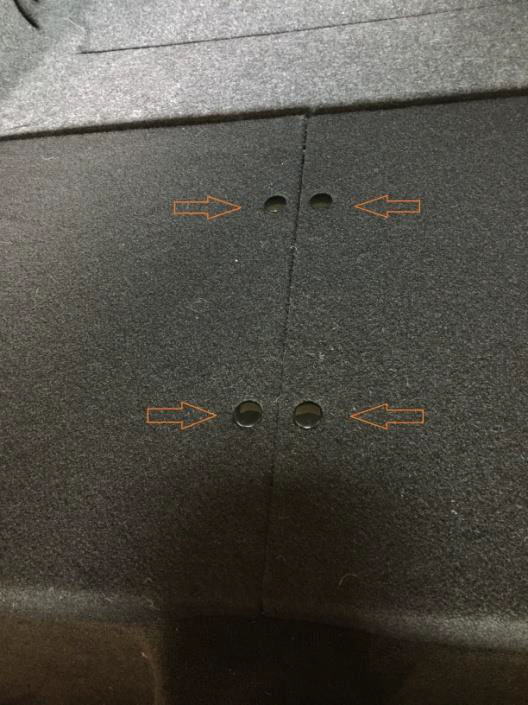
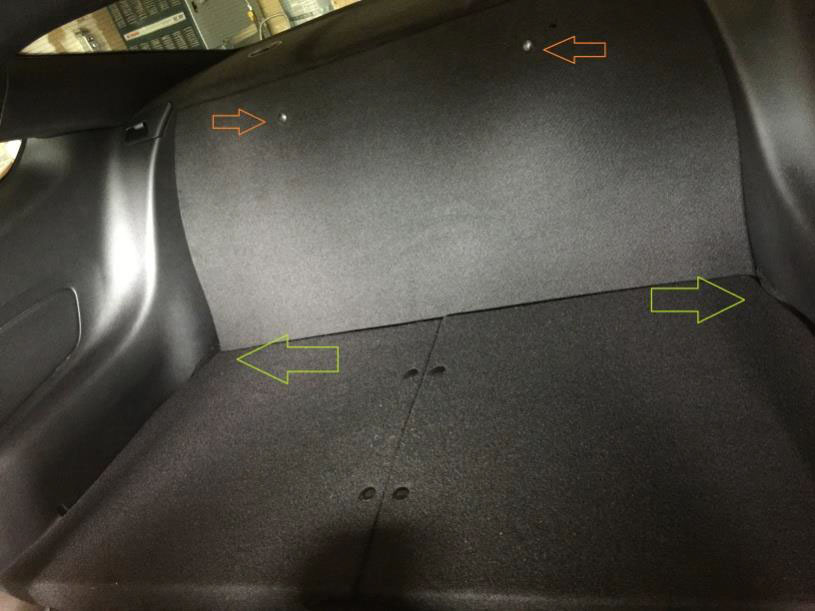
1. You will need to remove the stock rear seats. Begin by feeling around under the middle of each rear seat and locating the release button. Depress the button and lift up on the lower section of the seats. There is one button on each side. Note the hole locations in the bottom centers below:
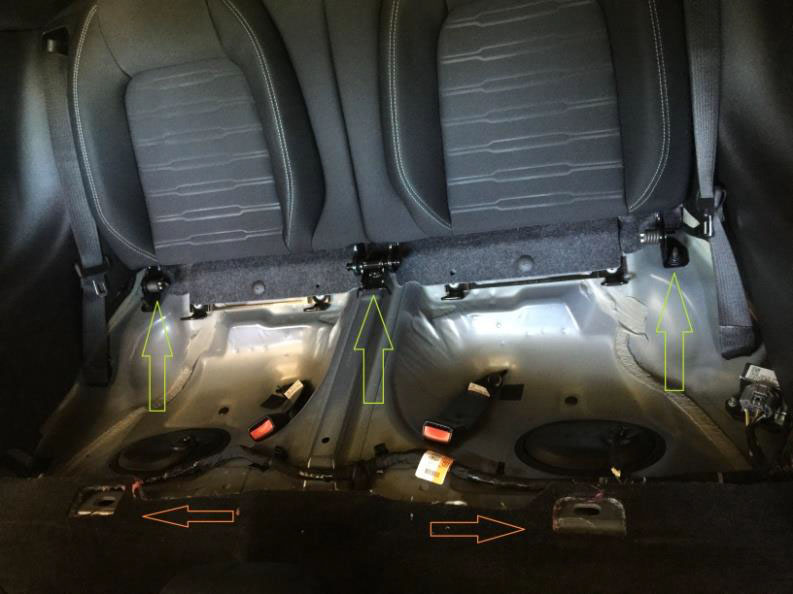
2. Locate the bolts along the bottom sides and middle that are holding the upper rear seat section in place. Use a 3/8in Socket wrench with 15mm socket to remove the three bolts, noted by green arrows
3. Remove the seats from your vehicle. Now, with the seat bottom and back removed, you can remove the bottom sections of the seatbelts and the child-seat restraints.
4. Next, locate the plastic covers at the top of each seatbelt – carefully pop these out of the way.
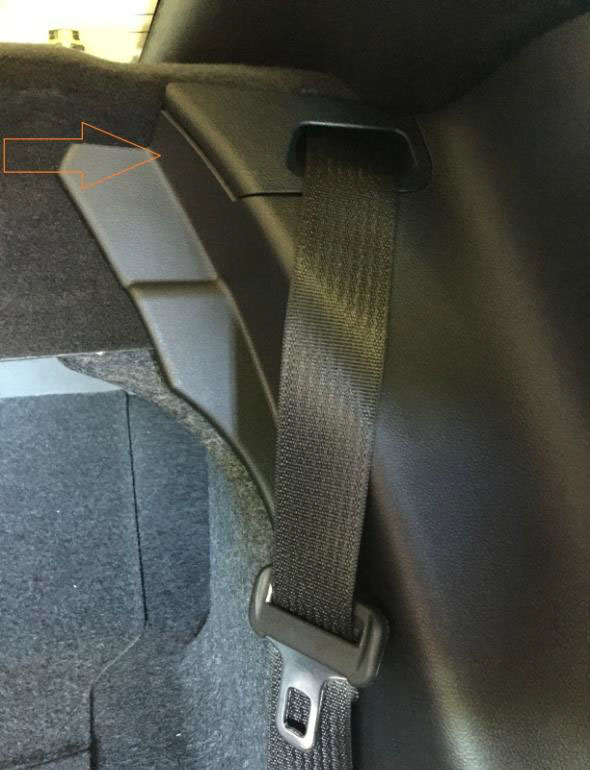
5. With these out, remove the two interior side panels from the car. You can pull these away, tab by tab, starting from the rear, exerting enough force to pop out each one as you move along back to front.
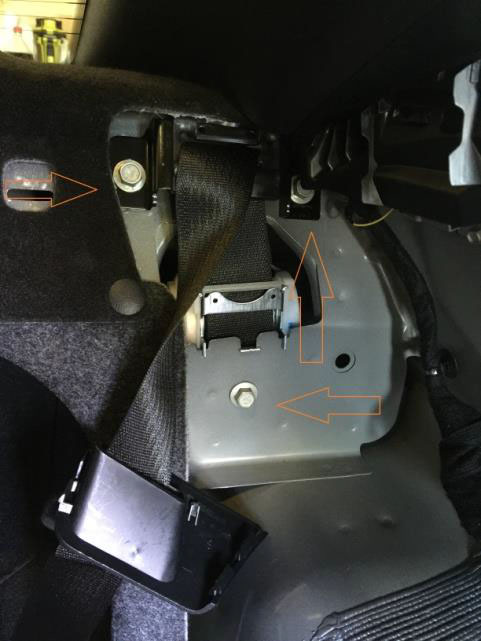
6. Remove the three 13mm bolts holding the upper part of the seatbelt mechanism in place and lift it out of the slot and vehicle. Do this for each side.
7. With these out of the car, you will need to remove the seatbelt from the plastic trim piece that you will be reinstalling into your car. Use a box cutter or similar tool to make a small slit at the upper rear so that you can slide out the seatbelt. AIM THE BOX CUTTER TOOL AWAY FROM YOUR BODY! Once removed, set these plastic pieces aside to reinstall after you replace the side panels in a later step.
8. Remove the child-seat braces by using a T45 torx bit. You may plug these holes by replacing the bolts
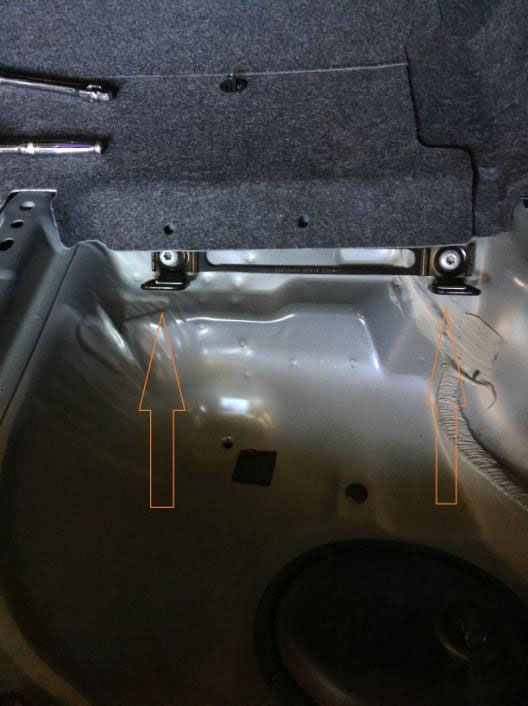
9. Now, carefully lift up and remove the carpeted upper rear deck panel. With this removed, use a T40 torx bit to unlatch the two black hook pieces that hold the stock upper rear seat.
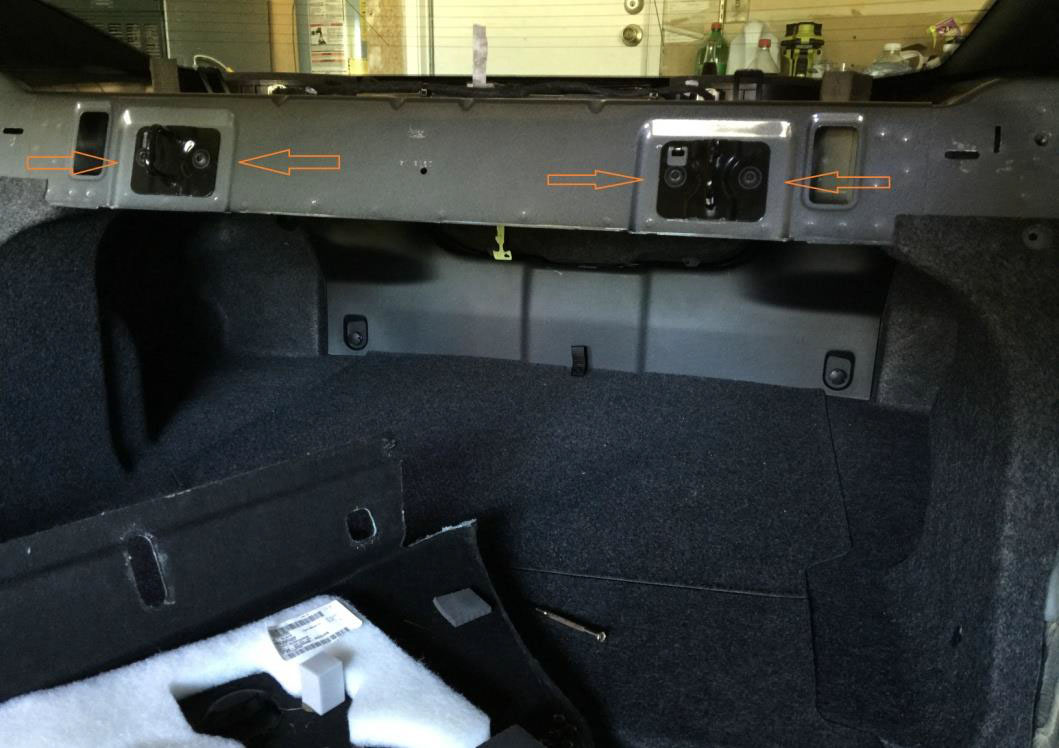
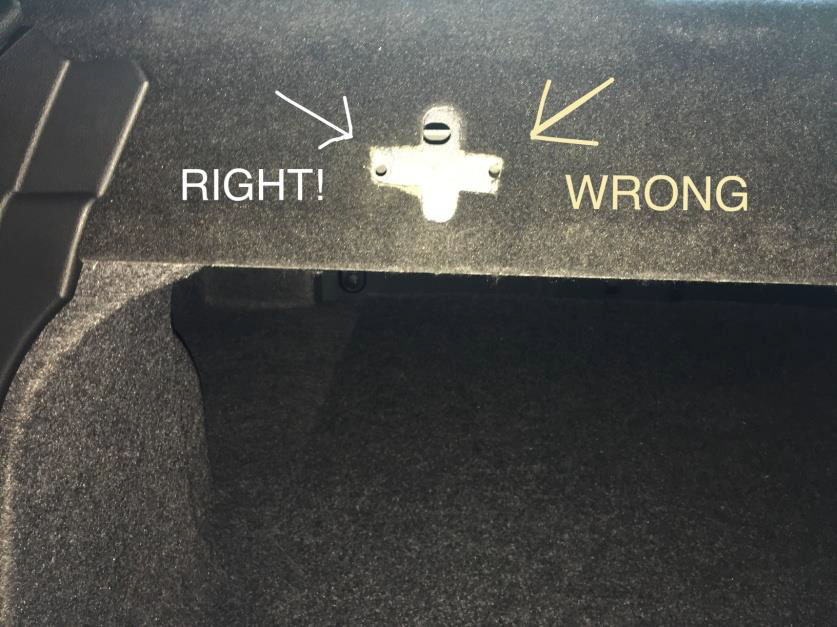
10. After the hooks have been removed, and with the carpeted area out of the car, use your box cutter blade or scissors to trim away a small portion of the area covering the hole you will need to access. NOTE: there are holes on each side of the black hook you have removed. Ensure that you are cutting a spot to reveal the hole facing the exterior of the car, rather than the interior. See picture below:
11. With this piece trimmed, you can reinstall the upper carpeted area into the car. Once that has been replaced, reinstall the factory side panels into the car, and push the modified seatbelt holders back into place in their original locations, as well.
You can now begin installing the Seat Delete kit.
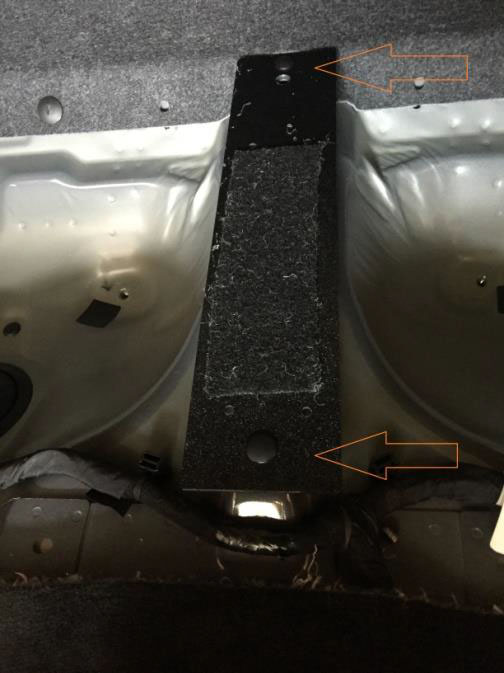
12. First, locate the center brace piece that came with the new kit. Line it up over the holes in the stock panel, and use two pushpins to secure it down into place. The rear pin will lock in securely, but you will need to use tape to cover the front pushpin so that it holds in place inside the oversized stock hole.
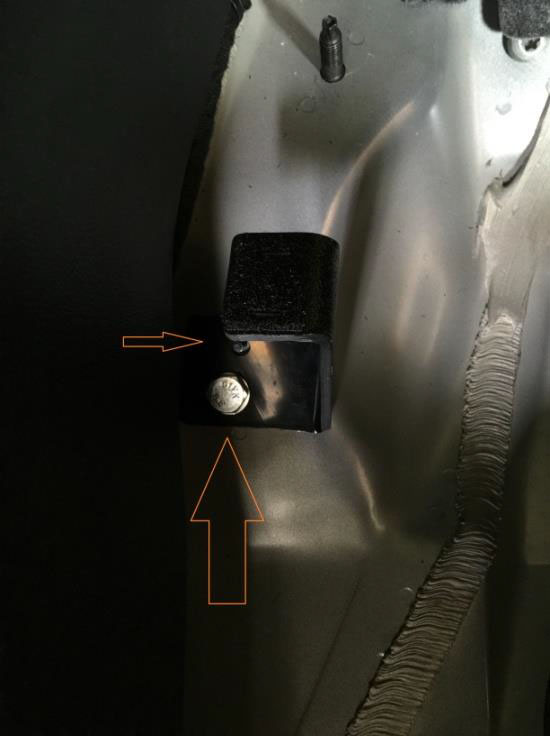
13. Locate the driver’s and passenger’s side support brackets from the kit. Align them over the stock bolt holes and pins in the pictured location – use the labeled bolts from the kit to secure the brackets:
14. You can now install each section of the lower rear seat delete. Use four of the six included push pins to secure the two sections to the new center brace piece. Two pins are extra, in case of breakage.
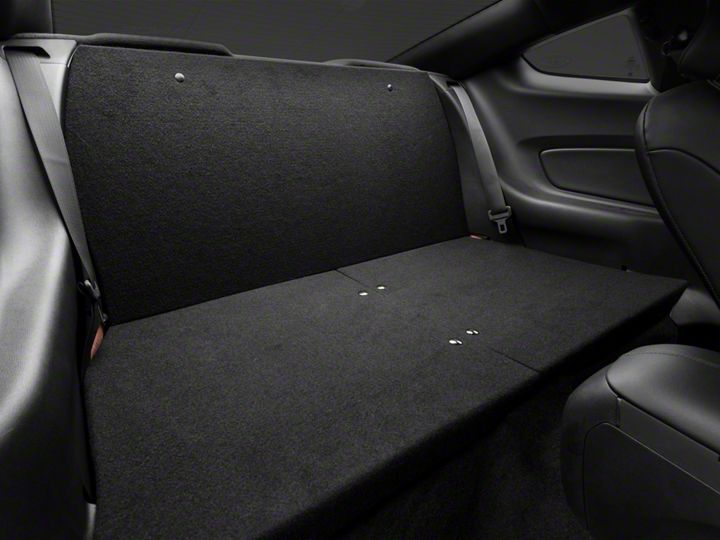
15. Now, place the upper rear portion of the kit into the car, and align it into place. Use the two included push pins to secure the panel into the holes you revealed in step # 10.
*If you desire a more secure fit, use the optional m6x1.0 threaded bolts included in the kit.* Finally, to cover the exposed portions where the side panels meet the upper and rear seat delete in the corners use the two included pieces of carpet from the kit.
Note the green arrows in the above picture for placement of carpet to finish install.
Guide Created and Submitted by AmericanMuscle Customer Jason Bonelli on 06-09-16
