 FREE 1 to 3-Day Delivery on Orders $119+ Details
Best Sellers


How to Install Roush Coil Cover Kit - Dark Gray on your Mustang
PACKING LIST FOR BLACK COIL COVER KIT 421833 (R1315-COILKIT)
| Description | Part Number | Quantity |
|---|---|---|
| Black Right Hand Coil Cover | 1315-6068-AA | 1 |
| Black Left Hand Coil Cover | 1315-6067-AA | 1 |
PACKING LIST FOR RED COIL COVER KIT 422021 (R1316-COILKITR)
| Description | Part Number | Quantity |
|---|---|---|
| Red Right Hand Coil Cover | 1315-6068R-AA | 1 |
| Red Left Hand Coil Cover | 1315-6067R-AA | 1 |
LIMIT OF LIABILITY STATEMENT
The information contained in this publication was accurate and in effect at the time the publication was approved
for printing and is subject to change without notice or liability. ROUSH Performance Products (RPP) reserves the
right to revise the information presented herein or to discontinue the production of parts described at any time.
SAFETY PRECAUTIONS
STOP
CAREFULLY READ THE IMPORTANT SAFETY PRECAUTIONS and WARNINGS BEFORE PROCEEDING
WITH THE INSTALLATION!
Appropriate disassembly, assembly methods and procedures are essential to ensure the personal safety of
the individual performing the kit installation. Improper installation due to the failure to correctly follow these
instructions could cause personal injury or death. Read each step of the installation manual carefully before
starting the installation.
• Always wear safety glasses for eye protection.
• Place ignition switch in the OFF position.
• Always apply the parking brake when working on a vehicle.
• Block the front and rear tire surface to prevent unexpected vehicle movement.
• If working with a lift, always consult vehicle manual for correct lifting specifi cations.
• Operate the engine only in well-ventilated areas to avoid exposure to carbon monoxide.
• Do not smoke or use fl ammable items near or around the fuel system.
• Use chemicals and cleaners in well-ventilated areas.
• Batteries produce explosive gases, which can cause personal injury. Therefore, do not allow fl ames, sparks or flammable substances to come near the battery.
• Keeps hands and any other objects away from the radiator fan blades.
• Keep yourself and your clothing away from moving parts when the engine is running.
• Do not wear loose clothing or jewelry that can get caught in rotating parts or scratch surface finishes.
• Allow the engine, cooling system, brakes and exhaust to cool before working on a vehicle.
WORK SAFELY!
Perform this installation on a good clean level surface for maximum safety and with the engine turned off.
ORIGINAL COIL COVER REMOVAL
Passenger Side
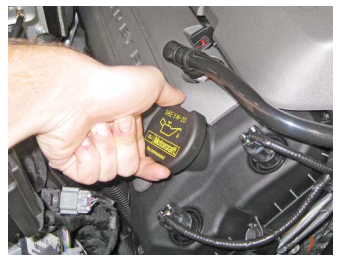
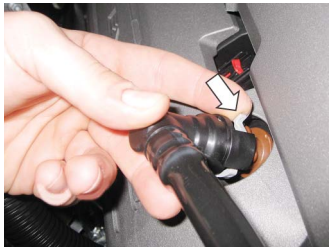
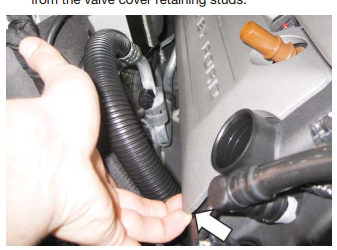
1. Remove the oil fill cap on the passenger side of the engine. Remove the PCV hoses on both sides of the engine by pushing on the small tabs and then pulling up on the elbows.
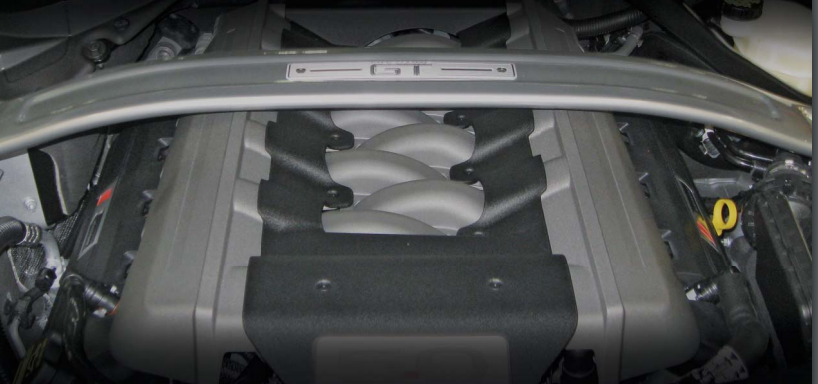
2. Pull up firmly on the OEM coil cover to remove it from the valve cover retaining studs.
Driver Side (with OEM intake)
On non-ROUSHcharged engines, access to the driver side coil cover is blocked by the induction resonance tube.
Remove the clamp that connects the induction resonance tube to the intake hose. The tube does not need to be fully disconnected for this installation. Once the clamp is removed, the tube can be moved out of the way.
Driver Side (ROUSHcharged models)
On ROUSHcharged engines, the air intake tube blocks access to the coil cover.

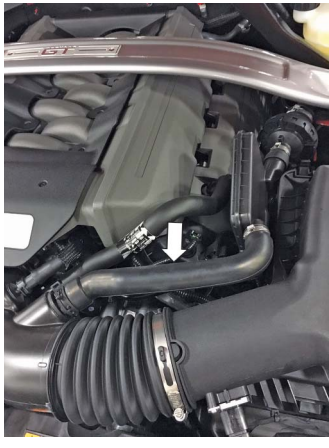
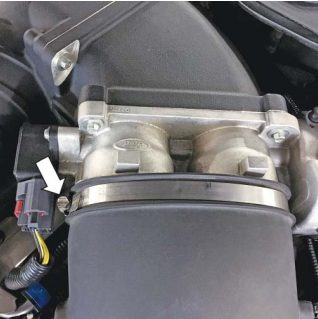
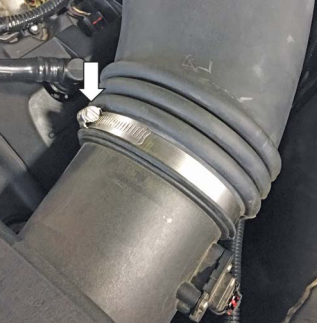
1. Begin by loosening the hose clamp where the clean air tube connects to the throttle body.
2. Loosen the hose clamp at the MAF housing.
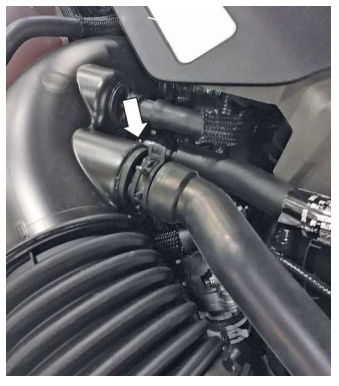
3. Remove the PCV hose from the valve cover and from the clean air tube. Push the gray tabs clockwise as shown and pull firmly to remove.
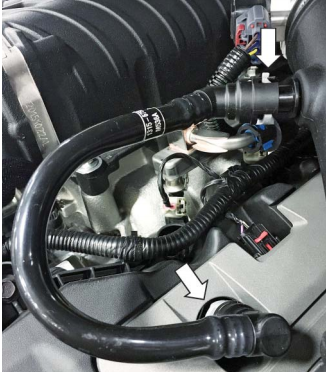
4. Remove the vacuum hoses from the clean air tube opposite from the PCV.

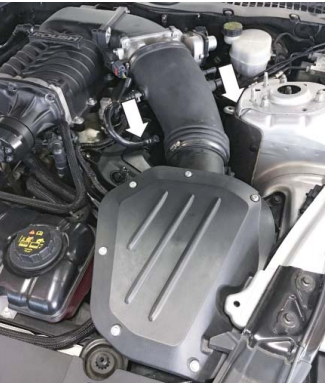
5. Pull the clean air tube towards the front of the vehicle, compressing the bellows near the air filter housing. This will allow the opposite end to come free from the throttle body. Once free, simply lift the clean air tube up and out.
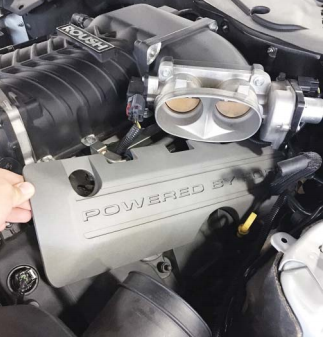
6. With the cover exposed, lift the cover to release it from the retaining studs and maneuver it out of the engine bay. Lift the end near the front of the engine and clear the PCV fitting. Then pivot the cover as shown and remove.
ROUSH COIL COVER INSTALLATION
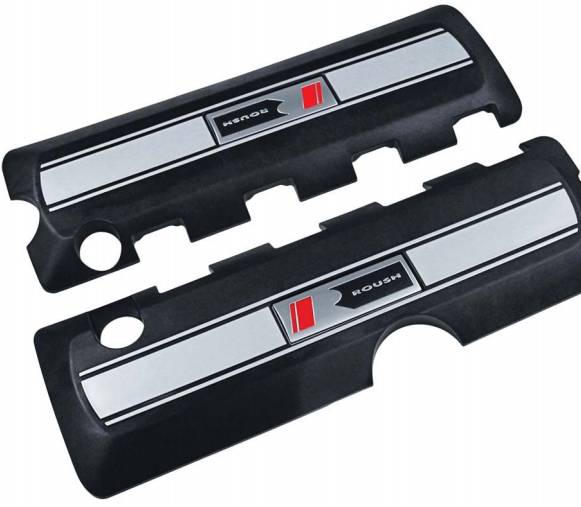
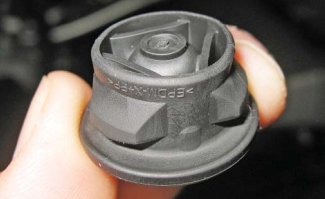
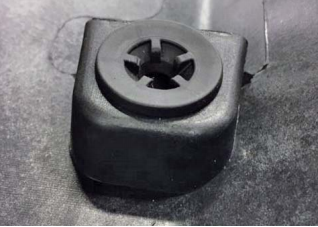
1. Install the six (6) rubber grommets from the factory covers into the ROUSH coil covers.
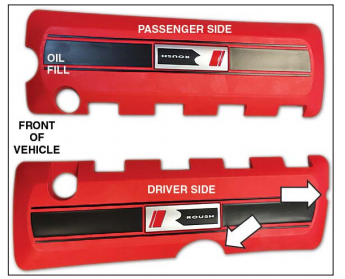
2. Installation to the valve covers is the reverse set of operations from the removal of OEM covers. The “Fingers” on the coil cover point inboard towards the center of the engine. Notice the features unique to each coil cover. The driver side coil cover shown below has a large semi-circular notch on the bottom; the passenger side has a notch for the oil fill cap by the front. Installation is the reversal of removal. Be sure to reconnect the PCV lines, fasten the oil filler cap, and reattach the induction resonance tube (if applicable) after seating the coil cover onto the retaining studs.
Congratulations!!! You have completed the installation of the ROUSH Performance Products, 2011 Mustang 5.0L Coyote Coil Covers. It is recommended that you save all parts removed from the vehicle during the installation of this kit.
