 FREE 1 to 3-Day Delivery on Orders $119+ Details
Best Sellers


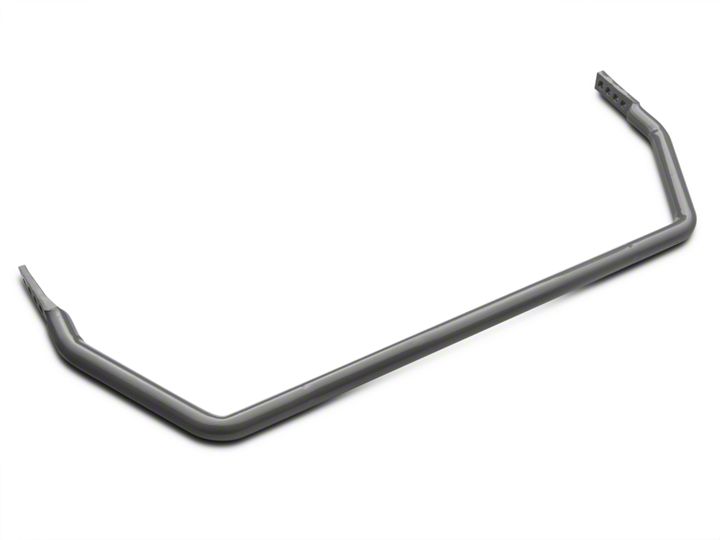
How to Install a RTR Tactical Performance Adjustable Front Sway Bar in a 2005-2014 Mustang
Installation Time
1 hours
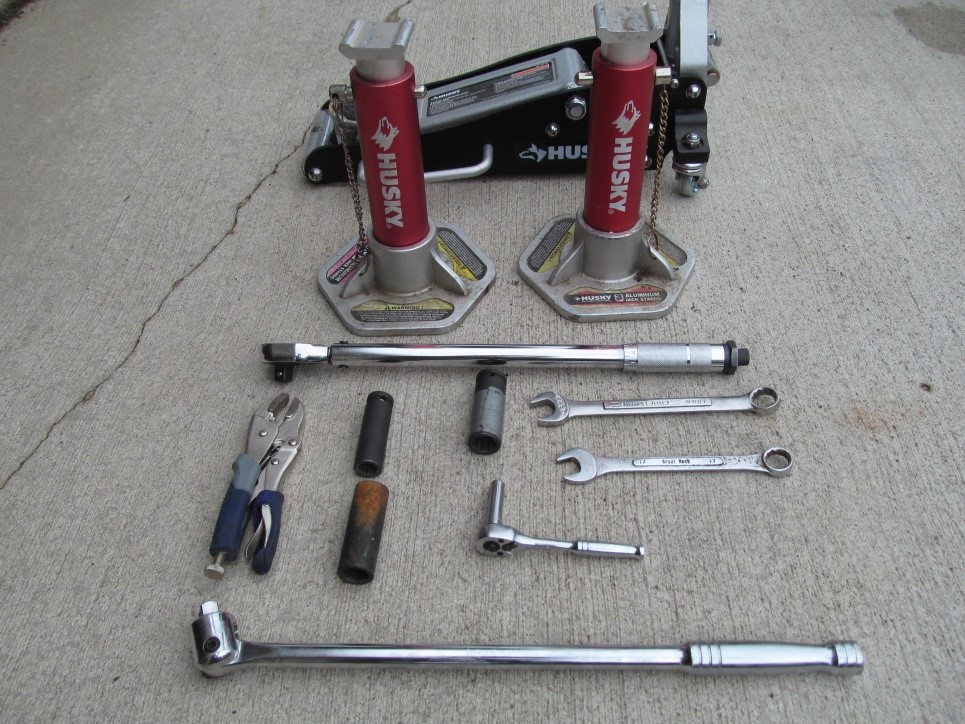
Tools Required
- 1 Jack
- 2 Jack Stands
- (1/2” Drive) Ratchet
- (1/2” Drive) Breaker Bar
- (1/2” Drive) Torque Wrench
- (1/2” Drive) Deep 15mm Socket
- (1/2” Drive) Deep 18mm Socket
- (1/2” Drive) Deep 19mm Socket (for wheel lug nuts)
- (1/4” Drive) Ratchet
- (1/4” Drive) 8mm Socket
- 18mm Wrench
- 17mm Wrench
- Provided Allen Wrench
- Channel Locks
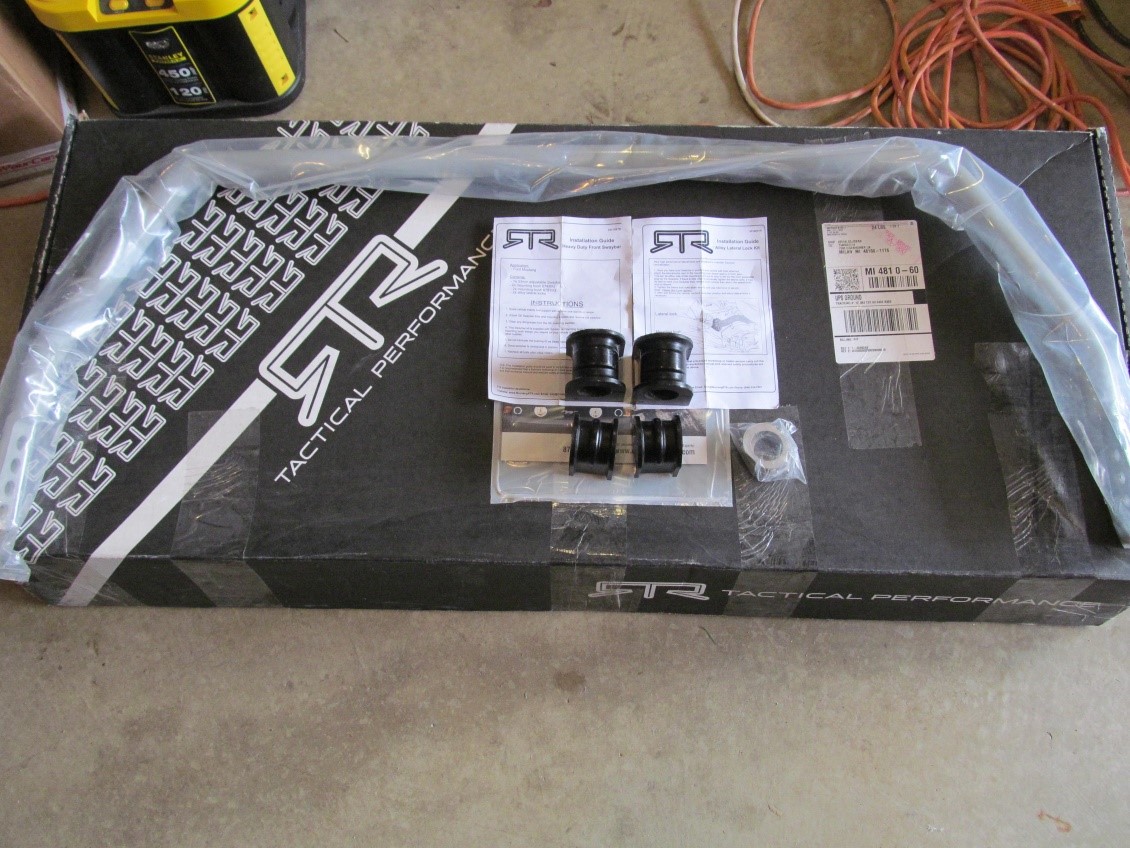
Shop Parts in this Guide
Note: This Installation guide is for RTR Tactical Performance Adjustable Front Sway Bar (05-14 All) but can be referenced for any Adjustable Front Sway Bar installation.
Stock Sway Bar Removal Procedure: Lifting Procedure:
1. First make sure the emergency brake is engaged and the car is in gear to prevent rolling.
2. Break loose but do not remove both front tires with a breaker bar and the appropriate socket for your wheels.
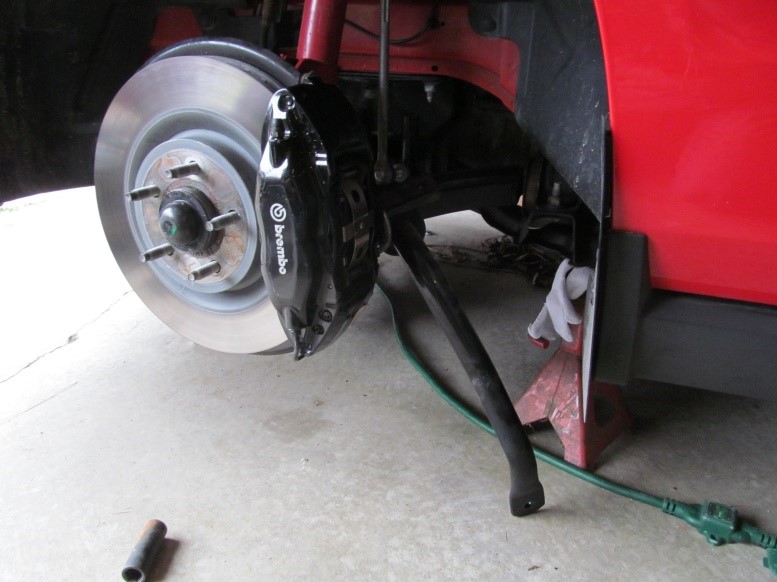
3. Next jack up the vehicle one side at a time in the proper locations and place jack stands to suspend the front of the car. The front of the car is being lifted to access the service cover.
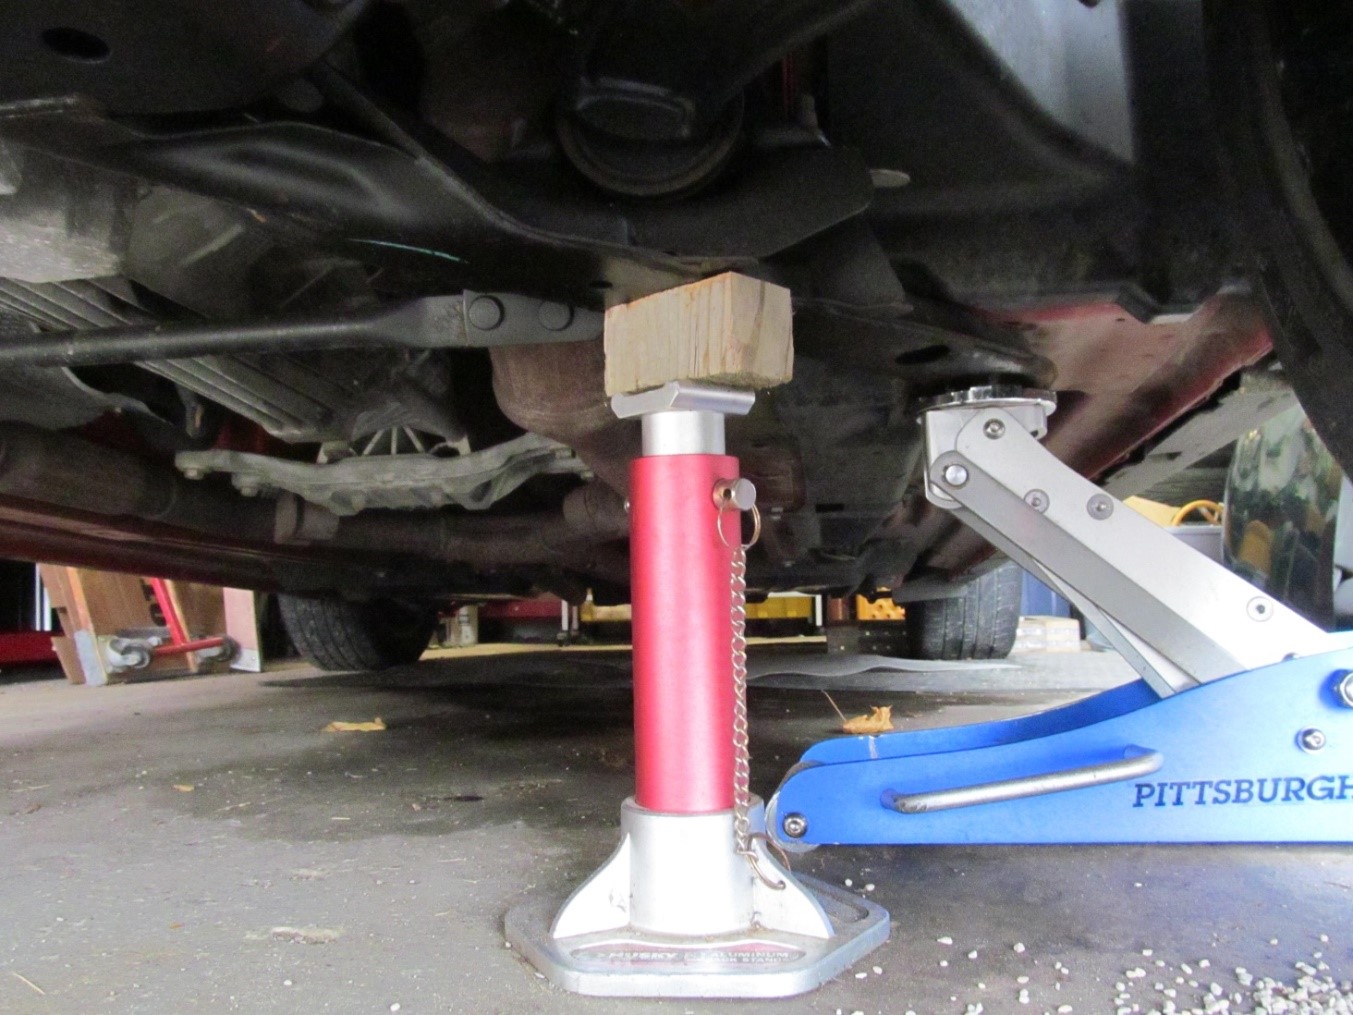
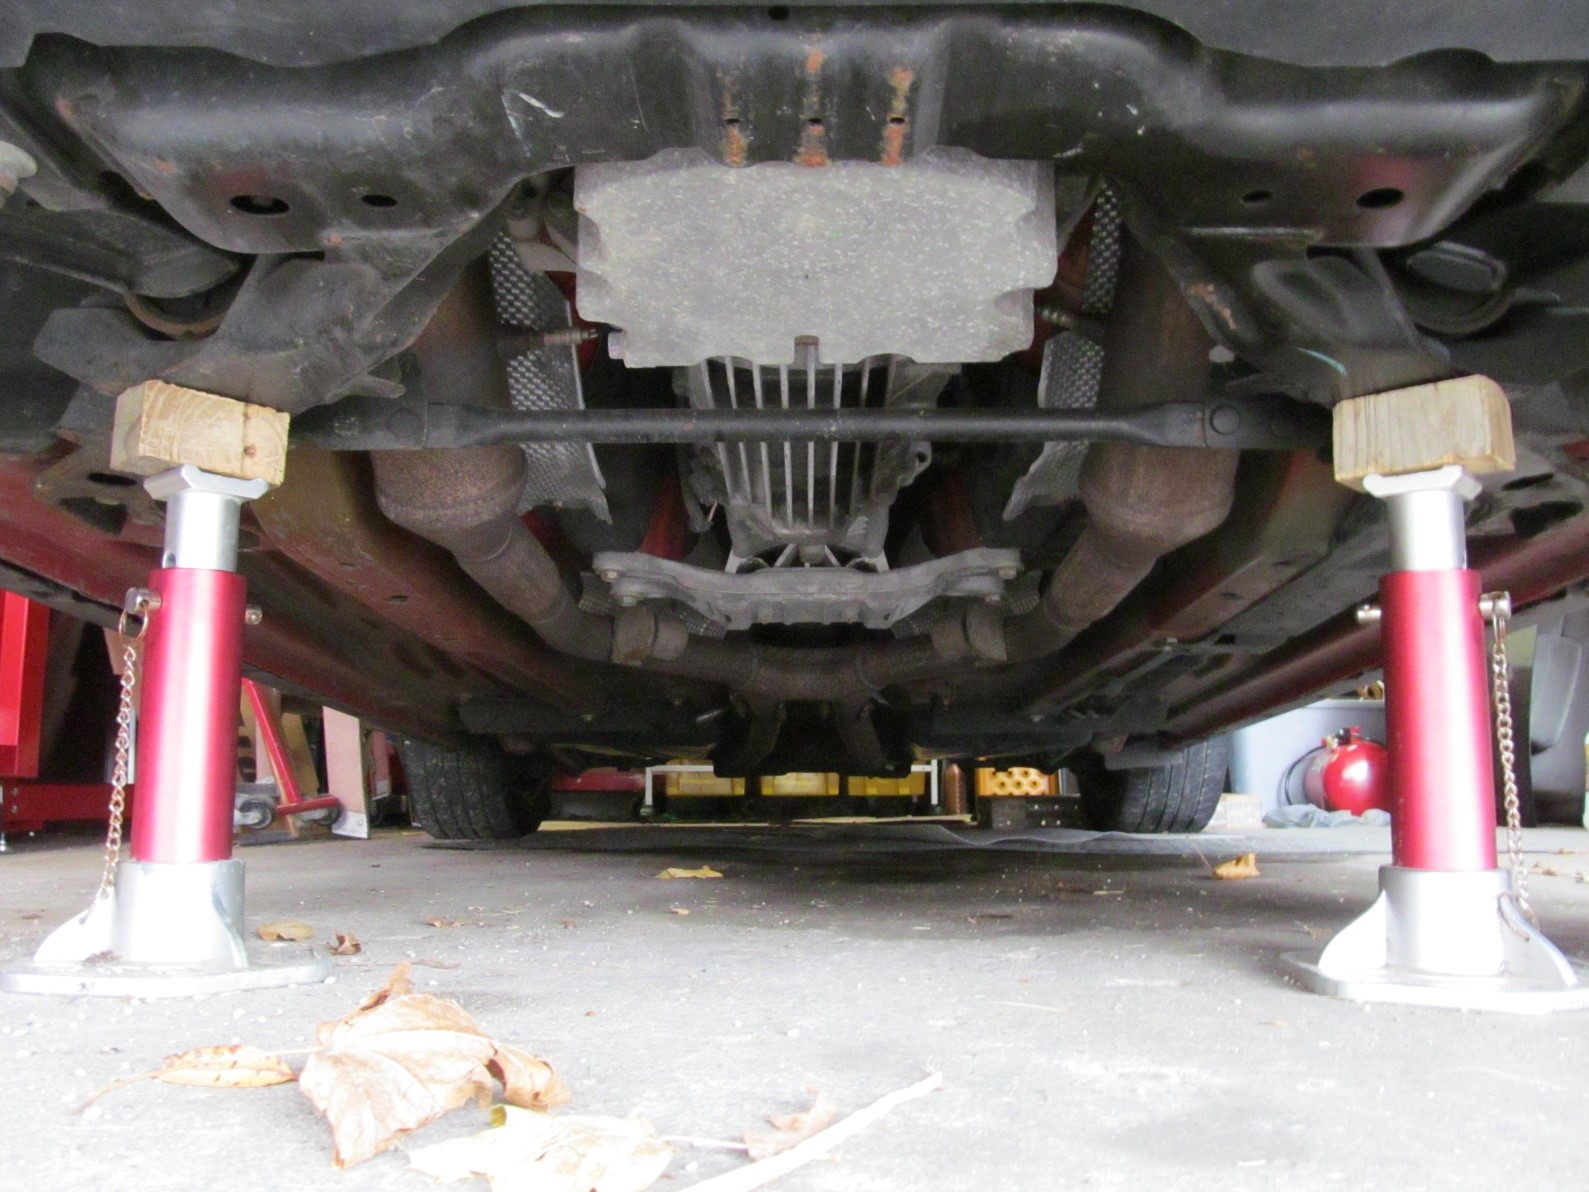
4. With the vehicle now lifted and properly supported, remove both of the front wheels and set them aside.
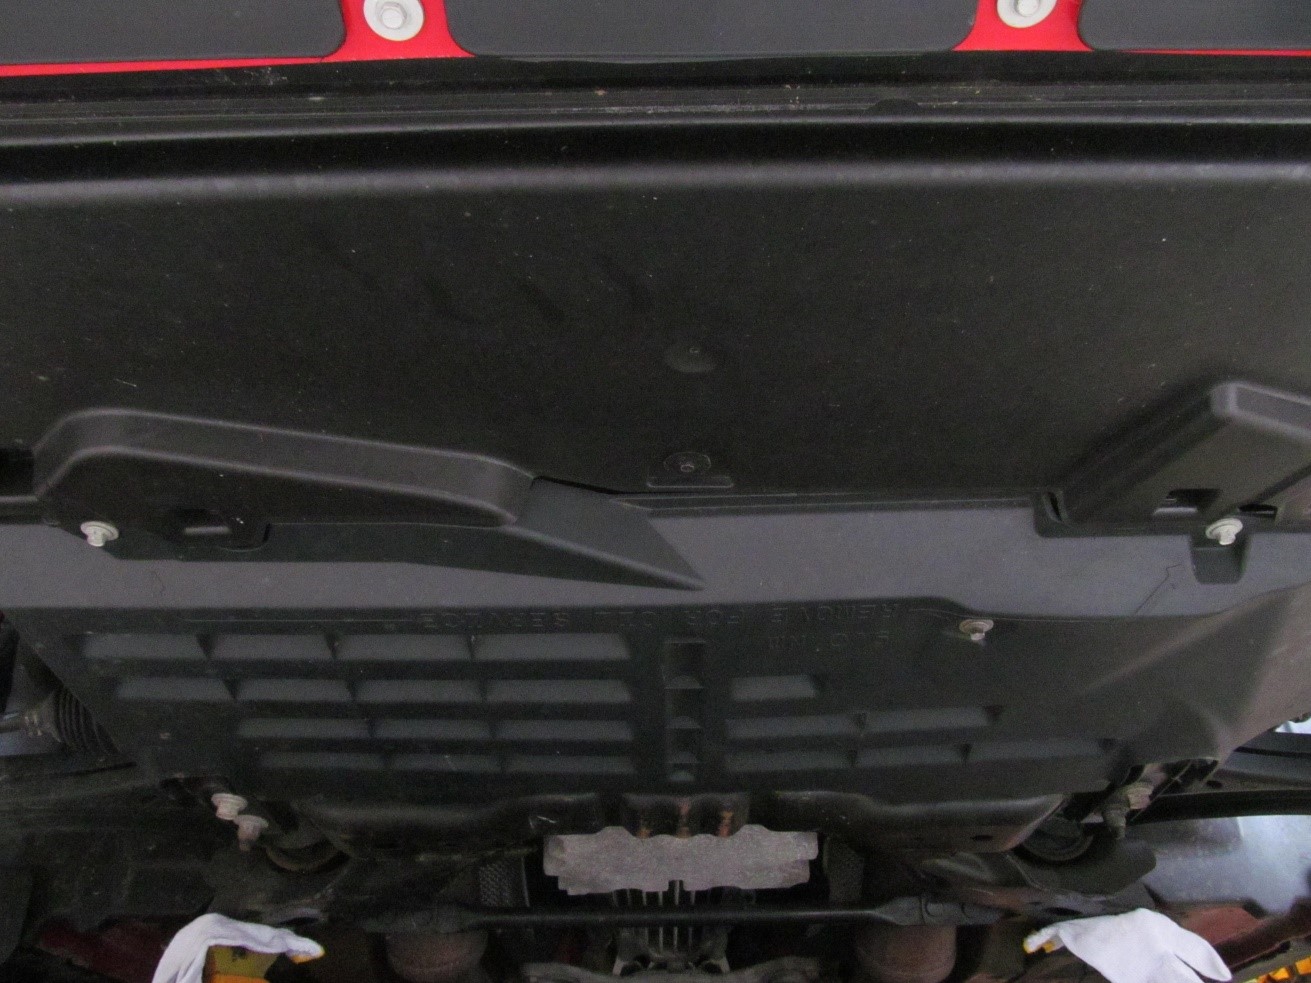
5. Take off the service cover with the three 8mm bolts. This will give you access to the sway bar bracket nuts.
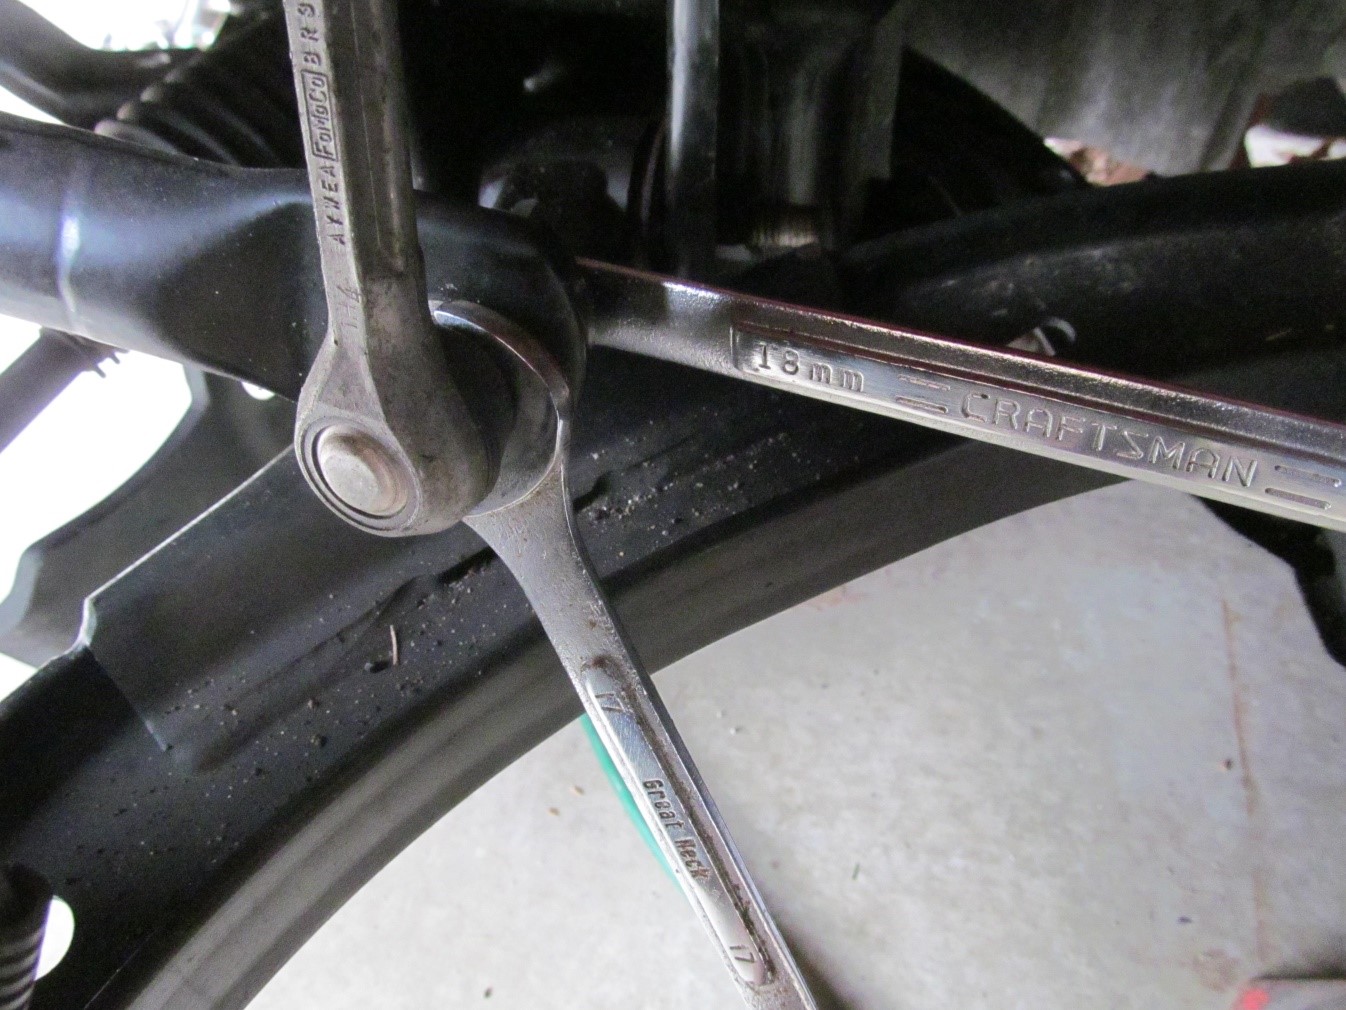
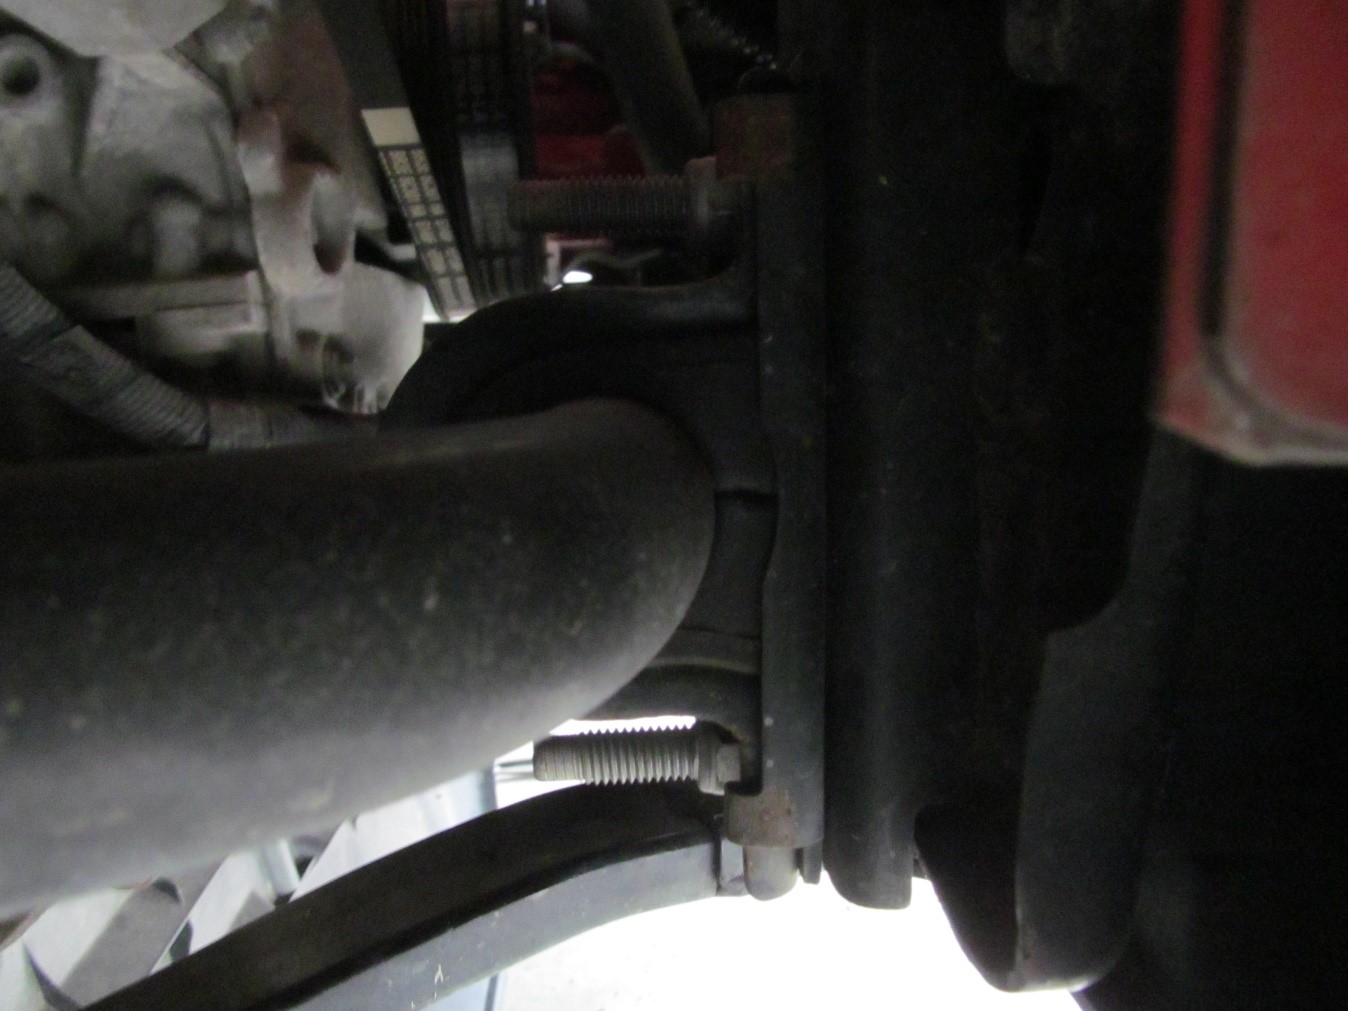
6. Shown on the driver side, grab a 18mm and 17mm wrench to take off the end link connecting your sway bar. Do this on both sides of the car. (Tapping the 18mm wrench with a hammer may help to break loose the nut on the end link initially.
7. With the end links removed, take off both sway bar brackets attaching the sway bar to the frame shown using a 15mm deep socket and a ½ inch drive ratchet.
8. With the brackets removed from the frame, maneuver the sway bar out towards the driver’s side of the vehicle. (Just be patient and you will get it.)
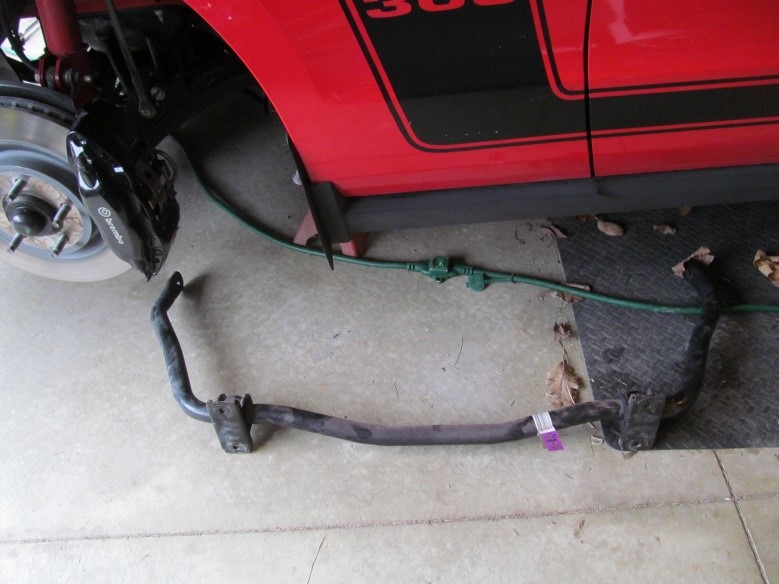
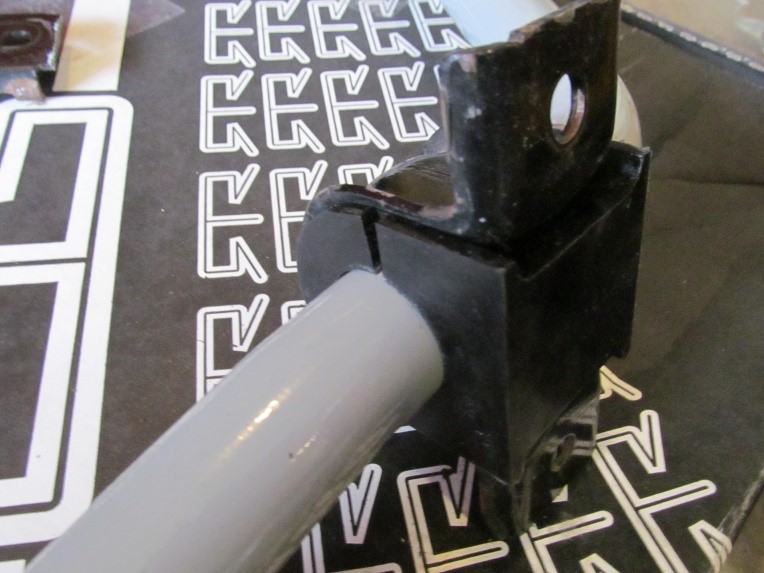
9. With a pair of channel locks peel back the four tabs holding the bracket together. You will only need the U shaped part of the bracket to reuse for the RTR Front Sway Bar.
RTR Tactical Performance Adjustable Front Sway Bar Installation Procedure:
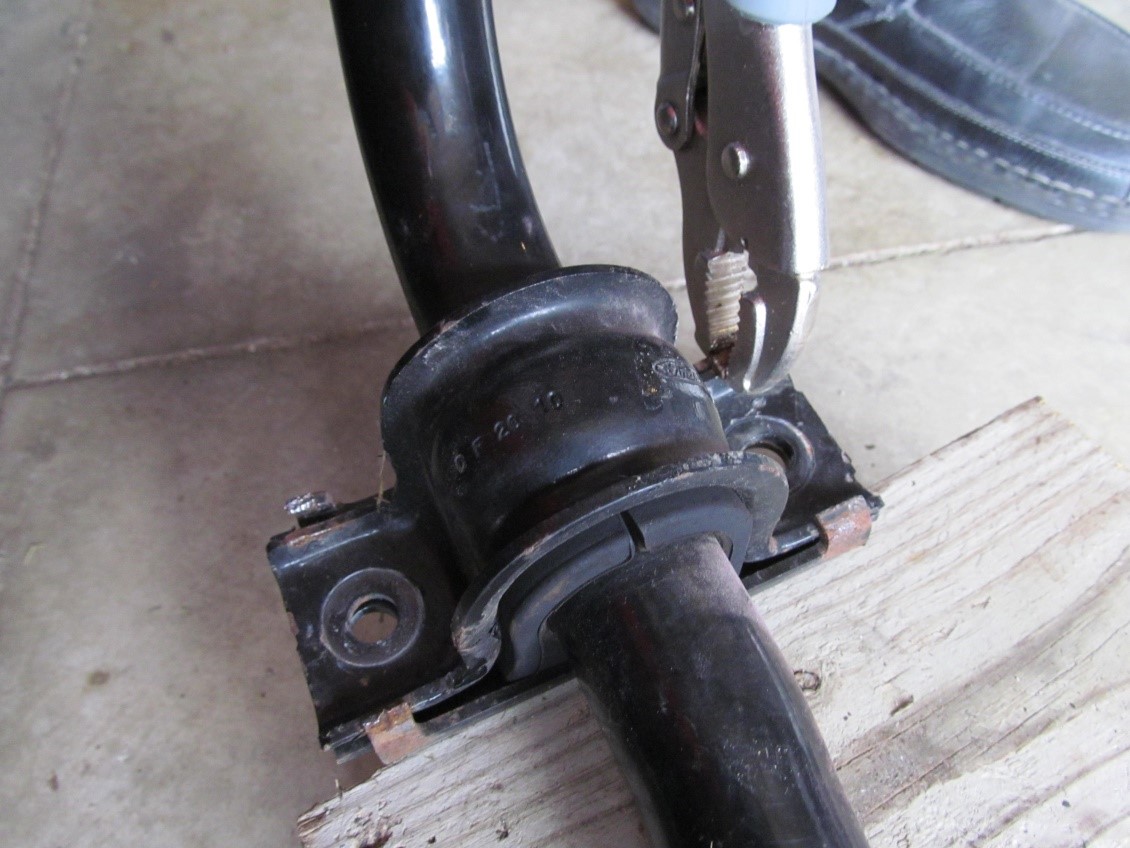
10. Install the new bushings onto the RTR Front Sway Bar. They gave you two sets depending on the existing bracket on the vehicle. I have a 2011 Mustang and used the larger bushing.

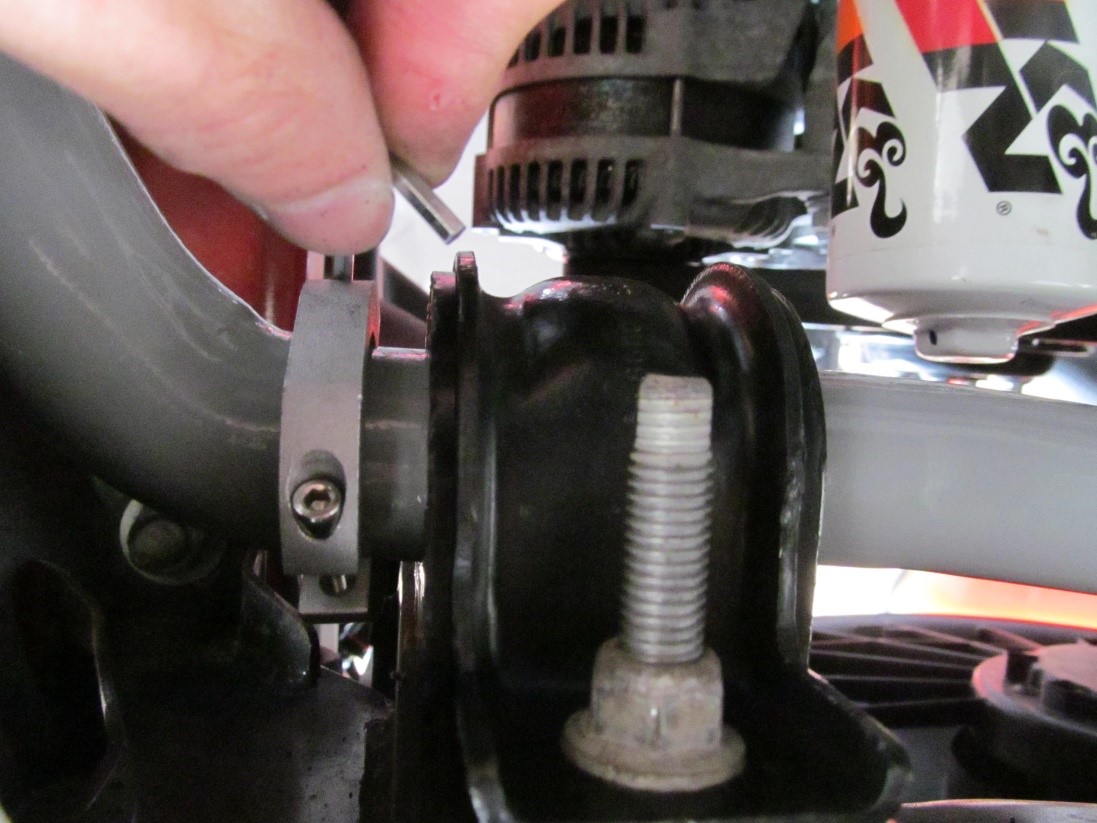
11. Just as you took out the stock sway bar, feed the new RTR sway bar in from the driver’s side. Attach but do not snug the sway bar brackets to the frame with the existing 15mm nut using the deep socket and ½ inch ratchet.

12. Re-attach the end links to both sides of the sway bar using the 17mm and 18mm wrench. Because the sway bar is adjustable, the hole closest to the front of the vehicle is the stiffest and towards the rear of the vehicle is closest to stock setting. (I positioned my links one hole away from the stiffest setting.)

13. With the sway bar installed in the correct position torque your bolts to the manufacturer’s specification. The sway bar bracket to frame should be torqued to 52 ft lbs. and the sway bar end links should be torqued to 85 ft lbs.
14. Now that the sway bar is torqued tight, install the sway bar locks with the given allen wrench 3mm to the outside of the sway bar brackets on both sides
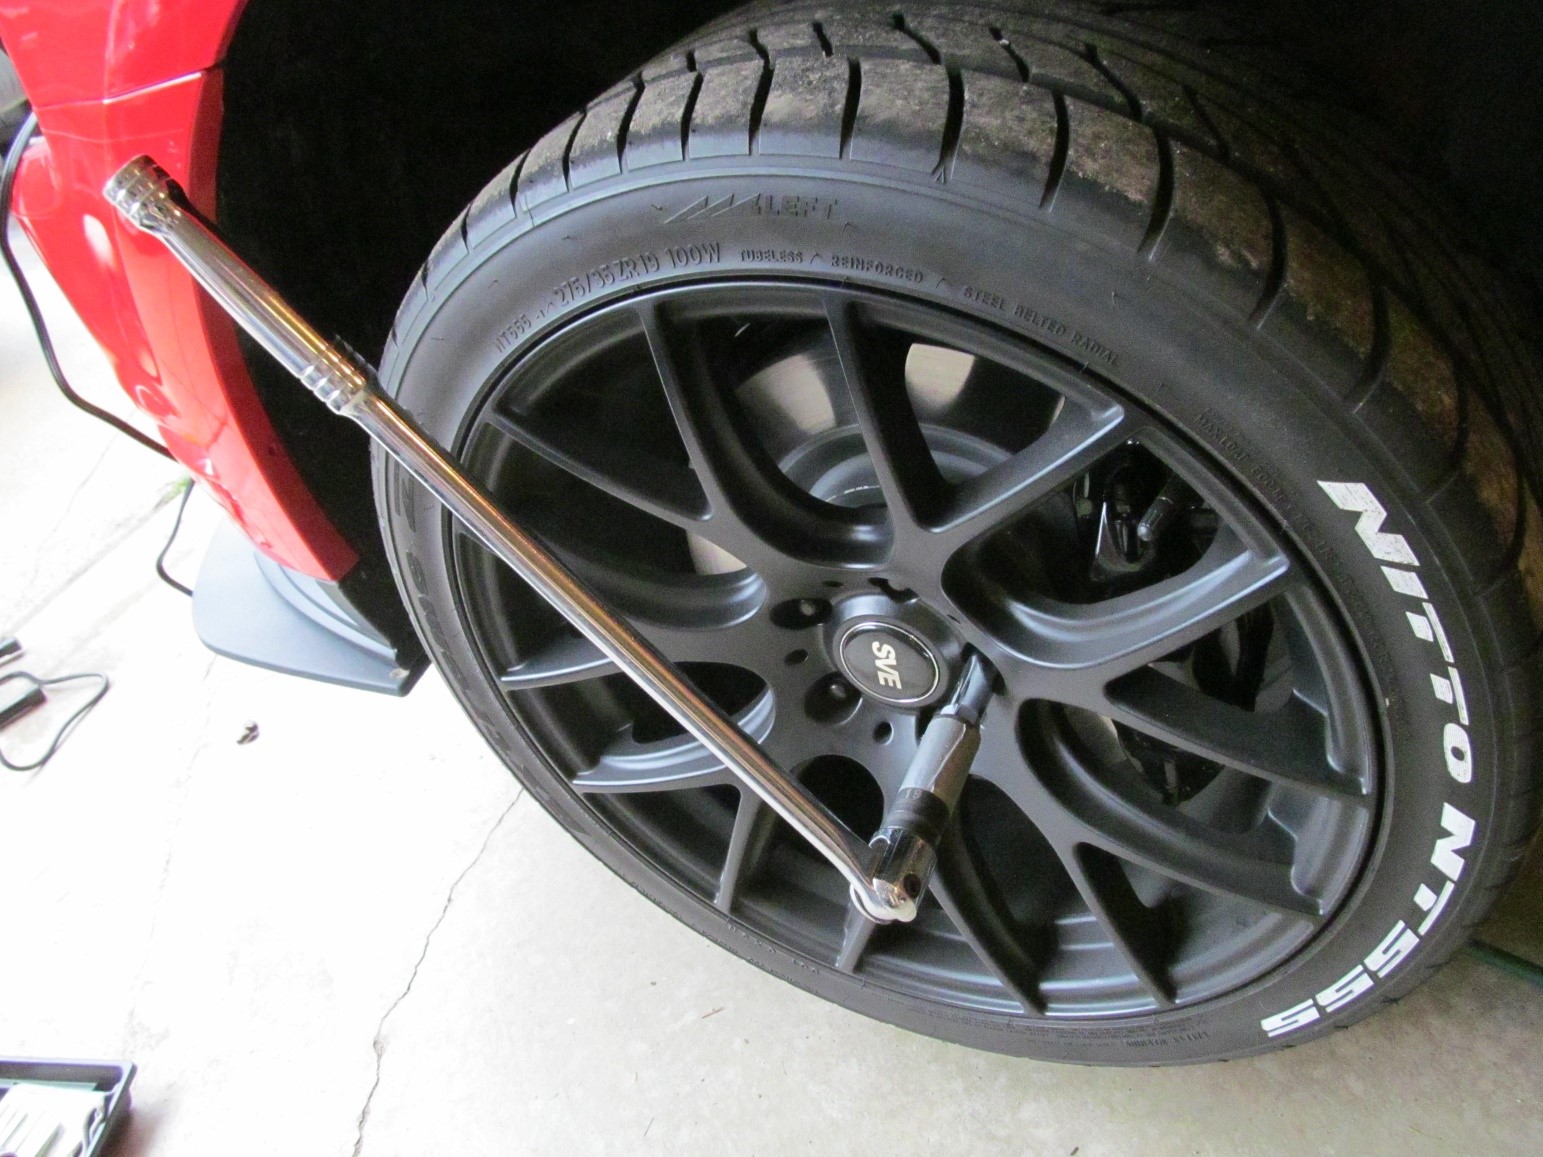
15. Re-Install the service panel with the three 8mm bolts taken off in the beginning of the procedure, install the front wheels (torque to 100 ft lbs.) and lower the vehicle. Your RTR Tactical Performance Adjustable Front Sway Bar is now installed!!! Go try it out!! (Re-check your bolts to make sure they are tight after about 10 miles of driving
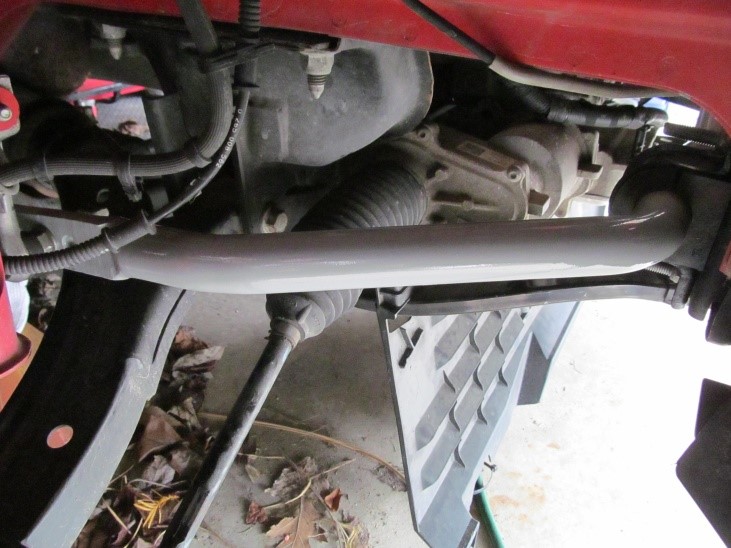
After
Installation Guide Created by AmericanMuscle Customer Kevin Souders (5/18/16)
