 FREE 1 to 3-Day Delivery on Orders $119+ Details
Best Sellers


How To Install a Chrome Exterior Door Handle on Your 2005-2014 Mustang
Installation Time
30 minutes
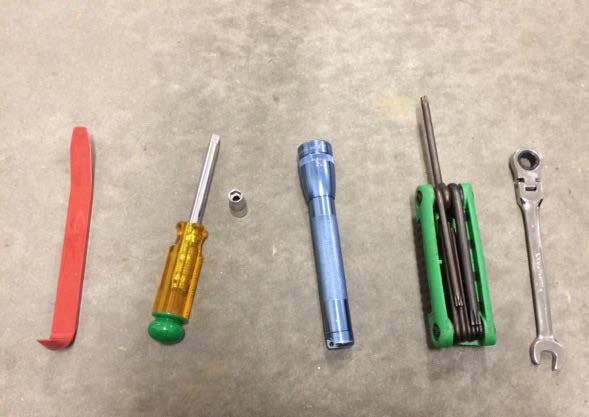
Tools Required
- White lithium grease and a couple paper towels. This will be to lube the mechanism in the new handles.
- Panel removal tool (you can get by with very small screwdriver or maybe the handle end of a kitchen spoon.)
- Hex nut driver with ¼” socket for door panel screws
- Small LED torch/flashlight for lighting the inside of the door to get at the handle hardware
- T30 Torx driver for two of the door panel bolts
- 10mm open-end or ratcheting-end “box wrench” to manage the handle connecting bolts. You will need something that works in a pretty small space but a ¼ ratchet drive and short socket may work.
Shop Parts in this Guide
You will use the panel/trim tool, hex nut driver and torx tools on the door panel removal part of the job. For the handles, only the flashlight and box wrench are needed.
INCLUDED PARTS
• LH Left Hand door handle (not handle covers) with hole for lock
• RH Right Hand door handle
INSTALLATION
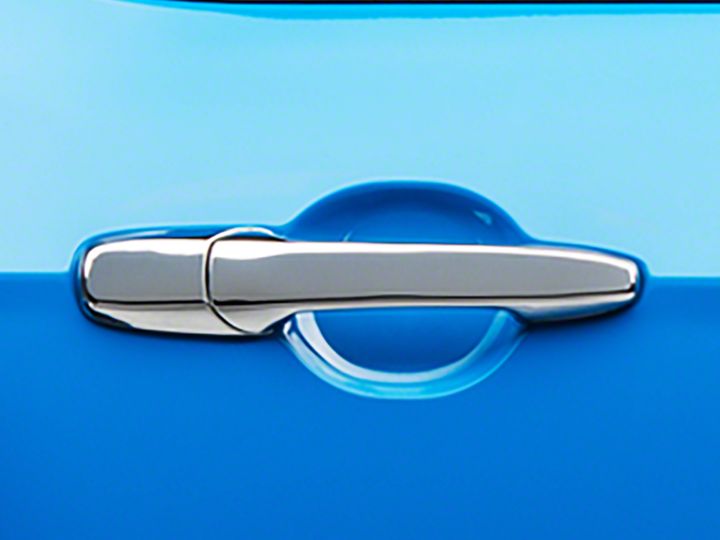
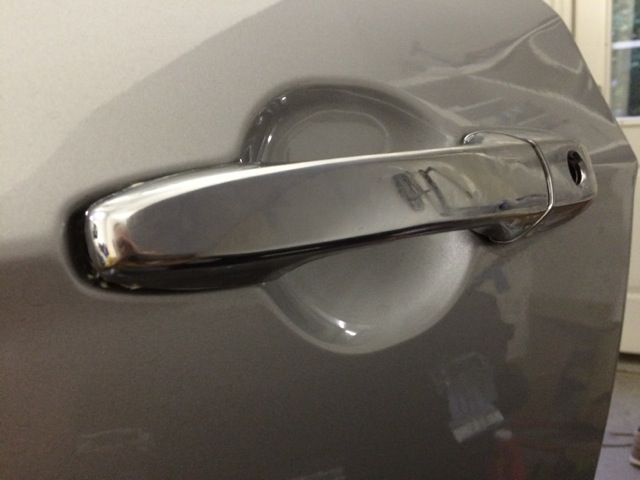
BEFORE: Body-colored original handle on 2013 GT in ingot silver.
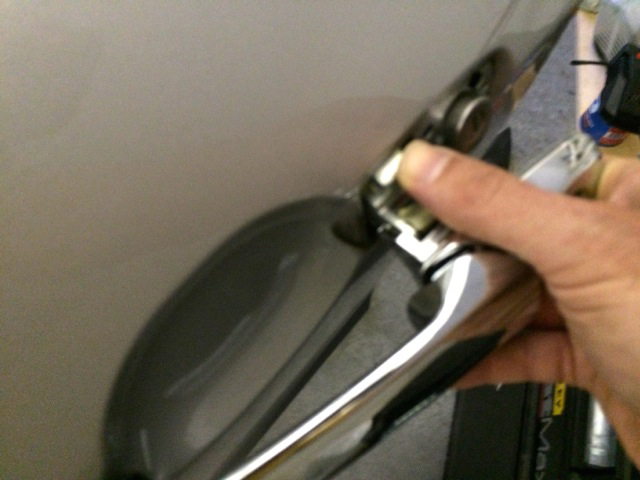
1) Find a video on removing your door panels and view it a couple of times. This is an easy job for anyone, but it would help to have a tool that helps you without scratching the finish/vinyl – see trim tool in first image. Worst case, use a small flat head screw driver on the cover plates.
2) Prepare your work place – towel on the car seat, small chair or table to set parts on. Make sure your windows are fully up! If down, you cannot complete this installation and if you attempt to lower them after you’ve removed the panel and some connectors… watch out. Suggest leaving the clear plastic protective cover on the new handles you received. You’ll remove just as you are installing them into the door
3) A good practice is to disconnect negative battery terminal
4) Remove door panel on side you wish to start on or both, if you have the room to leave both doors open.
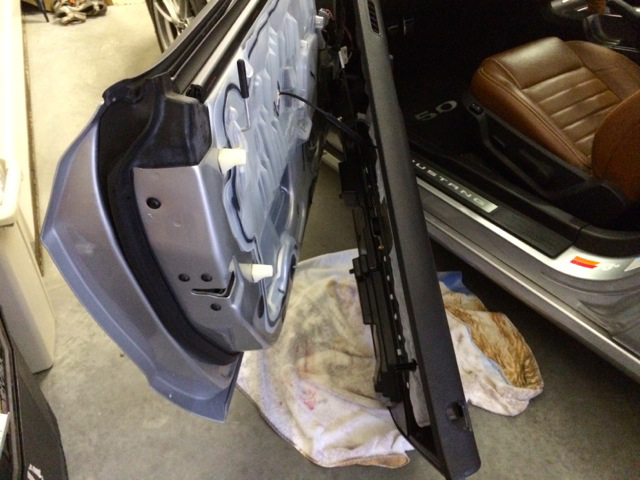
5) Slowly peel back the moisture barrier plastic from about half of the door, starting from the bottom farthest from the chassis. That should give you just enough slack to get this plastic off from over the door lock pin. If you lock it, make sure to unlock it before working with the door handle. It might bend a little, but don’t force it. Cut the plastic if you need to – the soft compound will hold the plastic tight after you’re done.
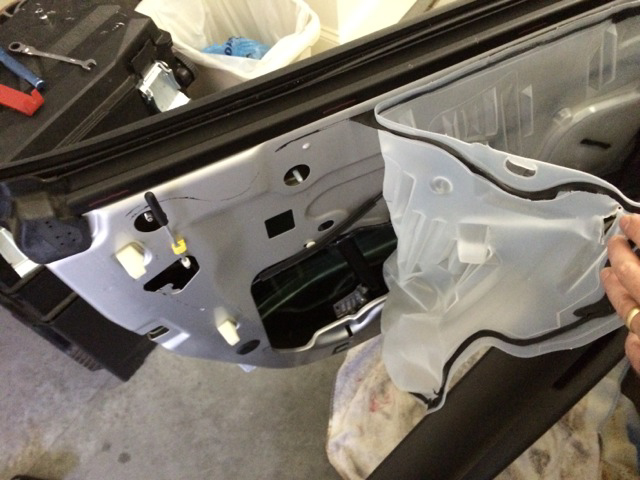
6) Use the flashlight and find the two hex nuts on inside at same height as the handle. They aren’t too hard to reach with one hand, inside the door frame.

Figure 1 - Hole used to see the nuts
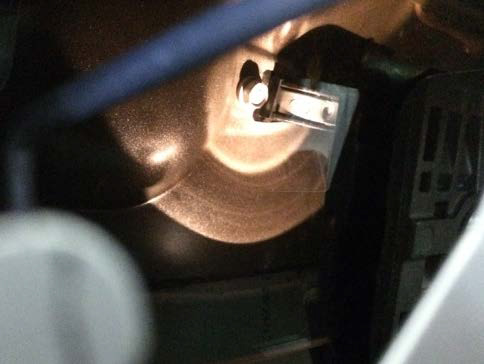
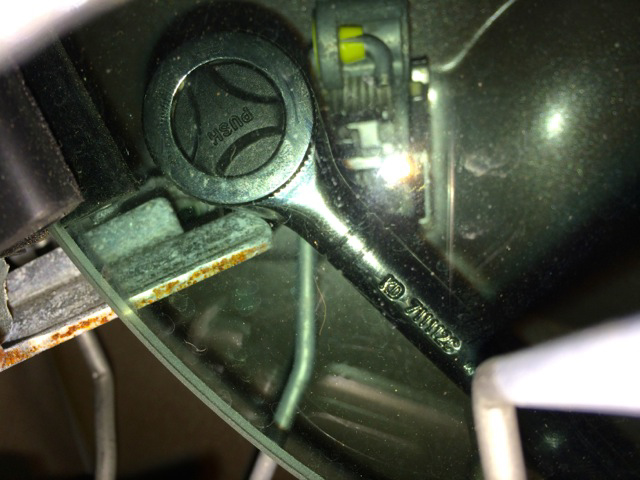
Figure 2 - Driver side, rightmost nut
7) Loosen and remove both nuts using a 10mm ratcheting or open-end wrench, being careful not to let them drop into the abyss. Set aside. You may be able to use a 3/8 drive and short well 10mm socket (not listed in tools needed)
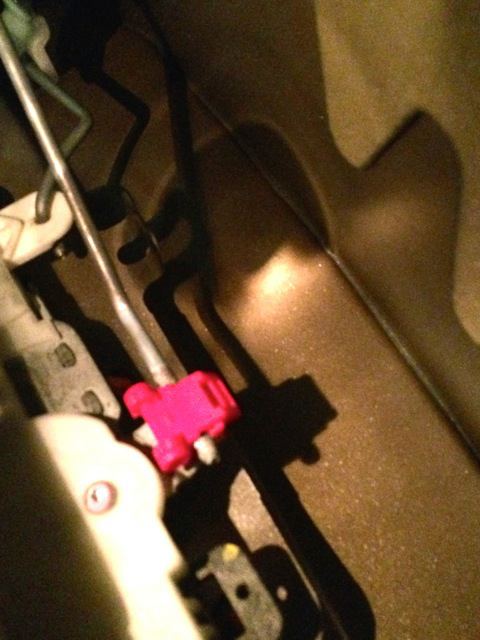
8) Peer inside to see the rod and mechanism that actuates the lock. The rod end is threaded and snapped into a plastic clip. Count the number of exposed threads or take a quick photo to get an idea of where to reattach this rod for the new handle.
9) If working on the passenger side door, pop open this clip from the outer side (farthest from the car body), to the front/left. If on the driver side, pull from behind to the right/front. A finger pull with enough force will get it. This frees the rod so you can remove the handle from the outside.
10)Move to the outside of the door and work the handle through the holes. This requires pulling out on the handle as if to open the door just so the mechanism and rod will come through.
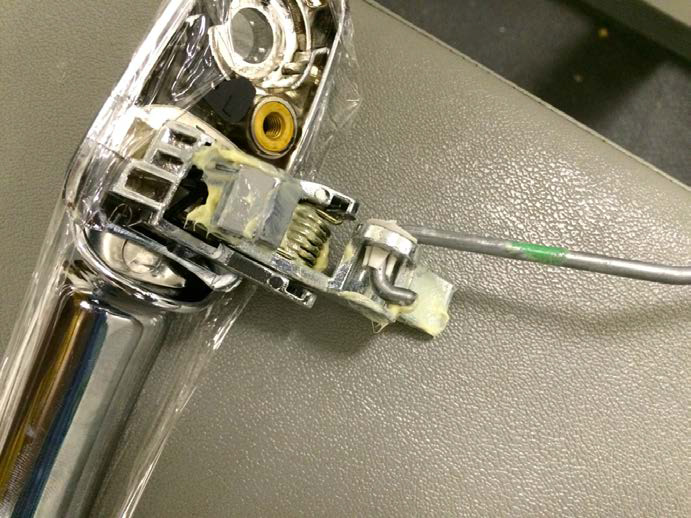
11) Remove the locking rod from the stock handle with a twist out in the shape of the J hook. You will reuse it, but not the plastic retaining clip.
12) Get the new handle and put grease on the spring, the front “slide,” and the trigger-hammer like mechanism. See your original handle if you aren’t sure where to lube.
13) Install the locking rod into new handle using a similar movement as when you removed it – it slips in and hangs down.

14) Now remove the plastic protecting the finish of the handle
15) Consider taping off a couple inches around the door handle holes to protect your paint and make grease clean-up easier.
16) To install, first insert the front “slide” into the door about half way. Try and “open” the handle as you put the rod down into the rear hole, followed by the mechanism. Take your time and change angles a bit until you get most of it in and adjusted to nearly the final position. You might have to press or even smack the rear/larger portion to get it into the tight hole .
17) The handle should stay put and look flush all around. If it is, remove any tape that is in the way before you secure the handle with the nuts.
18) Get the two hex nuts and install them to hold the handle in place. Use the same amount of force needed to match what you felt when you loosened them – metal is mounted into a plastic handle, so not much torque at all.
19) Use the flashlight to find the rod you just inserted and the plastic clip. Line up the rod end to match where it was before removal (count threads or see your photo) and snap the clip. You can manually actuate the door lock to make sure the rod is seated.
20) Test the door handle from the outside.
21) Clean the door and handle.
22) Reattach the plastic sheet (blow dryer can help or carefully use a slight torch action to help soften in cold conditions) and reinstall the door pane
23) Repeat on the other door. The driver’s side is more challenging due to the lock mechanism, which limits your access to the nut. Finger tighten the night before attempting to use a ratchet drive.
24) Reattach battery, start car and actuate door locks to check operation.
25) Use door handles a few times to check for function. A notchy feel might go away after a dozen opens.
26) Upload an image to American Muscle.
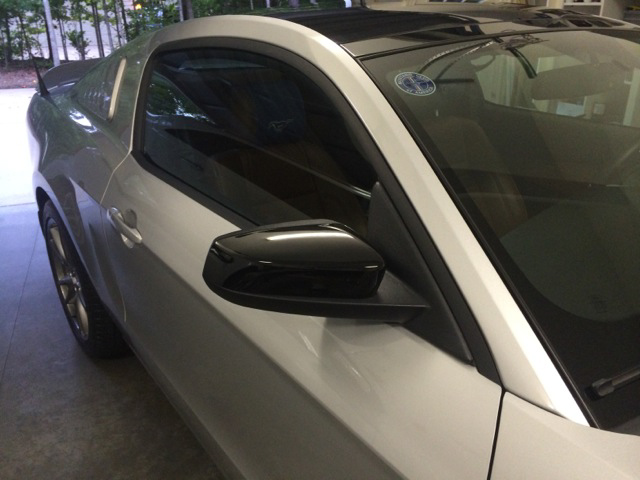
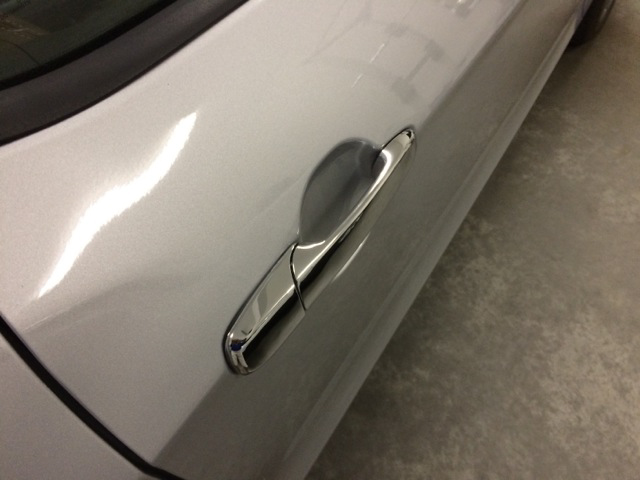
AFTER
Work is complete. 2013 GT in ingot silver with chrome handles
Installation Instructions written by AmericanMuscle Customer Eric Murray 10.3.2014
