FREE 1 to 3-Day Delivery on Orders $119+ Details
Best Sellers


How to Install a SR Performance Alternator – 130 Amp on a Mustang GT 1999-2004?
Installation Time
2 hours
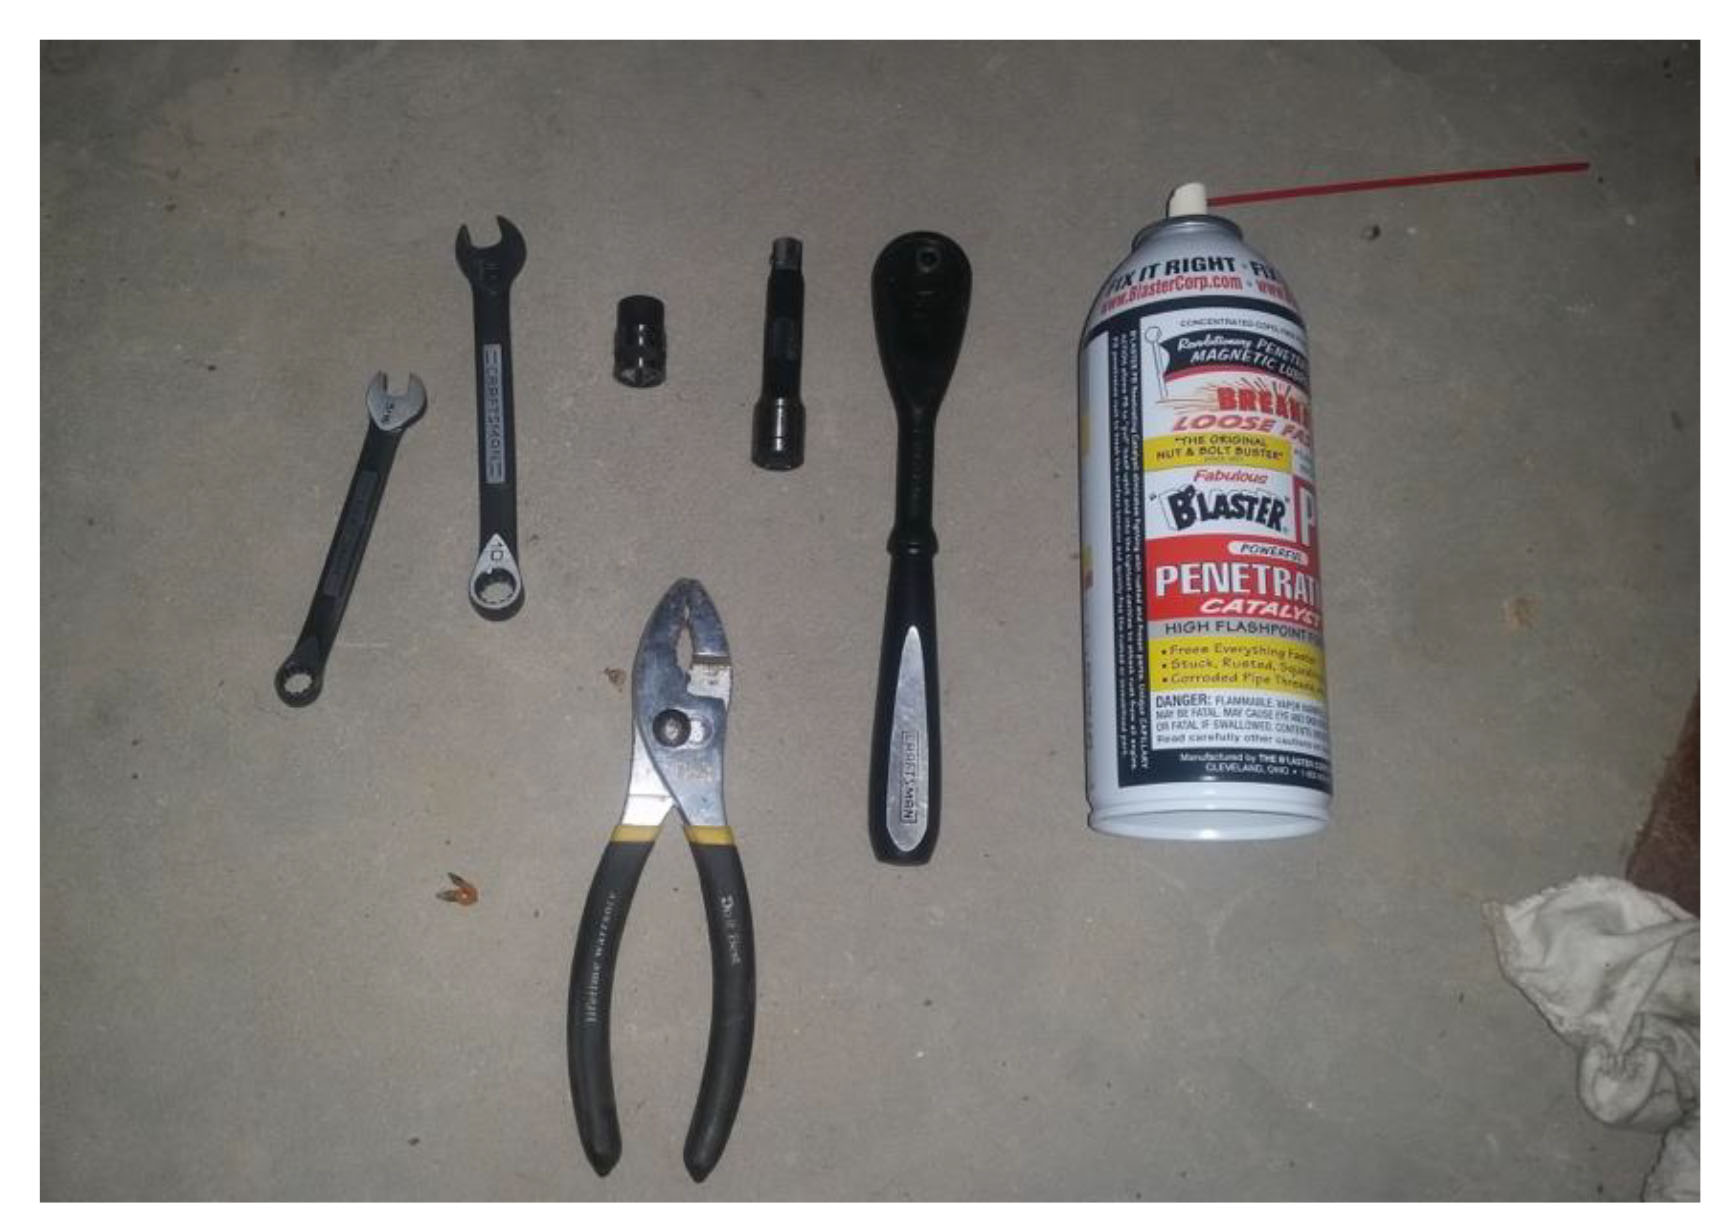
Tools Required
- 3/8” Drive Ratchet
- Small 3/8” Drive Extension
- 10mm Socket
- 10mm Wrench
- 5/16” Wrench
- Pliers
- (Optional) Penetrating Oil
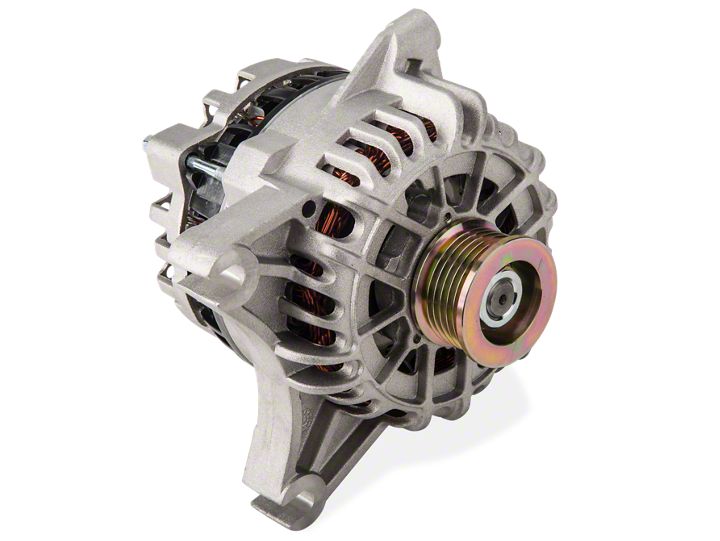
Shop Parts in this Guide
Note: This alternator is a direct replacement (no modifications required), so this guide can be referenced for any direct replacement alternator.
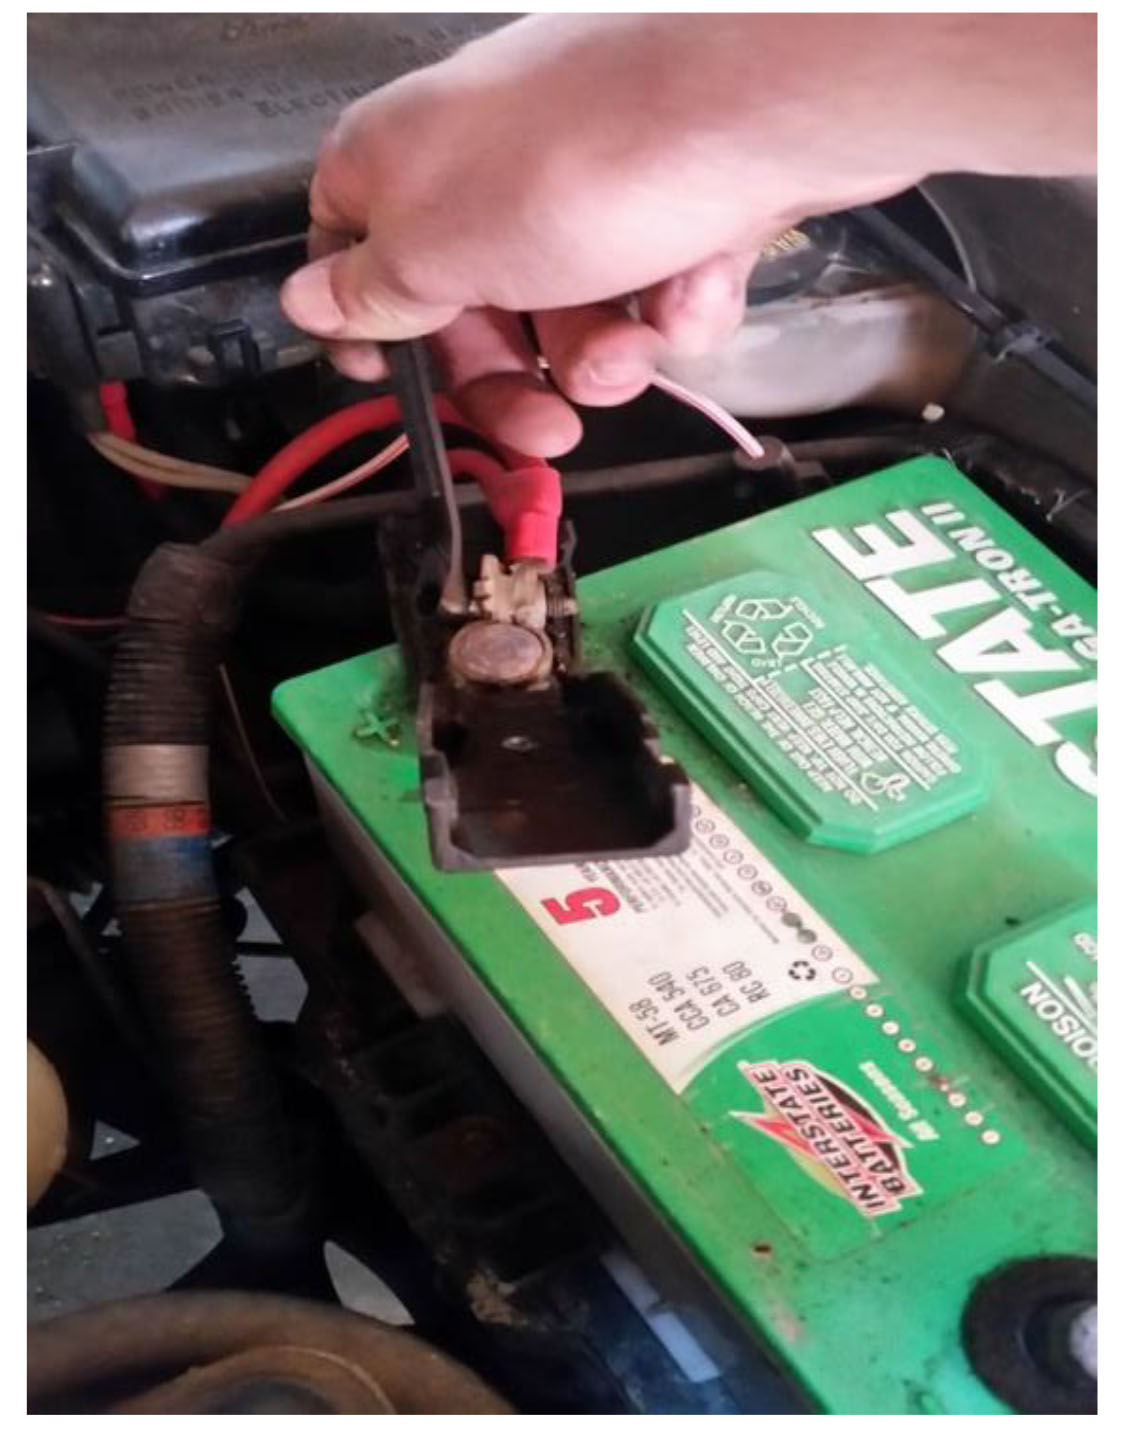
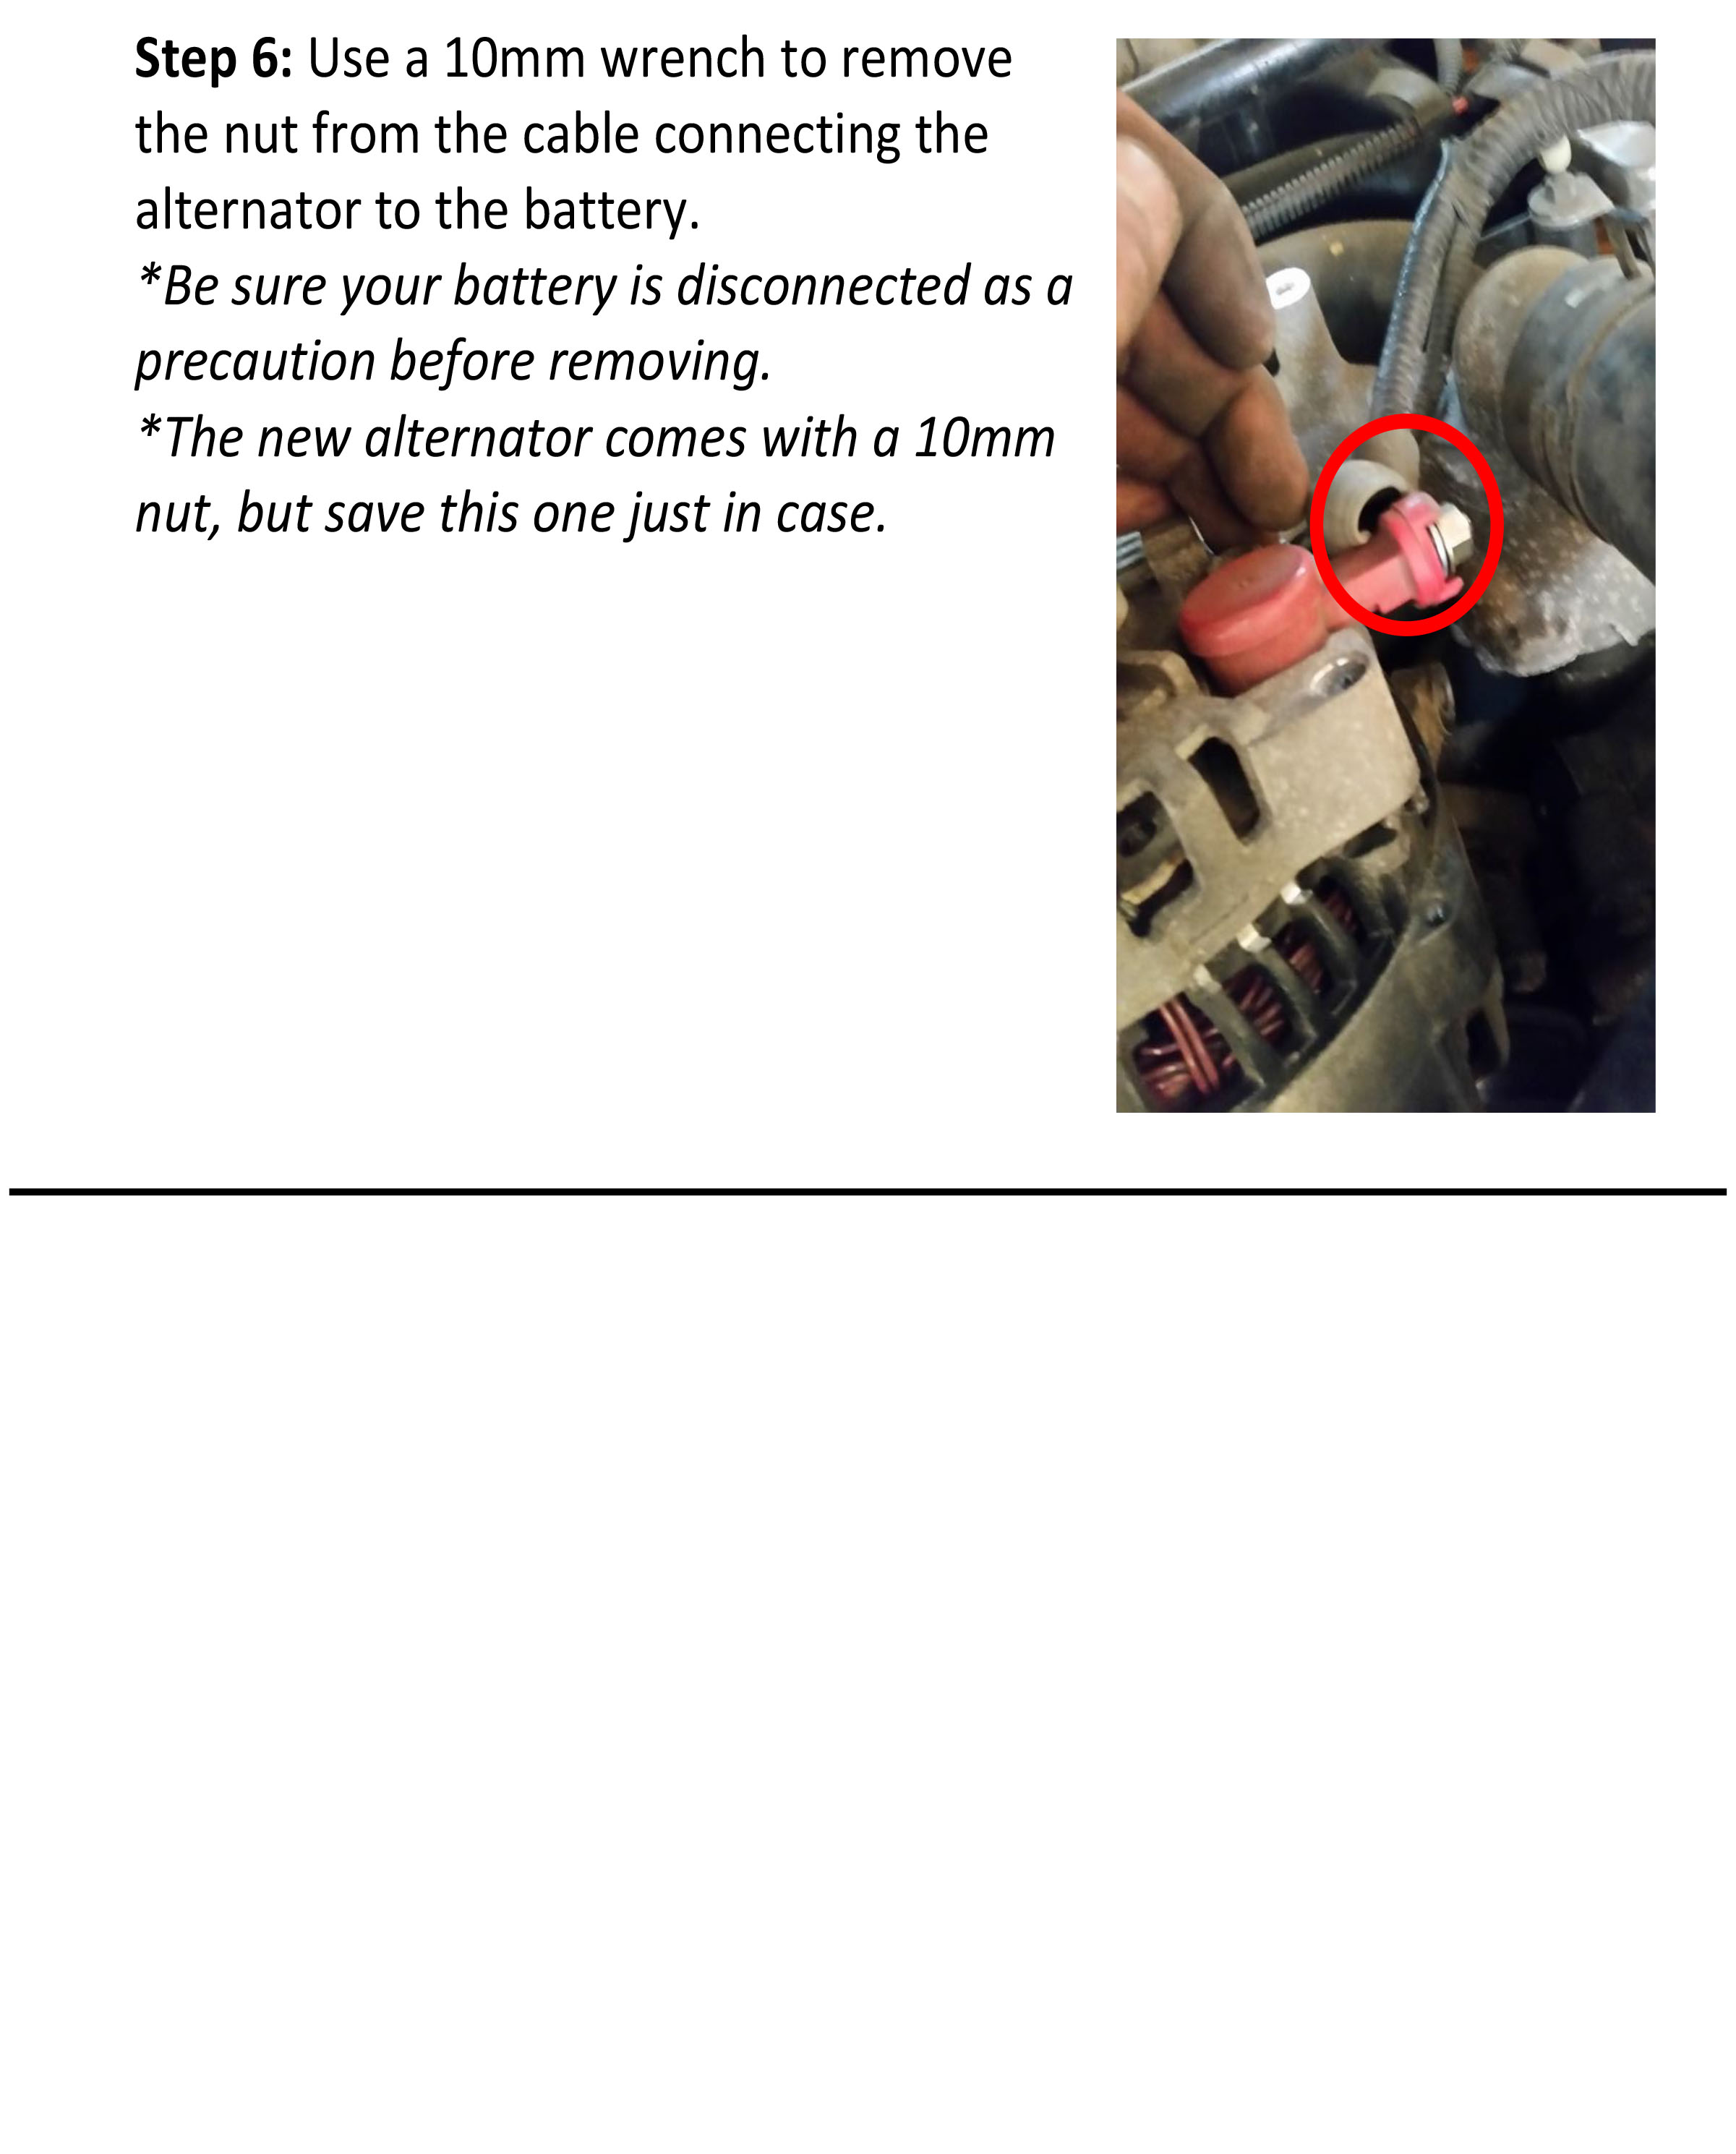
Step 1: Open the hood and remove the positive ( ) and negative (-) battery terminal connections using a 5/16” wrench. Move the cables off to the side so they cannot bend back to touch a terminal. *Just loosen the bolt enough to slip the positive and negative clamp off each of the battery terminals.
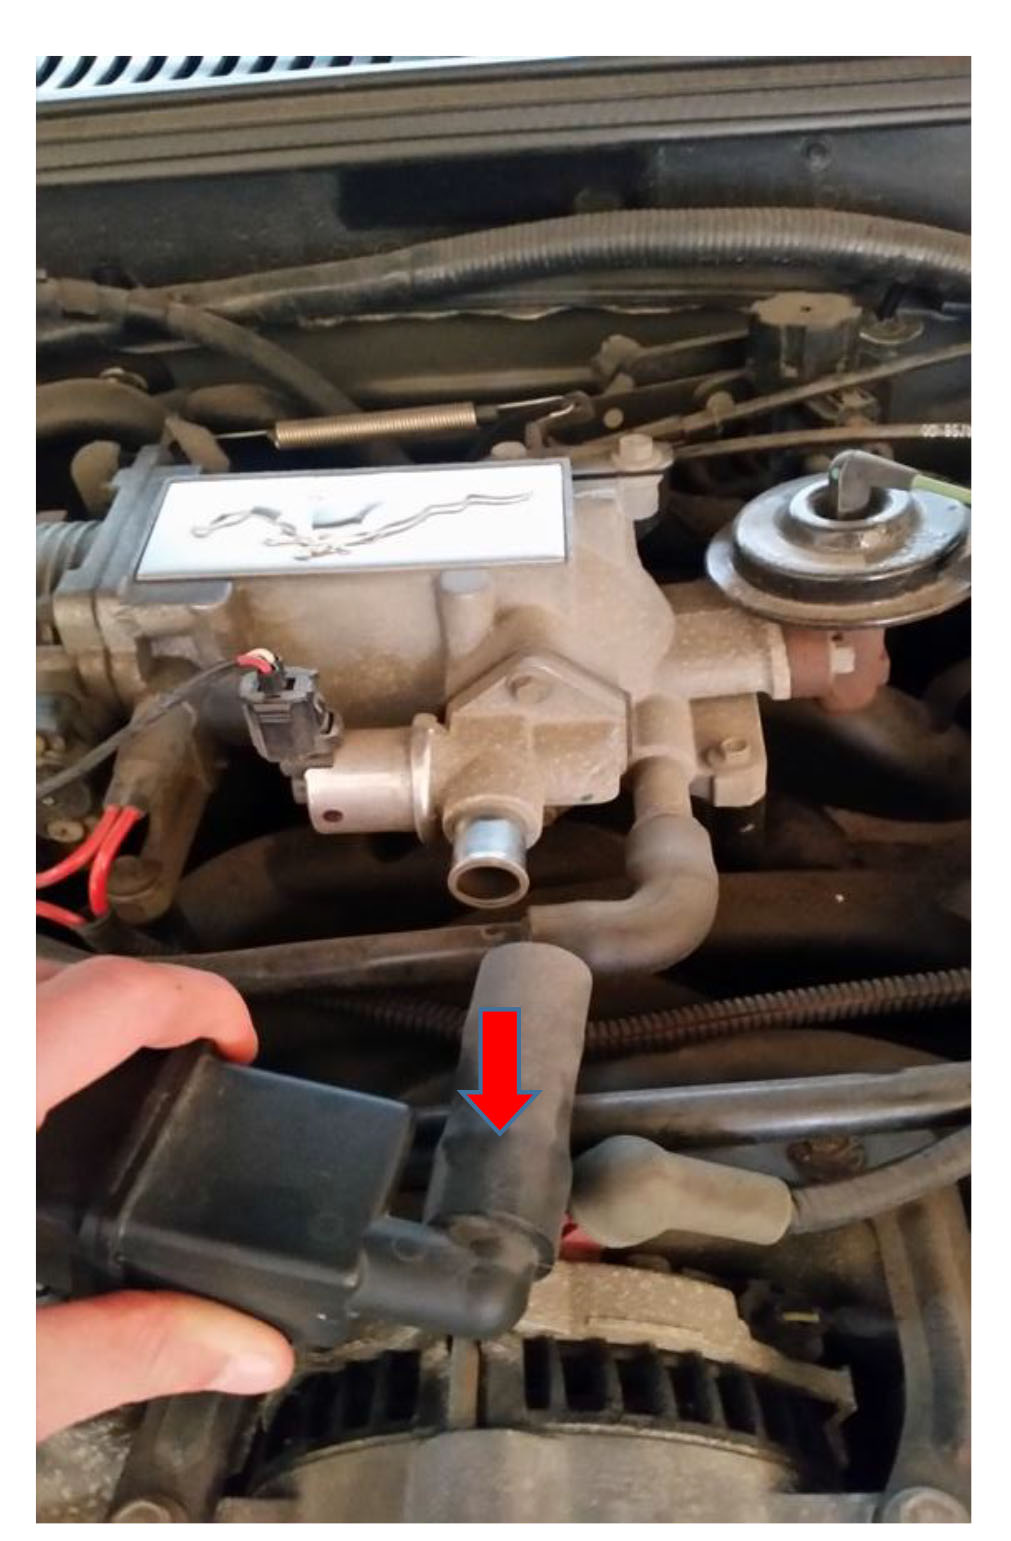
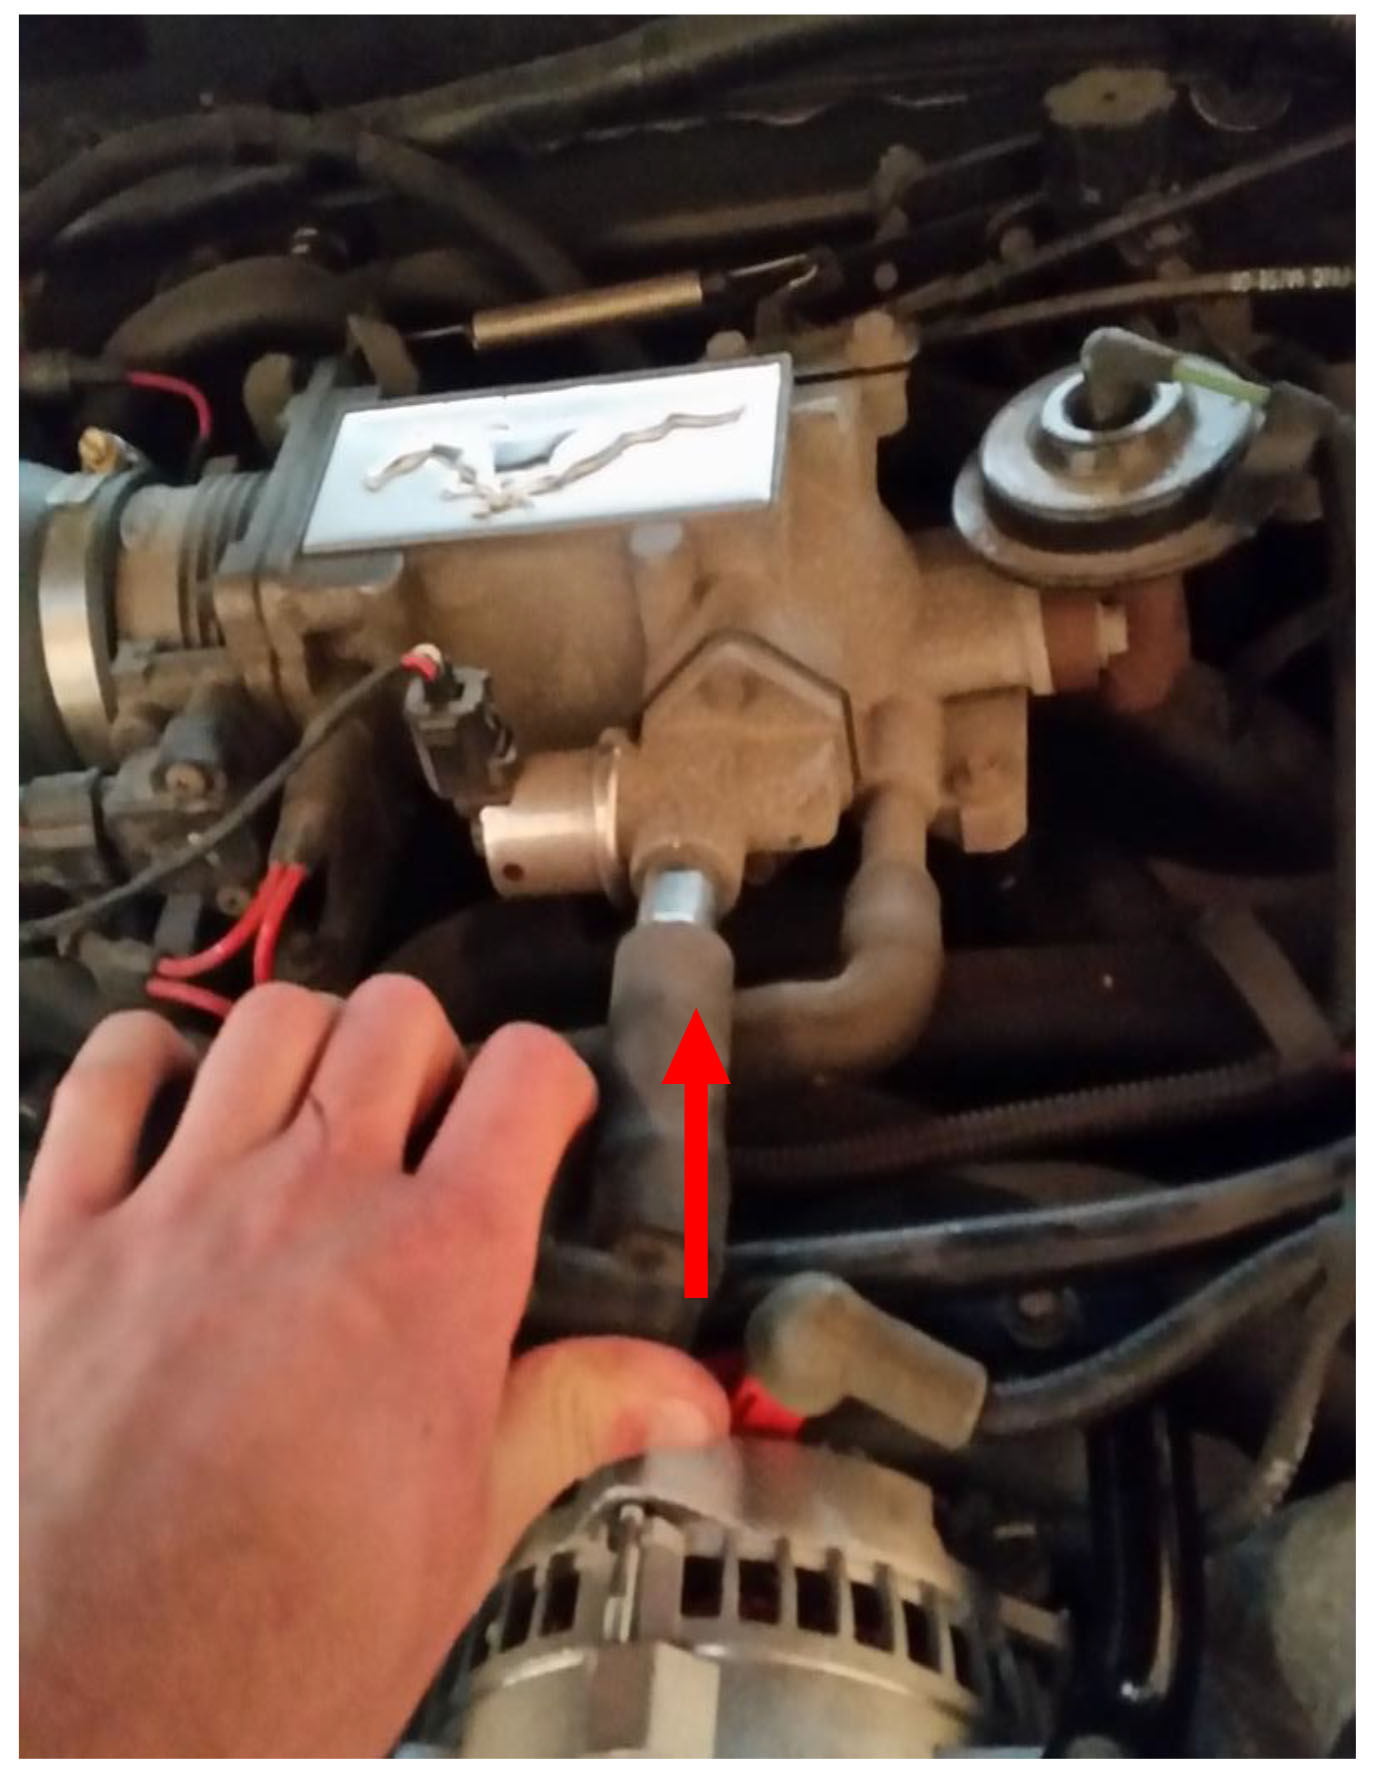
Step 2: Disconect tube on the front side of the throttle intake to easily access the top bolts of the alternator.
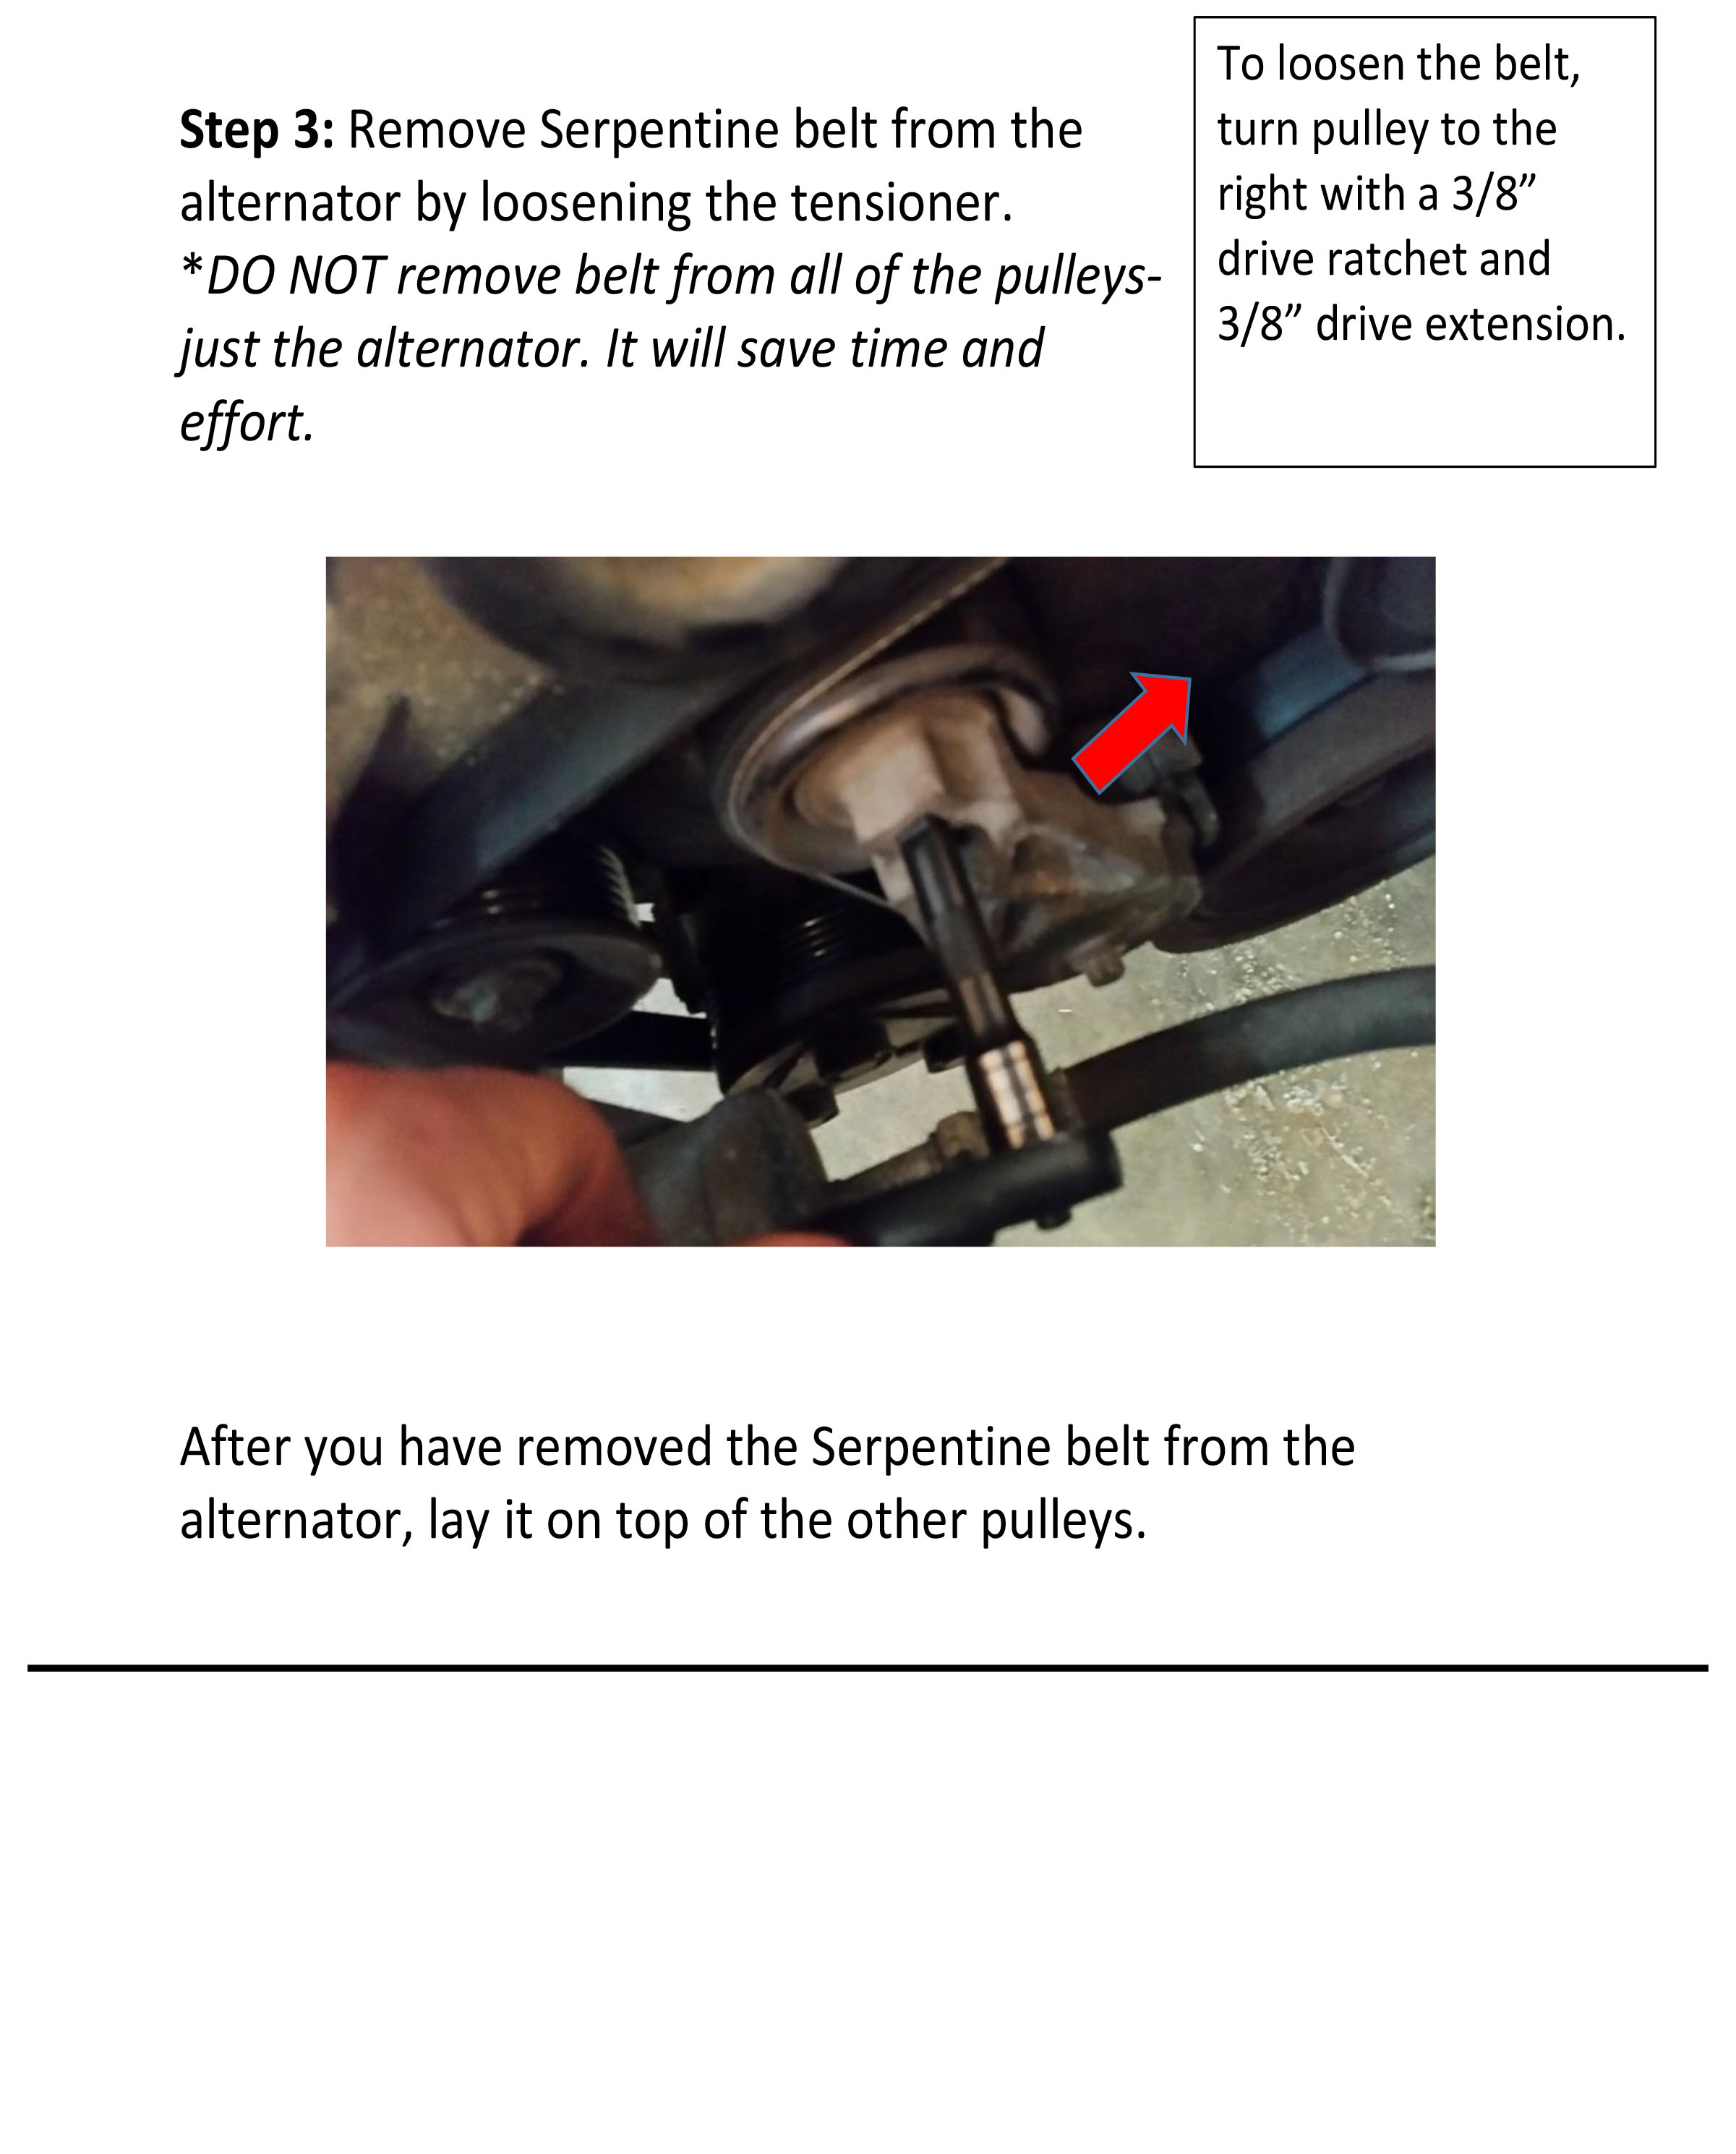
Step 3: Remove Serpentine belt from the alternator by loosening the tensioner. *DO NOT remove belt from all of the pulleysjust the alternator. It will save time and effort.
To loosen the belt, turn pulley to the right with a 3/8” drive ratchet and 3/8” drive extension.
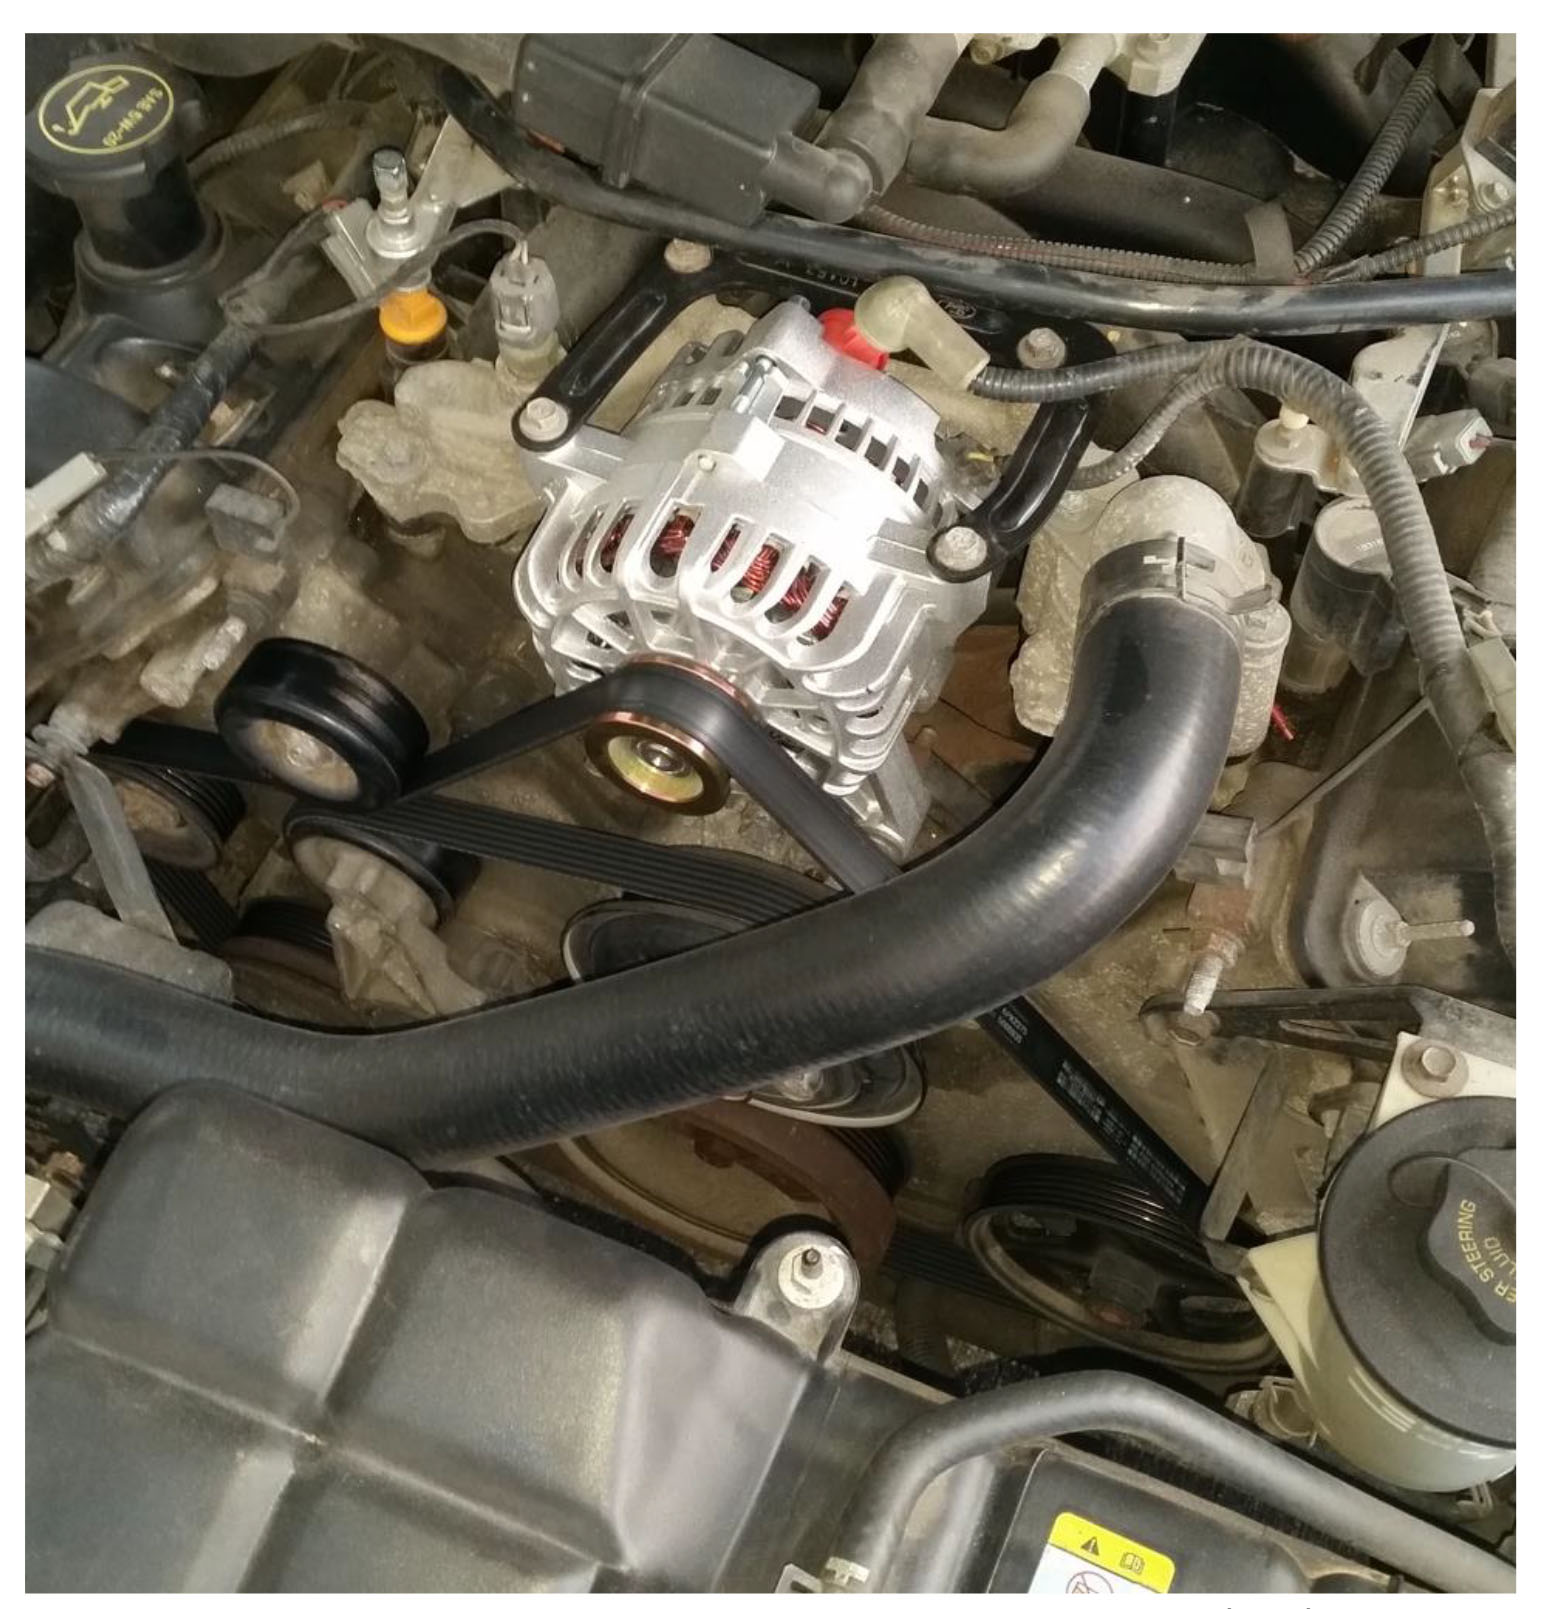
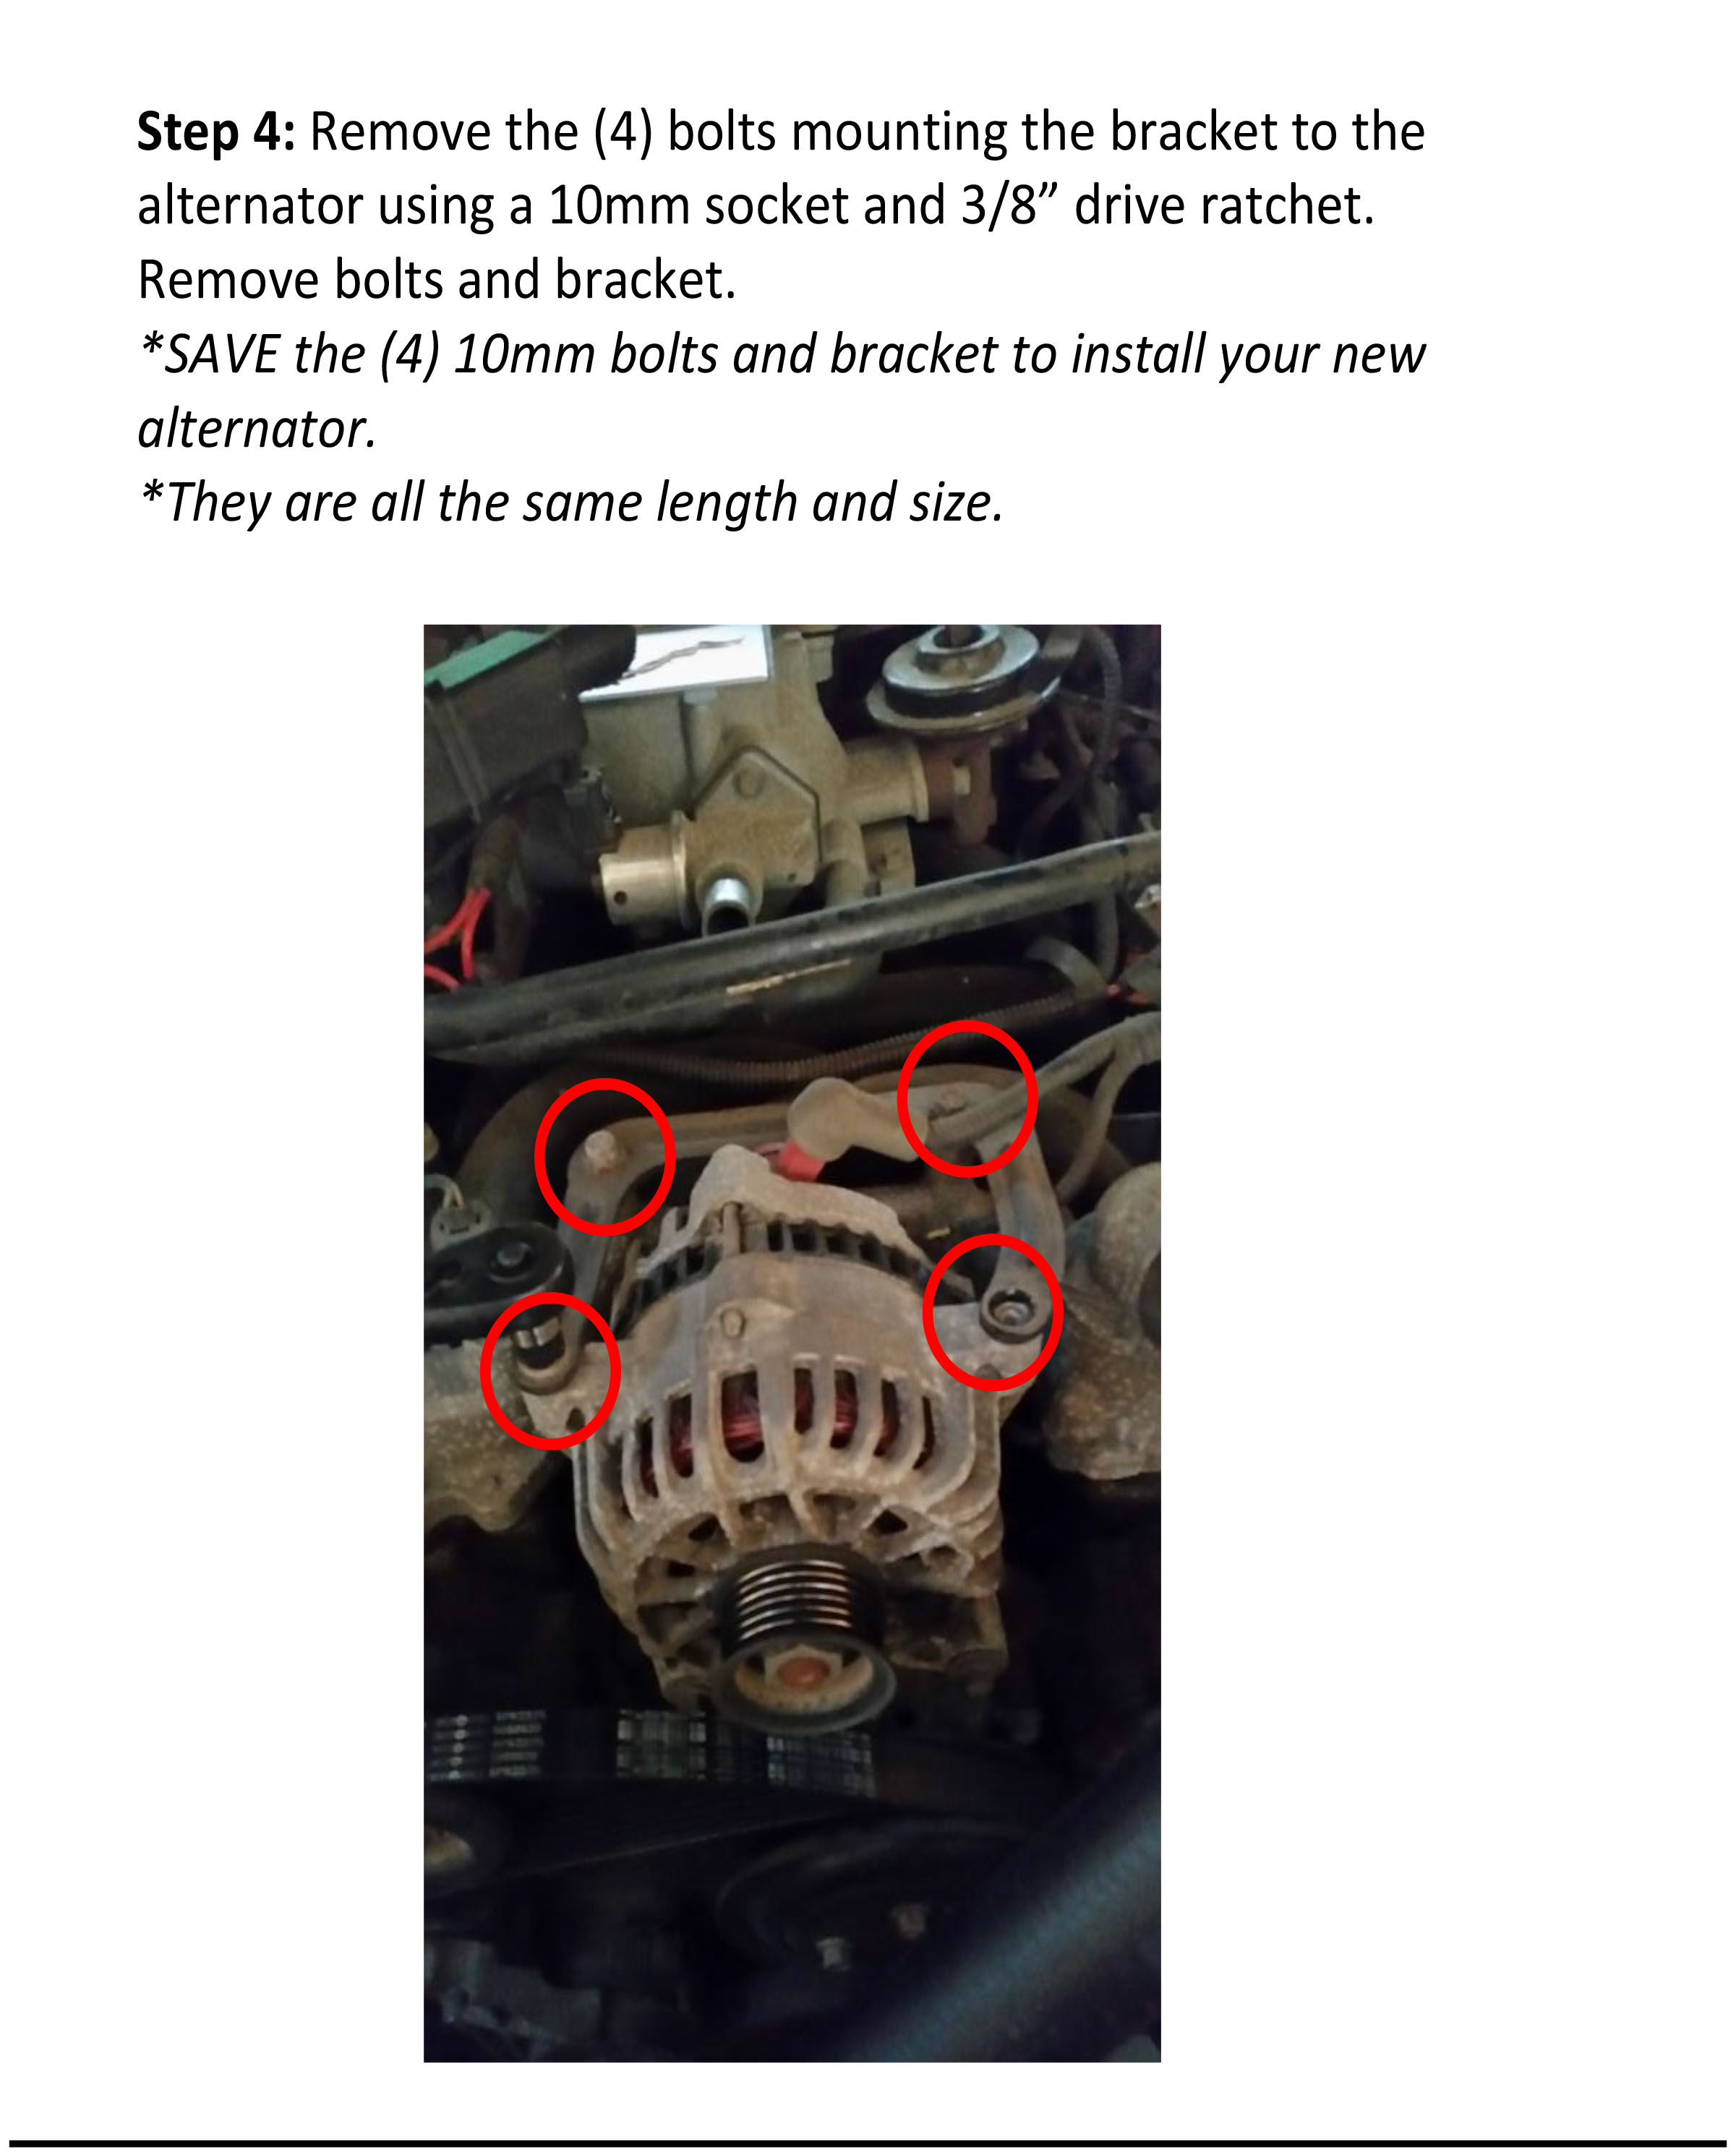
Step 4: Remove the (4) bolts mounting the bracket to the alternator using a 10mm socket and 3/8” drive ratchet. Remove bolts and bracket. *SAVE the (4) 10mm bolts and bracket to install your new alternator. *They are all the same length and size.
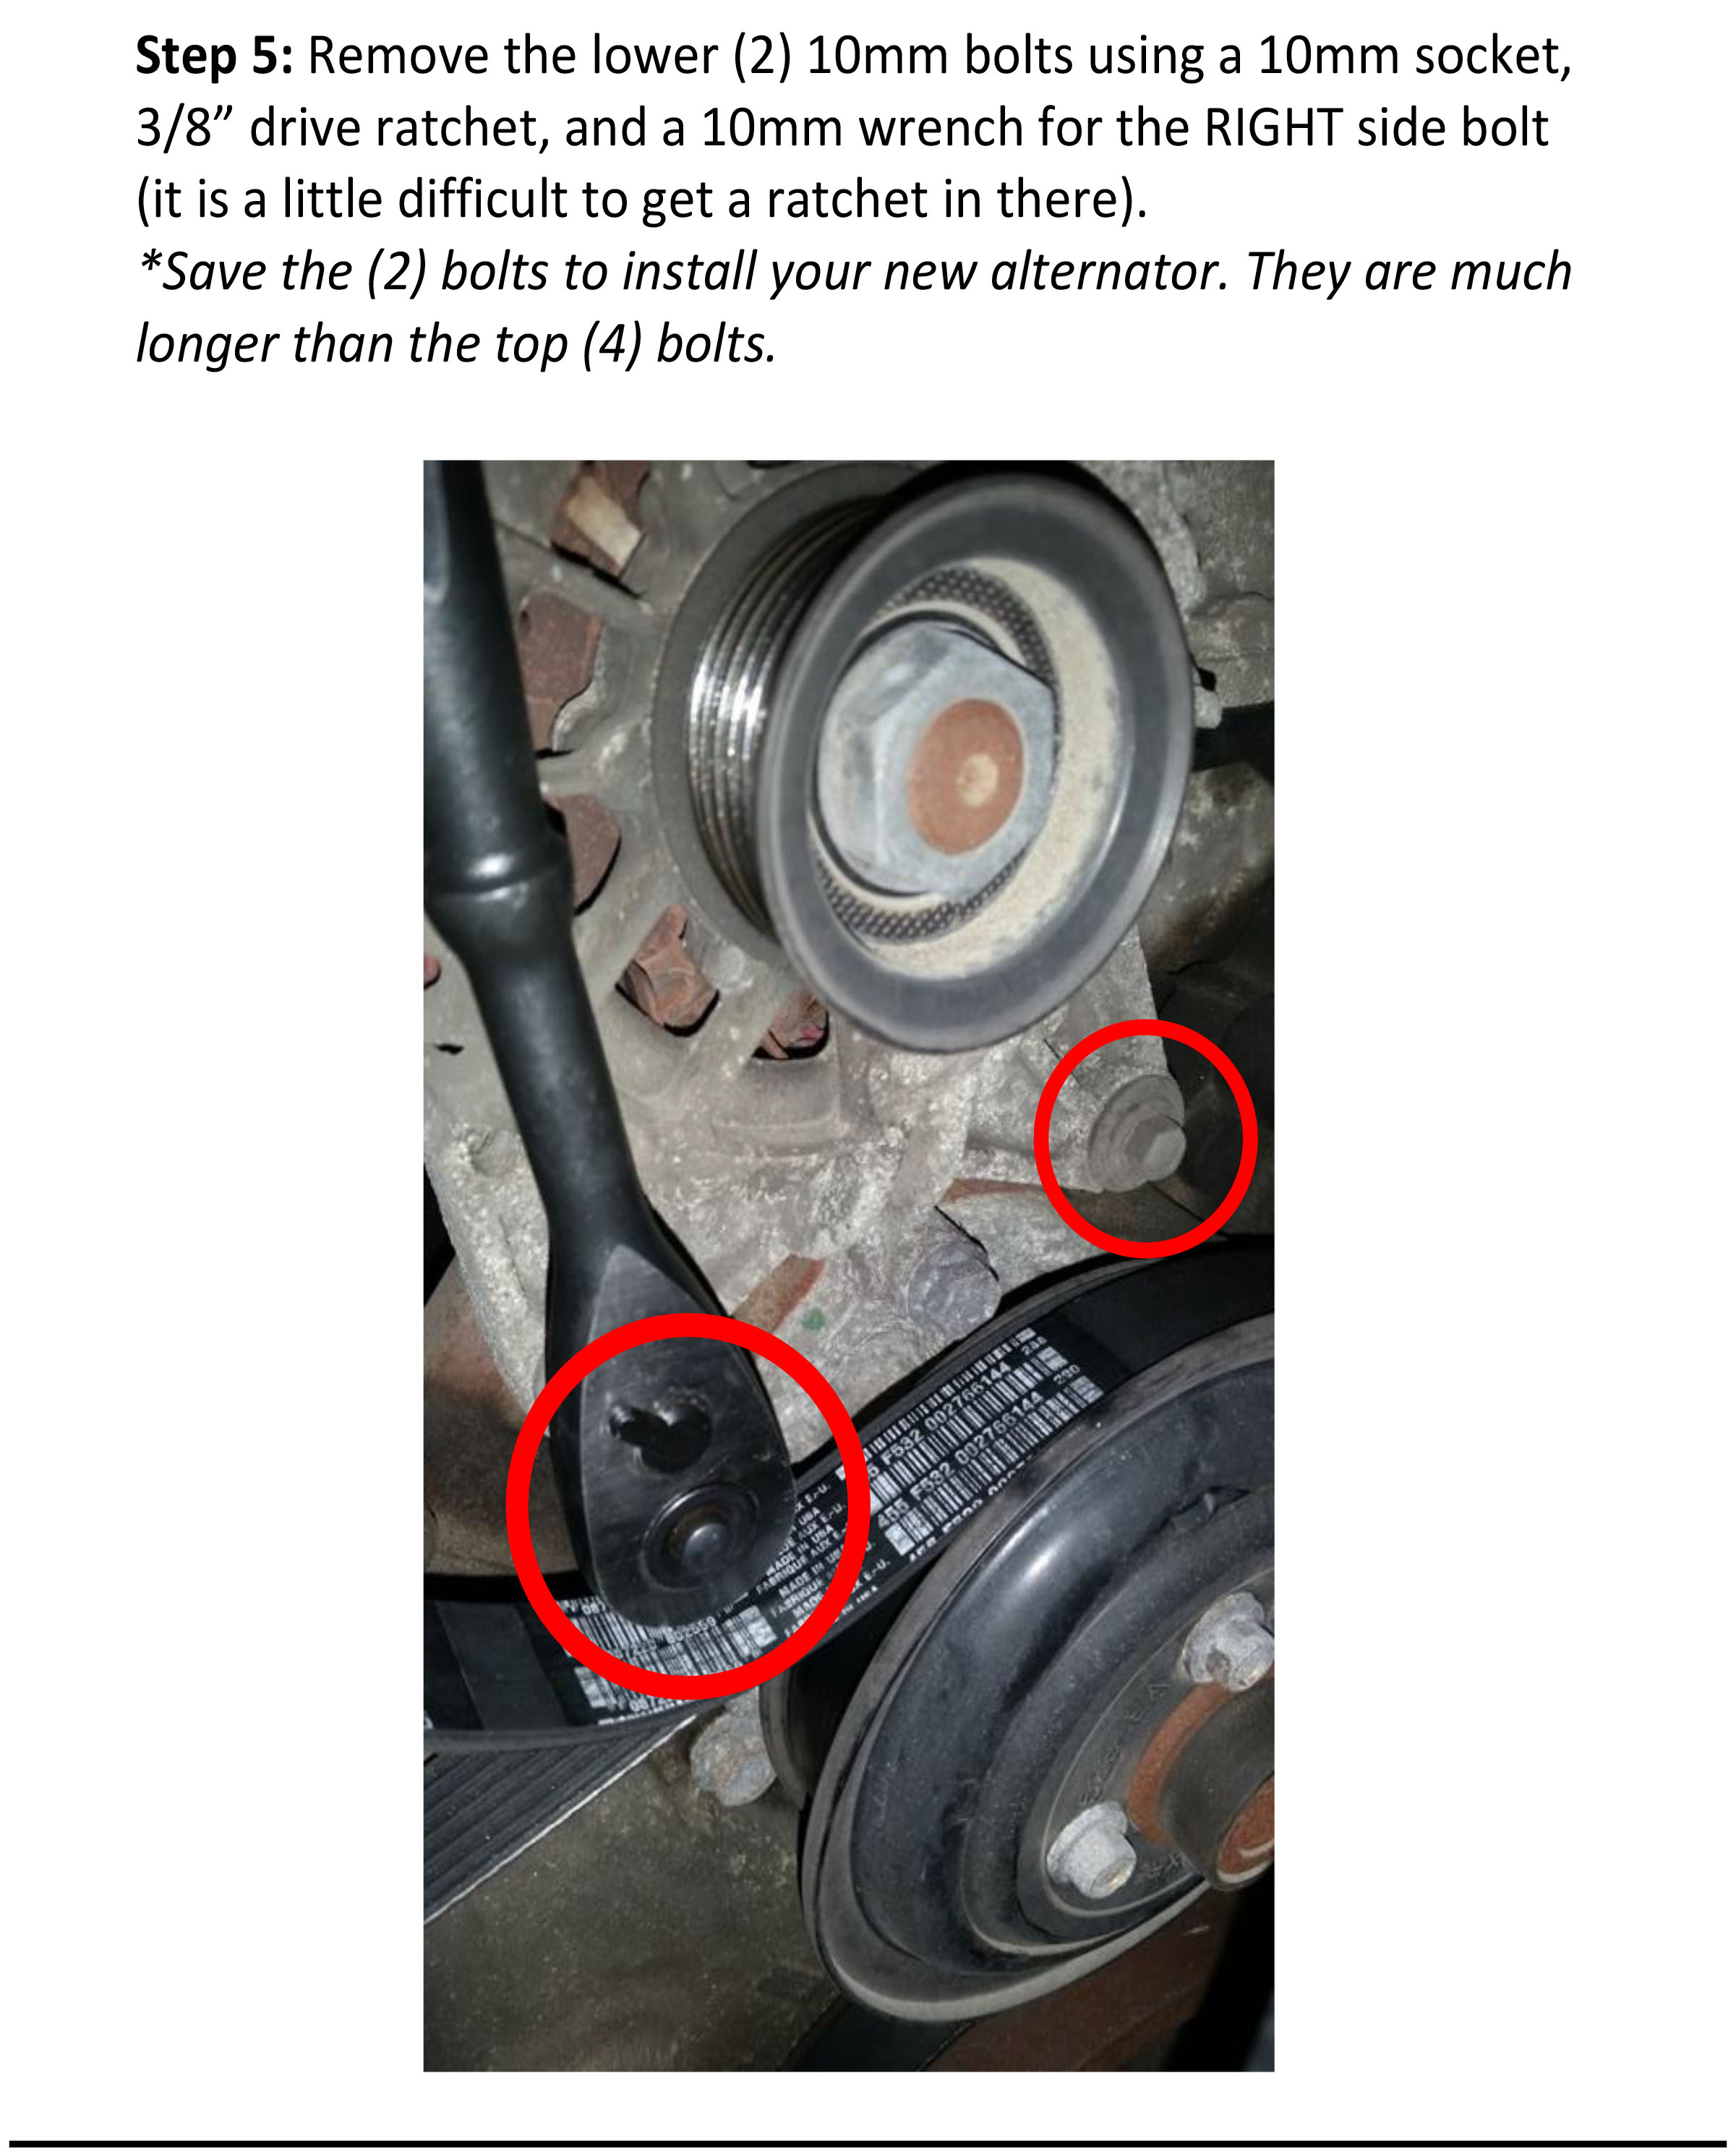
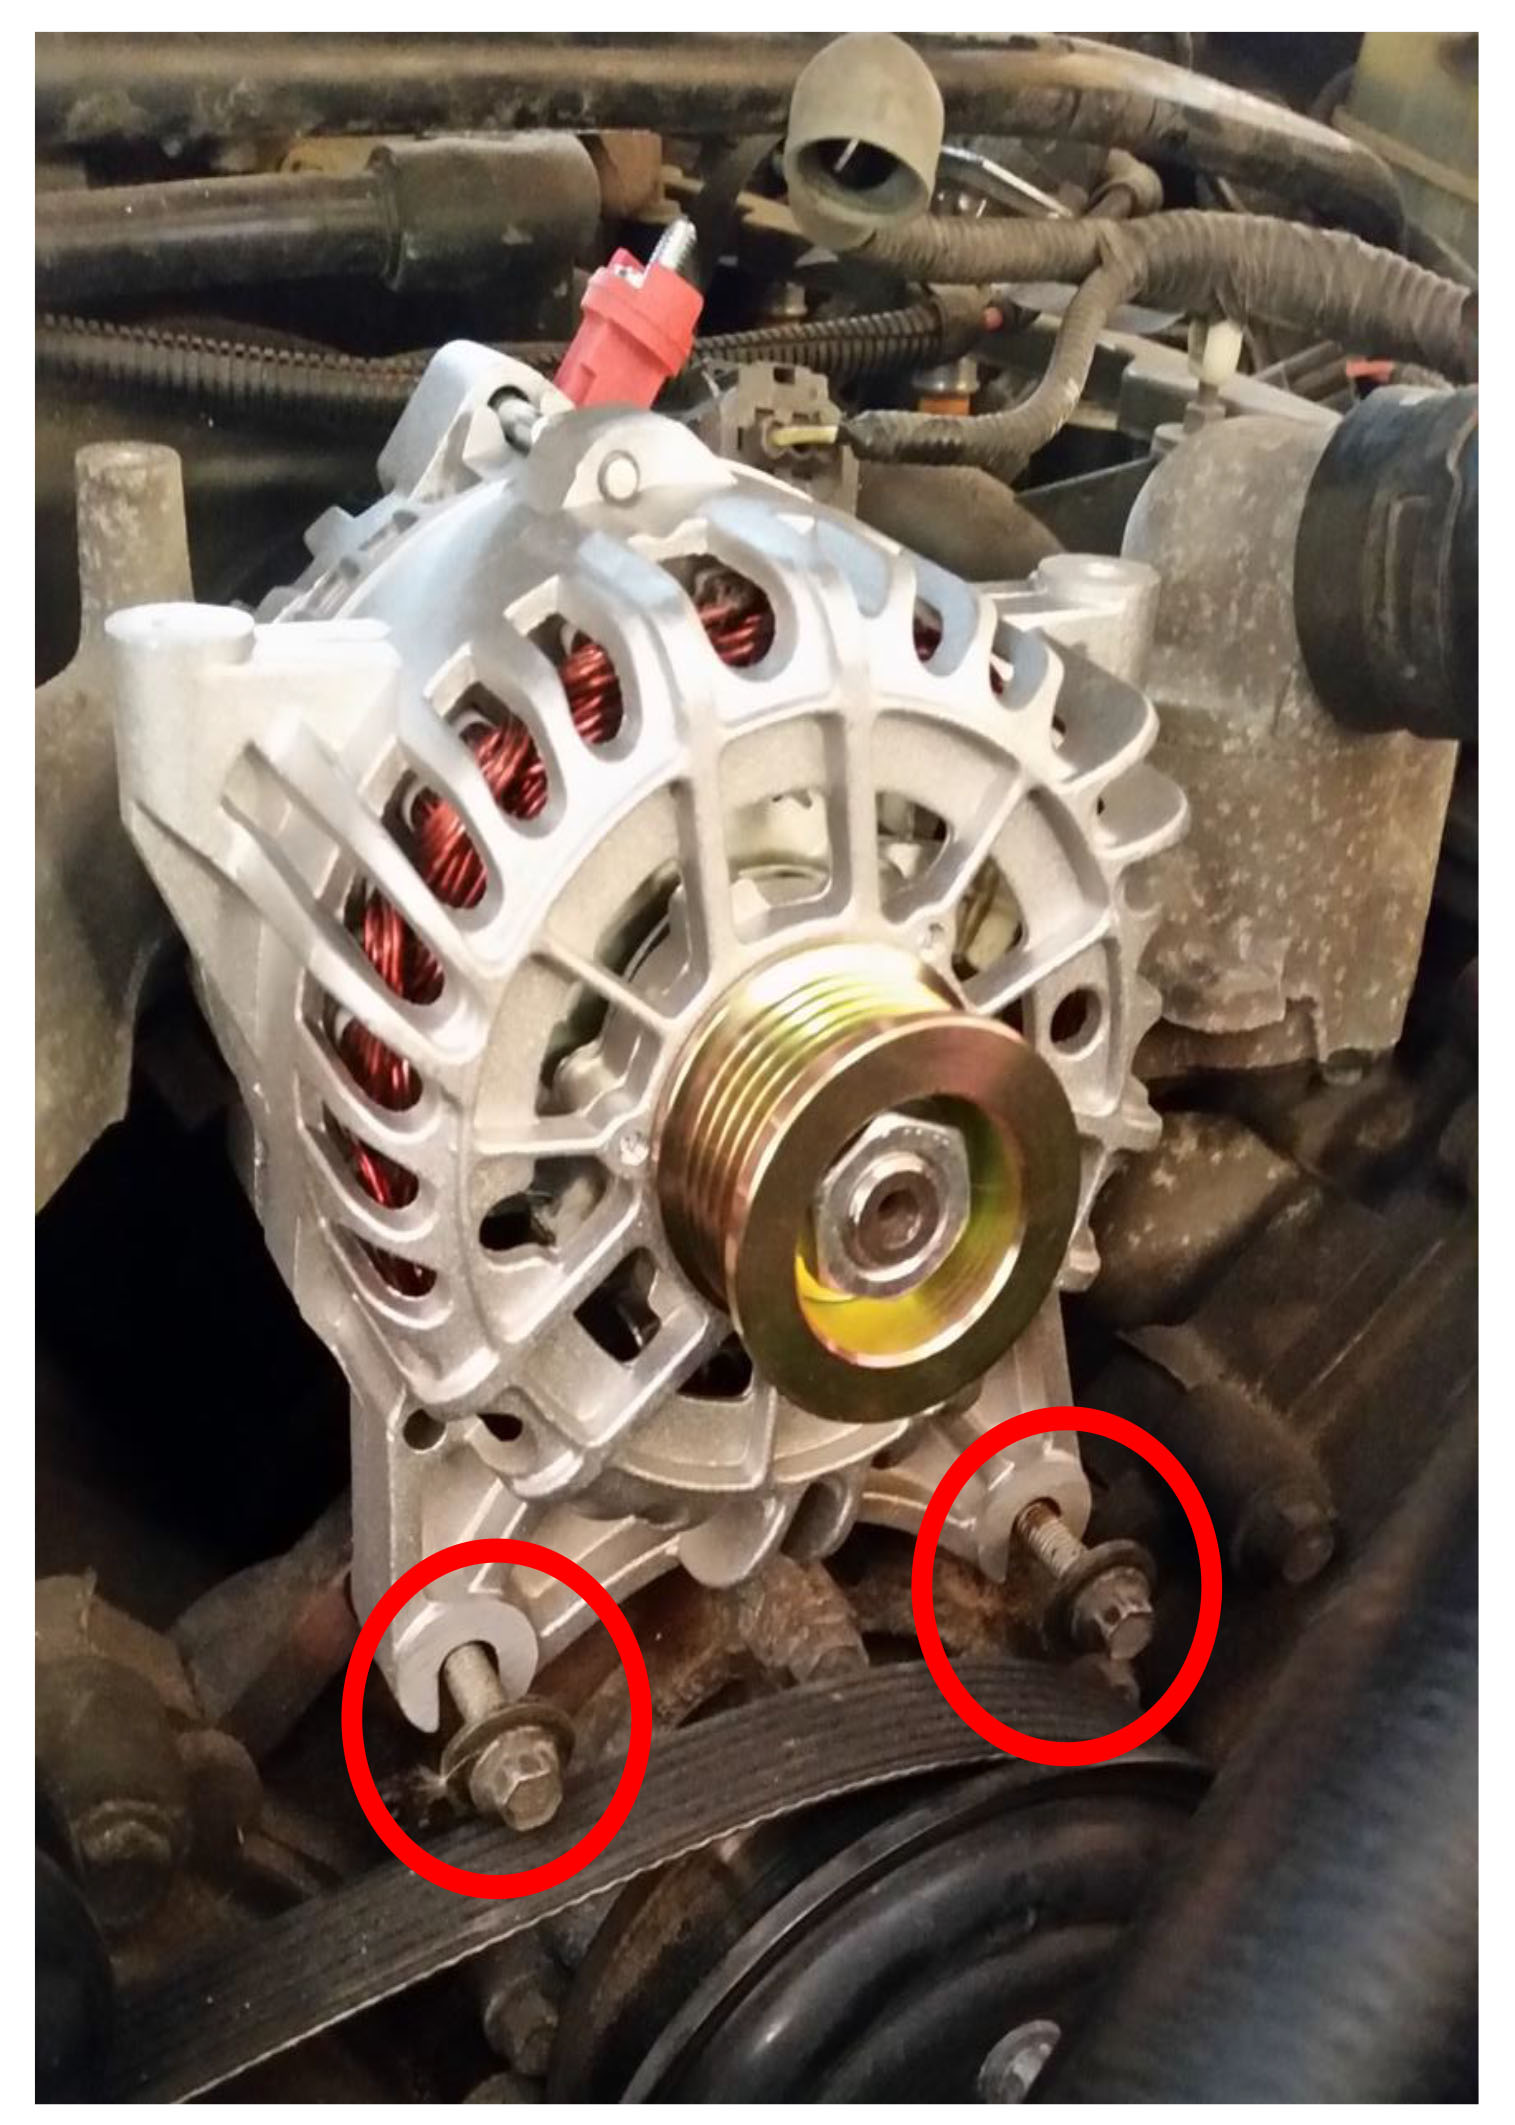
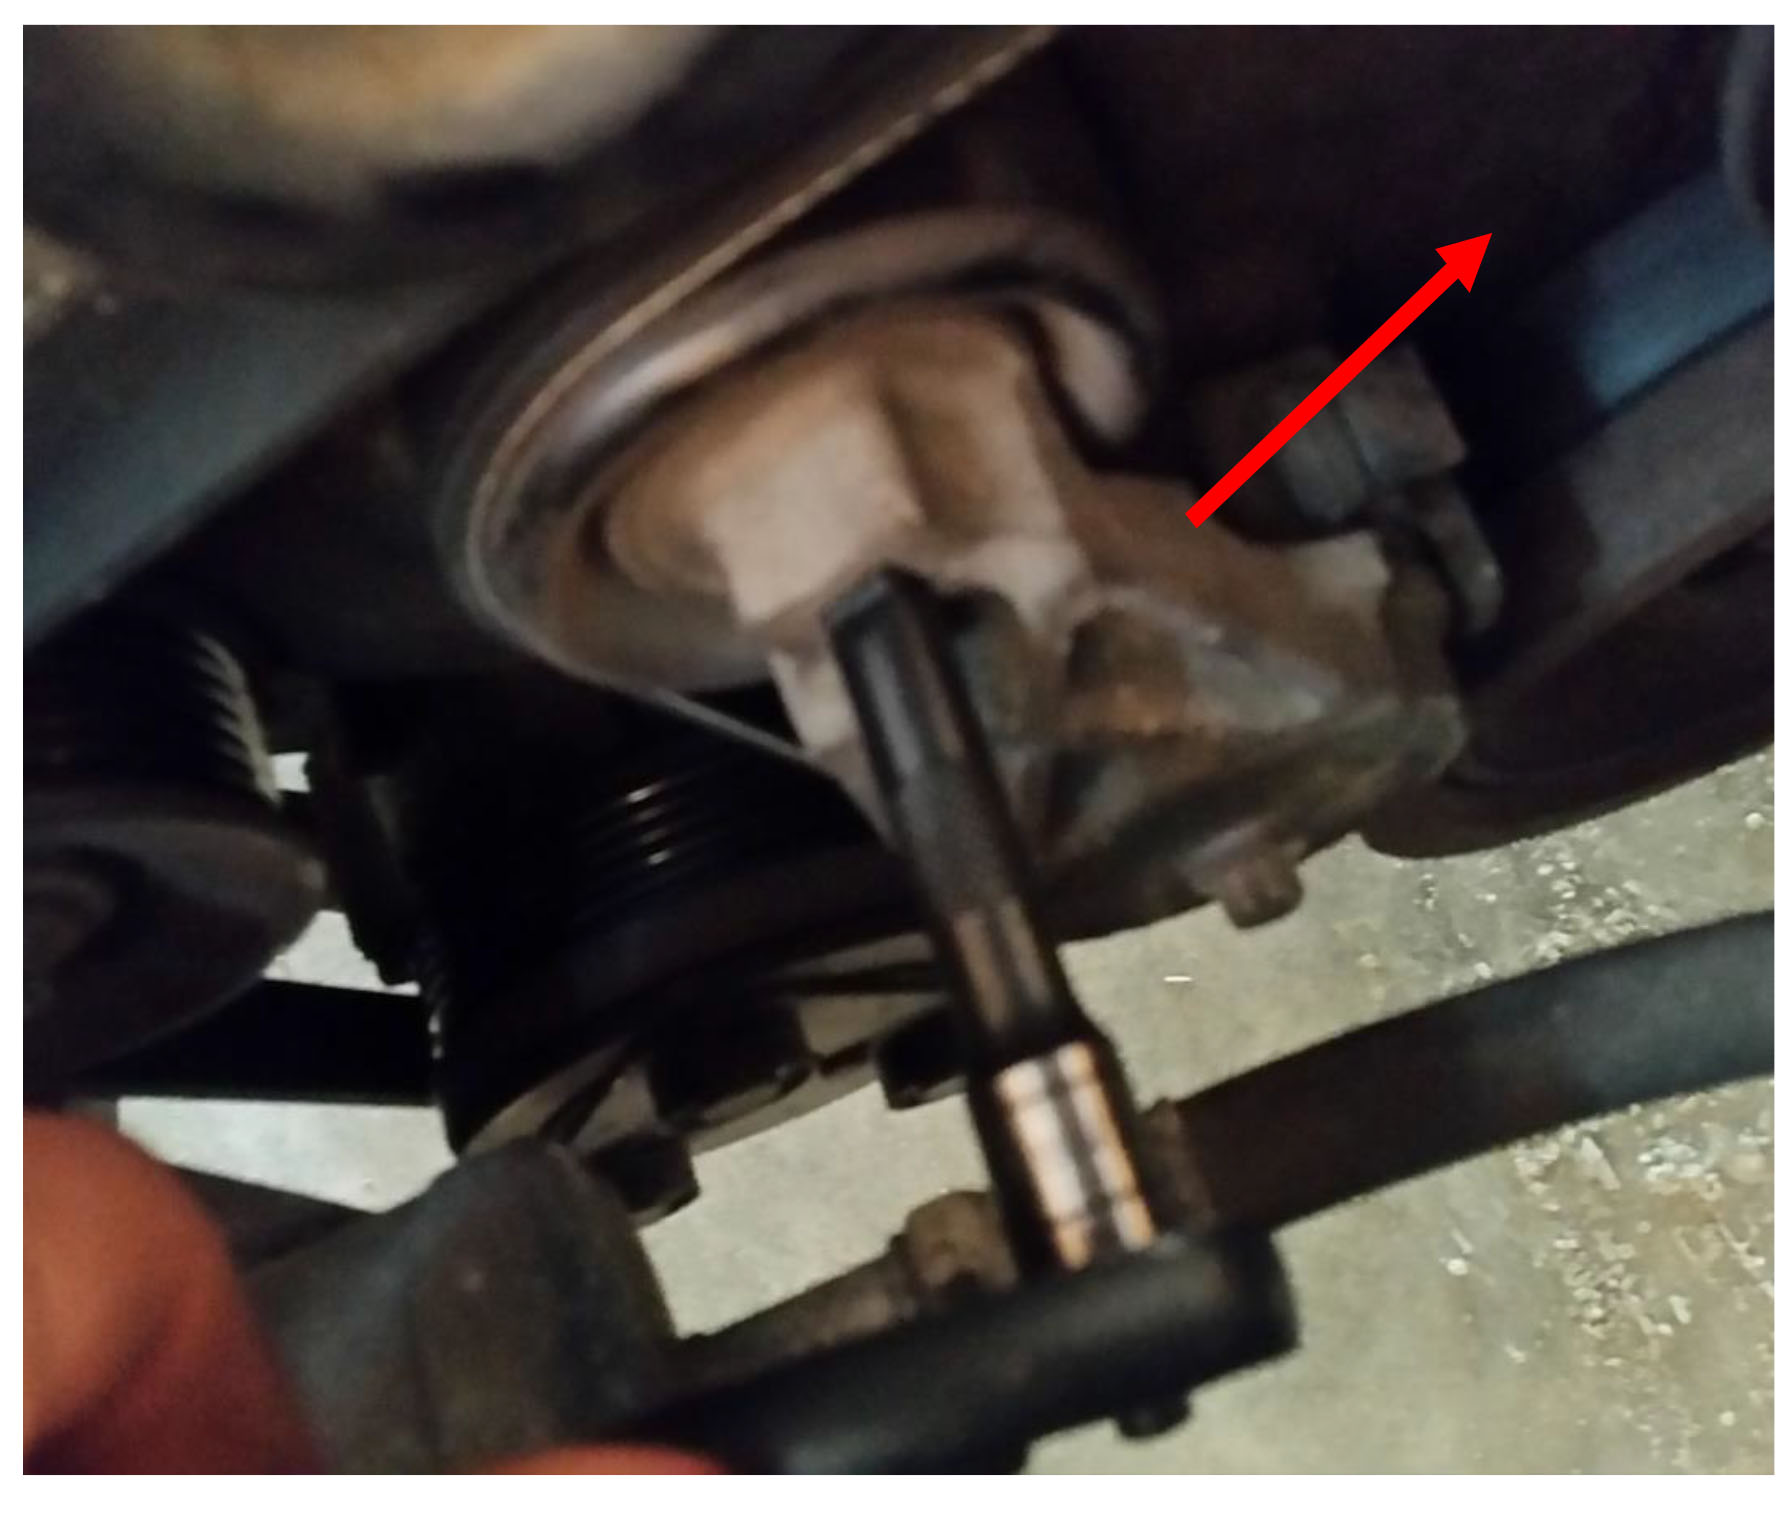
Step 5: Remove the lower (2) 10mm bolts using a 10mm socket, 3/8” drive ratchet, and a 10mm wrench for the RIGHT side bolt (it is a little difficult to get a ratchet in there). *Save the (2) bolts to install your new alternator. They are much longer than the top (4) bolts.
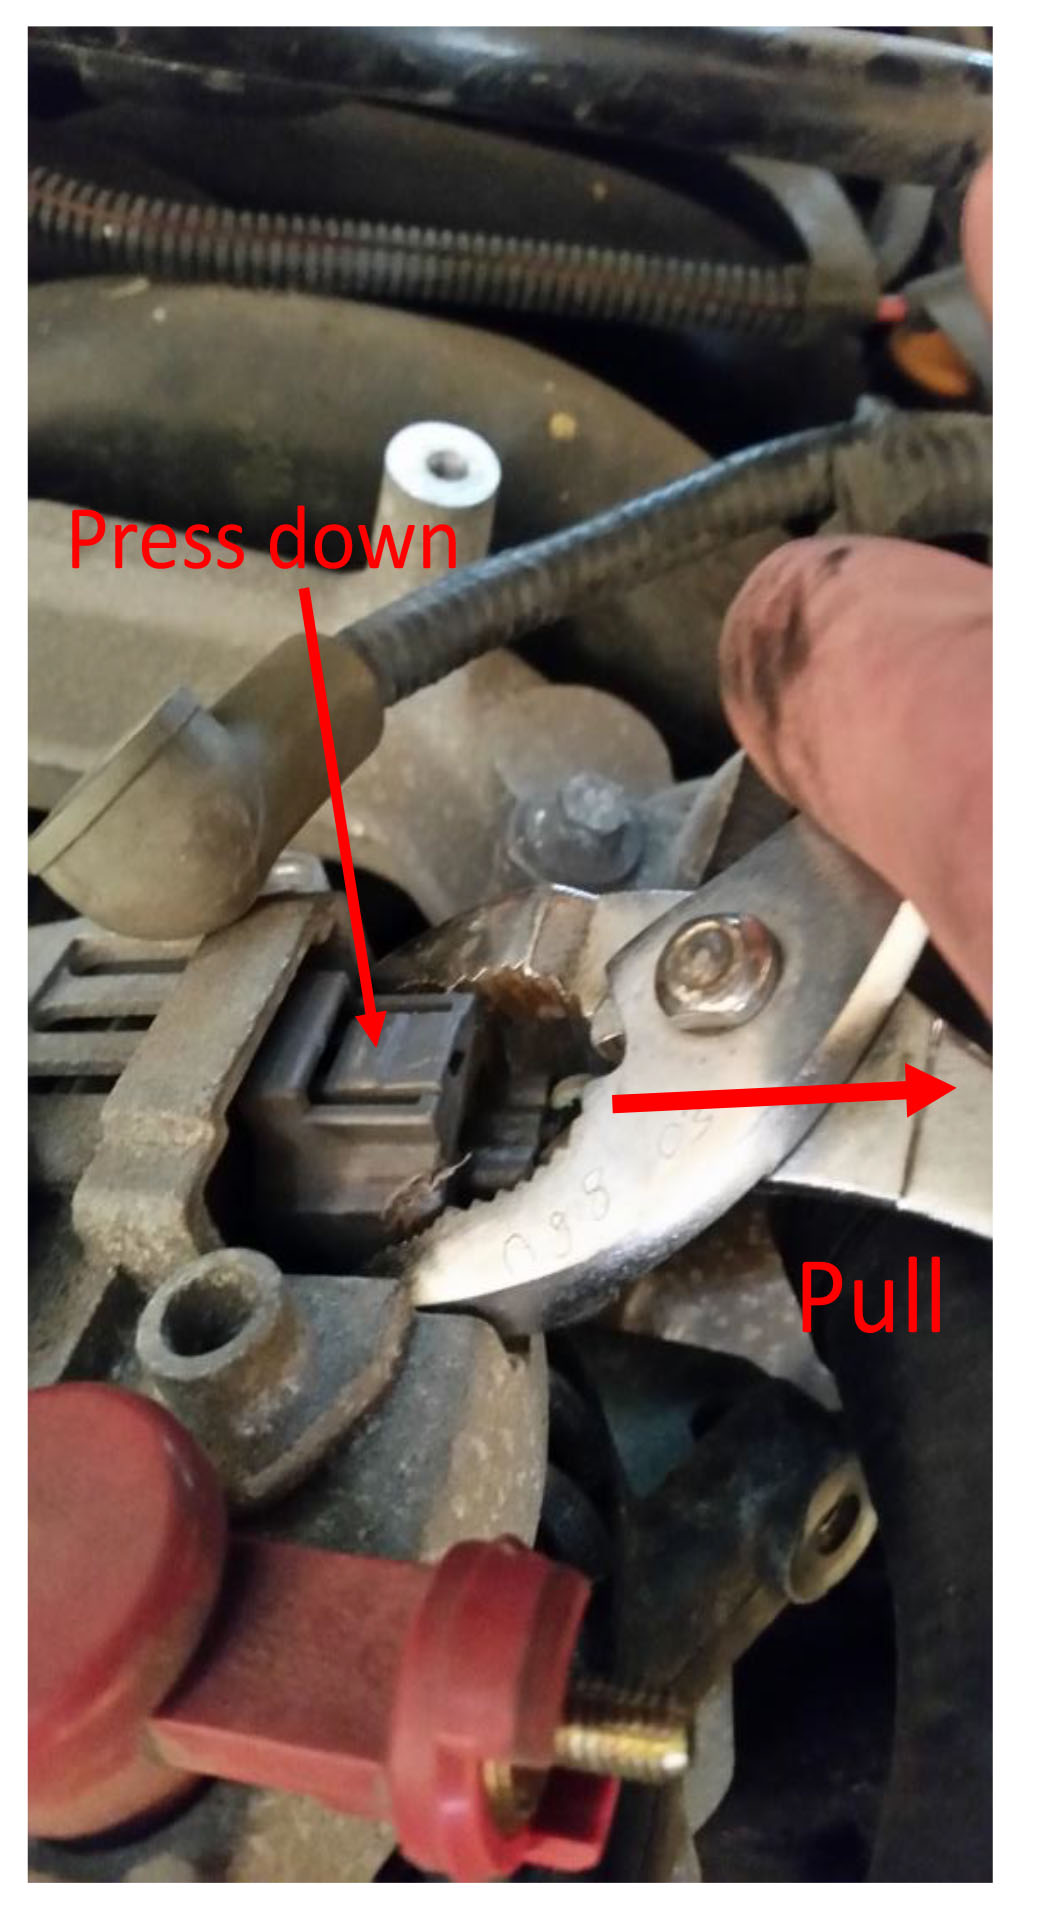
Step 7: Remove the remaining grey plug by depressing the tab (a bolt works well) and pulling gently with a pair of pliers. May require some gentle wiggling to remove. *Be sure not to damage any wires while doing this. It can be a bit tricky.
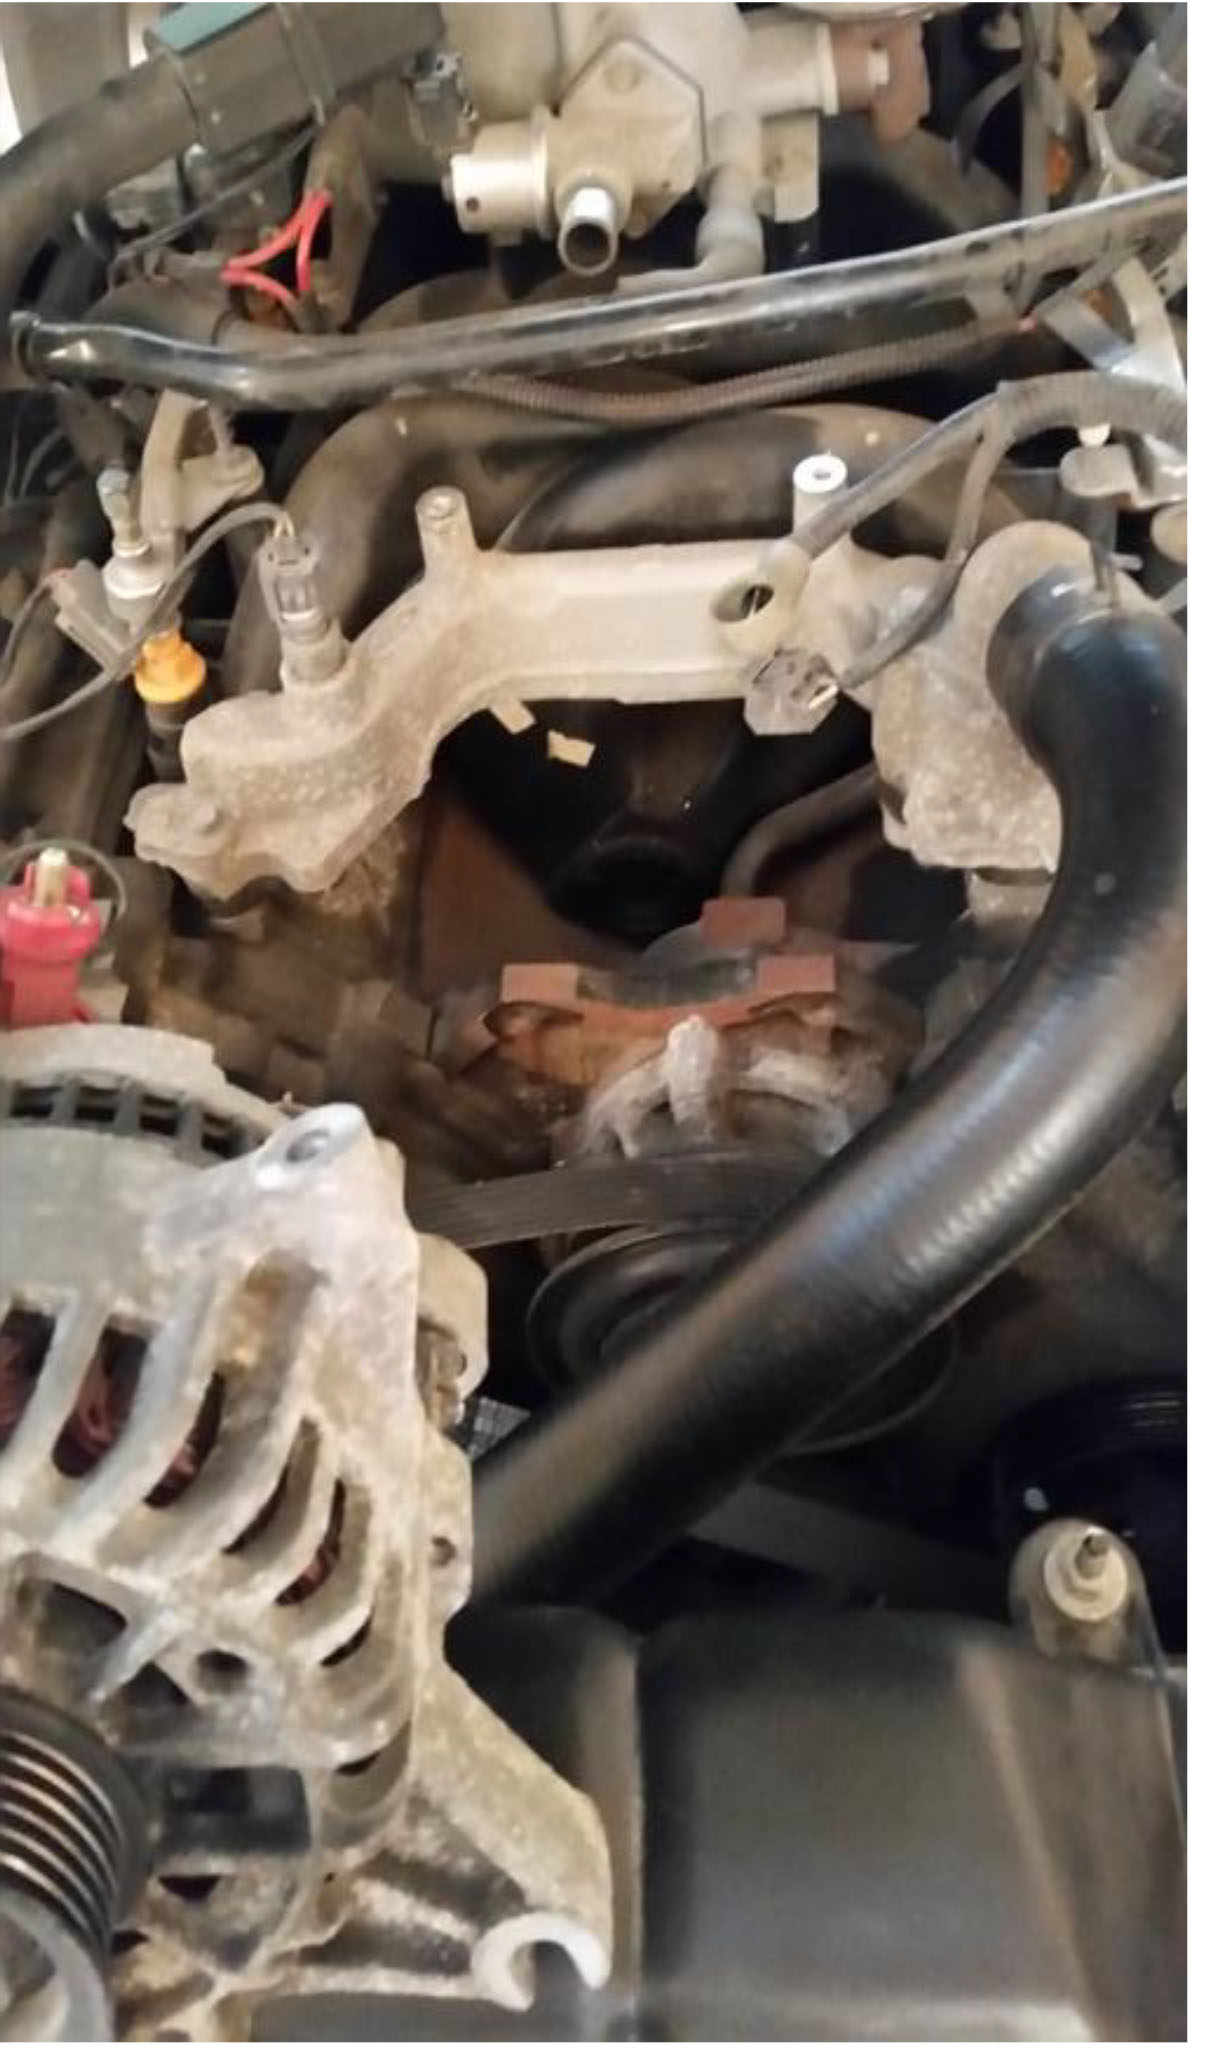
Step 8: Remove old alternator. *CAUTION: Alternator is somewhat heavy and may be hot if you just got done driving, so handle with care. Now may be a good time to spray some penetrating oil on your bolts and let them sit for a few minutes. It helps them screw in much easier.
Step 9: Insert new alternator. Start bottom two bolts by hand and insert alternator on top.

Step 12: Tighten the top (4) bolts and the bottom (2) bolts with a 10mm socket and 3/8” drive ratchet. No torque specs are necessary, just get them hand tight.
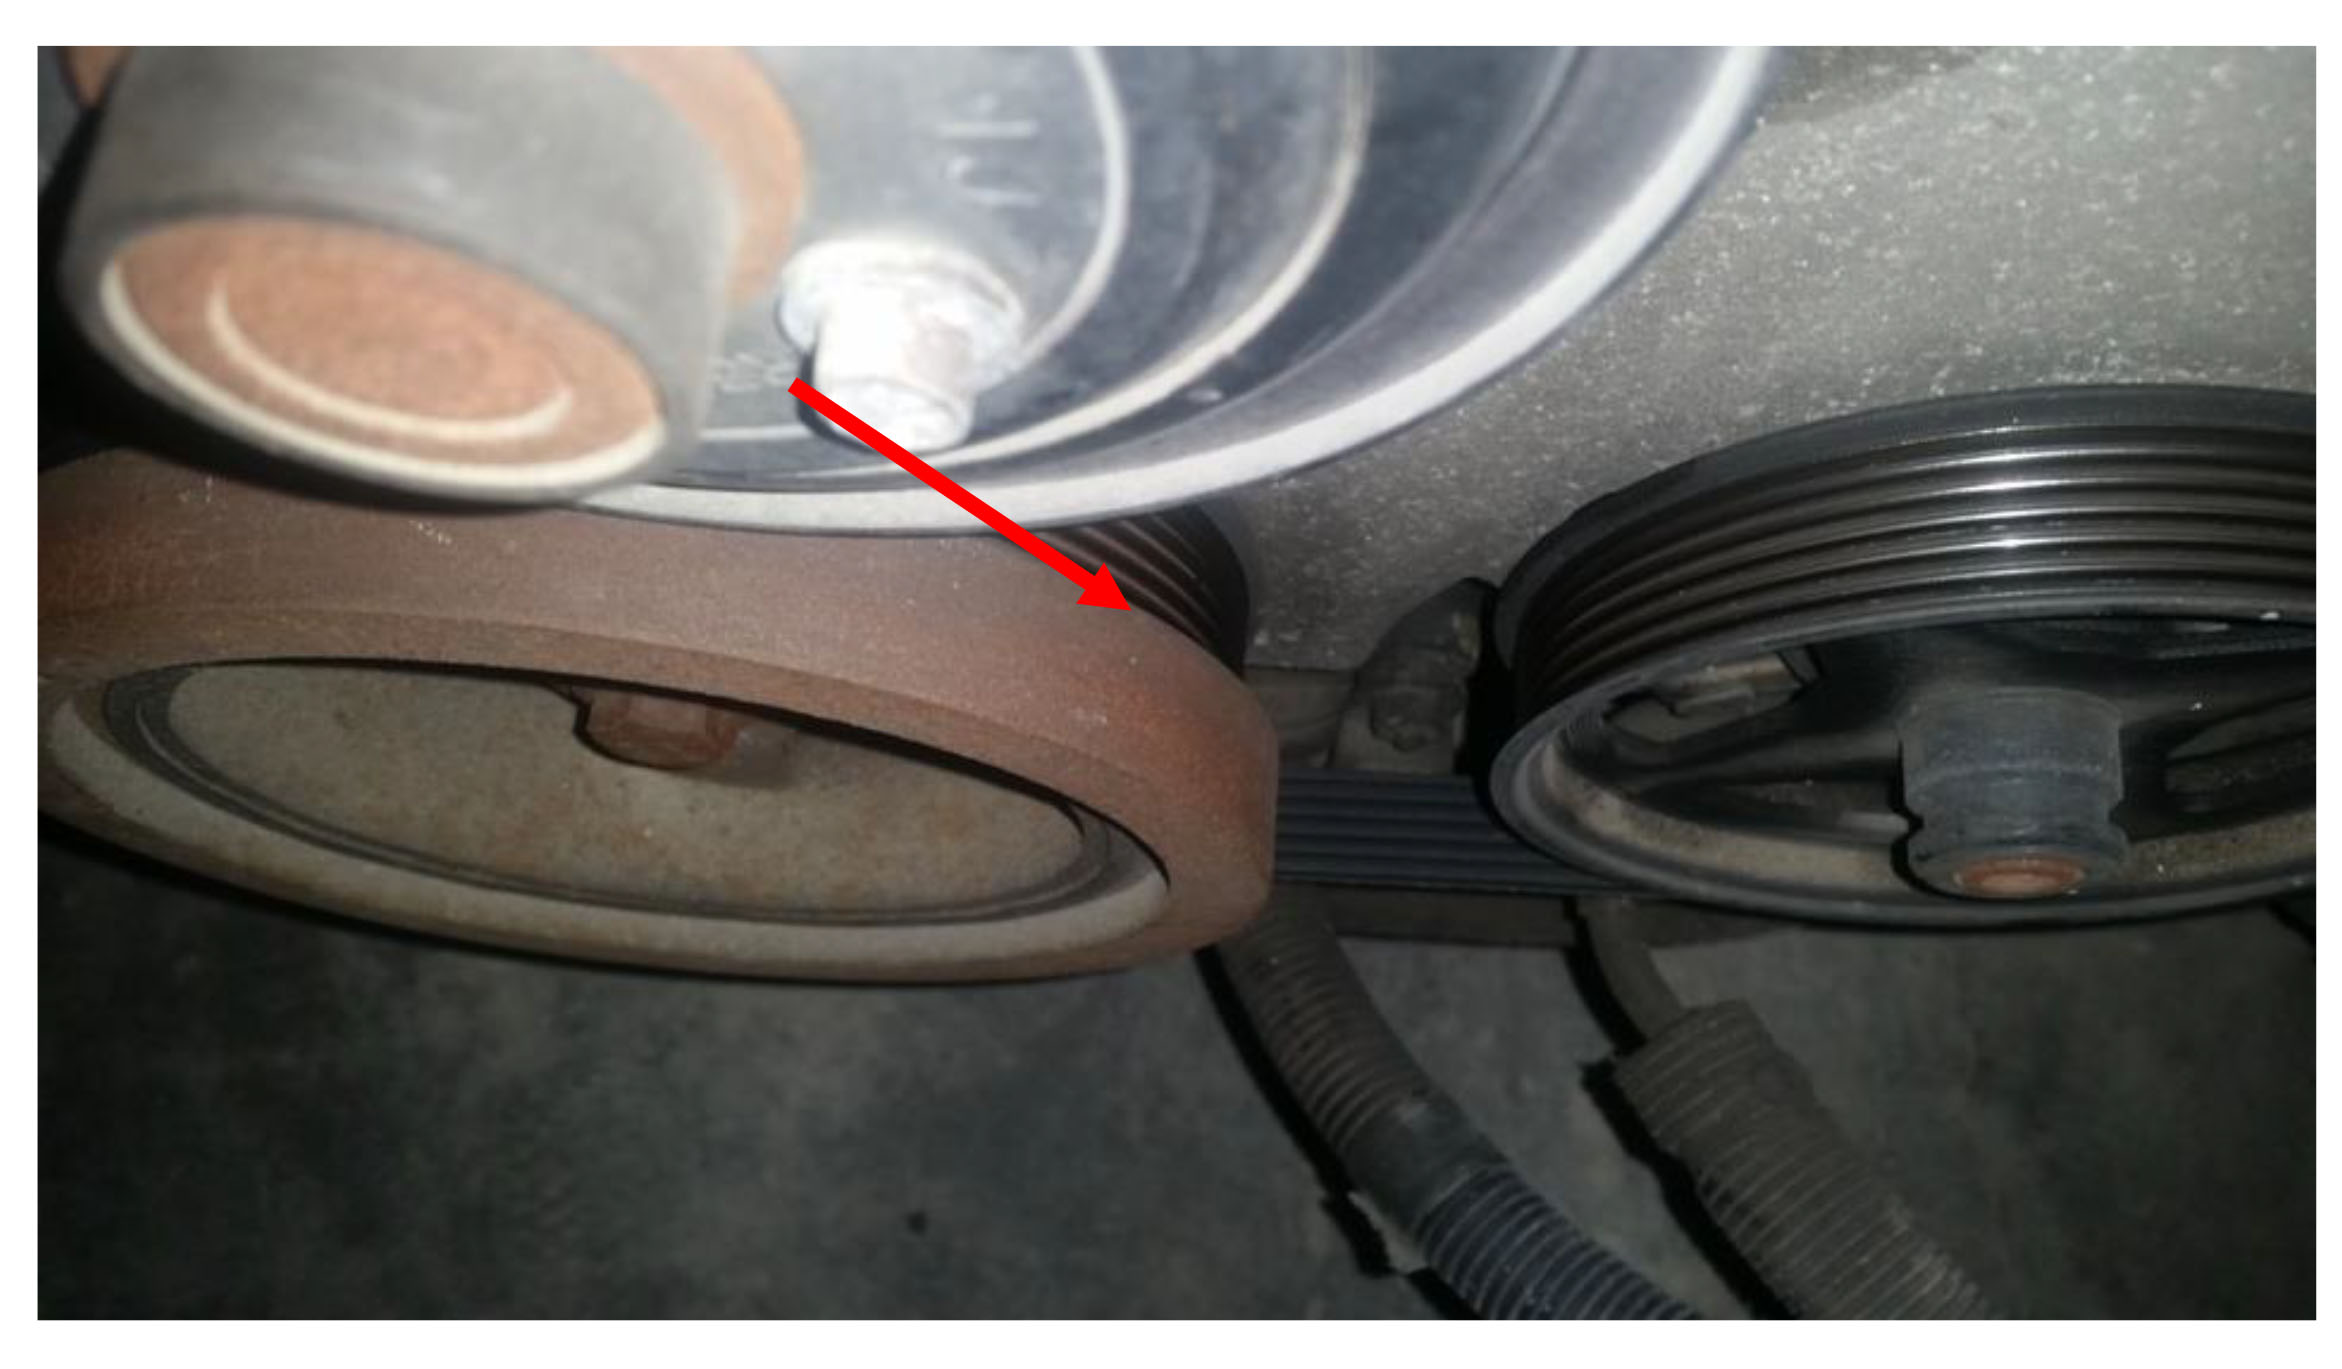
Step 13: Reinstall serpentine belt. To loosen the belt, do as you have previously done by turning the tensioner to the DRIVERS SIDE (Right) with a 3/8” drive ratchet and a small extension. *The 3/8” drive should fit perfect into the small square on the top of the tensioner. *If your belt does happen to fall off, consult your owner’s manual to find the pattern that the belt installs around the pulleys.
Step 14: CHECK THAT YOUR BELT IS ON STRAIGHT. *There is a lip on the outside of the large bottom pulley. Be sure the belt is seated in the groove behind the lip. Also, check the other pulleys to be sure the belt is seated properly.
Step 15: Reconnect the tube leading into the throttle intake.
Step 16: Reconnect the positive ( ) and negative (-) battery cables to the correct battery terminals with a 5/16” wrench. RED=Positive ( ) BLACK=Negative (-)
(4) top bolts on the alternator bracket are tight.
(2) bottom bolts below the alternator pulley are tight.
The serpentine belt is properly seated on each pulley and the belt has proper tension.
The grey sensor plug is connected.
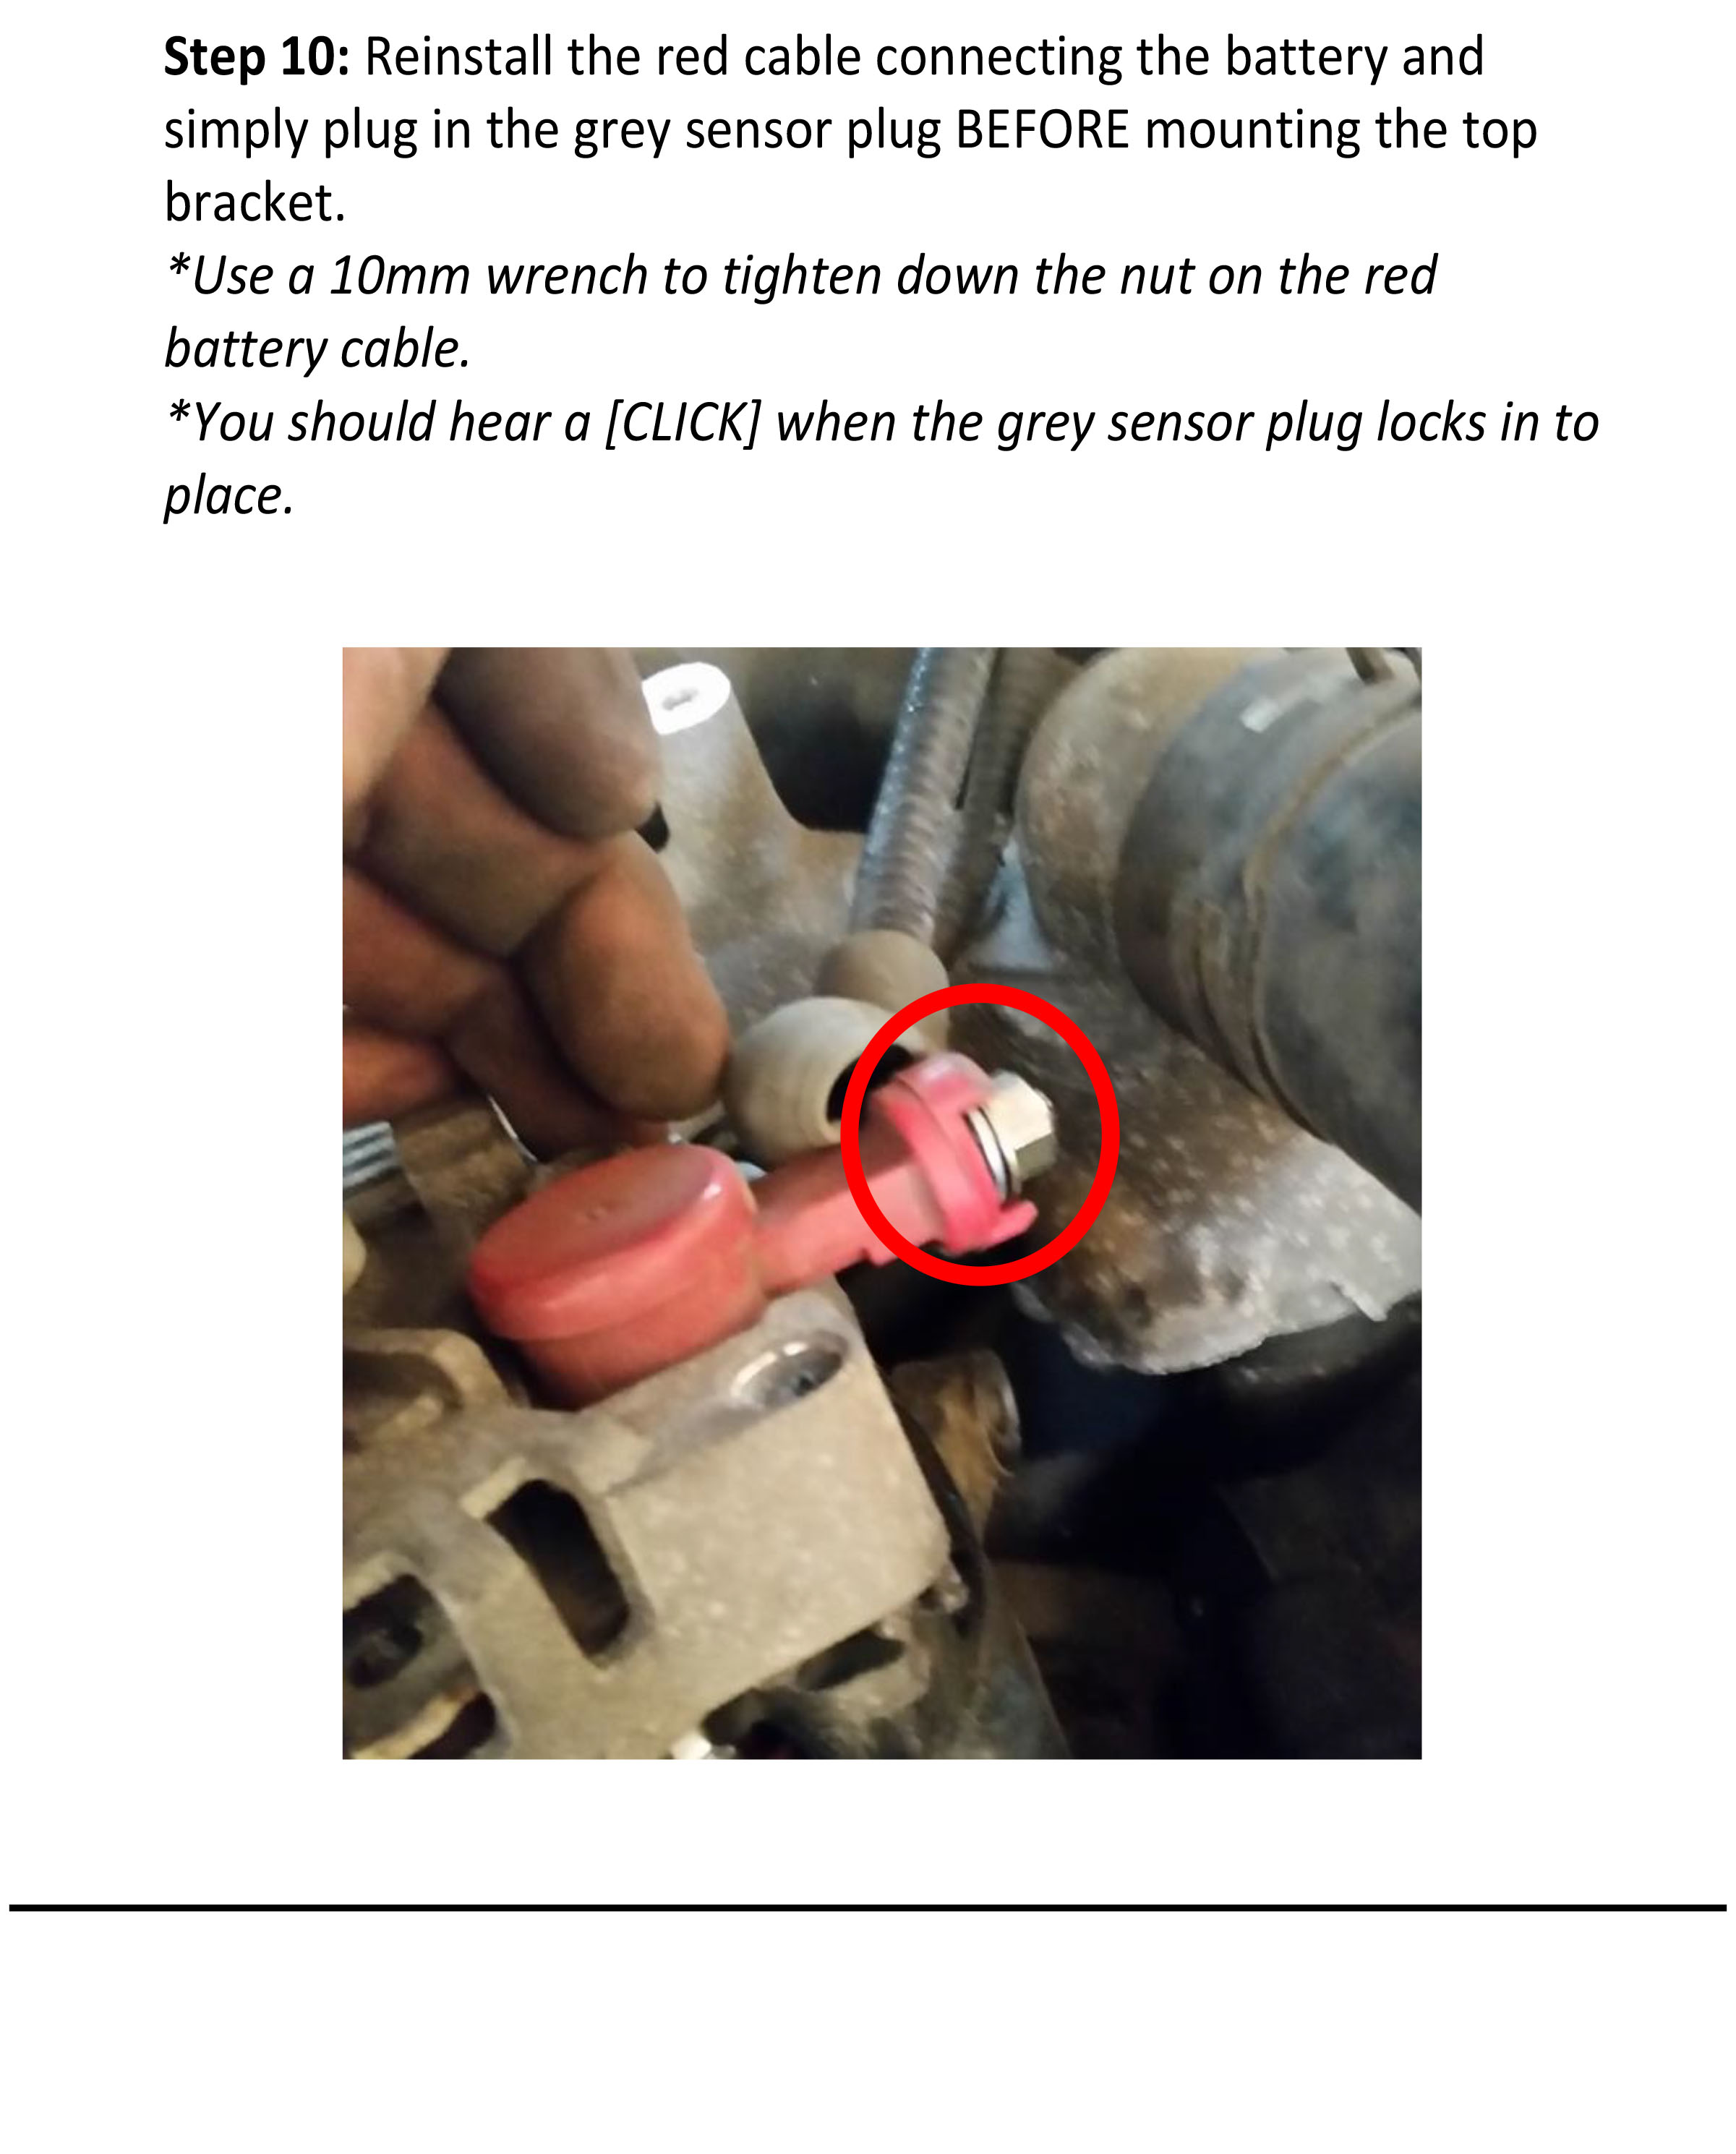
The nut on the cable that connects the battery to the alternator is tight.
The tube on the throttle intake is fully seated as far as it can go.
Both battery terminal connectors are tight and not corroded.
Now you have installed your new alternator!
Submitted by: AmericanMuscle customer Robert Barker, 5/12/2016