 FREE 1 to 3-Day Delivery on Orders $119+ Details
Best Sellers


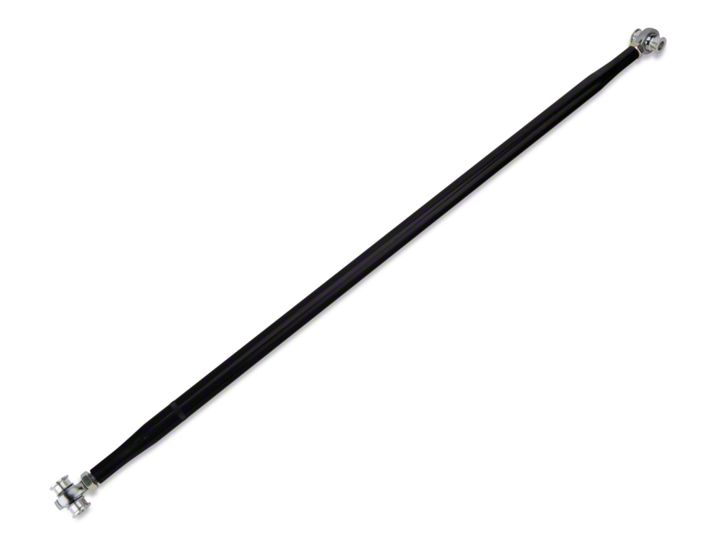
How to install an SR Performance Double Adjustable Panhard Bar on your 2005-2014 Mustang
Installation Time
1 hours
Tools Required
- Jack and jackstands
- 1/2” ratchet
- 18mm socket
- Pry bar
- 2 Pieces of string
- 2 Small nuts
- Blue Loctite
- 1/2” torque wrench
Shop Parts in this Guide
Removal:
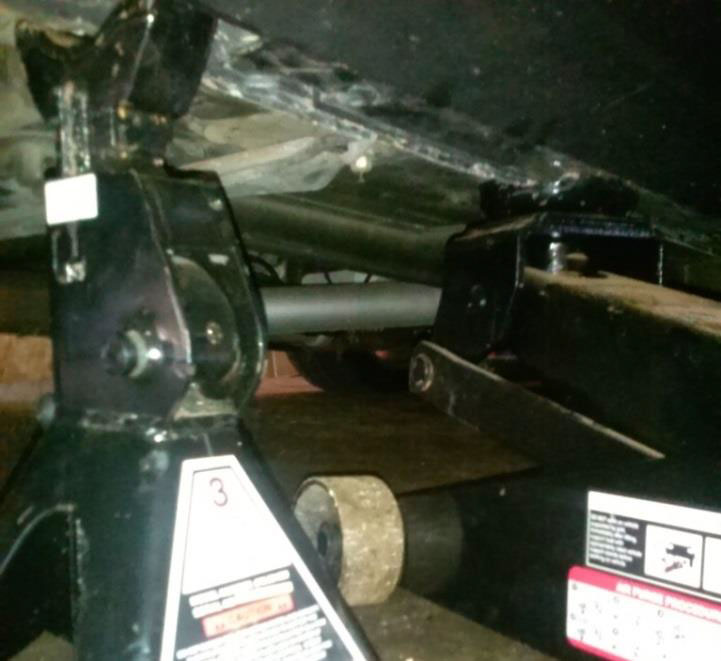
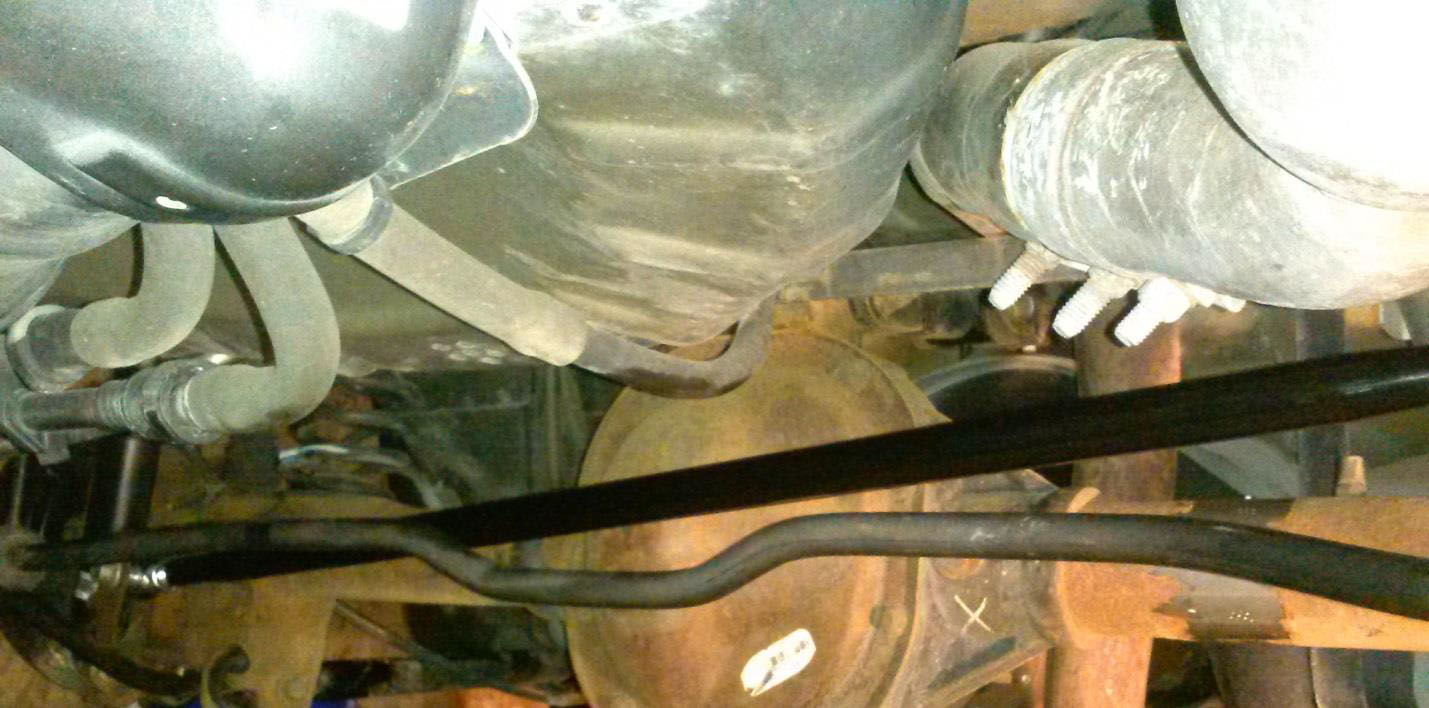
1. Begin by placing chocks behind and in front of the front wheels, then jack up the rear of the vehicle on one side of the pinchweld (circled), and lower onto a jackstand on the pinchweld also. Repeat for the other side, however you could also back up onto a pair of ramps, since the wheels don’t have to be removed.
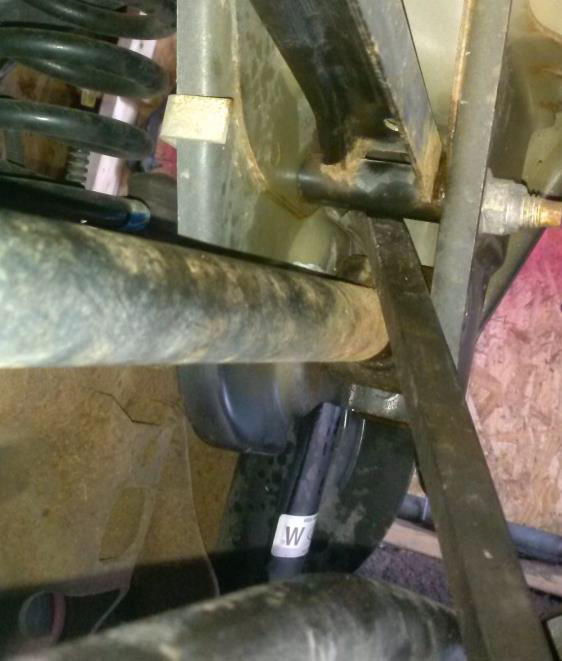
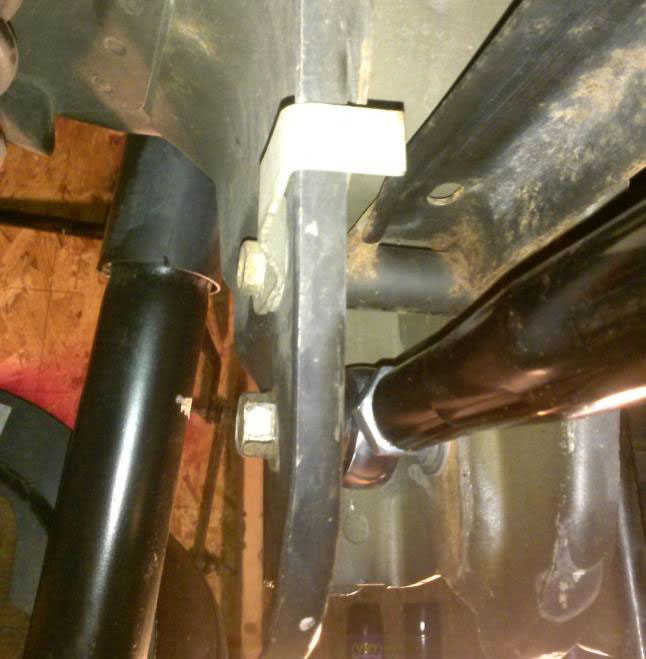
2. Next you will want to remove the bolt on the driver’s side of the panhard bar (right behind the axle) using an 18mm socket and a 1/2” ratchet. There are locking tabs on the nuts, so another wrench to keep it from spinning isn’t needed.
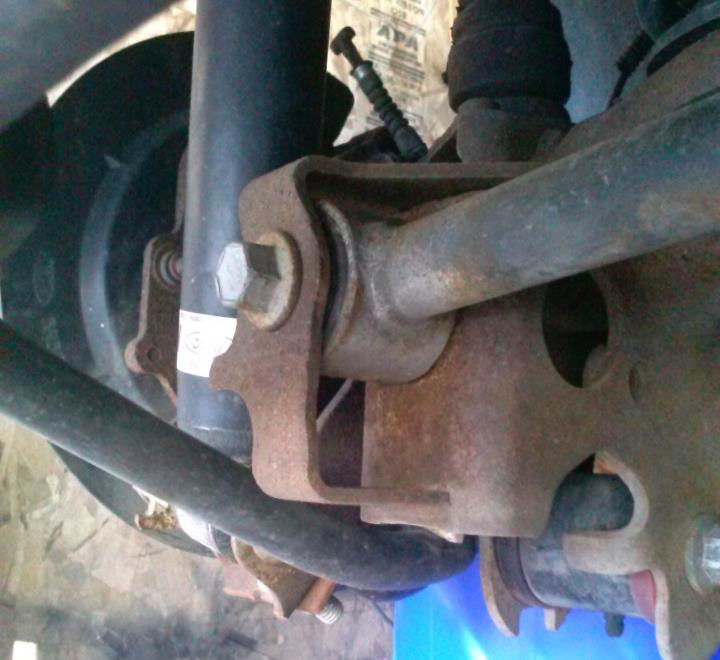
3. Then remove the passenger side bolt using the 18mm socket and ratchet
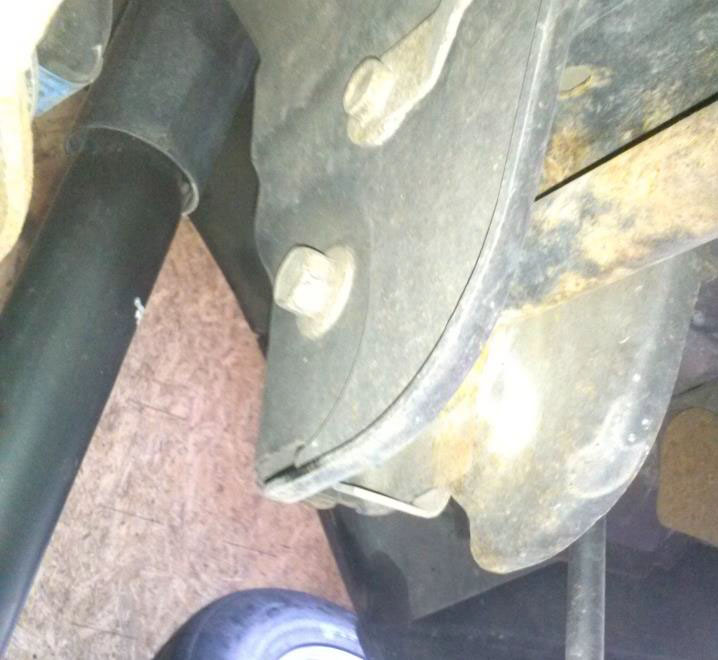
4. You will probably need a pry bar at this point to pry the old panhard bar out of the housings on either side and remove from the vehicle.
Installation:
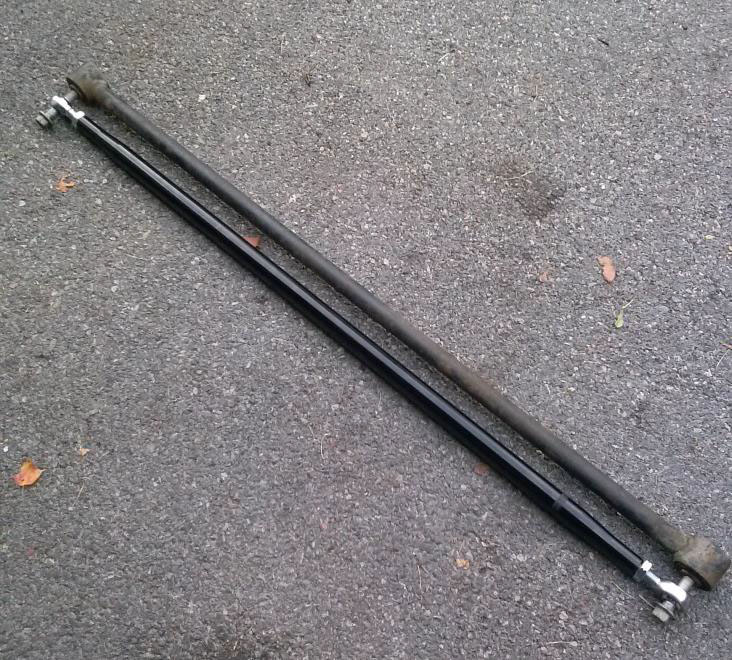
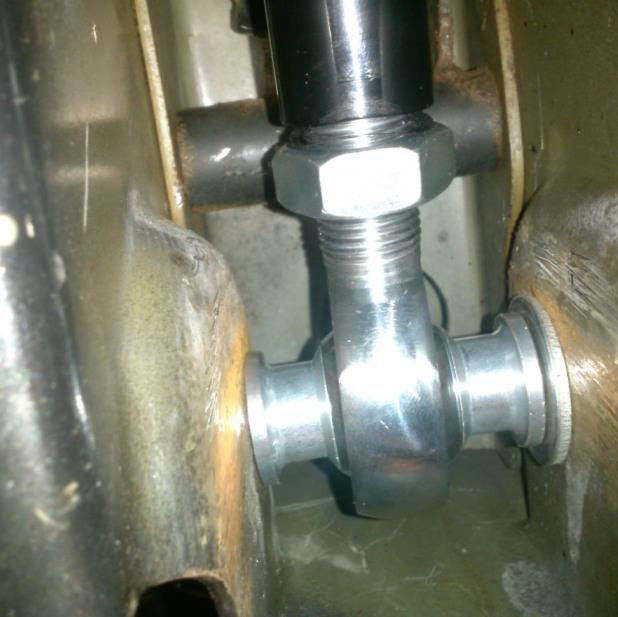
1. To assemble the new panhard bar, thread the nuts (1) onto the panhard bar ends (2), and then thread the ends into the black portion of the panhard bar. Make sure that both ends are threaded into each side the same amount of threads. Leave the nuts loose at this point. Next, insert the aluminum bushings (3) on each side.
2. Remove the old panhard bar and set it down on the ground next to the new one. Thread the ends in or out to make both lengths equal to start. You can pass the bolts through both bars to verify this.
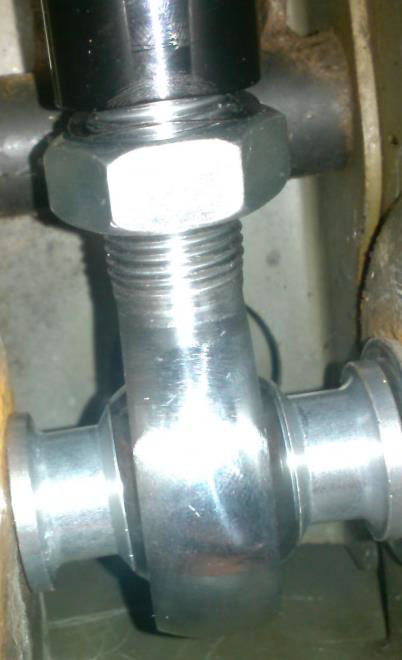
3. Now you are ready to install by placing the driver’s side joint into place using the supplied washer (shown with arrow), if able to fit. Insert the bolt through the bushings and thread the nut on but do not tighten yet.
4. You can now swing the passenger side of the bar into place. Pass the bolt through and hand tighten with a ratchet using the 18mm, as well as the bolt on the driver’s side. Final torque should be done once the vehicle is on the ground.
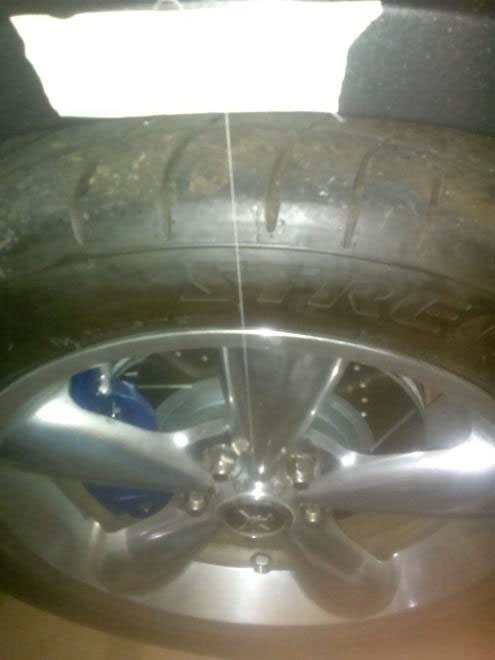
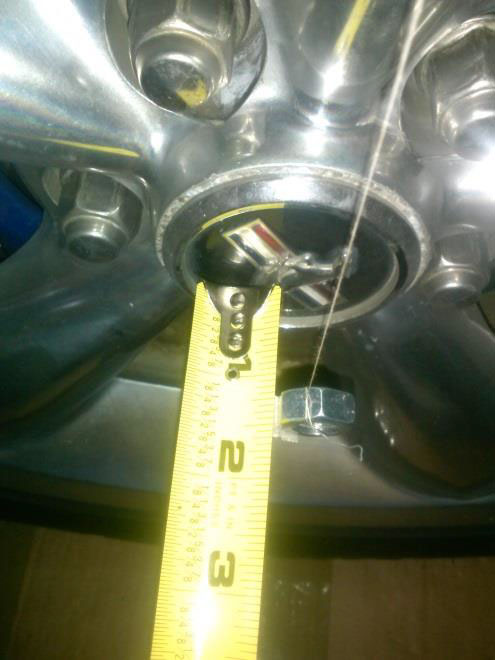
5. You can now lower the vehicle, and using a string with a nut tied to it, tape it to the center of your wheel arch and let it hang in front of your rear tire on both sides. Measure the distance from the nut to the center cap on each side, and use these measurements to adjust the panhard bar until they are equal distances.
6. To adjust the length of the bar, you can spin any part of the black portion one way or the other. Both nuts on each side need to be loose to do this. Counter-clockwise from this view shown (driver’s side) will lengthen the bar, which will move the axle to the left. Moving the bar clockwise will move the axle to the right.
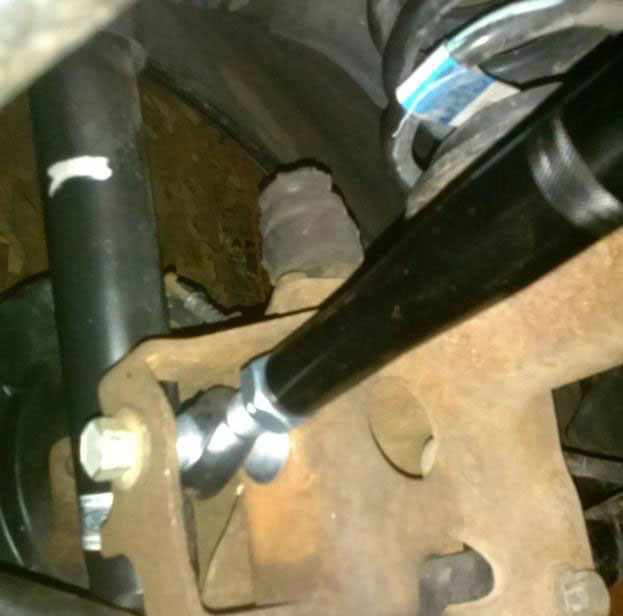
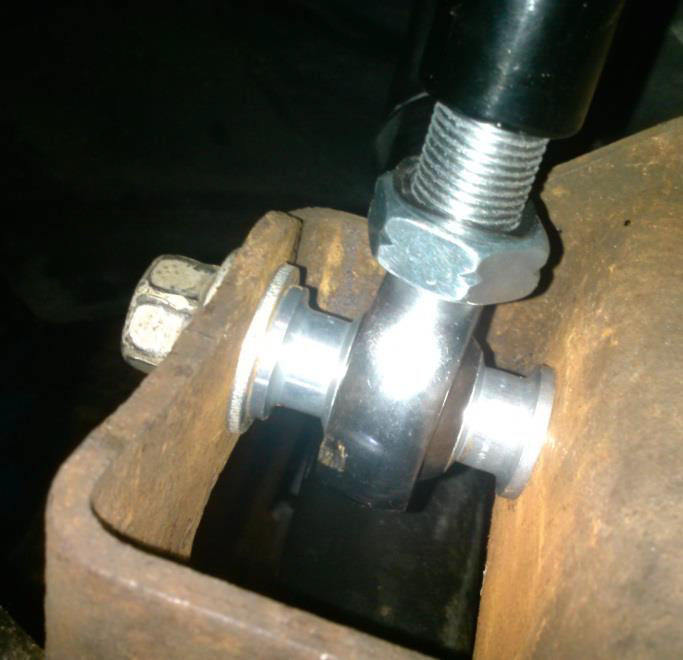
7. After you are satisfied with the adjustment, you can tighten the nuts with a 24mm wrench. Before tightening apply a small dab of blue Loctite to the threads (shown in picture). The driver’s side nut is easy to get to; the passenger’s side is a tight fit because of the surrounding bracket that gets in the way
**If you cannot get a wrench to fit inside of the bracket to tighten the passenger side nut, you will have to get it adjusted where you want it and remove both of the bolts and drop the panhard bar, tighten the nut on the ground with a wrench and then re-install.**
8. After the 24mm nuts are tight, you can give both the 18mm bolts a final torque of 129 lb/ft using a 1/2" torque wrench. You are now finished and ready to enjoy your perfectly centered axle and improved traction & handling!
Installation Instructions written by AmericanMuscle customer Micah Piron 9.2.15
