 FREE 1 to 3-Day Delivery on Orders $119+ Details
Best Sellers


How To Install SR Performance Billet Aluminum Adjustable Motor Mounts For Your 2005-2014 GT Mustang
Installation Time
1.5 hours
Tools Required
- Engine hoist and chains (only for Hoist method)
- jack with a 2x4 piece of wood (only for jack method)
- Wrench
- Extensions (the longer the better)
- Sockets (13mm and 15mm) for motor mounts (7mm) for negative battery terminal
- Swivel socket (makes the job easier)
- Torque wrench (capable of up to 41 lb-ft.)
- Thread locking compound
- Screwdriver (to help remove air intake)
- Jack stands (only if you need more room)

Notes
#1.There are two ways to do this install. The first way requires an engine hoist and chains to help lift the engine. This way works better if your car is lowered and you cannot fit a jack and a piece of wood under your oil pan to help raise engine during install. This method is a bit more challenging and takes longer due to the extra steps required.
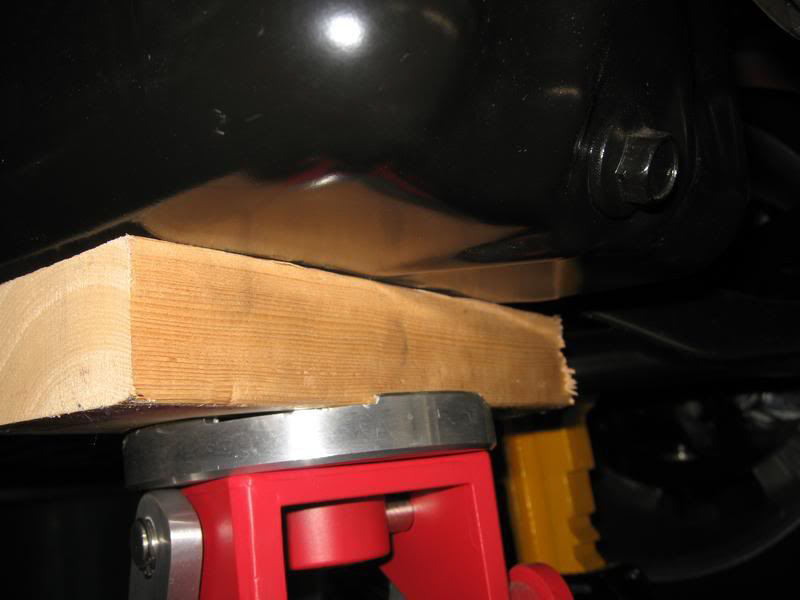
#2. The second way requires a jack and a small 2x4 piece of wood that will be placed between the jack and oil pan, to help prevent damage from occurring to the oil pan. This method works best if your mustang is not lowered nor have an engine hoist.
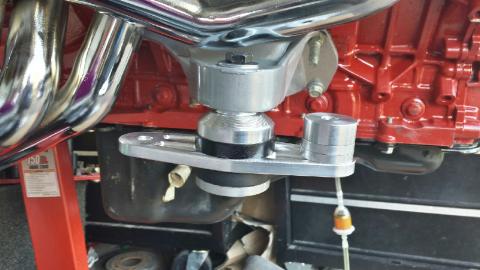
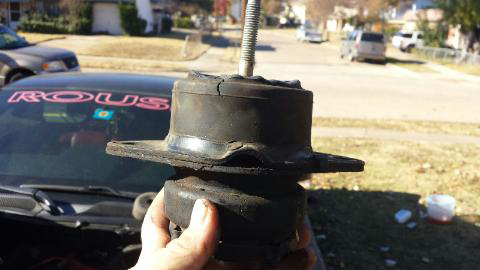
The SR Performance Billet Aluminum Adjustable Motor Mounts Come with two sets of bolts. The first set of bolts is the longer set of the two and is used if you want to keep all 3 adapters in the mount for setting the motor mount height to stock factory height. The Second set of smaller bolts is used if you decide to lower the height of the motor mount only.
Included Parts
2 motor mounts
2 washers
2 small bolts
2 large bolts
Different Motor Mount Height Examples
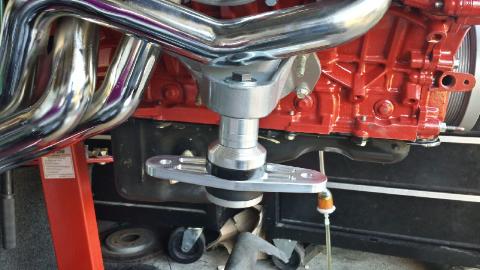
Stock Height (Requires the longer bolt)
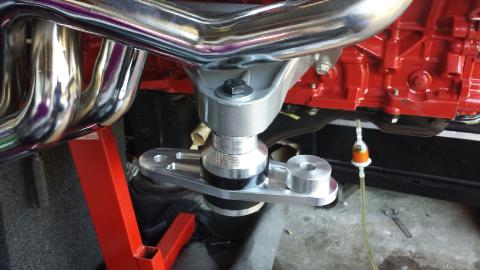
Lowered a ¼ in (requires smaller bolt)
Lowered all the way about 1 ¼ in (requires the small bolt)
Engine Hoist Method
Step 1- Engage emergency brake and put transmission in gear, automatics will be in Park.
Place bricks or wheel chocks in the rear wheels.
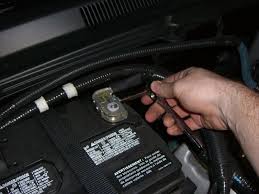
Step 2- Disconnect the cable from the negative battery terminal using a 7mm socket
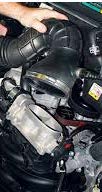
Step 3- Remove the air intake from the throttle body to allow you more room when working on the right motor mount. (Use screwdriver)
Step 4- Remove the throttle body (only if your are using an engine hoist method)
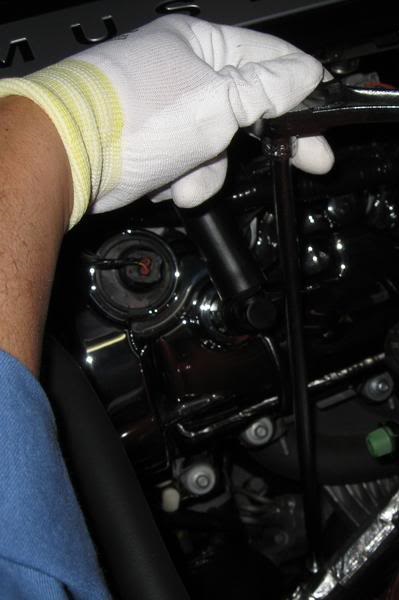
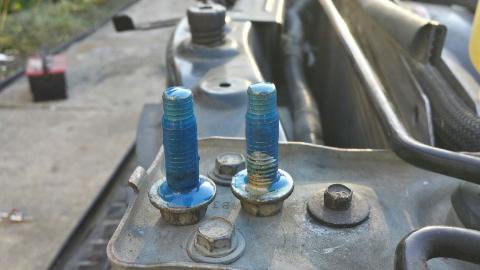
Step 5-Remove the alternator (only if your are using an engine hoist method)
Step 6- Install an engine hoist with the chains connected to the alternator mounting studs. Make sure to use washers and that the nuts are tightened securely.
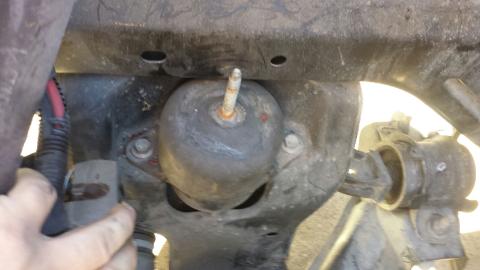
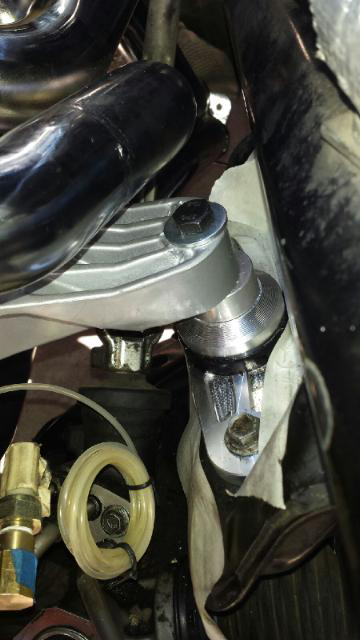
Step 7- Remove the fasteners holding the mount to the mount bracket (1 bolt 15mm) and the chassis (2 Bolts 13mm) the two chassis bolts will be reused again so do not throw away.
Step 8- Raise the engine about 1- 1(1/2)in and remove the mount.
Step 9-Install new Motor mounts and do not forget to use thread locking compound on the mount fasteners and tighten them back to torque.
Step 10- Torque the 2 side mounting bolts to 41 lb-ft. Step 11- Torque the center socket head bolt to 30 lb-ft.
Step 12- Installation is the reverse of removal. Make sure there are no tools left behind before you start you Mustang back up.
Step 13- Enjoy your new ride
Jack and A 2x4 Piece Method
(Refer to pictures from above for help)
Step 1- Engage emergency brake and put transmission in gear, automatics will be in Park.
Place bricks or wheel chocks in the rear wheels.
Step 2- Disconnect the cable from the negative battery terminal using a 7mm socket
Step 3- Remove the air intake from the throttle body to allow you more room when working on the right motor mount. (Use screwdriver)
Step 4- Remove the fasteners holding the mount to the mount bracket (1 bolt 15mm) and the chassis (2 Bolts 13mm) the two chassis bolts will be reused again so do not throw away.
Step 5- Place a jack with a piece of wood such as a 2x4 between the jack and the oil pan and raise the engine about 1-1(1/2)in and remove the old motor mounts. When placing the 2x4 make sure not to place on top of the oil drain plug.
Step 6- Install new Motor mounts and do not forget to use thread locking compound on the mount fasteners and tighten them back to torque. Torque the 2 side mounting bolts to 41 lb-ft. Torque the center socket head bolt to 30 lb-ft.
Step 7- Installation is the reverse of removal. Make sure there are no tools left behind before you start you Mustang back up.
Step 8- Enjoy your new ride
Installation Instructions written by AmericanMuscle Customer Abel Bernal 12/03/2014
