 FREE 1 to 3-Day Delivery on Orders $119+ Details
Best Sellers


How to Install an SR Performance Bumpsteer Kit on your 2005-2014 Mustang
Installation Time
90 minutes
Tools Required
- 1 Large Adjustable Wrench
- 1 Small Adjustable Wrench
- Ratchet
- 18mm Socket or Wrench
- Shop Rag
- Penetrating Oil
- Hammer or Mallet
- Jack Stands
- Floor Jack
- Impact Wrench (optional)
- Tie-Rod End Separator (optional)
Pre-Installation Notes:
• Having a lift to get the car up in the air makes it a little easier, but it is perfectly do-able in a home garage as long as a good set of jack stands and a good floor jack are used.
• Make sure the exhaust and brake components are cool before starting
• Using the method described in this guide, it is possible to set the alignment (toe in/out) close to original; however it is highly recommended that you get the alignment checked after performing the installation to ensure even tire wear and proper handling characteristics.
• Tie Rod separator is not needed, but will help in removal of tie rods from hub assembly
• Penetrating oil should be used sparingly and wiped off threads when installing new equipment
• Professional installation is always recommended
Removal & Installation:
1. Begin by jacking up the front of the car and make sure it is safely supported on jack stands. Remove the front wheels.
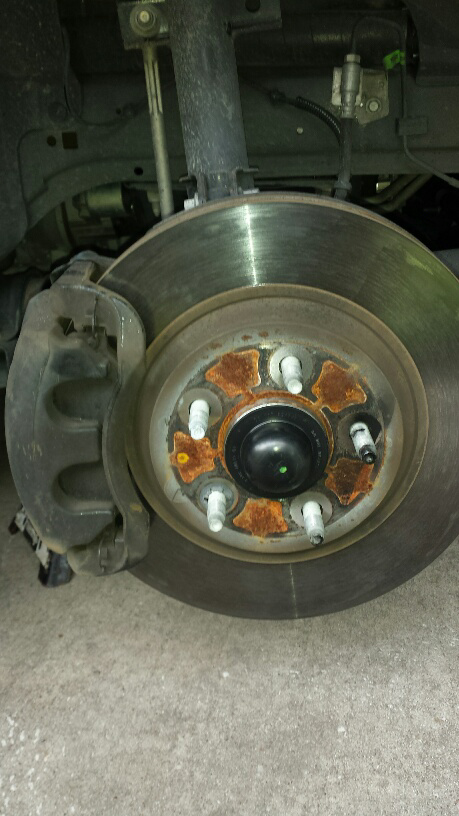
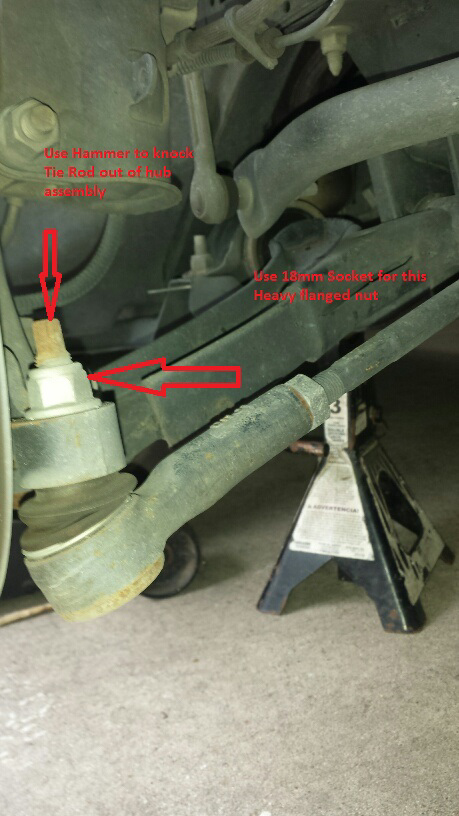
2. To disassemble the Outer Tie rod from the Wheel hub, use the 18mm socket and ratchet to remove the flanged nut on the top side. The nut uses a nylon locking ring on the inside so it doesn’t vibrate loose, so you will have to use the socket to completely back it off. Use a hammer to knock the top of the bolt to separate the tie rod from the hub assembly.
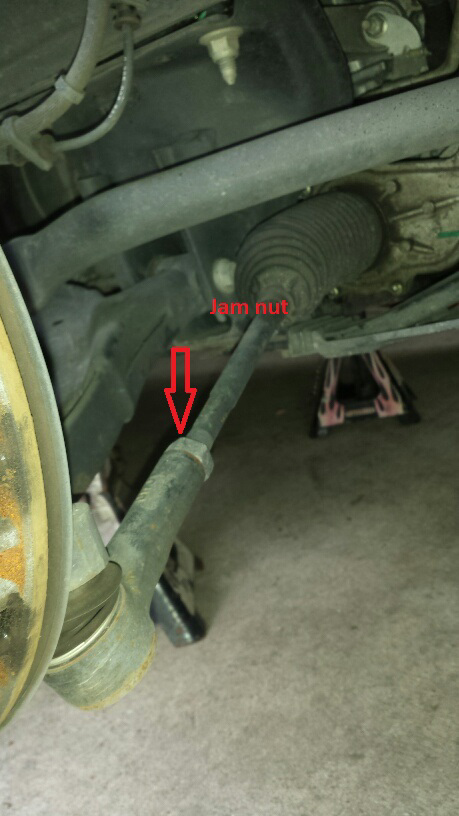
3. Once the tie rod has been loosened from the hub assembly, screw the nut a few turns to the end of the tie rod. This will keep the tie rod from turning when you loosen the jam nut. Using the adjustable wrench, turn the jam nut until it backs off, then turn by hand back towards the tie rod.
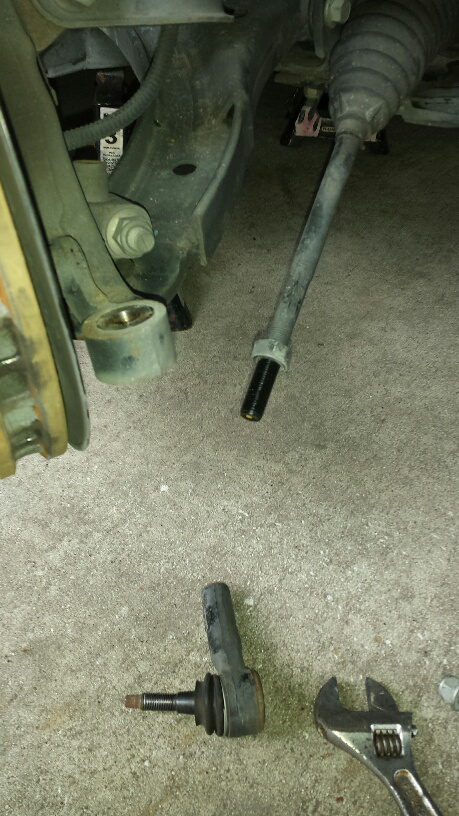
4. Unscrew the heavy nut holding the outer tie rod to the hub assembly, and unscrew the outer tie rod from the inner tie rod as shown.
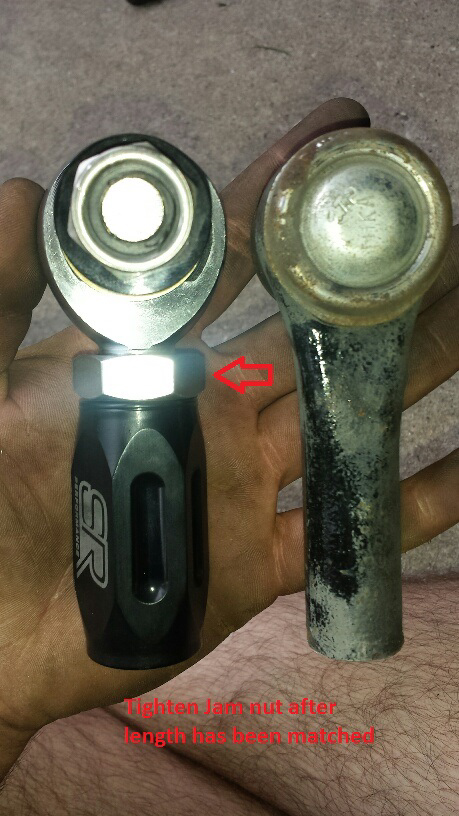
5. Using the old rod-end, match the length of the new assembly to that of the old one by inserting the old rod-end bolt through the new steel end. Then unscrew the steel end until the length of the whole new assembly (black collar and steel spherical end) matches the length of the old tie rod end. Finally, tighten the jam nut on the steel end against the collar.
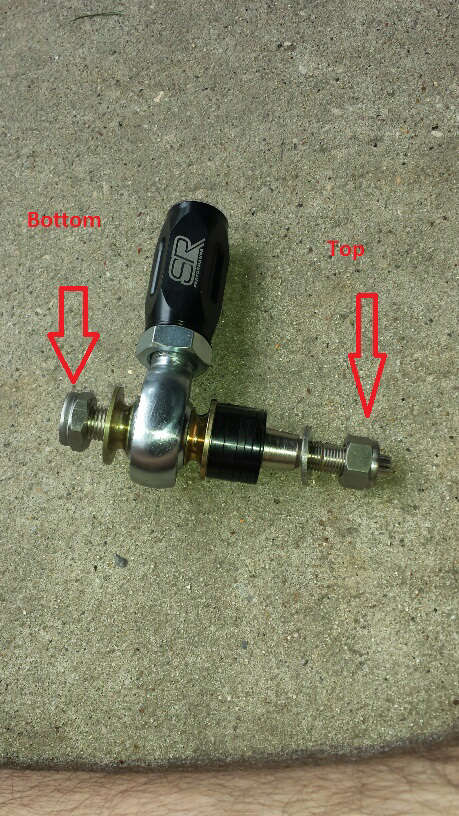
6. If you have lowered your vehicle, the spacers will be used between the inner tie rod and the hub assembly as shown below (top). The amount of spacers used for the top or the bottom depends on how much you have lowered your vehicle. If you have not lowered your vehicle, all of the spacers will be on the underside or bottom as shown in the following pictures.
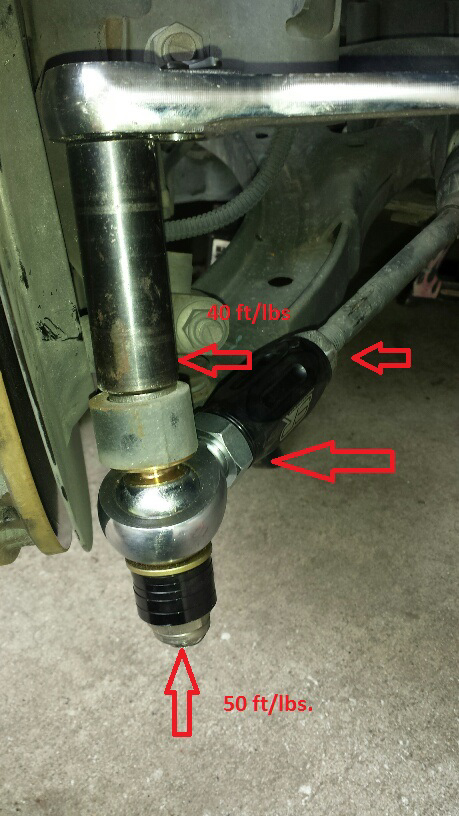
7. Using the smaller and larger adjustable wrenches, tighten the 2 jam nuts towards each other. Install the bolt assembly according to step #6 and tighten the two nuts (upper and lower) to the stated torque ratings. Repeat these steps on the opposite sides to complete the installation.
8. Install wheels and have alignment checked. Check all torque on nuts after installation and after first few hundred miles to insure nothing has backed off.
Installation Instructions written by AmericanMuscle Customer Jordan Fontenot 8.04.2014
