FREE 1 to 3-Day Delivery on Orders $119+ Details
Best Sellers


How to install an SR Performance Coil-Over Kit on your 1979-2004 Mustang, Excludes IRS
Installation Time
3 hours
Tools Required
- Jack
- Jack Stands (2)
- Flat Screw Driver
- Ratchet
- Breaker Bar
- Pry Bar
- Torque Wrench
- Sockets (10mm, 12mm, 13mm, 15mm, 15/16”)
Contents:
► (2) Front Coil Overs
► (2) Rear Shocks
► (2) Rear Springs
► (2) Spanner Wrenches
► (2) Adjustable Spring Perches
► (4) Brackets
Tools Needed:
Jack
Jack Stands (2)
Flat Screw Driver
Ratchet
Breaker Bar
Pry Bar
Torque Wrench
Sockets (10mm, 12mm, 13mm, 15mm, 15/16”)
**Important Notes:
► Professional Alignment is Highly Suggested after the install and ride height is set.
► Assure that all lock collars are tight before operating vehicle.
Front
Step 1: Raise front of vehicle, support with jack stands. Remove front wheels
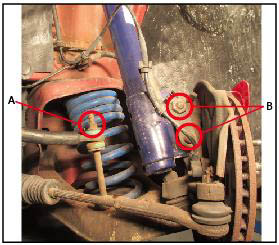
Step 2: Remove Sway bay end link (A).
Step 3: Remove the brake caliper to allow for easier access to the strut mount bolts. Support the caliper so that there isn’t strain on the brake line.
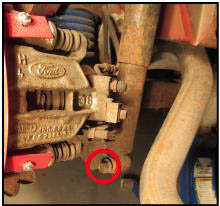
Step 4: Remove the 2 lower strut mount bolts (B) from the hub.
Step 5: Remove the 3 upper Strut tower nuts.
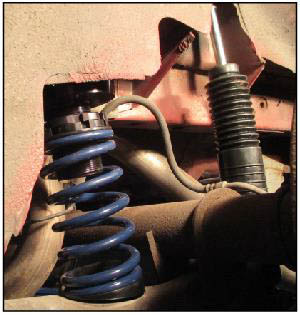
Step 6: Remove the factory strut from the car.
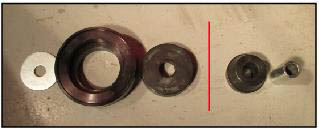
Step 7: Assemble the Front coil-over in this sequence: supplied flat washer, aluminum bearing assembly, supplied rubber washer, factory strut top hat (represented as the red line), upper rubber mount, sleeve insert, factory metal washer and then the supplied nut.
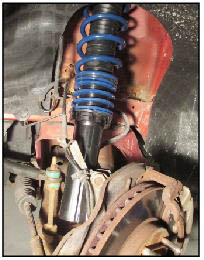
Step 8: Install the new strut assembly using the 3 upper strut mount nuts. Keep them loose for the time being.
Step 9: Reinstall the 2 lower strut bolts.
Step 12: Test fit the wheel and lower the car then tighten the 3 upper strut mount bolt.
Step 13: Adjust the suspension to achieve the desired ride height, ensure all the lock collars are tight so that the strut doesn’t loosen.
** Torque Specs
(A) 45 ft/lbs.
(D) 148 ft/lbs
Strut Mount Bolts 26 ft/lbs
Rear
Step 1: Raise the rear of the vehicle support with jack stands under the rear frame rails. Keep the axle supported by a floor jack. Remove wheels.
Step 2: Remove the lower shock mounting bolt. Note: you may need to jack the rear up or down so that the bolt comes out easily.
Step 3: Fold the inner trunk liner out of the way so that you can access the upper shock mount nut. Remove the Shock.
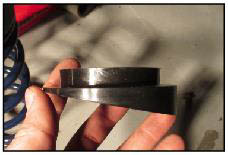
Step 7: Place supplied isolator on the lower perch so that the thicker side is toward the back of the car.
Step 8: Install the new shock re-using the factory upper bushings and top nut. The sequence is supplied washer, factory rubber bushing. Push the shock through the mounting hole, then the factory rubber bushing and the factory nut.

Step 9: Adjust the rear ride height until the desired ride height is achieved. Ensure all the lock collars are tight.
** Torque Specs
Perch Bracket 26 ft/lbs
Lower Shock Mount 85 ft/lbs
Upper Shock Mount 30 ft/lbs