FREE 1 to 3-Day Delivery on Orders $119+ Details
Best Sellers


How to Install a teeda ProFlow Cold Air Intake - Tune Required in a 2015-2017 Mustang GT
Installation Time
1 hours
Tools Required
- 6mm socket
- 10mm socket
- 15mm socket
- T10 Torx Bit or 5/16” Allen wrench
- T20 Torx Bit
- 7/16 Allen wrench
- Flat head screwdriver
- Pliers
- Sawzall, air saw or similar cutting device
Step 1: Begin by removing the engine cover by simply pulling up firmly on the left and right sides of the cover. For those with a strut tower bar, remove the two 15mm nuts on the driver and passenger shock towers. The rear most nut on the passenger side is located underneath the rubber seal on the battery cover
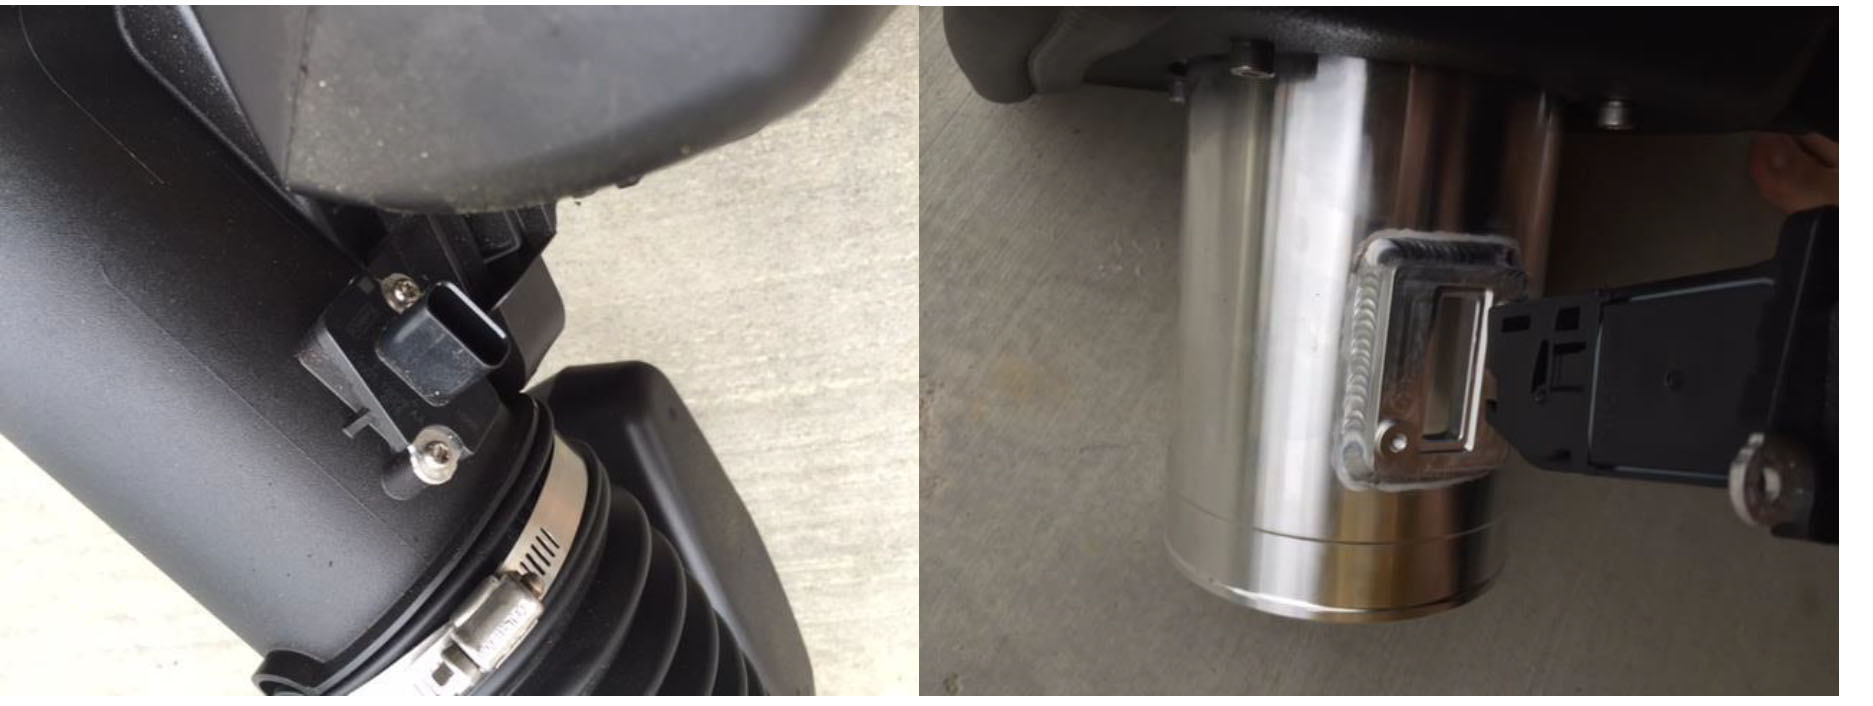
Step 2: Loosen the hose clamp securing the factory intake tube to the throttle body using a flathead screwdriver
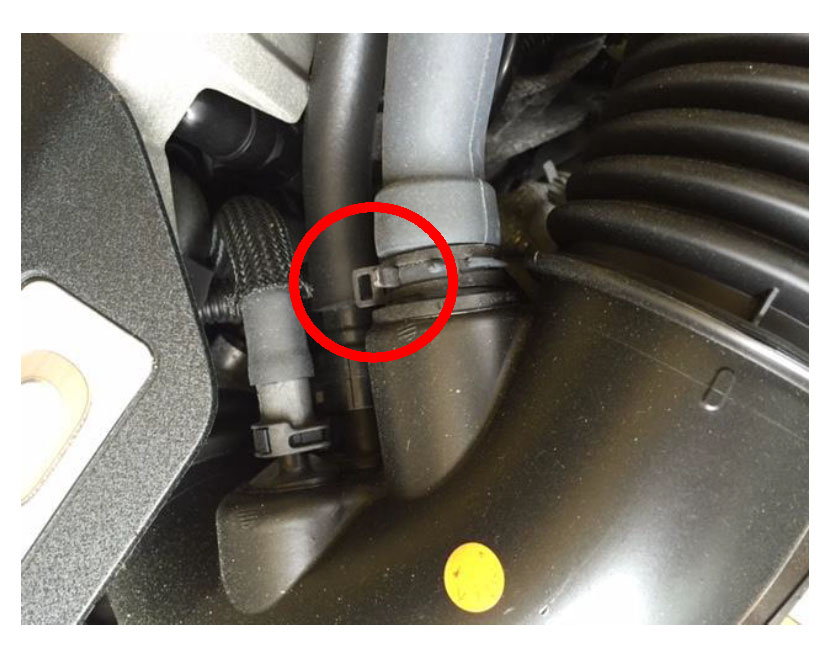
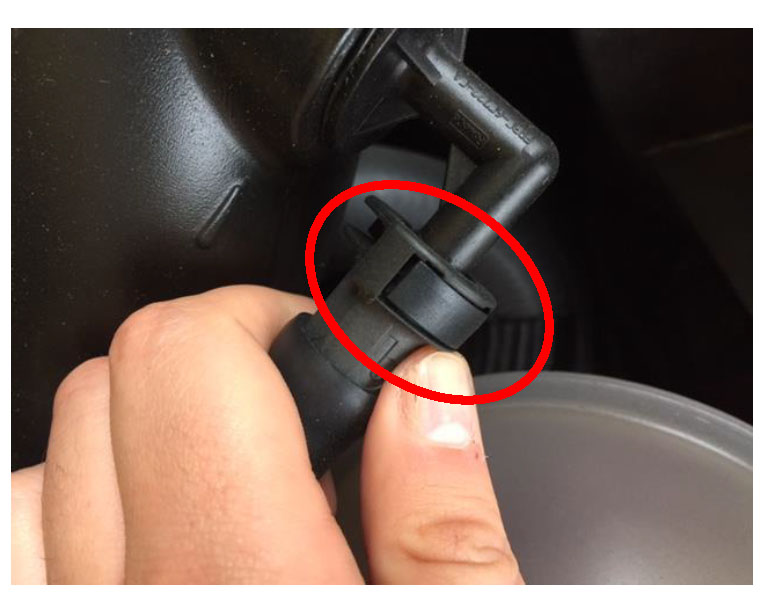
Step 3: Using a set of pliers, remove the factory sound tube from the intake tube. Circled above are the tabs you will need to compress together. There is a small tab integrated in the clamp that will hold it open after you compress it.
Step 4: Disconnect the remainder of the of the hoses attached to the intake tube. There are two that are accessible after removing the sound tube and one located on the bottom of the intake tube. Simply press the release button pictured above and pull to remove.
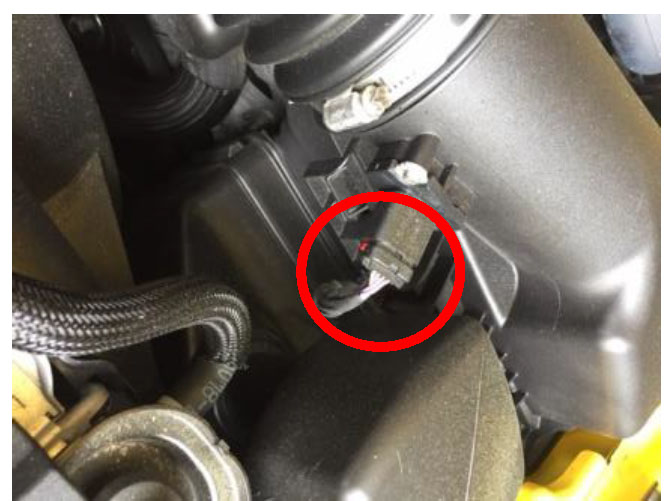
Step 5: Disconnect the electrical connector to the Mass Airflow Sensor (MAF) and pull the wire from the intake box.

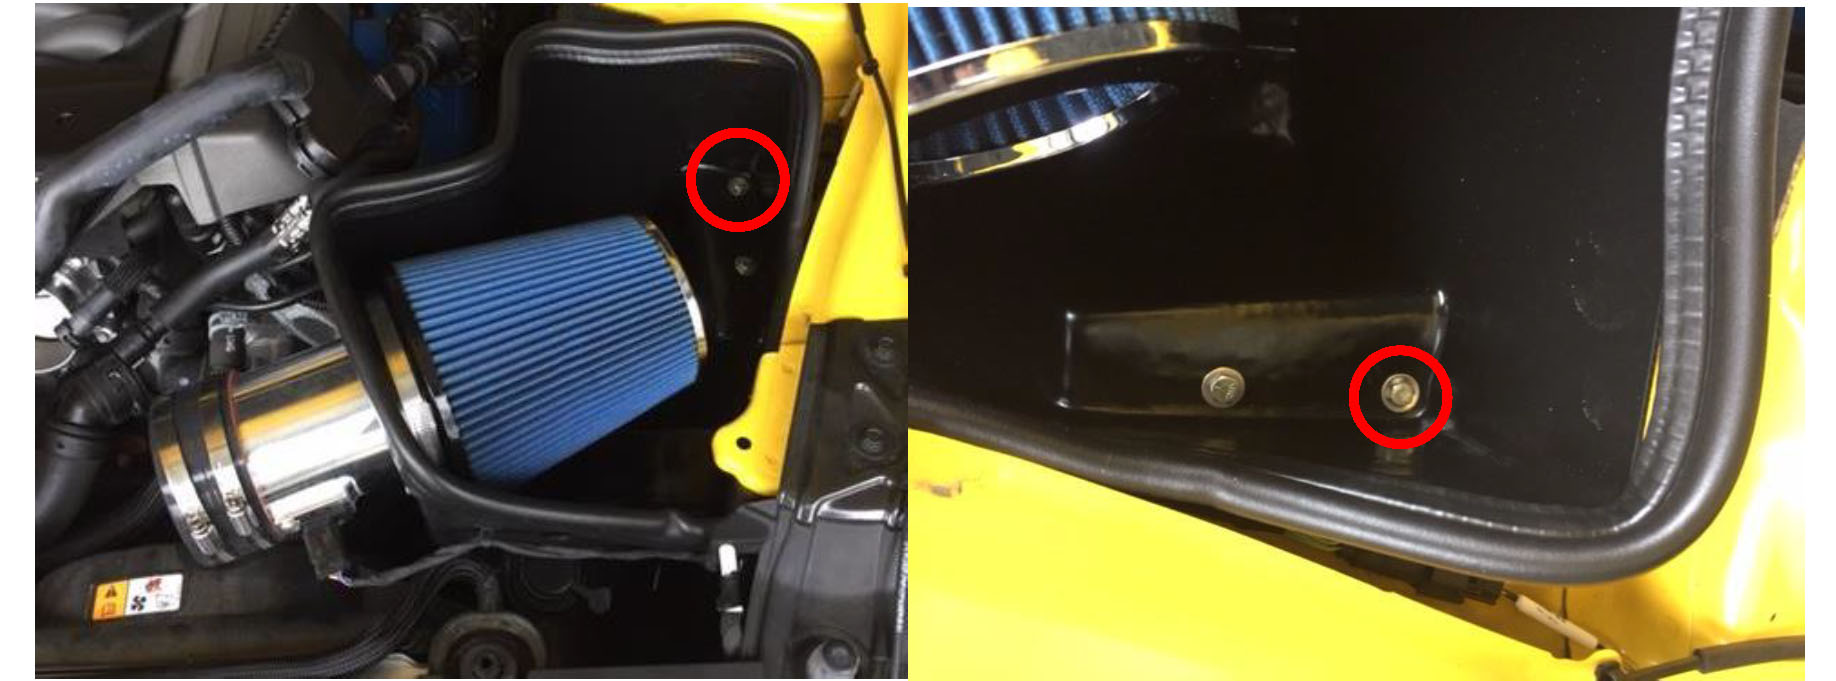
Step 6: Unbolt the lower portion of the air box from the fender using a 10mm socket and wrench.
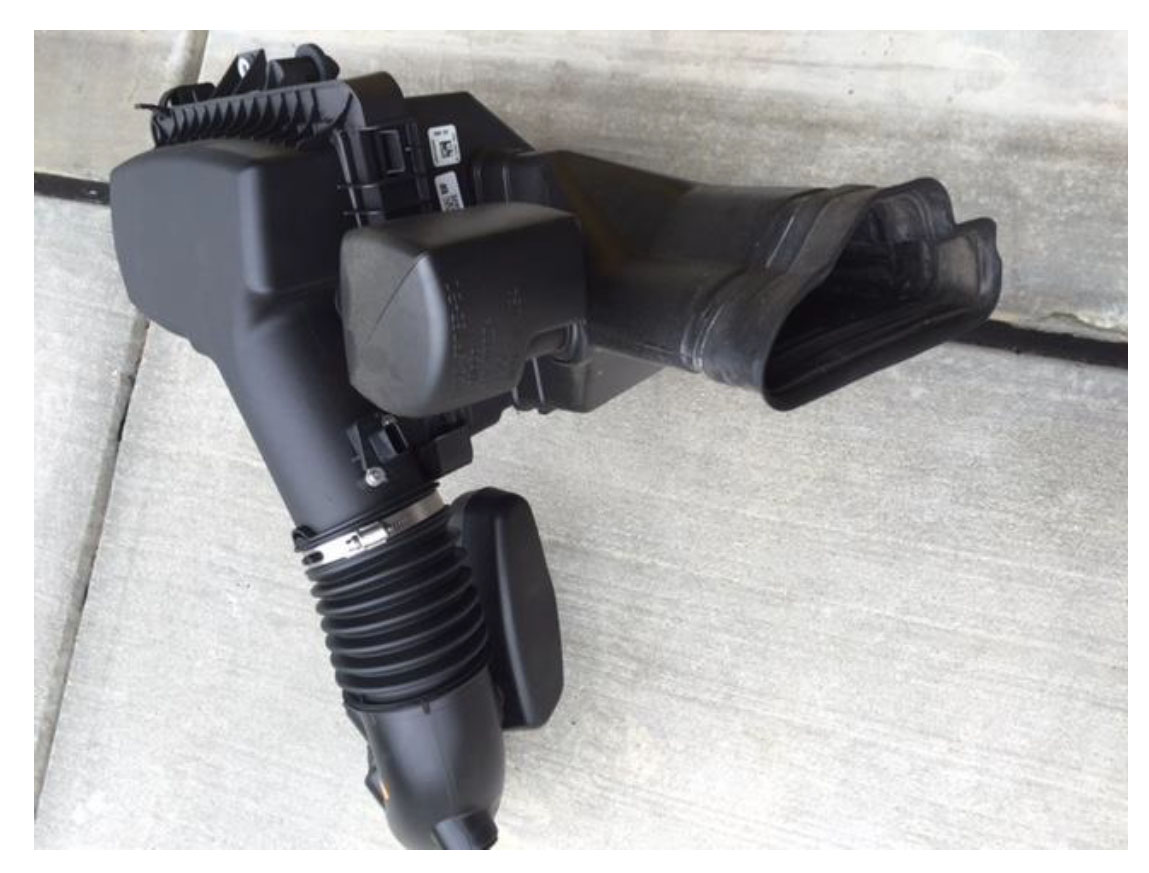
Step 7: Pull the factory intake tube and air box assembly from car. This will all come out in one piece. From the rear of the air box, pull towards the firewall and up in order to remove the inlet snorkel. The complete assembly is pictured above
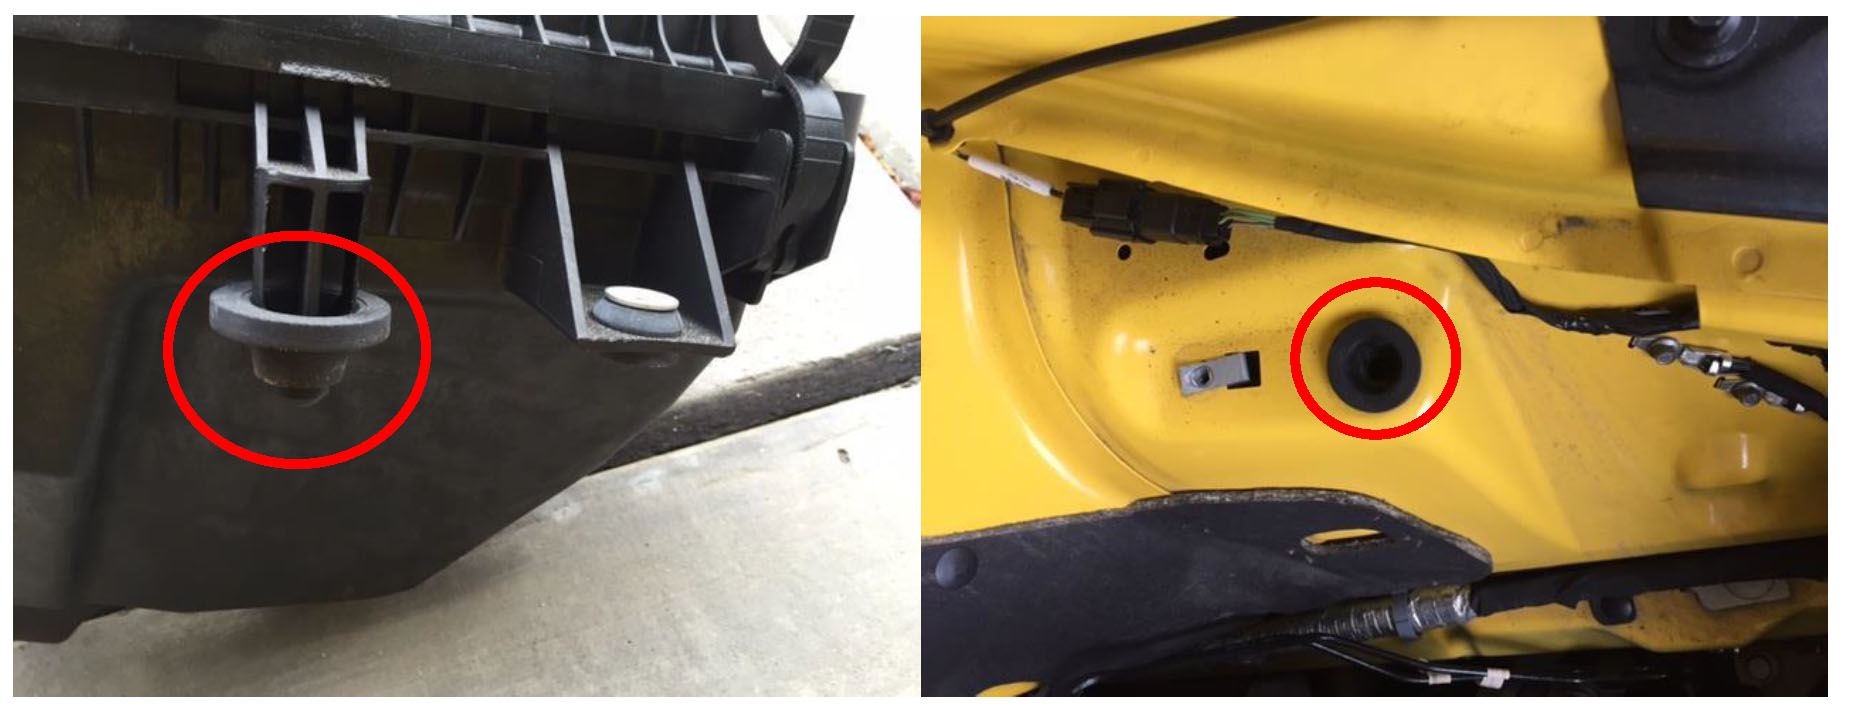
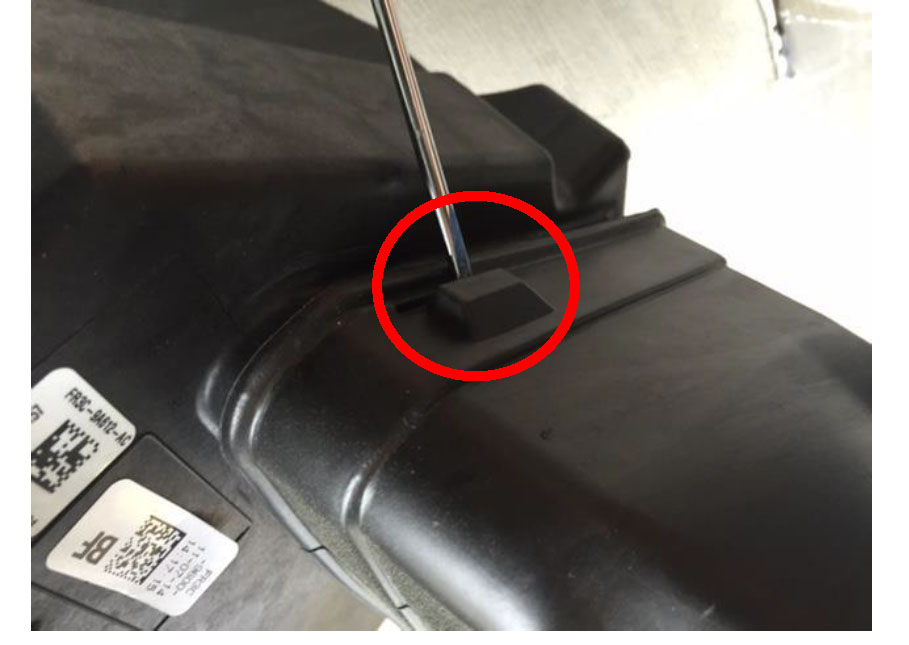
Step 8: Remove the rubber grommet from the bottom portion of the air box and reinstall it in the fender. (circled above)
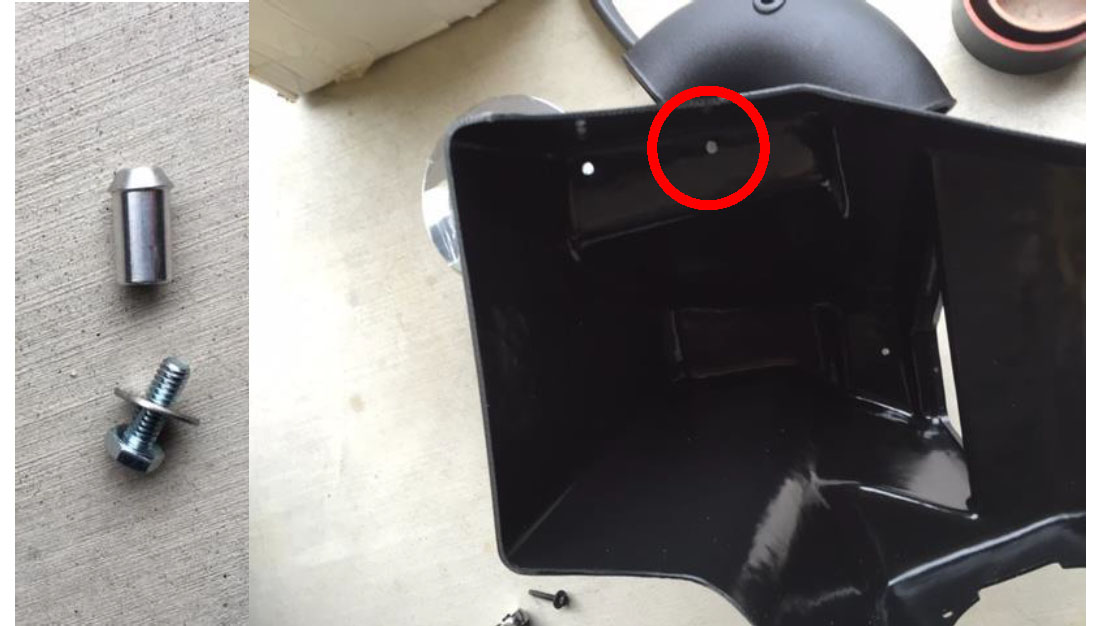
Step 9: Install the aluminum stud into the front hole Steeda air box. The assembly and location is pictured above. This will locate the Steeda air box into the grommet you just reinstalled in the fender.
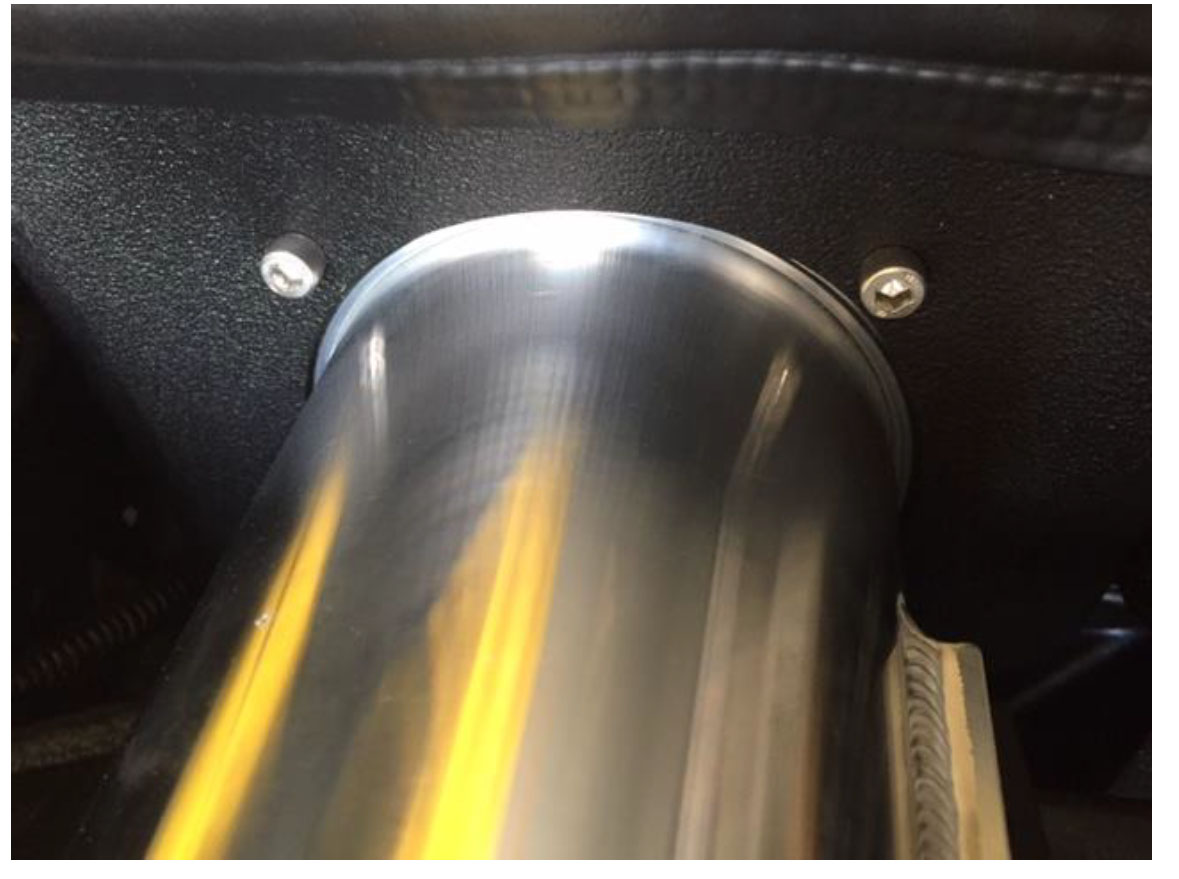
Step 10: Install the Aluminum velocity stack into the Steeda Air box. Pass the housing through the air box and orient it such that the opening for the MAF sensor will face the front of the car when installed. Complete using the four supplied ¼-20 bolts (7/16” head) and tighten them. Step 11: **FOR THOSE WITH A CAI RESTRICTOR ONLY** Slide the restrictor from the air box side into the velocity stack. Those with a Tune-Only intake set-up will not have this part and will skip this step. Step 12: Install your new cone filter using the largest supplied hose clamp.
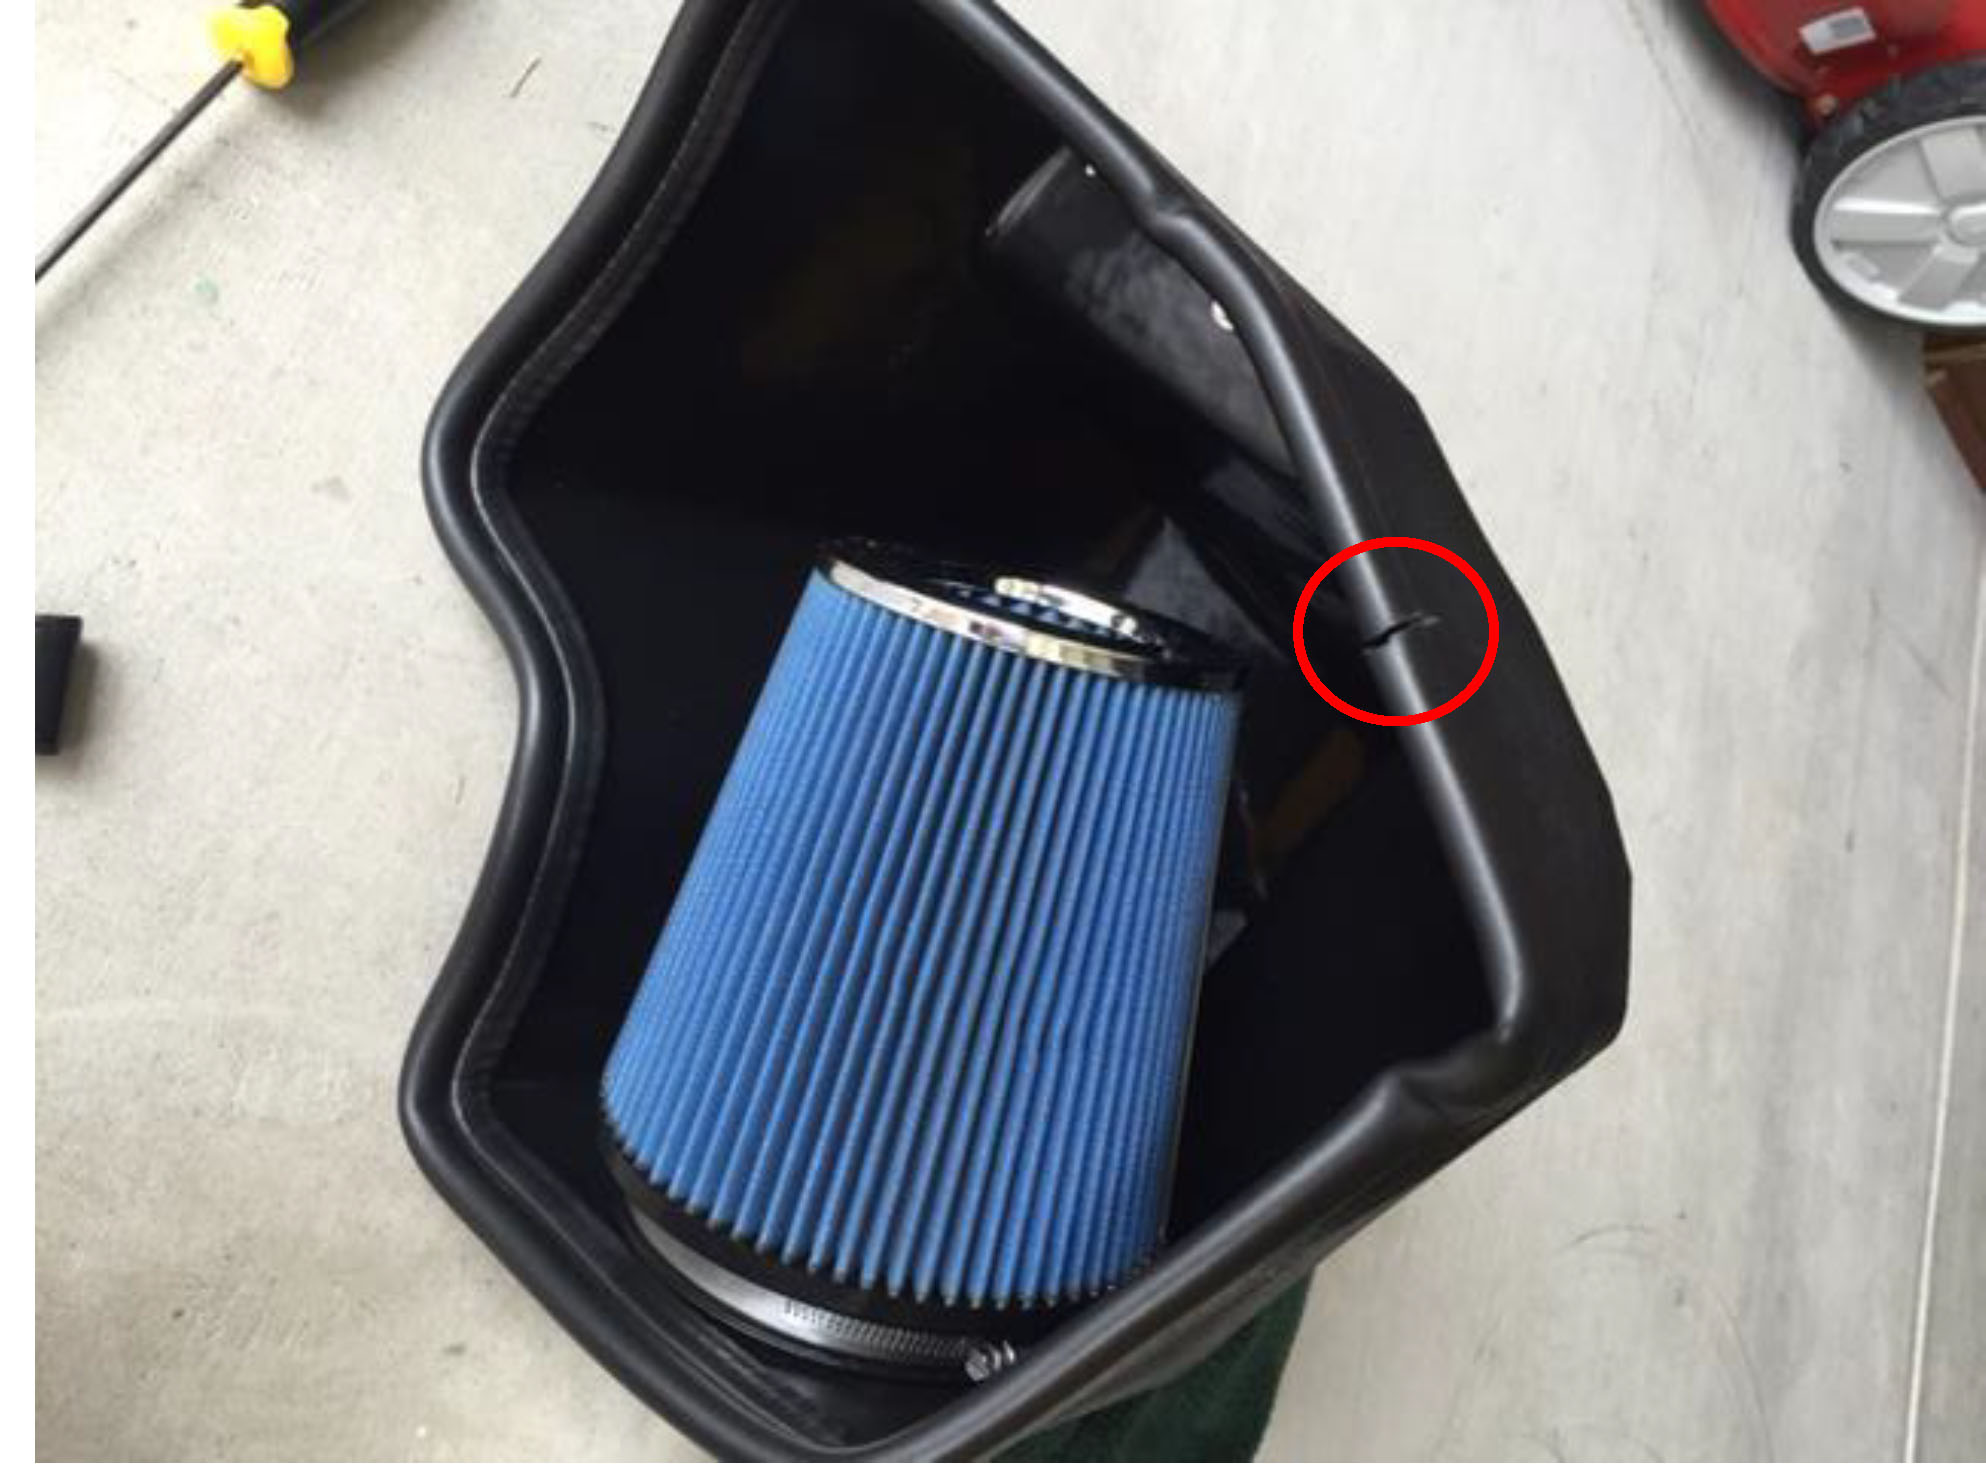
Step 13: Install the rubber trim provided around the top of the Steeda air box. I found that starting in the location circled above will hide the seam of both ends when installed in the car. You may need to trim away excess.
Step 14: Transfer the Mass Airflow Sensor (MAF) from your factory assembly to the Steeda assembly. Install the sensor with the black side up as pictured on the right. A T20 torx will be used to remove the MAF from the factory location and a T10 torx or 5/16” allen wrench will be used to secure the two new screws provided to install the MAF in the Steeda housing.
Step 15: Remove the lower inlet snorkel from the factory assembly to your Steeda assembly. The inlet is secured in three places on the factory assembly and can be popped from its place with a flat head screwdriver.
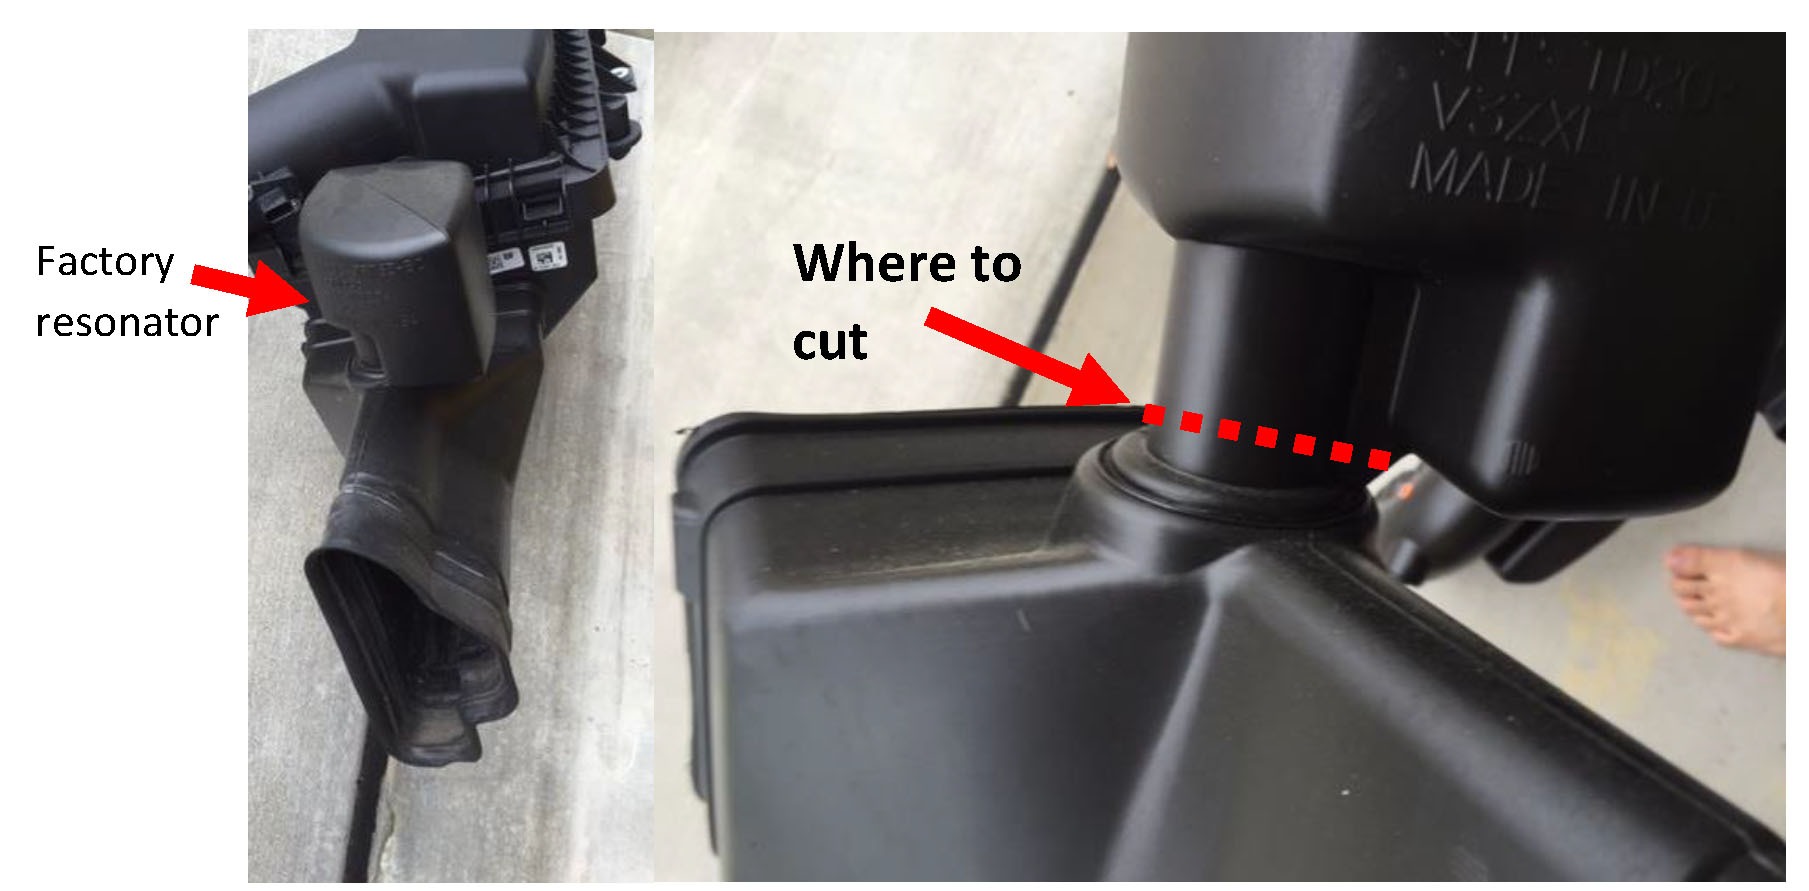
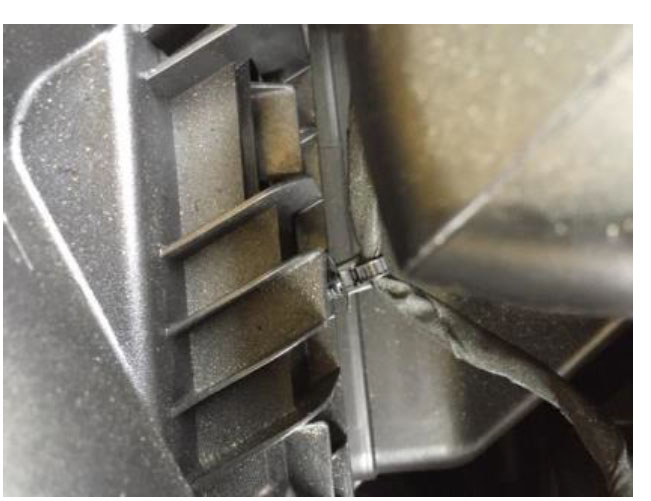
Step 16: You will need to cut the factory resonator from the inlet snorkel and plug it before transferring to your Steeda assembly. This can be done using a Sawzall, air saw, hand saw or similar tool. Pictured above is where you will need to cut to remove the resonator.
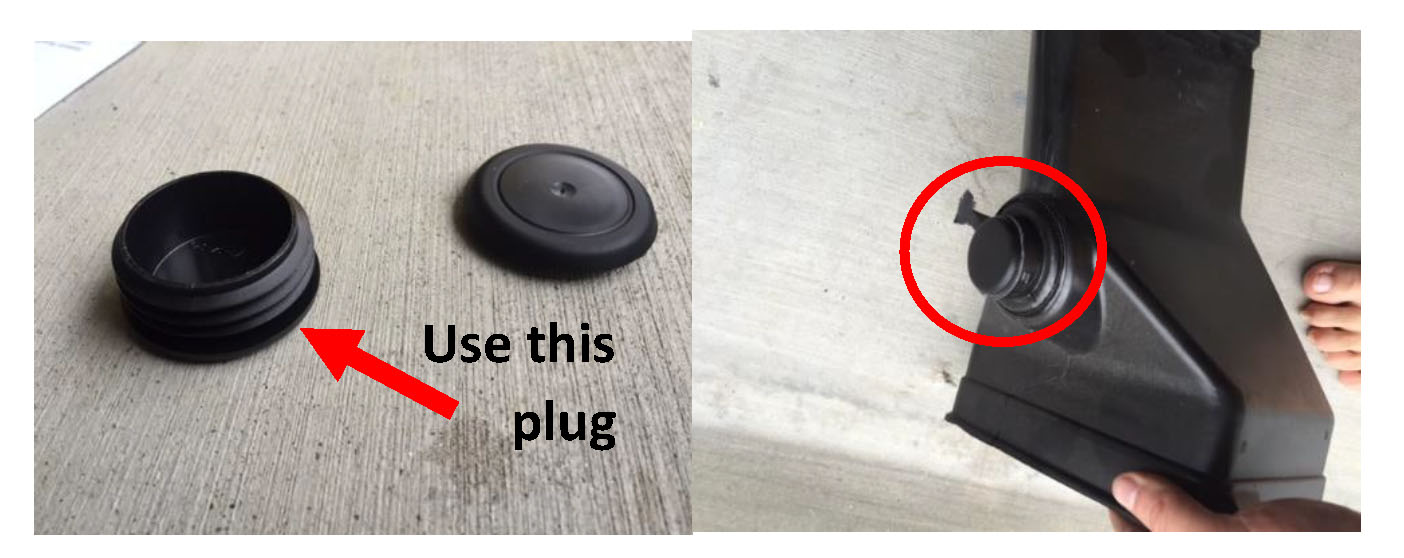
Step 17: Plug the hole left by the removed resonator as shown above. The assembly will then clip into place on the bottom of the Steeda air box over the three pre-adjusted screws on the lower opening of the air box.
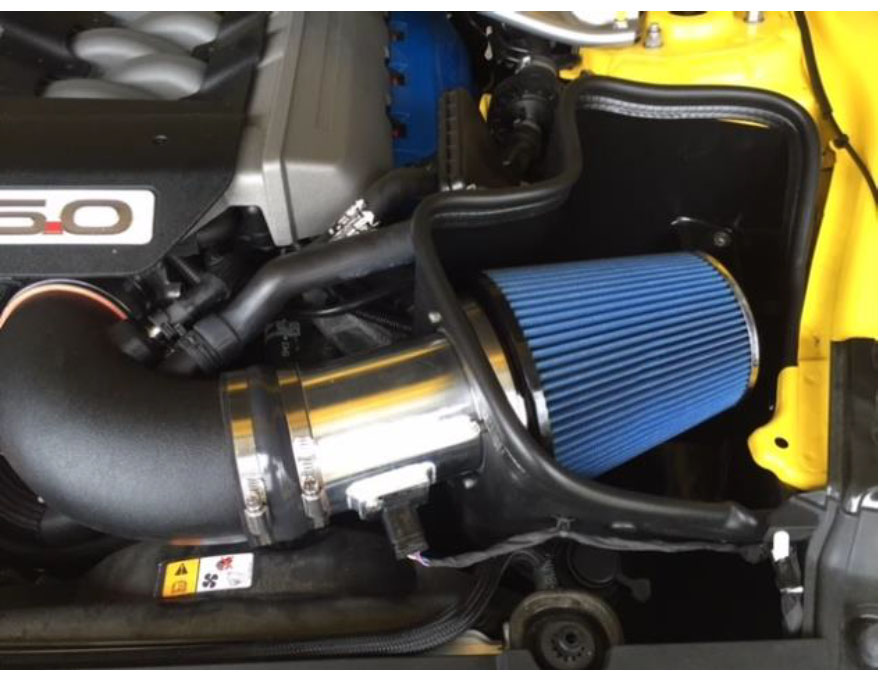
Step 18: Install the completed filter and air box assembly in the car making sure to properly locate the inlet snorkel toward the front grill. You will be able to feel this by reaching your hand down in front of the assembly. Secure the air box using the supplied 6mm bolt and washer in the rear hole of the air box as circled above. Loosely install the larger of the two rubber couplers and two larger supplied hose clamps to the end of the velocity stack as shown above. You can also reconnect your factory MAF sensor wire at this time.
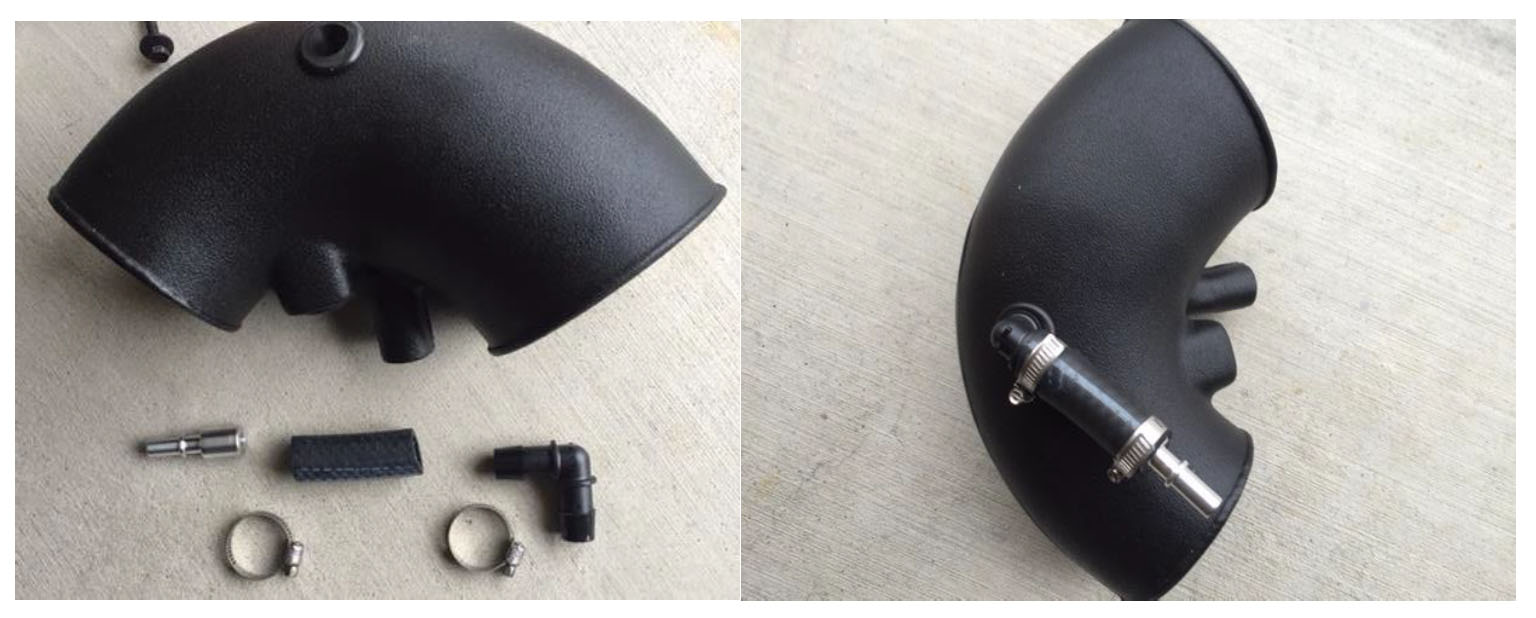
Step 19: Assemble the lower PVC adapter and install into the Steeda inlet tube as shown on the right. Place the aluminum adapter in one end of the hose and the plastic elbow in the other. Tighten both hose clamps and install facing the smaller diameter opening in the inlet tube. (throttle body end)
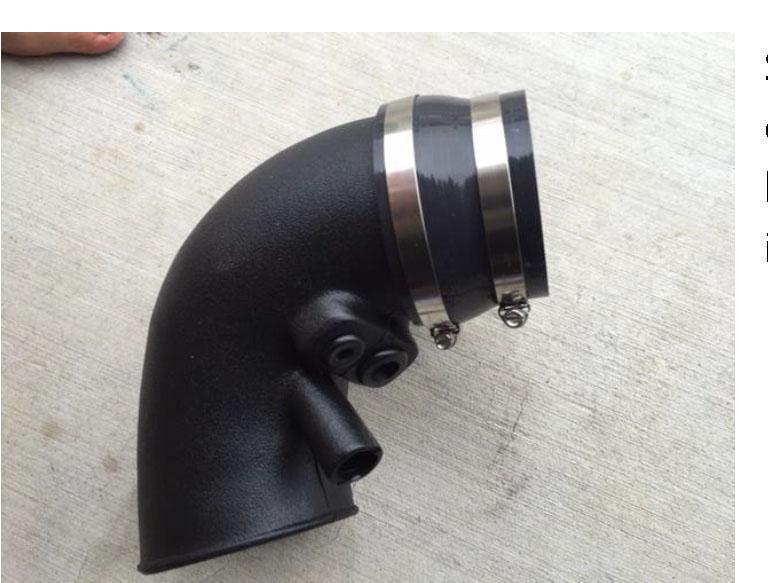
Step 20: flip the intake tube over and install the reducer coupling and supplied hose clamps on the smaller or throttle body end of the intake tube as shown above. You can now install the assembly on the throttle body.
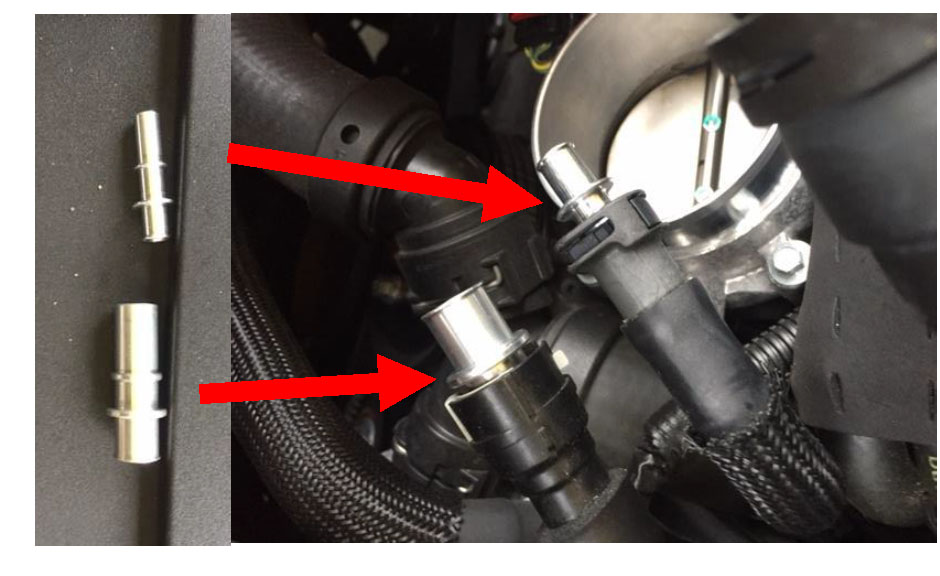
Step 21: Install the supplied aluminum fittings into the factory hoses. The smaller fitting goes to the braided hose and the larger fitting goes to the rubber vent tube that runs to the driver side cylinder head.
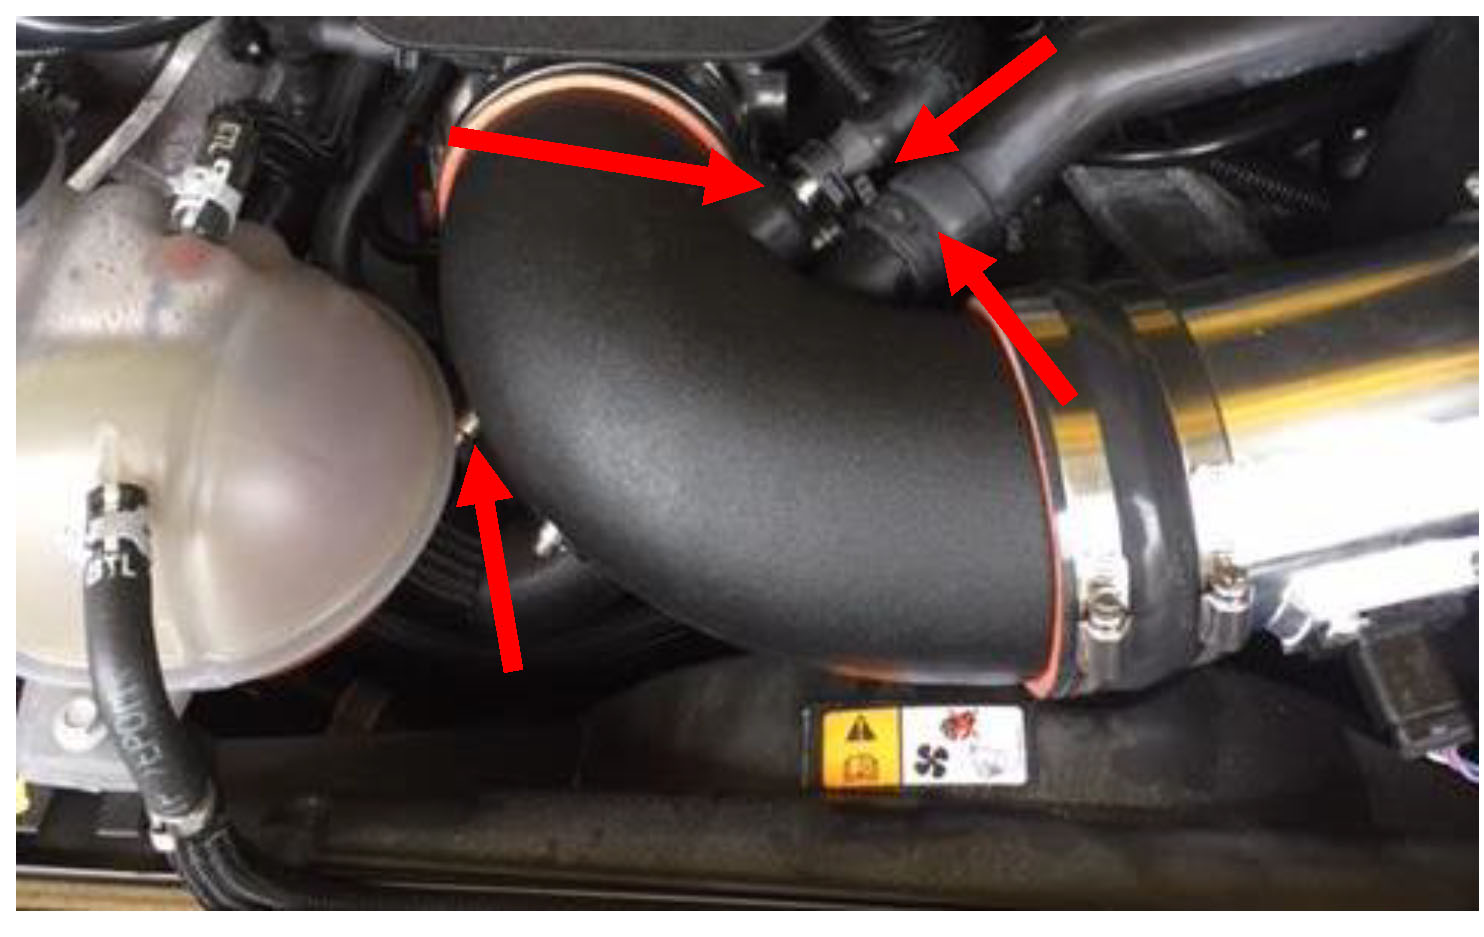
Step 22: Reinstall all hoses to the new Steeda inlet tube. There are 3 on the top side of the tube, including the sound tube, and one on the bottom side of the inlet tube that will attached to the assembly completed in step 19. See arrows above for all locations.
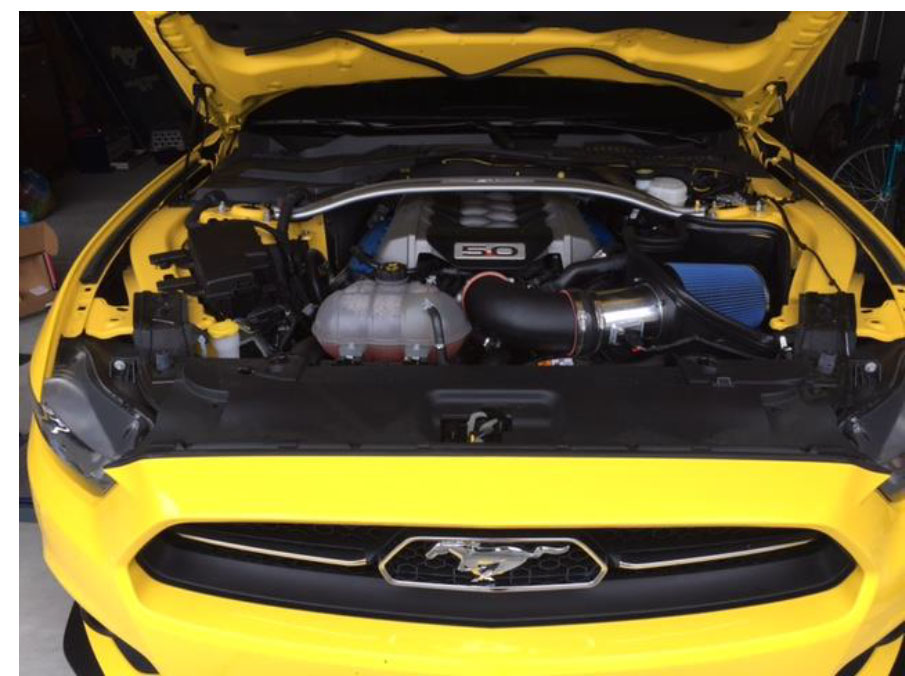
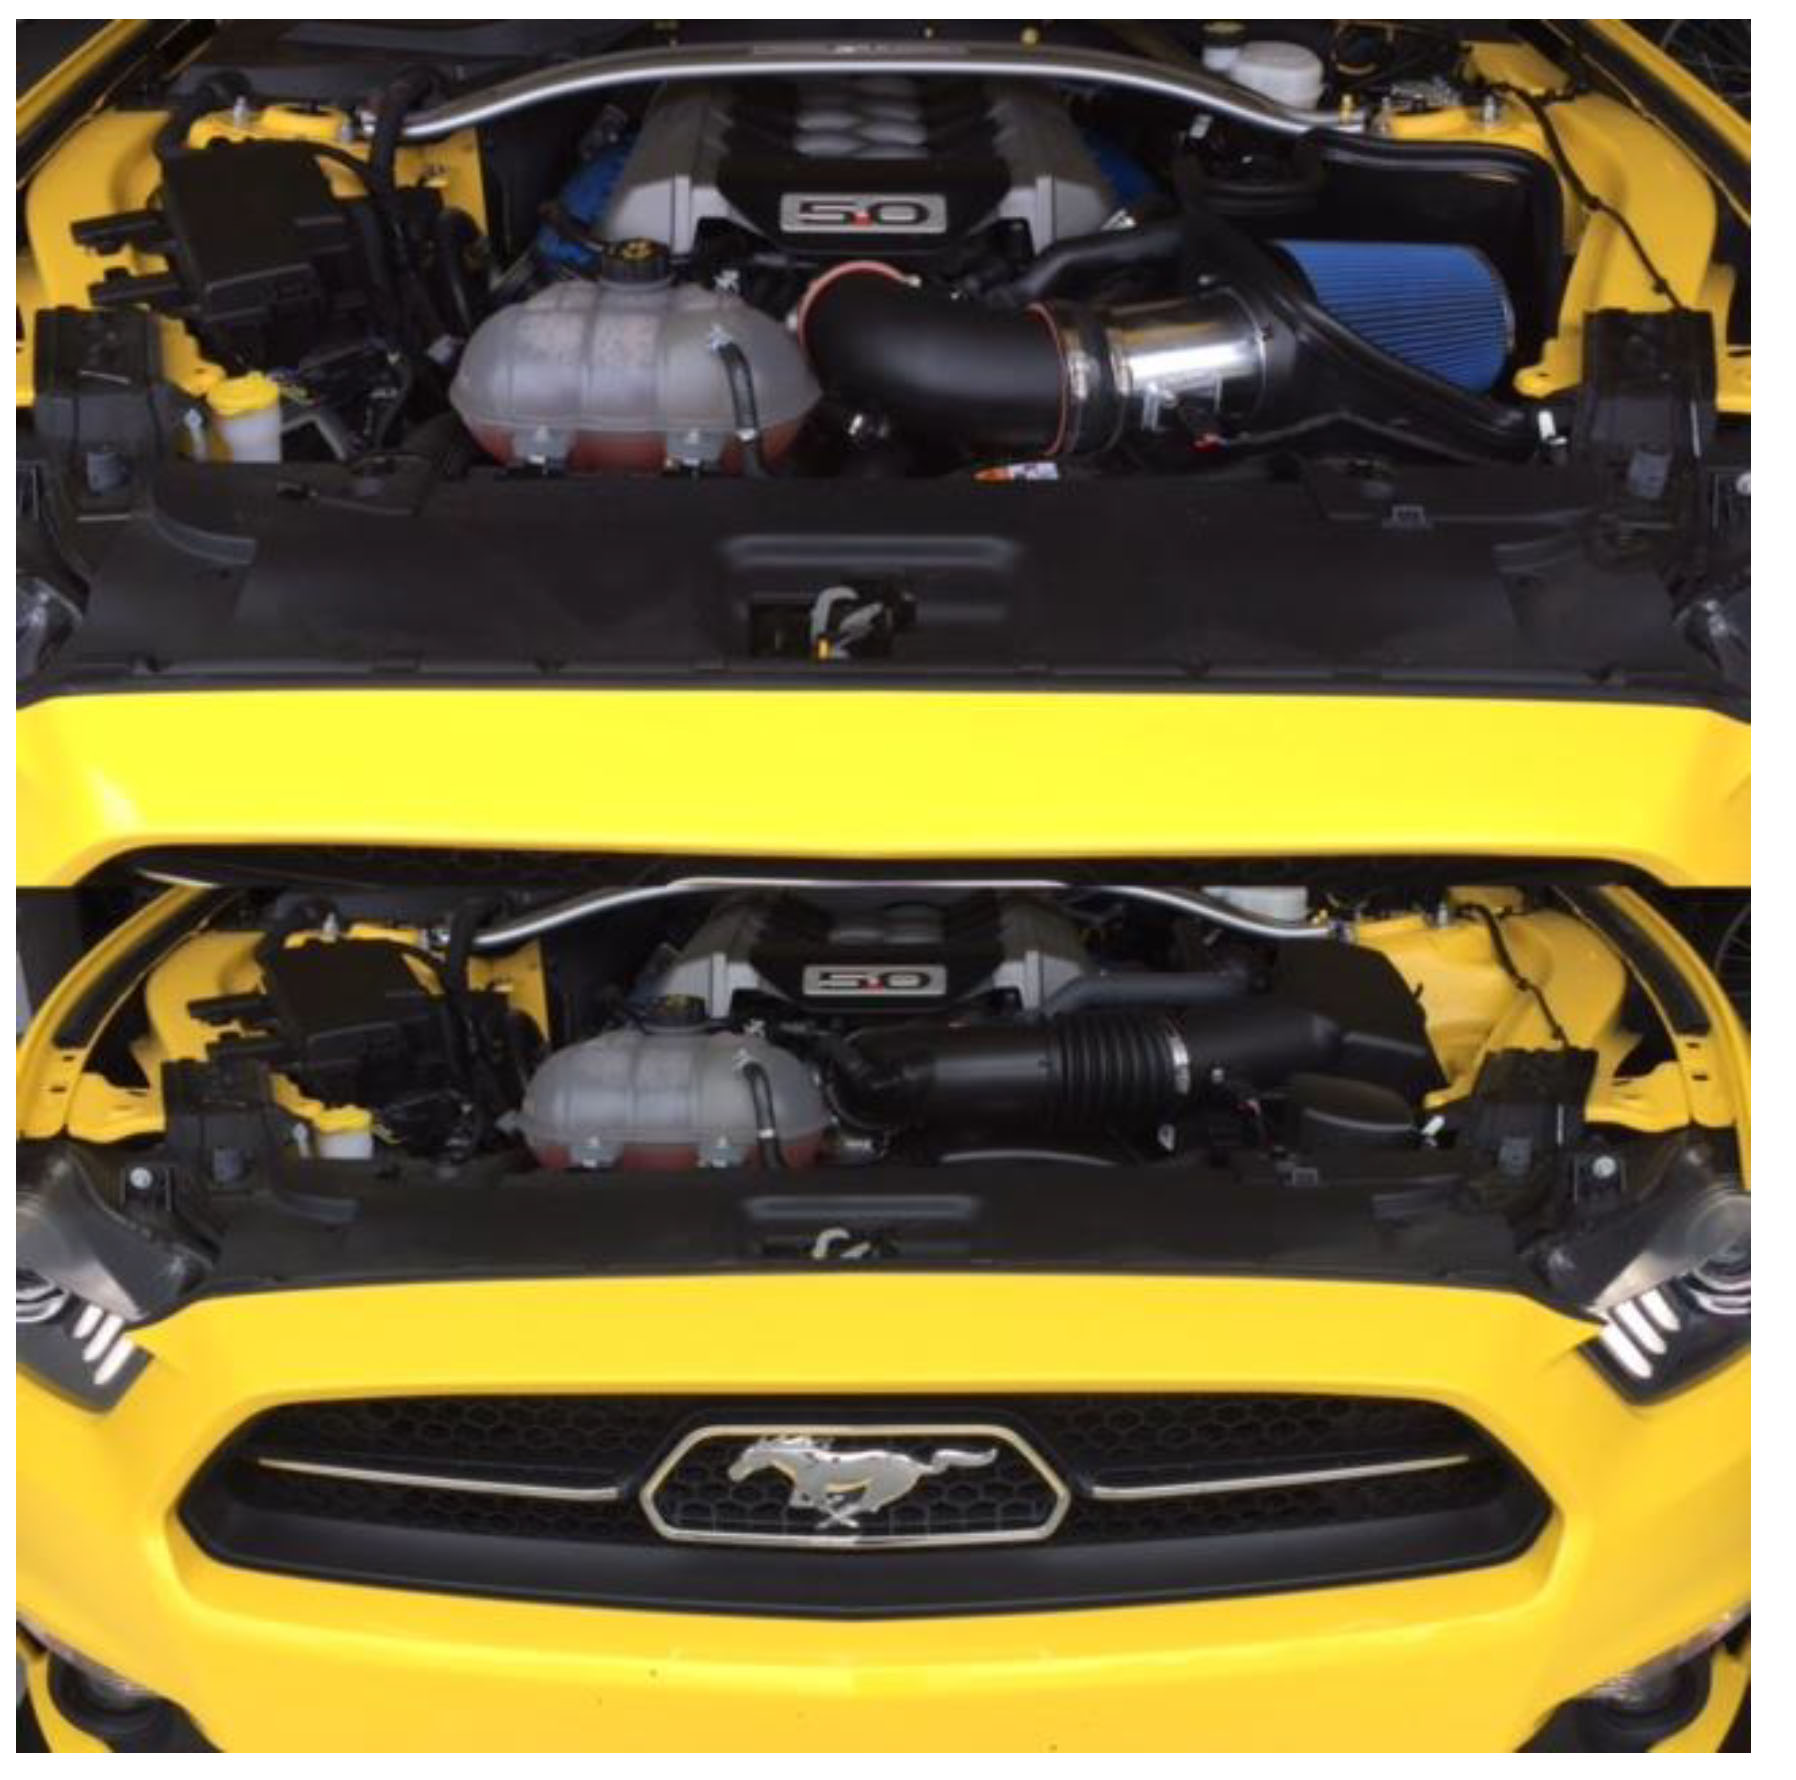
Step 23: Tighten down all hose clamps and check for snug fitment. Reinstall the engine cover and strut tower bar if removed from Step 1. Check all fittings and connections one last time. **FOR THOSE WITHOUT A RESTRICTOR** Do NOT start the vehicle until your tune has been uploaded.
Enjoy your completed Install! Written by American Muscle Customer Ryan McCallum 4/5/2016