 FREE 1 to 3-Day Delivery on Orders $119+ Details
Best Sellers


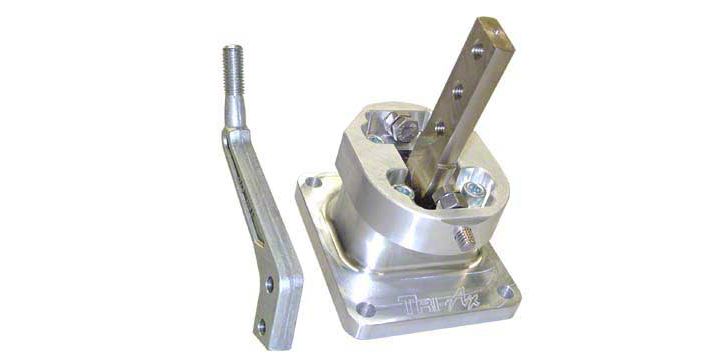
Steeda Tri-Ax Shifter for T56 - Installation Instructions
Shop Parts in this Guide
Installation
1. Unscrew the shift knob and remove the shift boot and console cover plate assembly. (Push your fingers into the boot, hook your fingers under console plate and lift up).
2. Remove the factory shift handle with a 10mm wrench.
3. Remove the four bolts (8mm) holding the inner rubber shift boot plate and remove the boot.
4. Remove the four bolls (13mm) holding the factory shifter to the transmission. Remove the shifter from the transmission. You may have to pry the shifter from the transmission because the adhesive sealant bonds the shifter to it. A quick sideways blow to the lever with a block of wood will break the shifter free without damaging it.
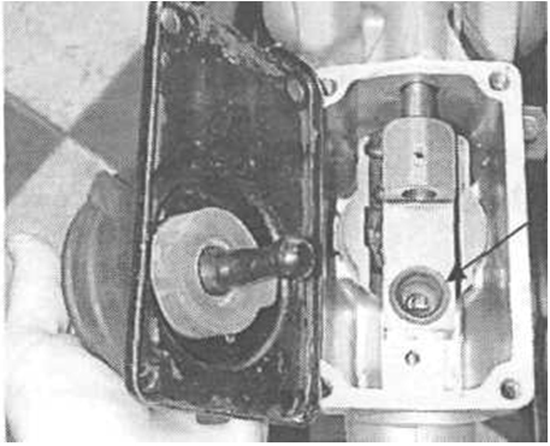
5. Make sure the plastic bushing is still in the transmissionwhere the shift lever moves the gear selector. If it is not there, look for on the end of the shifter, as sometimes it comes out with the stock shifter.
6. Scrape any remaining gasket material off the transmission and clean off any oil or dirt.
7. Apply a thin bead of silicone gasket maker to the transmission mounting surface.
8. Install the new shifter. The round end of the tower goes forward, with the flat angled sides towards the back of the car.
9. SET THE SHIFTER STOPS as follows:Back off the stop bolts so that the shifter moves freely into all gears
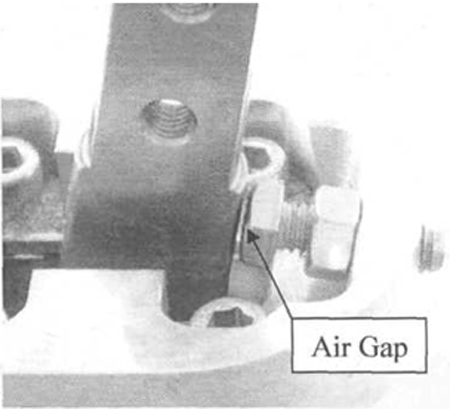
10. Place the shifter in third gear.Push forward firmly on the lever while turning thestop bolt in by hand until it contacts the shift lever. Once the stop bolt contactsthe shift lever, back off the bolt 1/6turn, until there is a small air gap (about.010") between the shift lever and the stop, while still applying pressure to the lever.Pushing on the lever takes all of the slack or play out of the linkage, ensuring you get the proper adjustment.
11. Hold the bolt with a 1/2" wrench while tightening the jam nut against the shifter tower with another wrench.
12. Double check the space between the shift lever and the stop bolt.When you pushvery hard on the shift lever it shouldbarelycontact the stop bolt, but when you let go of the lever it should not touch the bolt, but instead have a small air gapbetween them.
13. Place the shifter in second gear and adjust the other stop bolt as outlined above.
14. Shift the shifter through all gears and double check the stop clearance in each gear.The shifter must be able to shift freely into all gears without interference fromthe stop bolts.IMPORTANT!Stops that are set too close to the shift lever may prevent the gears fully engaging, causing serious damage to the transmission. The stop bolts are there to prevent the lever from being over -extended. They should not be engaged during normal operation. When in doubt, leave a little extra space between the lever and the stop bolt.
IMPORTANT!Whenever the shifter is removed from the transmission the stop bolts must be reset when the shifter is reinstalled.
15. Place the BootGuard washer over the shift lever. (The large washer slips over the top of the lever and slides down until it sits on the f "step" in the lever.)
16. Place the inner shift boot over the shift lever until it rests on the BootGuard. (This is the rubber boot which bolts to the transmission tunnel. Reinstall the inner boot with the four factory bolts.
17. Install the new shift handle at the desired position with the two i-bolts (8mm x 25mm long) and K-lock washers provided. Tighten bolts securely with a wrench.Install the handle in the higher position for the greatest driver comfort. Install the handle in the lower position for the shortest throw.
18. Install the console cover plate, shift boot and knob.
Important:Alwaysuse an anti-seize compound on the threads when installing analuminumshift knobonto the Steeda shift handle.
19. Because the Tri-Ax shifter eliminates the factory rubber noise isolators (as do all high performance shifters)you will hear more gear noiseor "gear whine" from the transmission once the shifter is installed.This noise is normal, and comes from the transmission, not the shifter. The vibrations that cause the noise are always present, but are hidden by rubber isolators in the original shifter and shift handle. The isolators which absorb the noise are also partly responsible for the sloppy, rubbery feeling of the stock shifter, so it is necessary to eliminate them for a performance shifter.
20. Some of this noise can be muffled by removing the rubber boot from the original shifterand stretching it over the top of the new shifter (after the stops have been set and theBootguard washerinstalled).
Important!
T-56 CONVERSIONS ONLY: Many T-56 transmissions have a reverse lockout solenoid which is designed to prevent you from accidentally engaging reverse gear. If the car was not originally equipped with a T-56, it may be necessary to wire a 12 volt switch to the reverse lockout solenoid, to disengage the lockout when you want to engage reverse gear. Do not attempt to force the transmission into reverse. Once the reverse lockout is disengaged the shifter should go into reverse easily. For safety it is recommended to use a "momentary switch" which only temporarily allows access to reverse and then reverts back to the "locked out" condition when you are not holding the button. Contact your transmission supplier if you need more information about the reverse lockout switch.
Installation instructions provided by Competition Engineering
