 FREE 1 to 3-Day Delivery on Orders $119+ Details
Best Sellers


How to Install Whiteline Double Adjustable Rear Lower Control Arms - MAX-C Bushings on your Mustang
Installation Time
1 hours
Tools Required
- 1 1/8 inch wrench - 2
- 18mm Wrench or Socket
- Flat Blade Screw Driver
Shop Parts in this Guide
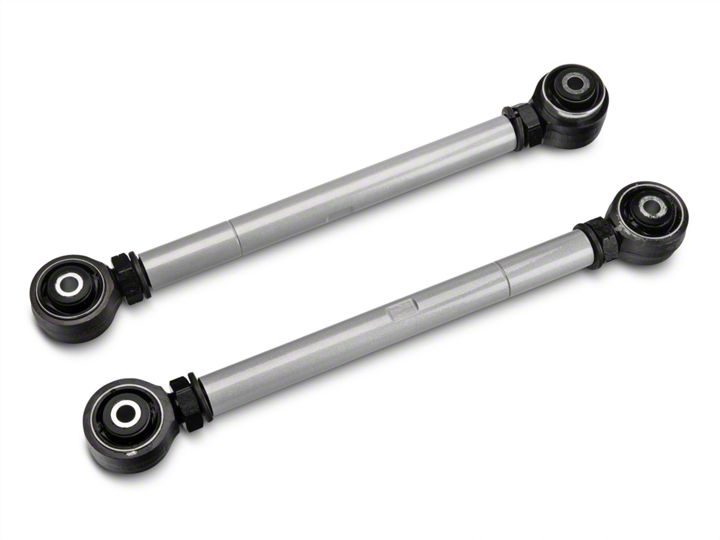
Kit Includes:
• Adjustable Control Arms - 2
WARNING: Whiteline Products are designed for easy installation however professional installation by a Whiteline Performance Center is recommended. Please drive carefully and accustom yourself to the improved handling characteristics of the vehicle.
1. Lift the vehicle and place jack stands under the rear axle, and then remove both rear wheels.
2. Using a flat blade screwdriver, detach the brake cable from the caliper and slide the brake cable out of the control arm. Repeat on both sides.
3. Using an 18mm wrench or socket, remove both control arm bolts and remove the control arm.
NOTE: Do not remove more than one control arm at a time.
4. Whiteline Control Arms come pre-adjusted at stock length, however it is recommended at this stage that you double check the size by lining them up against the stock. aims.
5. Install the control arm using the factory bolts with the wider bushing towards the rear of the car and the thicker side of the rear bushing facing towards the inside of the car. Insert one washer on each side of the front of the arm. Tighten all mounting bolts to 130 ft./lbs.
6. Repeat steps 2 through 5 on the opposite side.
7. Re-install the brake cables and tighten the jam nuts.
8. Lower the vehicle to the ground and check that all fasteners are properly torqued.
9. Recheck all fastener torque after initial 100 miles of driving.
