FREE 1 to 3-Day Delivery on Orders $119+ Details
How to Install Airaid Cold Air Dam Intake System - SynthaFlow Oiled Filter on your F-150
Installation Time
1 hours
Tools Required
- Ratchet wrench
- 10mm socket
- 5/16” socket or nut driver
- 6” socket extension
- Flat blade screwdriver
Shop Parts in this Guide
Thank you for purchasing the Airaid Intake System. Please read the instruction manual
carefully before proceeding with the installation. Contact Airaid @ (800) 498-6951: 8:00 AM - 5:00 PM MST Weekdays for questions regarding fit or instructions that are not clear to you. Your Airaid Intake System was carefully inspected and packaged. Check that no parts are missing, or damaged during shipping. If any parts are missing, contact Airaid. The air filter element is protected from direct exposure to water and debris in its new location. Care should be taken not to drive through deep water.
WATER INGESTION IS THE DRIVERS RESPONSIBILITY! The air filter is reusable and should be cleaned using the Airaid Filter Tune-Up Kit periodically.
Thank you for selecting Airaid.
Installation Instructions. Read Me!
I DISCONNECT NEGATIVE (-) BATTERY CABLE.
II Remove air cleaner assembly.
a) Unclip air box lid. Remove A.F.M (Air Flow Meter) from lid and set aside.
b) Unscrew the air temperature sensor from the lower half of the air box. (Hint: Lift straight up to
remove lower air box half)
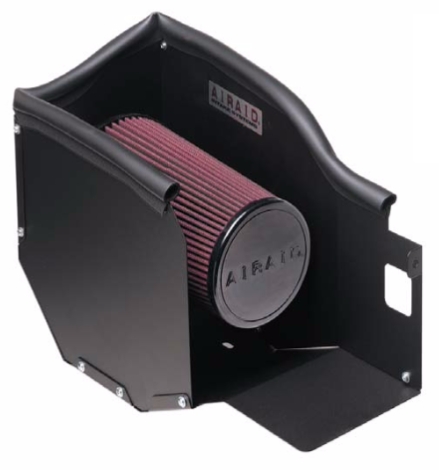
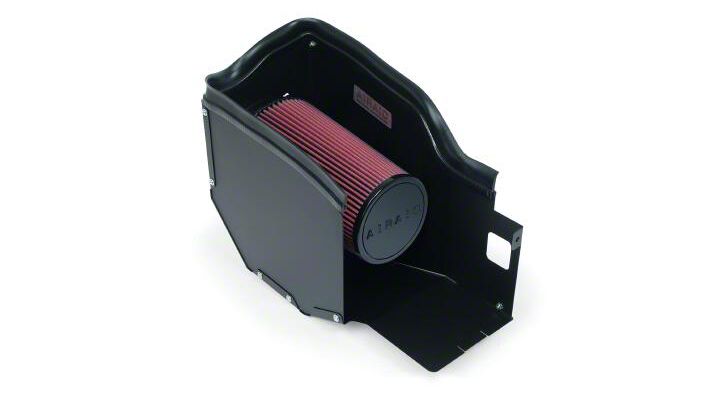
III Assemble Airaid Cool Air Dam (C.A.D)
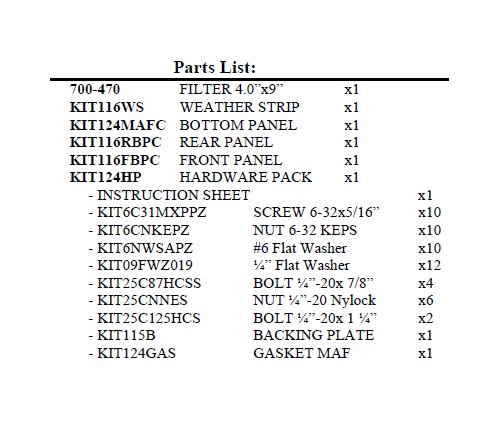
a) Bolt the rear, front and bottom panels together with the 10 supplied small screws, nuts & washers.
b) Position the Airaid C.A.D. in place of the original air box.
c) Align the two base holes over the factory rubber grommets. Using the two supplied 1/4x1 1/4”
bolts, fasten the silver Airaid backing plate to the underside of the air box mount grommets.
d) Bolt the A.F.M. to the Airaid C.A.D. utilizing the supplied 1/4” hardware.
e) Reinstall the air temperature sensor to the Airaid C.A.D.
f) Mount the Airaid Premium filter on the intake side of the Airaid assembly and tighten.
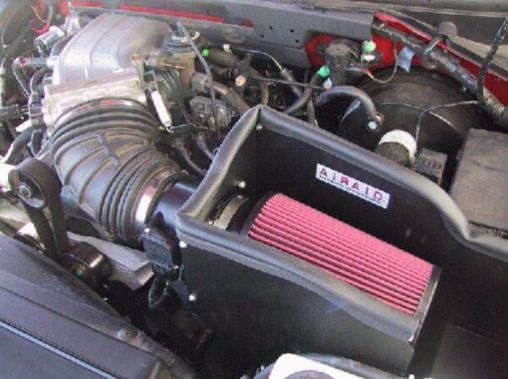
g) Align and position the Airaid intake system on the engine. When satisfied, fully tighten all
connections.
IV Finishing up.
a) Check over all work.
b) Check hood clearance before closing.
c) Make sure no foreign objects are in the intake path!
d) Reconnect battery cable.
e) Enjoy!