FREE 1 to 3-Day Delivery on Orders $119+ Details
How to Install Airaid Jr. Intake Tube Kit w/ Red SynthaMax Dry Filter on your F-150
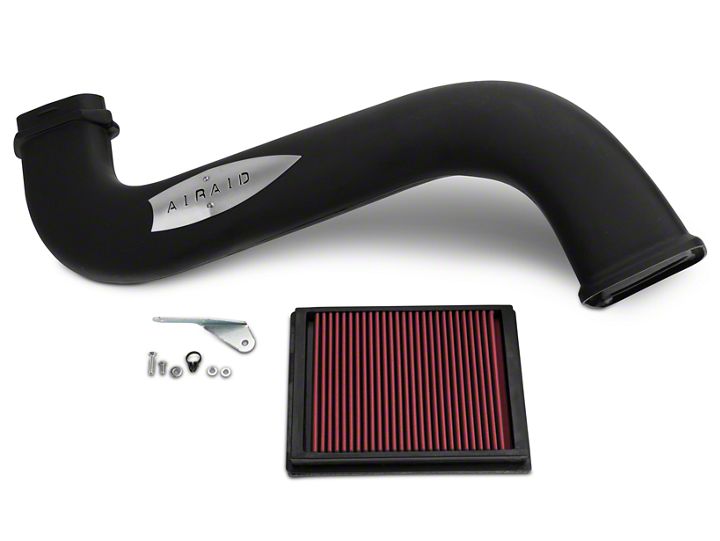
Shop Parts in this Guide
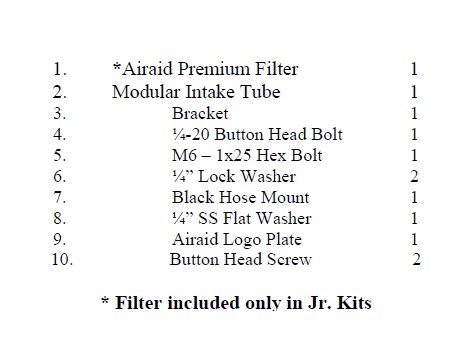
Component Identification
I DISCONNECT NEGATIVE (-) BATTERY CABLE
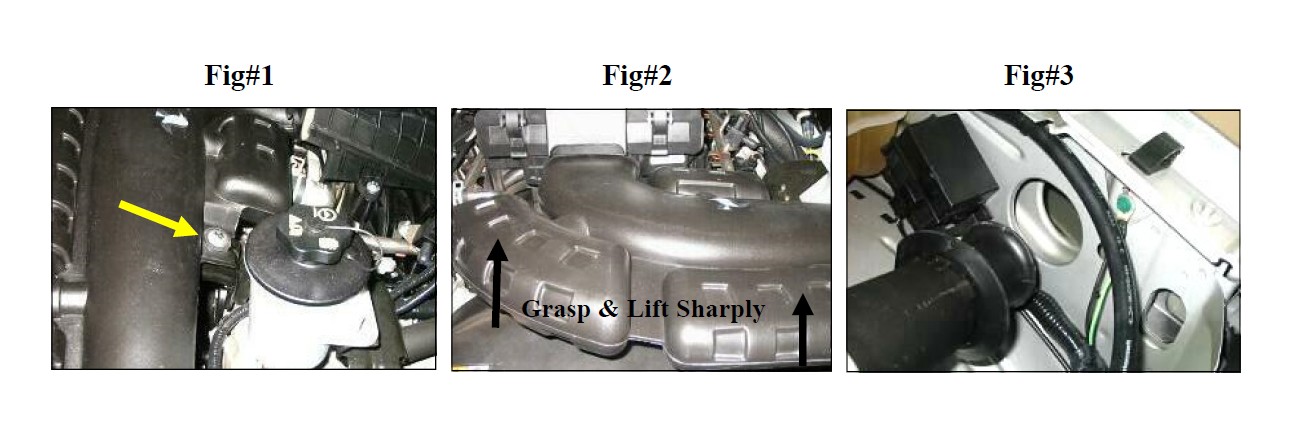
II Remove Factory Intake Air Tube
A) Remove the mounting bolt behind the factory air intake tube. See Fig#1
B) Firmly grasp the factory air intake and lift sharply to unsnap it from the factory air box. See Fig#2
C) Pull the factory air intake tube free from the fender opening and remove from vehicle. See Fig#3
III Airaid Modular Intake Tube Installation
A) Mount the Airaid bracket onto the Airaid tube using the ¼-20 button head bolt and lock washer provided. See Fig#4 (Hint: leave the bolt loose for easy adjustment later in the installation)
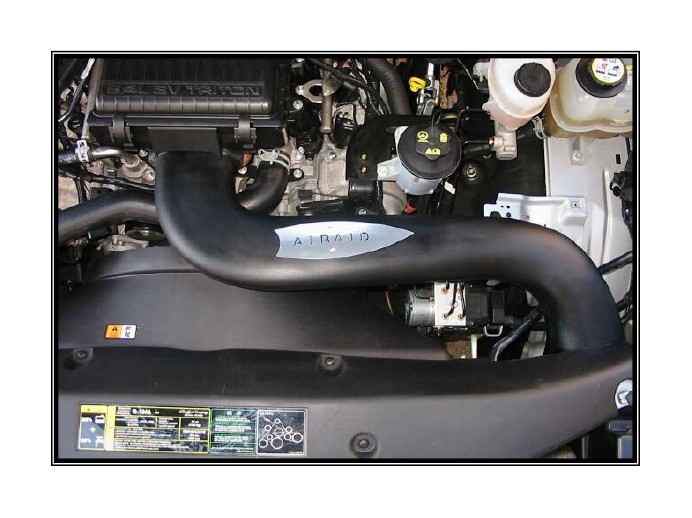
B) Position the Airaid tube in place of the factory air intake assembly. See Fig#5
C) Push the Airaid tube into the factory air box opening until it snaps into place.
D) Align the Airaid bracket on the Airaid tube to the factory mounting hole and secure using a #6 bolt and lock washer provided.
E) Mount the factory radiator overflow hose to the driver’s side of the engine compartment with the black plastic hose mount provided. Insert the mount through the factory hole in the upper fender and secure by pushing a ¼ washer over the clip. See Fig#6
F) Tighten the previously installed button head bolt fastening the bracket to the Airaid tube.
G) Fasten the Airaid Logo Plate to the Intake tube using the two Button Head Screws.
IV Airaid Jr. Replacement Filter
A) If you purchased the Airaid Jr. kit, replace the factory air filter with the Airaid Premium Filter included in the
Airaid Jr. kit.
V Re-Connect Accessories