 FREE 1 to 3-Day Delivery on Orders $119+ Details
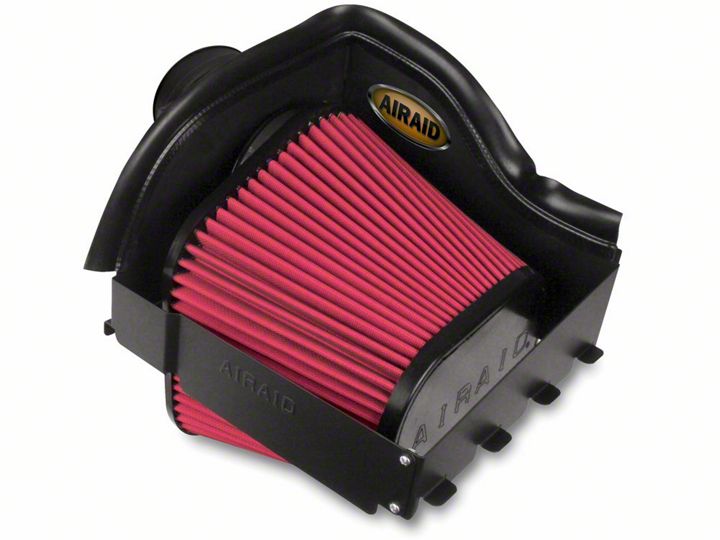
How to Install Airaid QuickFit Air Dam w/ SynthaFlow Oiled Filter on your F-150
Shop Parts in this Guide
- Airaid QuickFit Air Dam with Red SynthaFlow Oiled Filter (11-14 3.5L EcoBoost F-150)
- Airaid QuickFit Air Dam with SynthaMax Dry Filter (09-14 F-150)
- Airaid QuickFit Air Dam with SynthaMax Dry Filter (11-14 3.5L EcoBoost F-150)
- Airaid QuickFit Air Dam with SynthaMax Dry Filter (11-14 3.7L F-150)
- Airaid QuickFit Air Dam with SynthaMax Dry Filter (11-14 5.0L F-150)
- Airaid QuickFit Air Dam with SynthaMax Dry Filter (10-14 6.2L F-150 Raptor)
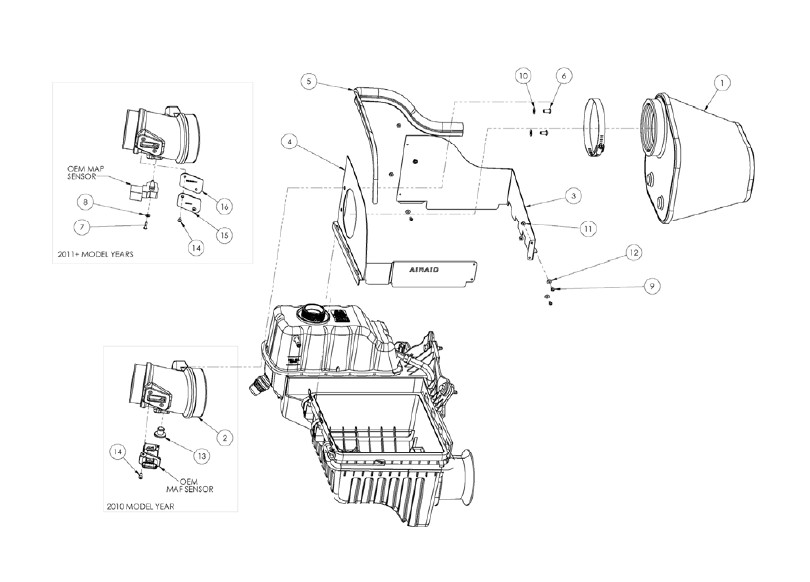
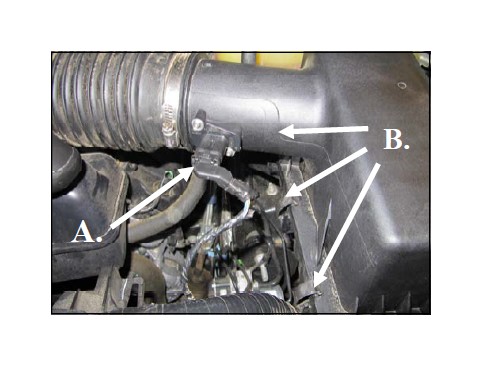
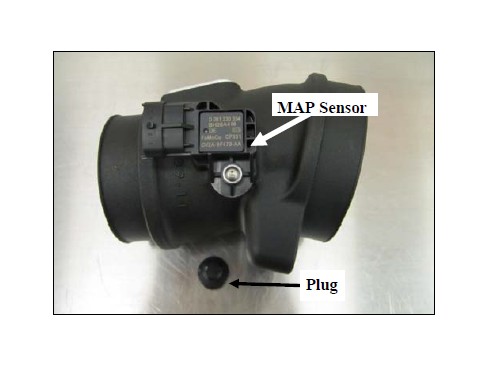
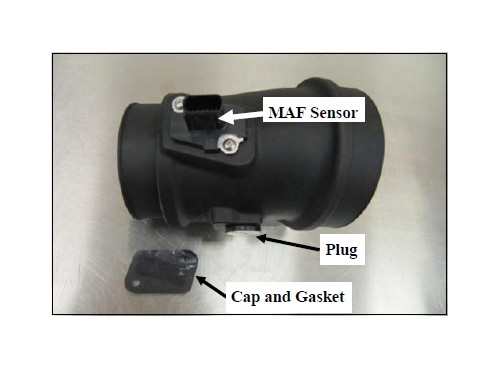
Component Identification
Disconnect The Negative Battery Terminal!
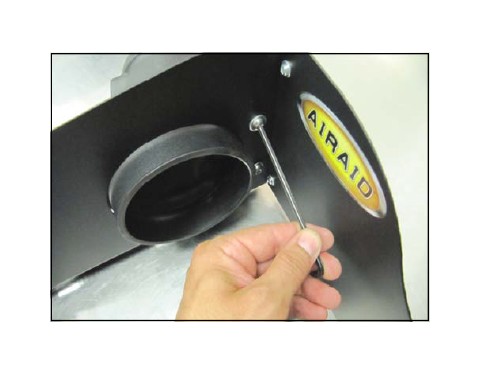
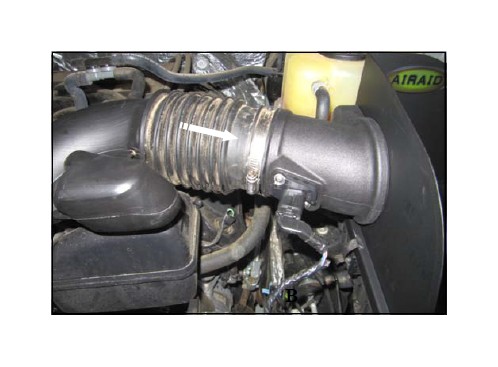
1. Loosen the hose clamp on the airbox side of the factory air intake tube.
2. A. Disconnect the sensor, MAF or MAP, in the factory airbox top.
B. Unfasten the Thr ee clips on the left side of the air -box.
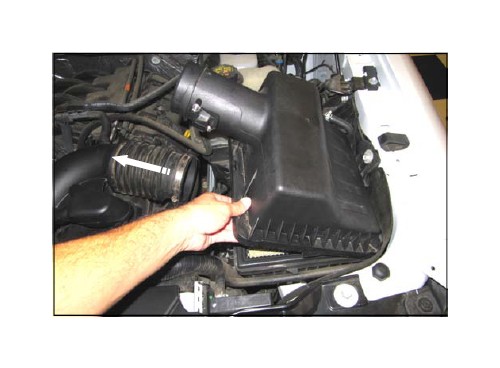
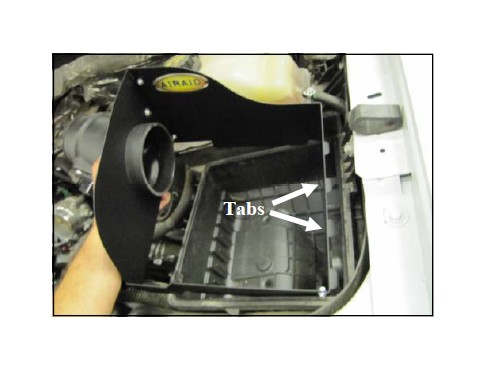
3. Slide the factory intake away from the airbox. Lift up and slide the airbox tabs out of the slots in the lower half and set aside.
4. Remove the Factory air filter.

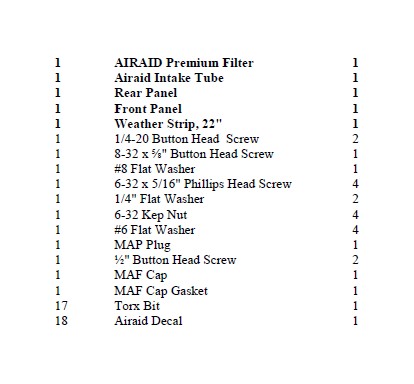
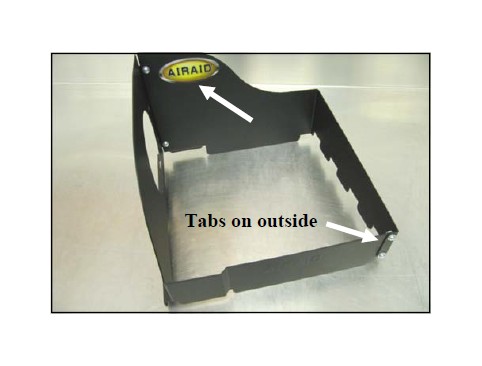
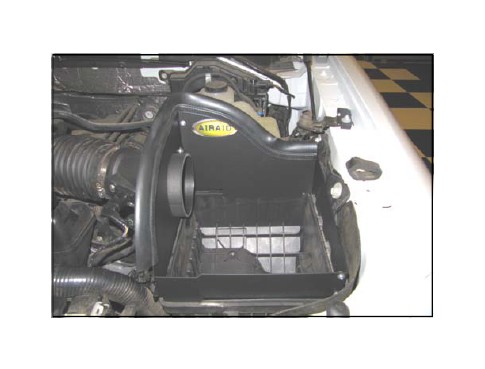
5. Assemble the Front and Rear Panels as shown with the tabs on the outside of the assembly. Use the four 6- 32 Phillips Head Screws, #6 Flat Washers, and #6 Kep Nuts to secure the assembly. Apply the Airaid Decal on the completed Panel assembly as shown.
6. Depending on the sensor configuration of your factory intake system, you will use one of the two sensor receptacles in the Airaid intake tube. There is a Mass Airflow sensor receptacle on the tube and a MAP sensor receptacle on the tube.

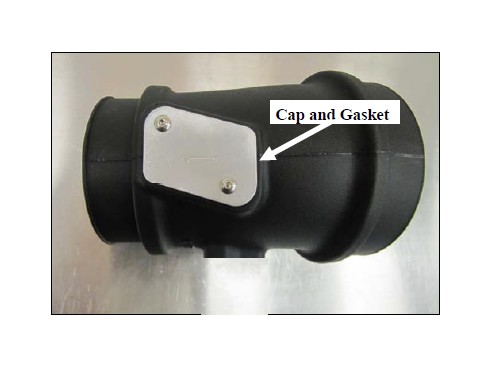
7. If your vehicles intake utilizes a MAP sensor: Install the Meter Cap and Gasket onto the Airaid Intake tube as shown, using the two 8-32 1/2" Button Head Screws.
8. Transfer the MAP Sensor into the Airaid intake tube as shown. Secure the sensor using the Long 8-32 Button Head Screw and the Washer . Discard the Plug. It will not be used.
9. If your vehicles intake utilizes a Mass Airflow , or MAF sensor: Transfer the sensor into the Airaid intake tube as shown and secure using the two 1/2" Button Head Screws. Complete the Tube assembly by inserting the MAP Plug. Discard the Meter Cap and Gasket. They will not be used.
10. Install the Air Meter Tube into the Panel Assembly and secure using the two 1/4-20 Button Head Screws ,and 1/4” Flat Washers .
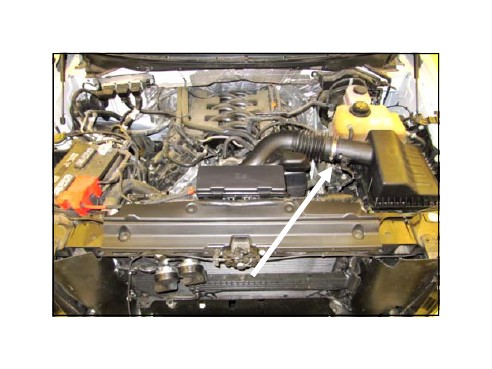
11. Install the Airaid intake assembly onto the factory airbox bottom. Insert the Panel tabs into the slots first, then lower the tube side down and fasten the three clips.
12. Slide the factory intake tube onto the Airaid Tube and tighten the clamp. Reconnect the Mass Air Flow or MAP sensor.
13. Install the Weather Strip to the Panel assembly as shown, with the contour rolling away from the filter area.
14. Install the Airaid Premium Filter on to the Air Meter Tube and tighten the clamp.
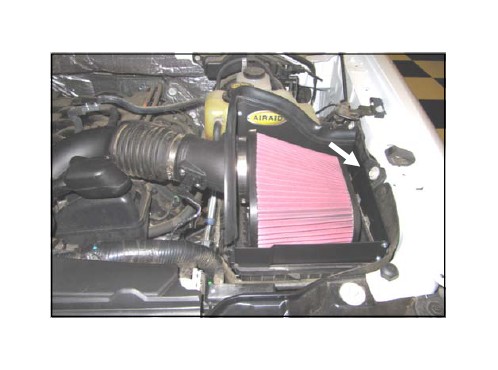
14. Double check your work! Make sure there is no foreign material in the intake path. Make sure all clamps, hoses, bolts, and screws are tight. Double check the hood clearance!
Reconnect the negative battery cable!
