 FREE 1 to 3-Day Delivery on Orders $119+ Details
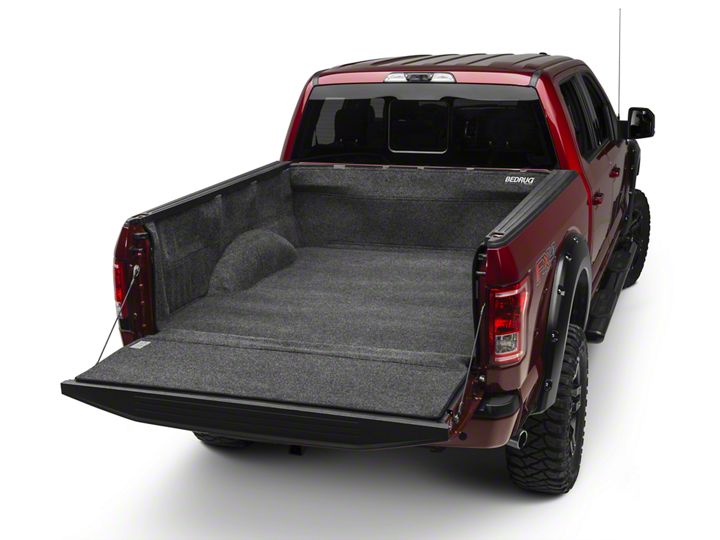
How to Install BedRug Bed Liner (15-17 All) on your Ford F-150
Installation Time
30 minutes
Tools Required
- Safety Glasses
- Gloves
- Utility Knife
- Awl
- Approved cleaner
Shop Parts in this Guide
WARNING: IMPROPER INSTALLATION WILL RESULT IN LINER FLYING OUT OF THE TRUCK. FOLLOW INSTRUCTIONS EXA
IMPORTANT: Never cut or put slits through any seams or sewn areas of the BedRug, unless specifically detailed in these instructions. This will cause the seam to come completely apart.
This document covers such items as:
• Vehicle Preparation (use of cleaners, adhesive promoters, etc.).
• Safety (rechecking torque procedure, etc.).
• BedRug installation.

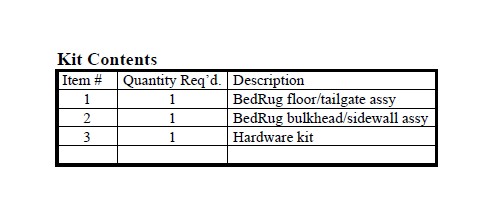
1. Check Kit Content.
(a) Verify that the kit contains all the parts listed in the Kit Contents.
2. Vehicle Preparation.
(a) Wash and Dry the Bed and Tailgate areas thoroughly.
(b) IMPORTANT: Review all instructions before beginning installation. Truck bed should be at least 68°F (20°C) for maximum adhesion. Clean all areas with an approved cleaner before applying tape. Do not remove backing from any tape until ready to adhere to the truck bed. When removing backing, do not touch adhesive. Extra adhesive strips have been provided in the kit for future use or if the installer deems more fasteners are necessary for better fit/appearance.
3. Pre-assemble BedRug.
(a) Align the sides of the BedRug as shown. NOTE: BEDRUG FLOOR IS FACE DOWN FOR THIS OPERATION. (Fig 3-1)
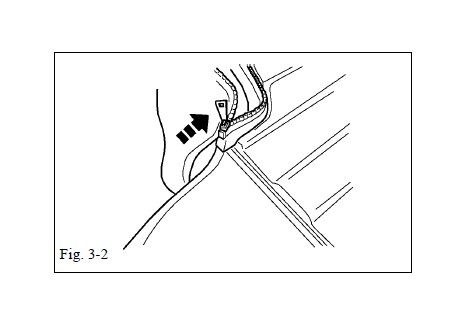
(b) Once properly aligned, zip sides into place. (Fig 3-2)
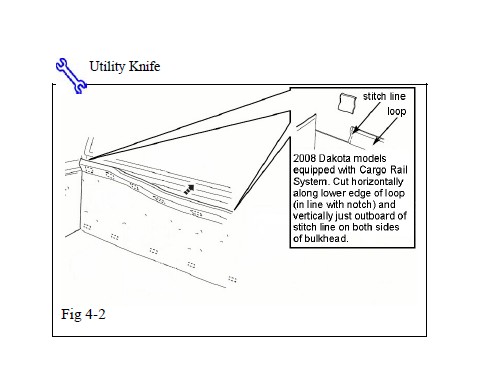
4. Pre-fitting BedRug.
(a) Before preceeding with installation, verify whether or not the bed of the vehicle has a bedrail cargo management system installed.
(b) If a bedrail is present, trim off sections in the corners of the bulkhead. (Fig. 4-2) If not, proceed with step 5.
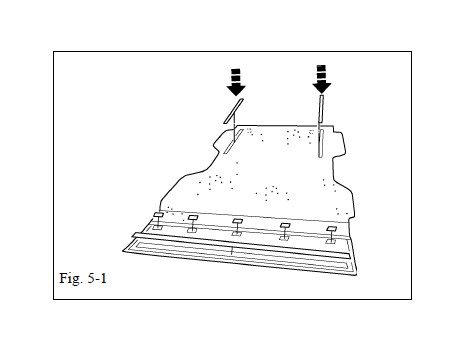
5. Installing fasteners to Bed Rug.
(a) Attach (2) 1”X 36”, 1”X 2” and 1”X 60” hook to underside of the BedRug and tailgate. Trim 1”X 60” strip where necessary. Do not remove adhesive protective film at this time. (Fig 5-1)
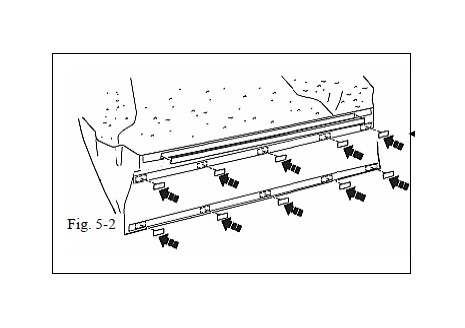
(b) Attach 1” X 60” and 1” X 2” hook to the BedRug bulkhead area facing the front as shown. Trim excess from 1” X 60” strip where necessary. Do not remove adhesive protective film at this time. (Fig. 5-2)
Middle 1” x 2” row of hook fasteners shown are not applicable on some models.
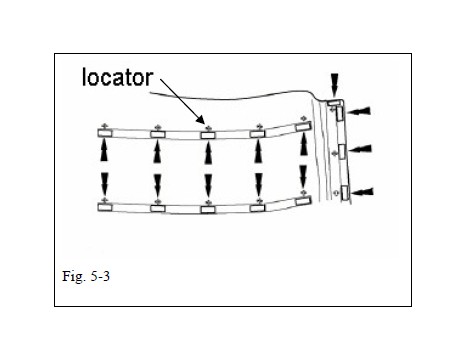
(b) Attach 1” X 2” fasteners to the back sides of the BedRug sidewalls as marked by locators. Do not remove adhesive protective film at this time. (Fig 5-3)
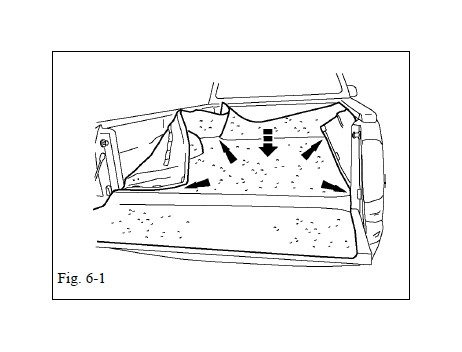
6. Installing BedRug floor and bulkhead
(a) Locate BedRug in the truck bed.
(b) Position the BedRug - front to rear and left to right by aligning all edges and tucking corners into place. (Fig 6-1)
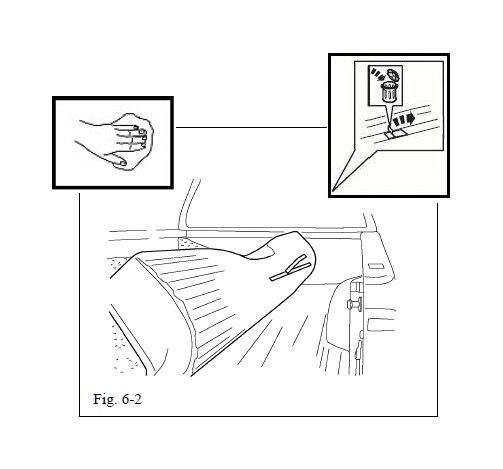
(c) Roll the Bed Rug floor to you, exposing the 1”x36” fastener located on the BedRug bottom.
(d) Clean attachment area thoroughly with alcohol and allow to dry.
(e) Remove the film. (Fig 6-2)
(f) Roll the BedRug floor and sidewalls back in place.
(g) Firmly press the Bed Rug top surface for 15 seconds to ensure adhesive attachment.
(h) Repeat for other side
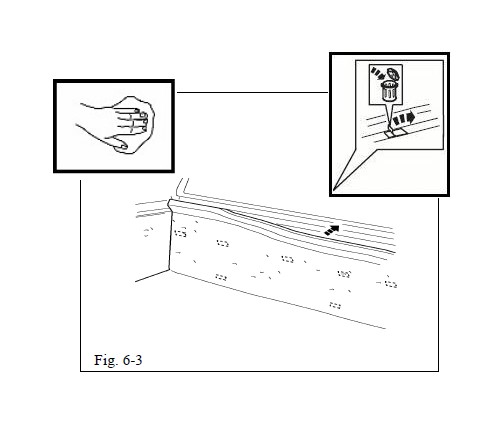
(i) Fit top edge of BedRug bulkhead to top edge of body panel to determine best location. (Fig 6-3)
Be sure fasteners are located on a flat solid surface of truck bed.
(j) Clean attachment areas thoroughly with alcohol and allow to dry.
(k) Remove the film working from bottom to top and center of part outboard.
(l) Roll the BedRug top edge back in place.
(m) Firmly press the Bed Rug top surface for 15 seconds to ensure adhesive attachment.
7. Fitting BedRug for beds with tie-down hooks or other optional features
Some truck beds are equipped with tie-down hooks, load extenders and other functional equipment located in the floor, bulkhead or sidewalls. For these the installer must either:
(a) Cut a small slit in the appropriate area allowing the equipment to protrude through the BedRug surface (This will not damage the BedRug) or,
(b) Remove the equipment until the BedRug installation is complete, then reinstall the equipment on top of the BedRug.
Do not cut through any seams or sewn lines.
TIP: It is easiest to locate fastener holes with an awl after BedRug is positioned for best fit.
Be sure to re-torque tie down fasteners to the OEM specifications.
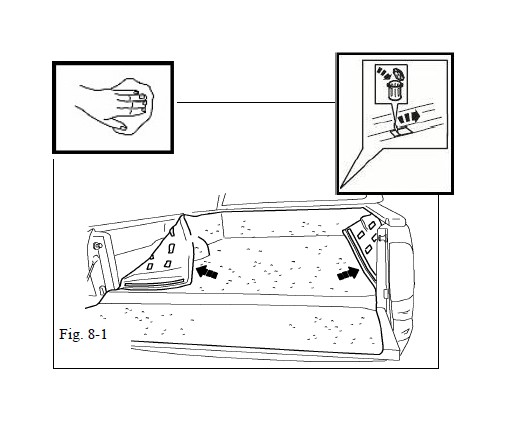
8. Installing BedRug sidewalls and tailgate.
(a) Rear vertical edge of BedRug should be positioned to match D-pillar surface. Start at front and working rearward begin removing film from fasteners bottom to top and from front to back. Firmly press the BedRug sidewall for 15 seconds to ensure adhesive attachment. Repeat for other side. (Fig 8-1)
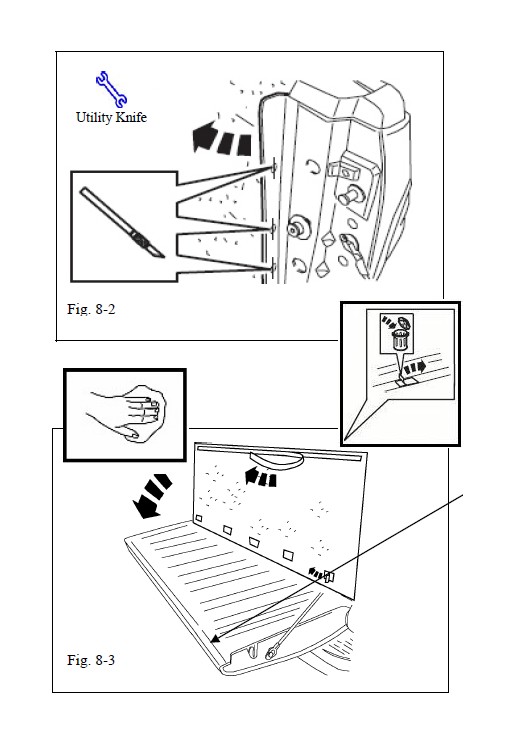
NOTE: If using the BedRug in conjunction with a bed extender, cut the slits (located on back of part) of the D-pillar area to allow access to attachment holes. (Fig 8-2)
(b) Rotate the BedRug up to access tailgate fasteners.
(c) Clean attachment areas thoroughly with alcohol and allow to dry.
(d) Apply adhesive promoter to plastic cap. (if applicable)
(e) Remove the film and align the edge of the BedRug tailgate section to the top edge of the tailgate. (Fig 8-3)
Do not adhere the hook fastener to the factory plastic tailgate cap unless a 4298 adhesive promoter pack is included in the hardware kit. Most models are designed to adhere to sheet metal just below plastic tailgate cap.
(f) Roll the BedRug tailgate back in place.
(g) Firmly press the BedRug tailgate for 15 seconds to ensure adhesive attachment.
(h) After installation is complete, tuck BedRug material between the tailgate and truck bed.
BEDRUG® CLEANING INFORMATION
The mildew resistant BedRug foam will not absorb liquids. The engineered polypropylene fiber top surface resists stains and deterioration from most acids, chemicals, gas and oils, etc. Therefore, by following the cleaning instructions below, your BedRug will remain serviceable for as long as you own your truck.
Cleaning your BedRug is easy:
1. A vacuum, broom, brush or compressed air can be used to remove dirt, grime, sand, mulch etc. Due to the fact that water will not harm the BedRug, pressure washing is also an effective way to clean a soiled BedRug.
2. Although most acids will not harm the BedRug, baking soda should be applied immediately to neutralize the acid to ensure the safety of the paint on the truck.
3. To clean tougher jobs such as gasoline, oil, chemicals, acid spills or leaks from your BedRug, use a detergent soap with degreaser and water, then rinse thoroughly. This detergent soap is used in most car wash locations with pressure washing equipment. The BedRug polypropylene closed-cell foam will not absorb water and the polypropylene fiber dries in minutes.
If you have additional questions, call BedRug, Inc. customer service at 800-462-8435.
Retain this cleaning information with your vehicle owner’s manual for future reference.
