FREE 1 to 3-Day Delivery on Orders $119+ Details
How to Install E & G Heavy Mesh Upper Replacement Grille - Chrome (15-17 All, Excluding Raptor) on your Ford F-150
Tools Required
- Automotive grade masking tape
- 10mm deep
- 10mm, 9mm, 8mm & 7mm standard sockets and ratchet
- large flat blade screwdriver
- #2 phillips screwdriver
- Flat or semi-gloss black paint
- mild solvent
- glass cleaner and soft
- clean cloths
Important: Fits F-150 models with air flow shutters only. If the factory grille on the vehicle you are working does not have air flow shutters, please call technical support at 410-381-4900 before proceeding. Will not work with vehicles equipped with 360-Degree camera system.
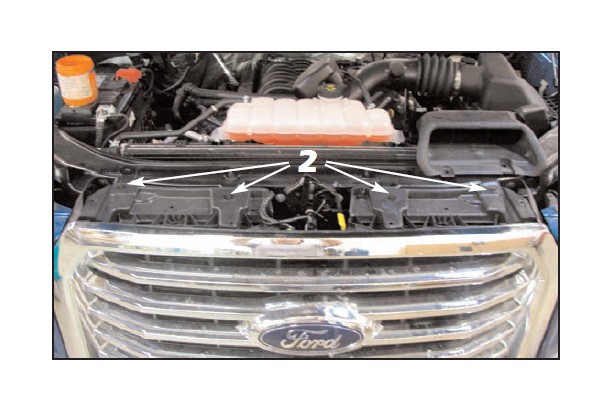
1. Open the hood and remove the plastic push fasteners securing the radiator support panel cover and remove the cover.

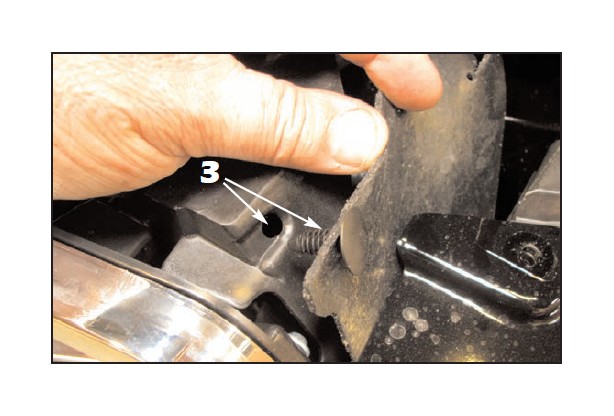
2. Use a 10mm socket and ratchet to remove the upper hex screws securing the top of the factory grille to the support.
3. Pull the top of the flexible rubber air deflector off the top sides of the factory grille.
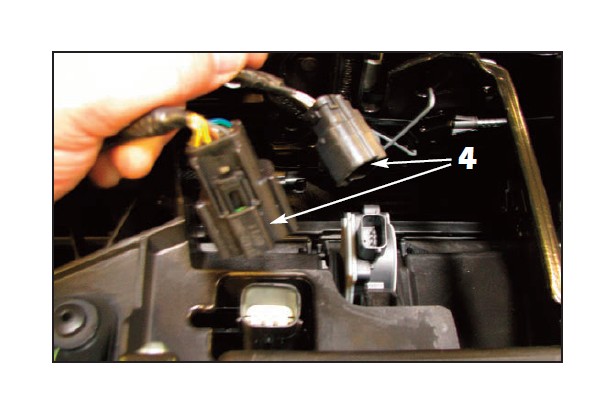
4. Disconnect the electrical connector at the air flow shutter motor. Disconnect the air temperature sensor electrical connector at the top of the factory grille.
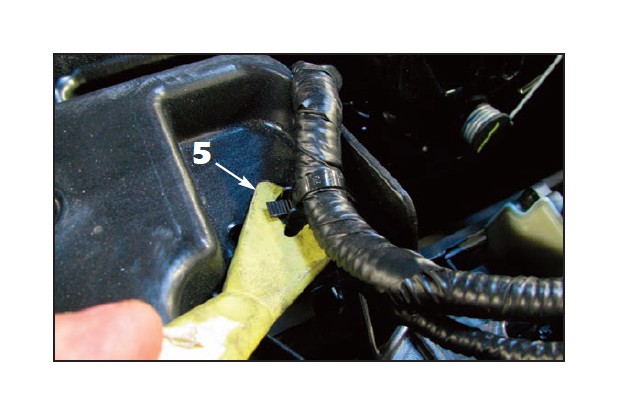
5. Carefully remove the plastic push fastener securing the electrical wire harness to the core support.
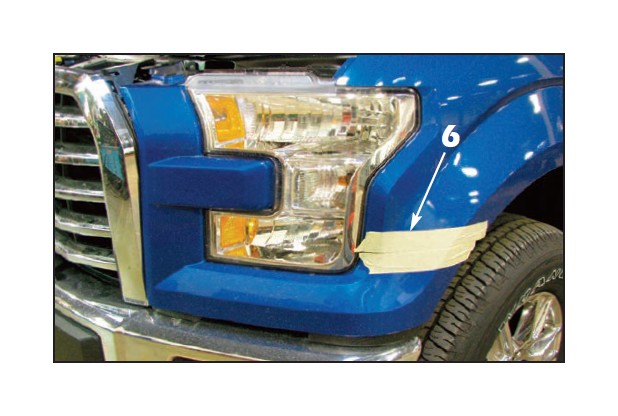
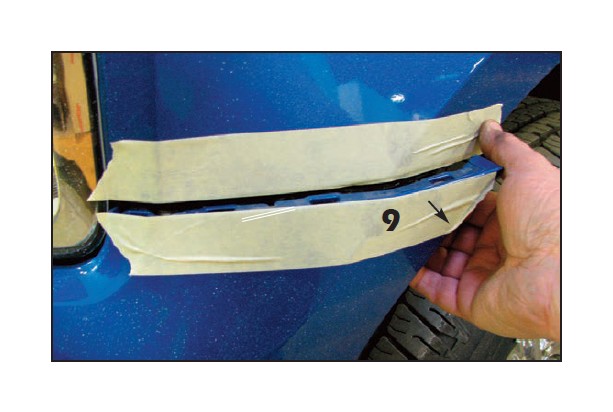
6. Apply masking tape to the fender and front moulding where they meet. Apply masking tape across the for ward edge of the hood at this time (not shown).
7. Remove the factory push fastener at the top of the front moulding.
8. Use a 7mm socket to remove the two hex screws from the wheel opening.
9. Pull out on the moulding to seperate it from the mounting channel of the front fender.
10. Pull forward on the top of the headlight surround to unclip and remove it from the vehicle to expose the factory grille lower mounting hex screws.

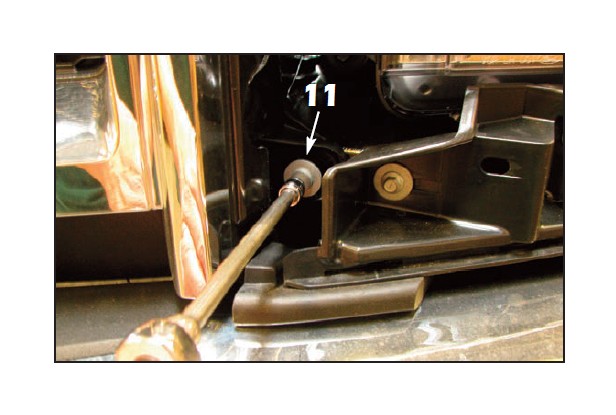
11. Use an 8mm socket to remove the hex screws retaining the lower sides of the grille to the vehicle.
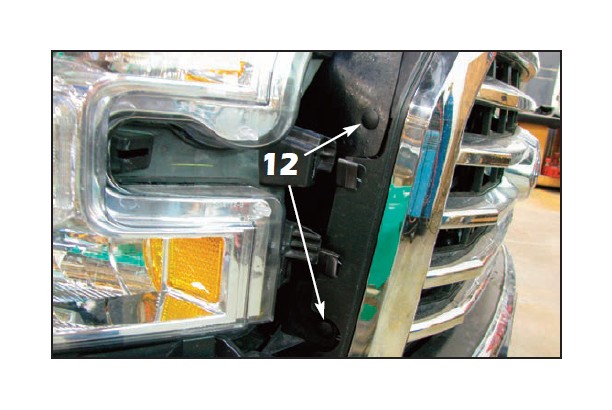
12. Remove the plastic push fasteners that attach the rubber sections to the sides of the grille. Once the rubber sections are free, lift the grille straight up to remove it from the vehicle.
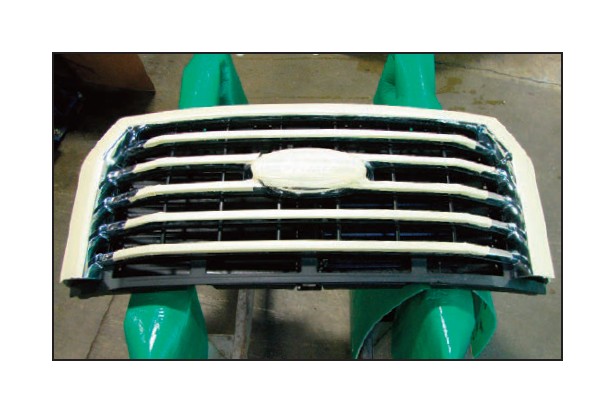
13. Place the factory grille onto a clean work area and apply protective masking tape to the factory emblem.
14. Turn the grille face down and remove the factory 10mm lock nuts retaining the air flow shutters from the sides of the grille. The lock nuts may come off, or the studs will un-thread from the clips in the grille base.
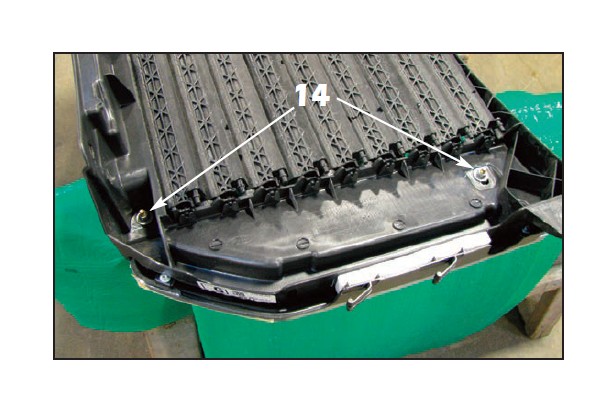
15. Use a 10mm deep socket to remove the speed nuts across the bottom of the air flow shutters.
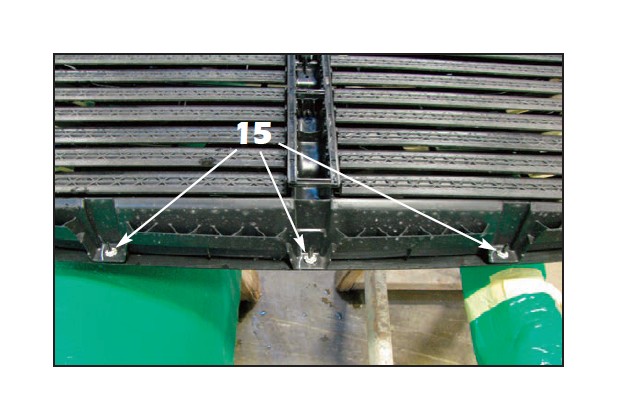
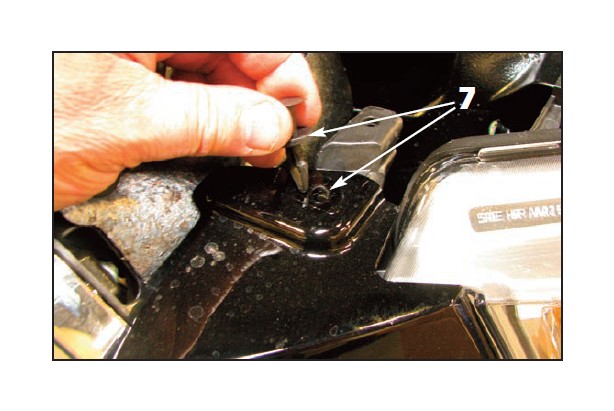
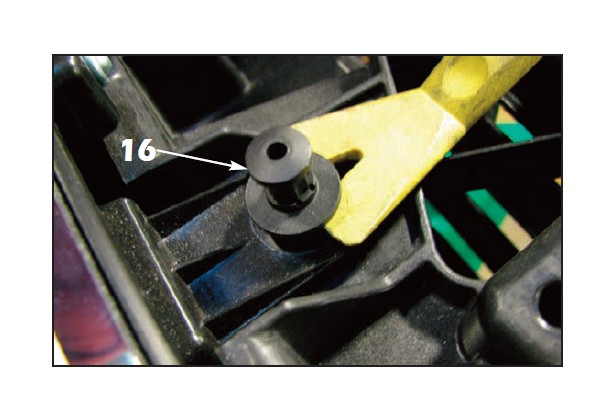
16. Remove the factory push fasteners across the top of the grille.
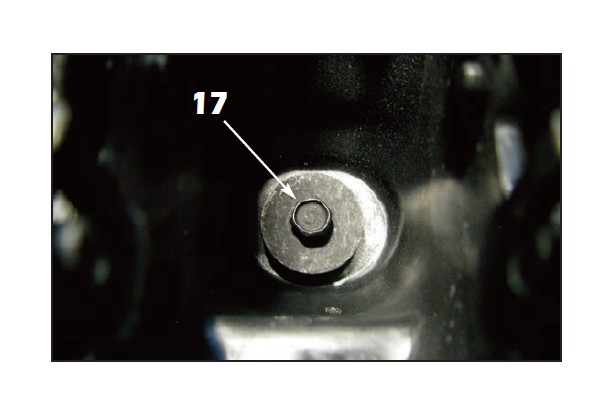
17. Remove the 8mm hex screw from the center of the factory grille air flow shutters.
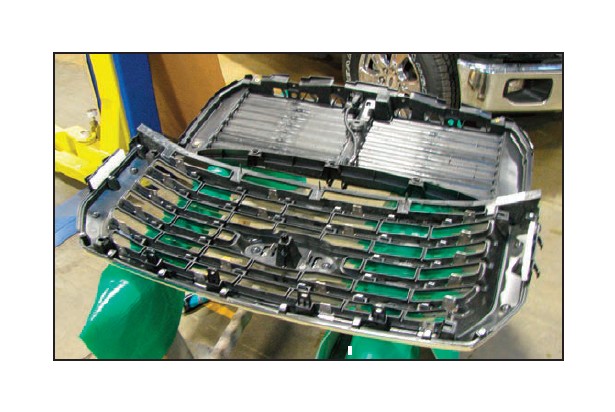
18. Carefully lift off the air flow shutters from the back of the factory grille and save them for reinstallation.
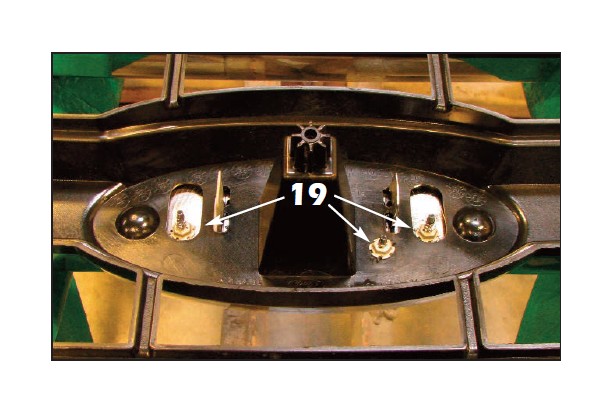
19. Remove the 10mm speed nuts securing the factory emblem. Turn the grille over, un-tape the emblem and remove it for installation onto the E&G mesh grille.
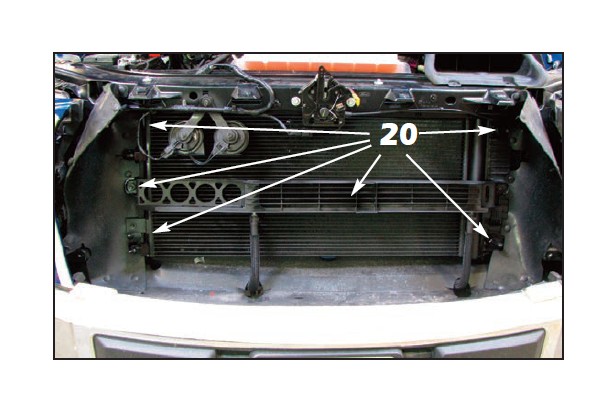
20. Use semi-gloss black paint to conceal anything that will be visible through the mesh grille.
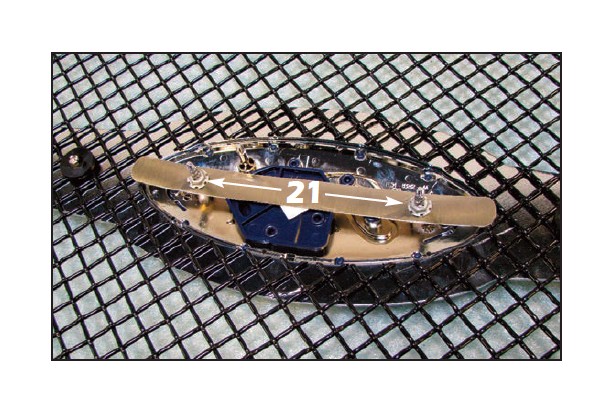
21. Align the emblem into the mesh grille emblem bezel and install the emblem retainer over the factory mounting studs. Reinstall the factory speed nuts to secure the emblem.
22. Realign the air flow shutters over the mesh grille and install the large push fasteners removed in Step 16 into the holes in the mesh grille top plate.
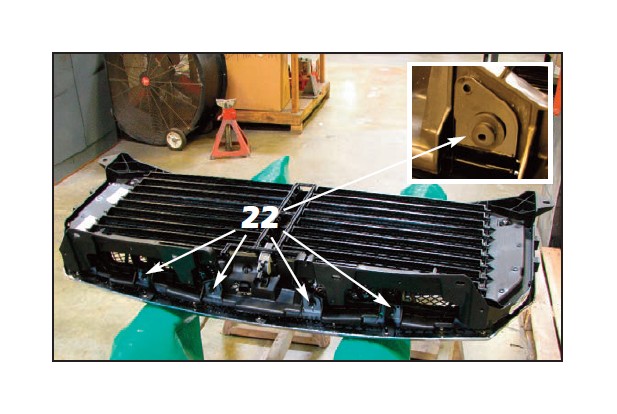
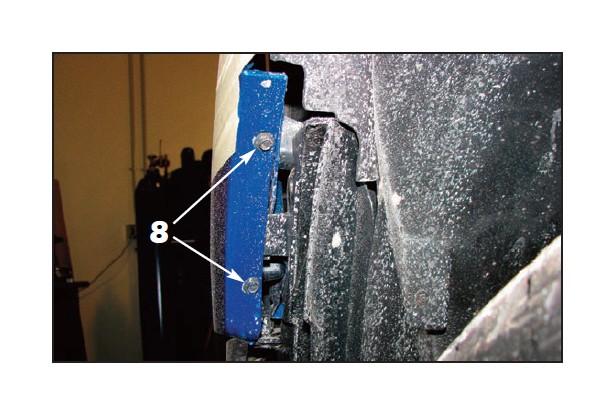
23. Install the supplied #10-24 x 3/4” phillips machine screws through the lower mounting bracket, through the openings in the bottom of the air flow shutter housing and install the supplied large black plastic washers and #10-24 ESNA nuts. Tighten until the bracket is tight against the air flow shutter housing.
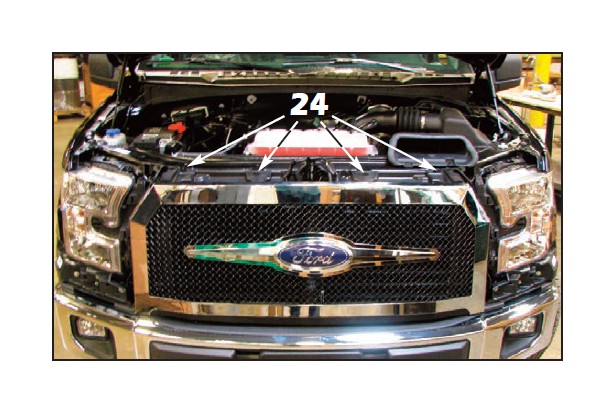
24. Align the mesh grille assembly back onto the vehicle and install the upper 10mm screws removed in Step 2. Leave the screws slightly loose for adjustment purposes at this time.
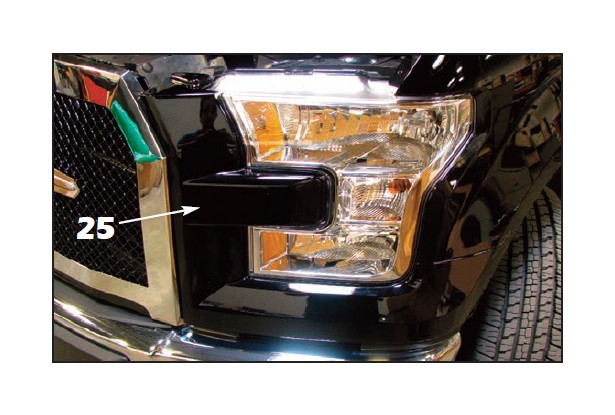
25. Realign the headlight surrounds and check the left-to-right alignment and adjust the grille so that the gap is even on both sides. Remove the headlight surrounds and reinstall the factory 8mm hex screws removed in Step 11. Once the bottom of the grille assembly is tight, reinstall the headlight surrounds.
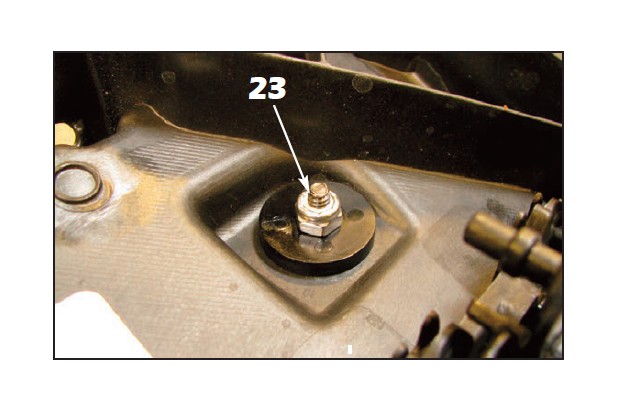
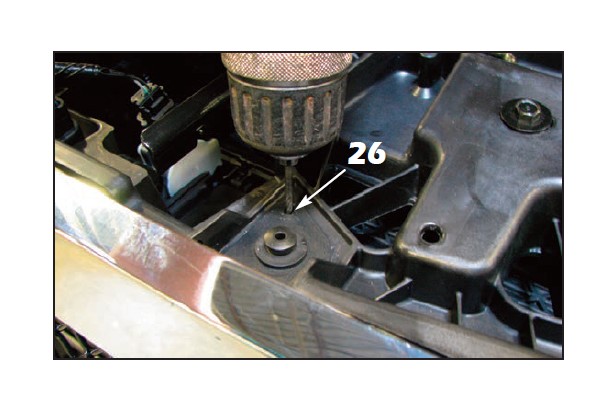
26. Carefully close the hood and check the upper grille surround depth. Adjust the grille so that it is an parallel with the headlight surrounds and slightly recessed behind the edge of the hood. Open the hood and tighten the upper factory 10mm screws. Use a 1/8” drill bit to drill through the four existing holes in the upper mounting bracket.
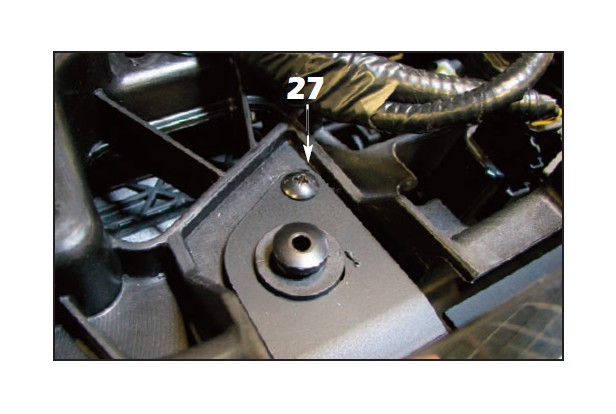
27. Install the supplied #8 x 1/2” black truss head screws through the holes drilled in the previous step to secure the top of the mesh grille.
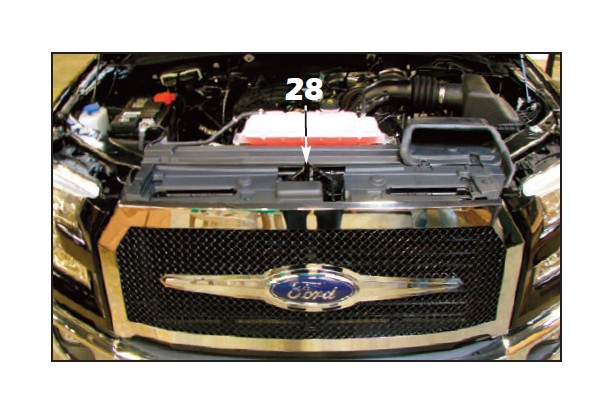
28. Reinstall the radiator support panel cover and remove all protective masking tape to finish the installation.