 FREE 1 to 3-Day Delivery on Orders $119+ Details
How to Install Injen Power-Flow Cold Air Intake - Polished on your F-150
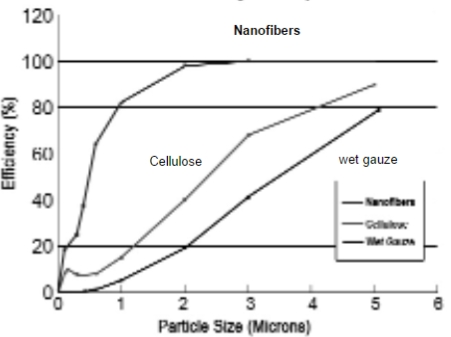
Nanofiber technology:
Is an oil free filtration media that has been used exclusively in heavy duty applications, including the US Army’s Abrams M1 tanks. Injen/AMSOIL is now
making it available to diesel applications and vary soon will be available for the gas
auto/light truck market
Congratulations! You have just purchased the best engineered and most
advanced air intake system, equipped with Ea nanofiber air filter.
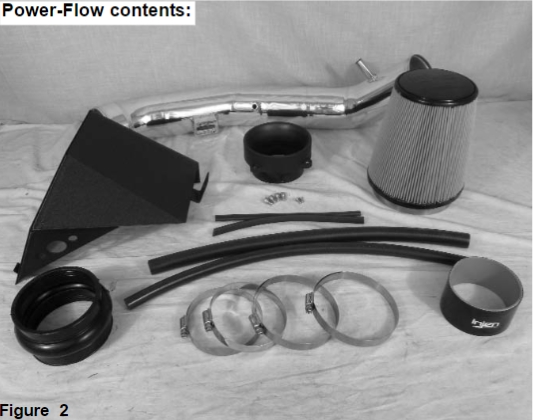
Please check the contents of this box immediately.
Report any defective or missing parts to the authorized Injen or
AMSOIL dealer you purchased this product from.
Before installing any parts of this system, please read the instructions
thoroughly. If you have any questions regarding installation, please
contact your dealer, Injen Technology or AMSOIL.
Installation DOES require some mechanical skills. A qualified
mechanic is always recommended.
*Do not attempt to install the intake system while the engine is hot.
The installation may require removal of radiator fluid line that may be
hot.
Injen Technology offers a limited lifetime warranty to the original
purchaser against defects in materials and workmanship. Warranty
claims must be handled through the dealer from which the item was
purchased.
Injen Technology 244 Pioneer Place Pomona, CA 91768 USA
Note: This intake system was tested with an Injen/AMSOIL air filter
made from synthetic Nanofiber media which has a 100,000 mile
service life or four year warranty, whichever comes first.

Note: Disconnect the negative battery terminal before beginning the installation process.

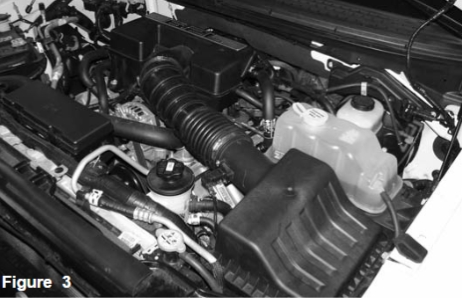
Complete stock intake shown. Disconnect battery before install.
Loosen clamp on air box resonator using 8mm nut driver.
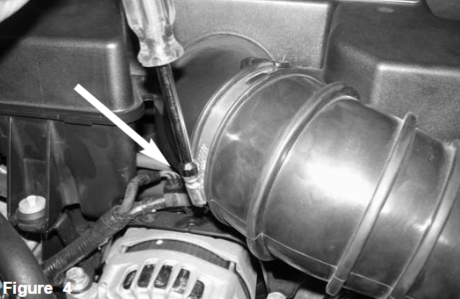
Disconnect MAF sensor harness. Pull back the intake tube from resonator air
box.
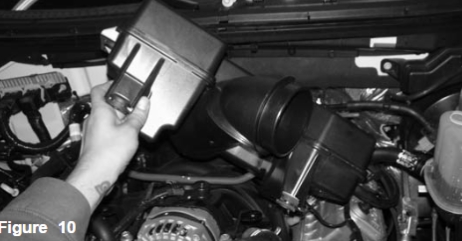
Un-clip the 3 clips holding in upper half of air box and slide back. Remove the
upper intake assembly from vehicle.
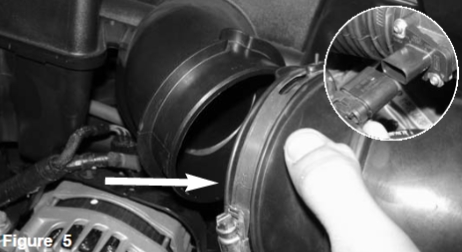
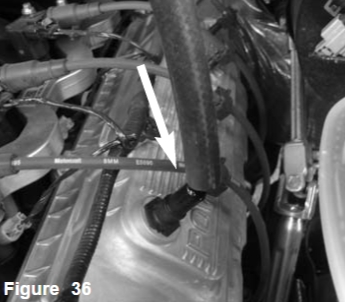
With 8mm nut driver, loosen the clamp on the throttle body.
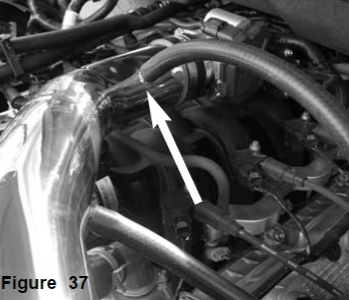
With 10mm socket or ratchet, loosen the 2 bolts holding the air box resonator.
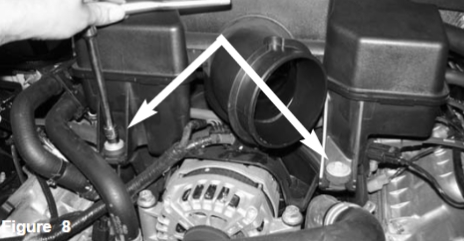
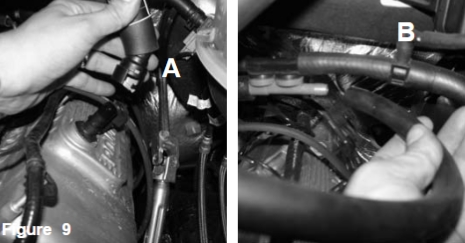
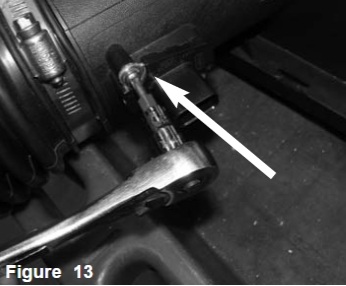
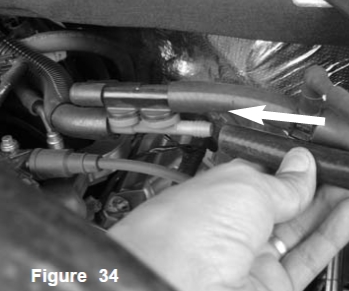
A) Loosen and remove the crank case line from the engine.
B) Pull back the vacuum line from the plastic valve.
Remove the resonator air box from vehicle.
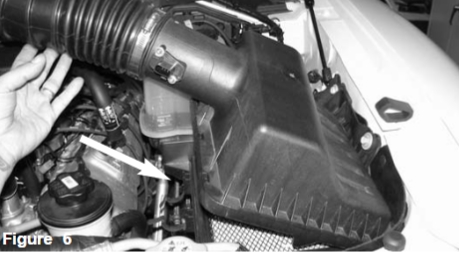
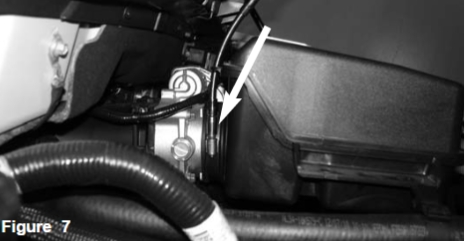
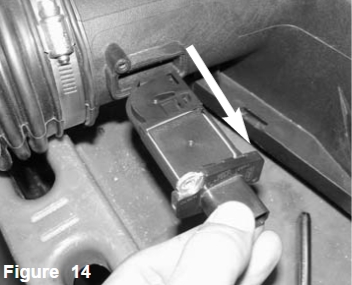
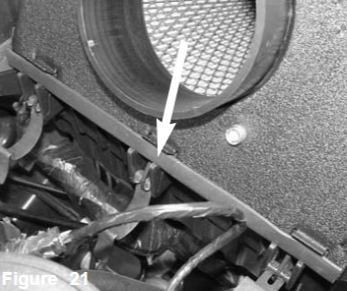
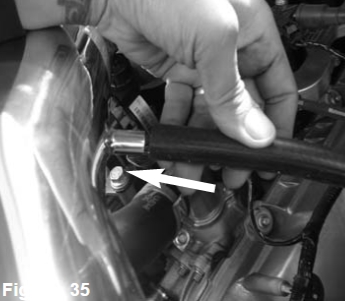
With 13mm socket and extension, loosen the bolt on
side of air box housing.
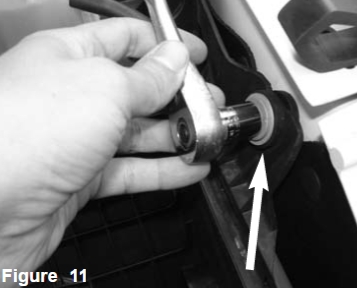
Remove bolt and save for later install.
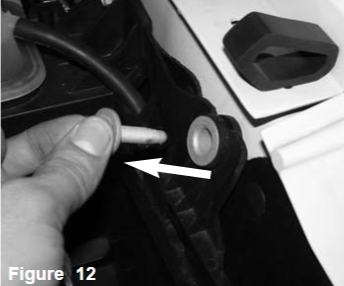
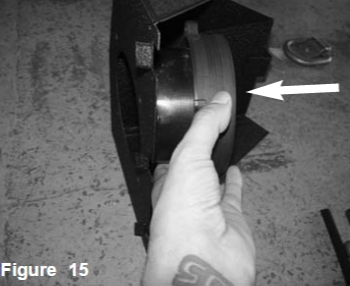
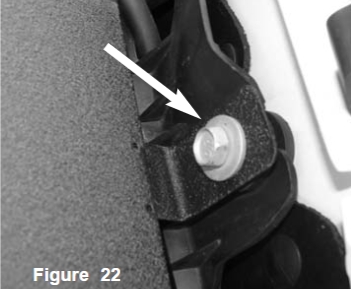
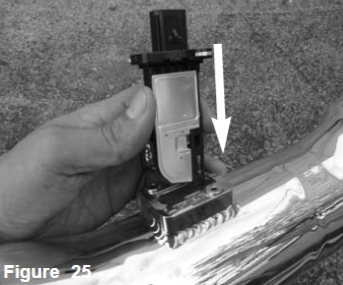
With t20 torx bit, loosen and remove the 2 screws
holding in the MAF sensor.
Carefully pull the MAF sensor out and set aside.
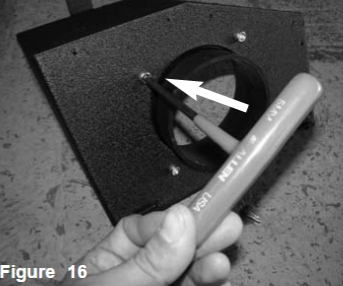
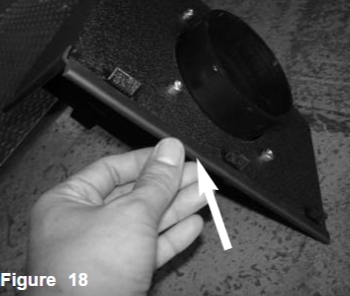
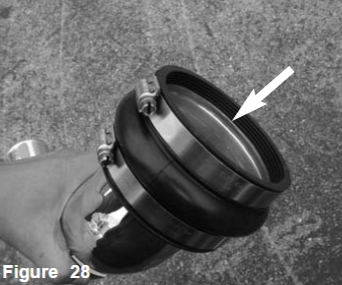
Install the 4” velocity adaptor tot he inside of the heat
shield.
Secure the adaptor using the provided M6 button
head screws and tighten using allen key.
Attach the vinyl trim to the side of the heat shield.
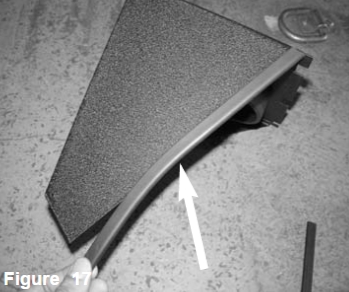
Attach the other vinyl trim to the side with tabs. Note:
make sure you attach the trim to heat shield to
prevent rubbing and vibration.
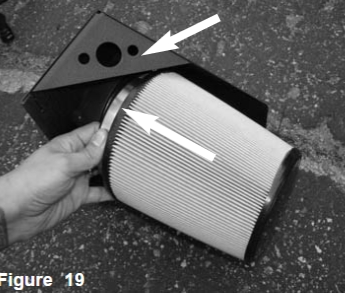
Install the filter to the adaptor and tighten using 8mm
nut driver.
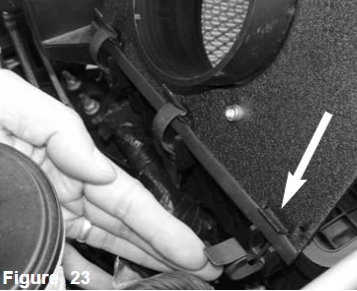
Instal the heat shield assembly into the vehicle and
position tab side first.
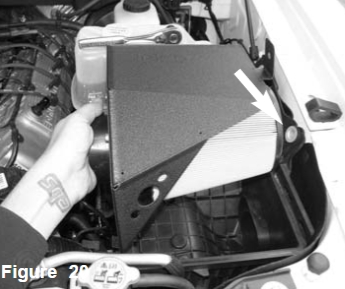
Make sure the heat shield assembly with trim seats in
the groove. Position heat shield forward for the tab to
align with hole from step 11. Align the tabs to clips.
Secure the tab using the bolt from step12.
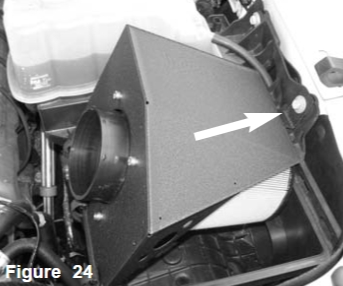
Secure the heat shield and clip to tabs.
Tighten the bolt using 13mm socket and ratchet.
Make sure the heat shield assembly is tight and
secure.
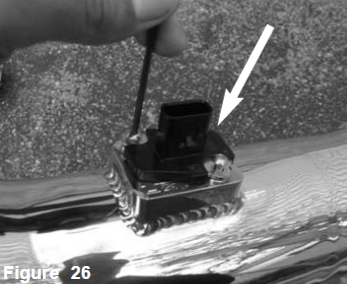
Install the MAF sensor into the new injen intake tube.
Secure the MAF sensor using provided M4 button
head screws and tighten using 2.5mm allen key.
With clamps provided, attach to the straight hose and
install to the throttle body.

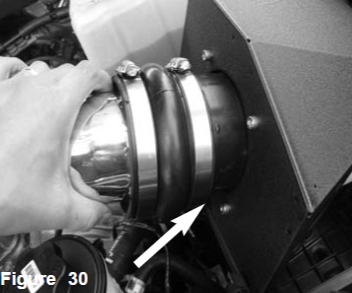
Install the hump hose with clamps to the tube, Do not
tighten.
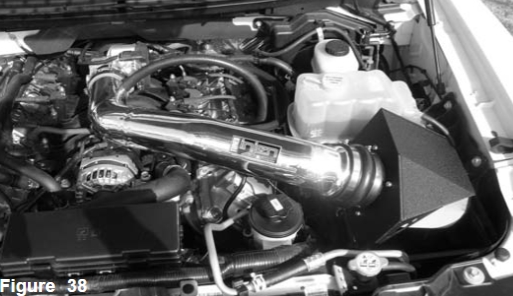
Install the intake tube into the vehicle and position to
the throttle body and adaptor.
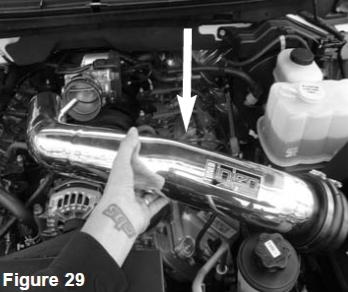
Slide the hump hose on to the adaptor and position.
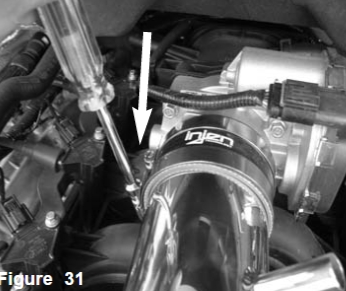
Now tighten the clamps on throttle body using 8mm
nut driver.
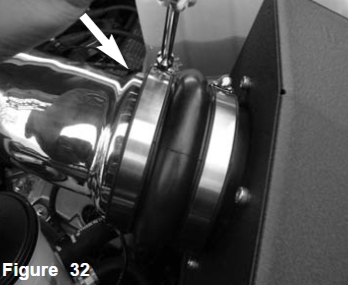
Tighten the clamps on the hump hose using 8mm nut driver.
Re-connect the MAF sensor harness.
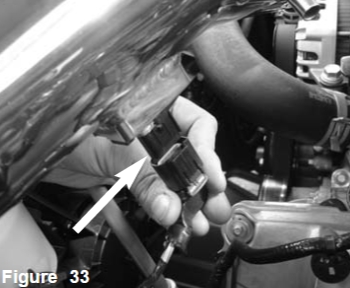
Install the 10mm vacuum hose provided to the
vacuum valve.
Attach to the fitting closes to the MAF sensor.
Attach the 15mm hose to the engine fitting.
Now install to the fitting on the intake tube closes to
the thorttle body and secure.
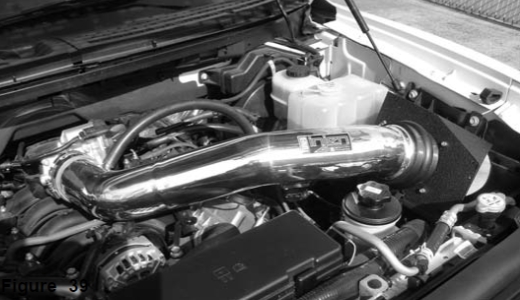
Check the entire system for the best possible fit. Once you have checked the
entire system for leaks, rubbing or rattling, continue to tighten all nuts, bolts and
clamps. Reconnect the negative battery terminal prior to starting the engine.
Congratulations! You have just completed the installation of the best engineered
intake system, featuring Web Nano-fiber dry filter. Periodically, check the system
for fitment, this will enhance the life of your Power-Flow system.
1. Upon completion of the installation, reconnect the negative battery terminal before you start the engine.
2. Align the entire intake system for the best possible fit. Once the intake has been properly fitted continue to tighten all nuts, bolts and clamps.
3. Periodically, recheck the alignment of the intake system and make sure there is proper clearance around and along the length of the intake. Failure to follow proper maintenance procedures may cause damage to the intake and will void the warranty.
4. Start the engine and listen carefully for any odd noises, rattles and/or air leaks prior to taking it for a test drive. If any problems arise go back and check the vacuum lines, hoses and clamps that maybe causing leaks or rattles and correct the problem.
5. Check the filter for excessive dirt build up. Clean or replace the filter with an original Injen/AMSOIL filter now sold on-line at “injenonline.com”). Congratulations! You have just completed the installation of the best intake system sold on the market. Enjoy the added power and performance of your new intake
system.
