 FREE 1 to 3-Day Delivery on Orders $119+ Details
How to Install Max Trac 3 in. Leveling Kit on your F-150
Shop Parts in this Guide
PARTS LIST
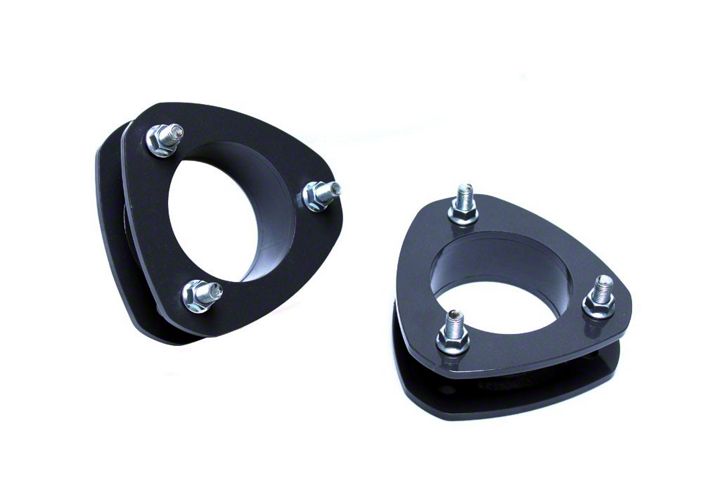
| STRUT SPACER | 2 |
| 10mm X 1.25 FLANGE NUT | 6 |
Please double check the parts list before beginning the installation, to ensure all parts are present. If parts are missing, please contact Maxtrac Suspension immediately, 714‐630‐0363. Read the instructions thoroughly before installation.
PRIOR TO INSTALLATION:
1. Factory service manual is recommended to have on hand.
2. Make sure that all parts in the parts list are present, and do not start the installation without a full set of parts.
3. Secure and properly block vehicle prior to beginning installation
4. Always wear safety glasses when using power tools or working under the vehicle
5. Modifications to any part will void the warranty associated with that product.
After removing parts from vehicle, save hardware for reinstallation
IT IS RECOMMENDED THAT YOU HAVE YOUR VEHICLE’S ALIGNMENT CHECKED WHENEVER INSTALLING NEW TIRES. IT IS ALSO RECOMMENDE DTHAT YOU ADJUST YOUR HEADLIGHTS WHENEVER THE VEHICLE’S RIDE HEIGHT IS ALTERED.
INSTALLATION STEPS
1. First, remove the driver side front wheel. Unbolt the two 10mm brake line bracket retaining bolts. Unhook the ABS line from the brake line support, brake line bracket, and coil tower.
2. Remove the 21mm tie rod nut. Separate the tie rod from the steering knuckle. Unbolt the upper sway bar end link.
3. Loosen, but do not remove the upper ball joint nut. Break the upper ball joint loose form the steering knuckle. Do not remove the upper ball joint nut.
4. Remove the lower strut mounting nut and bolt.
5. Remove the two lower control arm mounting bolts. Use a jack to support the lower control arm and take pressure off the bolts during removal. Remove the three upper strut mounting nuts Push the lower control arm down a little and remove the strut. Place the bottom of the strut in a vice. Install the MaxTrac strut extension using the factory hardware.
6. Rotate the strut 180 degrees and reinstall onto the truck. Be sure to leave the upper strut mounting nuts loose so that the strut can still be maneuvered when installing the lower mount.
7. Install the lower strut mounting bolt, do not tighten. Use a jack to raise the lower control arm back into the frame pocket.
8. Make sure the upper sway bar end link gets reinstalled at this time. Torque to factory specs.
9. Install the two lower control arm bolts but do not tighten.
10. Tighten the upper ball joint. Torque to factory specs. Tighten the three upper strut mounting nuts, reinstall the tie rod end, and tighten the lower strut mounting nut. Install the two 10mm brakeline support bolts. Install ABS line back into the brake line support. Repeat steps 1‐9 on opposite side.
11. With the vehicle on the ground tighten the lower control arm bolts. Double check all hardware and torque to factory specs.
12. After 50 miles of driving, re‐torque all hardware.
13. Perform Alignment.
