 FREE 1 to 3-Day Delivery on Orders $119+ Details
How to Install MBRP Performance Y-Pipe on your F-150
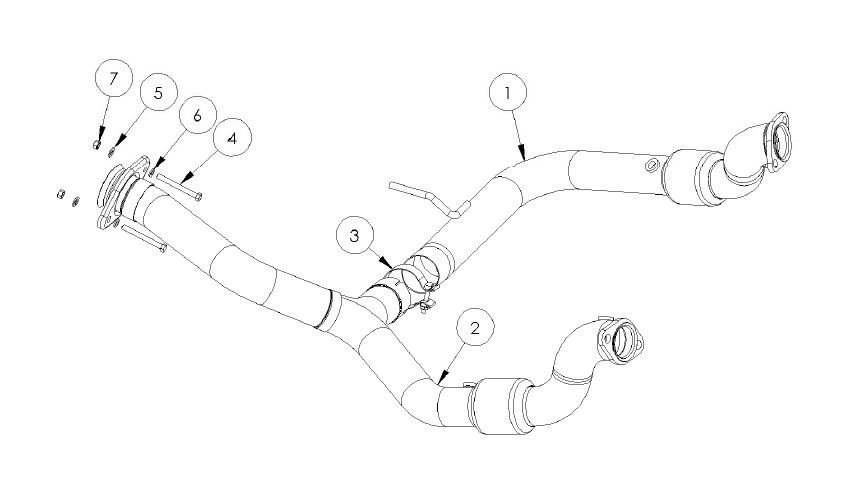
1. PIPE ASSEMBLY DRIVER SIDE
2. PIPE ASSEMBLY PASSENGER SIDE
3. 3" CLAMP
4. 3/8" X 3 1 /2" HEX BOLT (2PCS)
5. 3/8" FLAT WASHER (2PCS)
6. 3/8" LOCK WASHER (2PCS)
7. 3/8" HEX NUT WPCS)
NOTE: SADDLE CLAMP USED IN ALUMINIZED SYSTEMS
This system may require an aftermarket electronic programmer to work with the vehicle.
PLEASE READ BEFORE STARTING INSTALLATION
While MBRP Inc. has made every effort to ensure that all components of this system are of superior quality and properly packaged, it is the installer's responsibility to ensure the following before removal of the factory exhaust:
• that ALL components shown above are present.
• that ALL mating components fit together.
• that there are no damaged components.
• that the system you have purchased is appropriate for your vehicle year, model and configuration.
• that the system will not interfere with any modifications previously installed or planned.
• that you have read and understand these instructions.
If you have any questions or are uncertain about any aspect of the installation of this system to your vehicle please contact your dealer before commencing installation.
Removal of Stock System:
1. Apply penetrating lubricant liberally to all exhaust fasteners, hangers and rubber insulators.
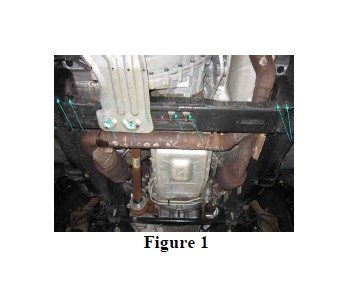
2. The transmission cross member has to be removed to permit access to the existing Y- Pipe and to install the new Y-Pipe. The transmission will need to be supported while the cross member is removed and the new one installed. If equipped, the skid shield located on the driver side will need to be removed. Arrows show most of the hardware that will need to be removed. There are fasteners attaching the heat shield to the transmission cross member that will also need to be removed. Refer to Figure 1.
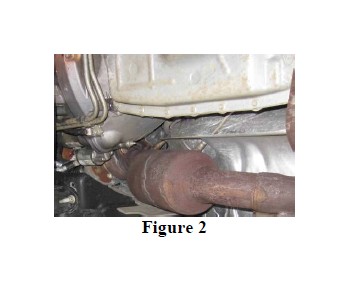
3. Each side of the Y-Pipe has two O2 sensors. Carefully disconnect the wires leading to the O2 sensors at their wire plugs. The O2 sensors then need to be carefully removed and saved for reinstallation. Note: it may be easier to remove the O2 sensors once the Y-Pipe is removed from the vehicle. Refer to Figure 2.
4. Carefully remove the two flange nuts found at either side of the turbo and save for reinstallation. Refer to Figure 3.

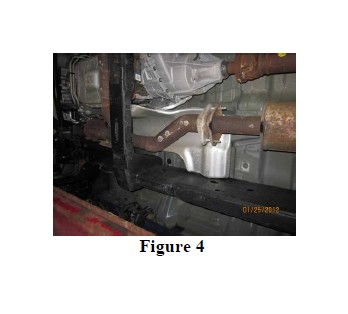
5. Remove the hardware attaching the Y-Pipe to the rest of the exhaust system. The exhaust system will need to be temporarily removed. Refer to Figure 4.
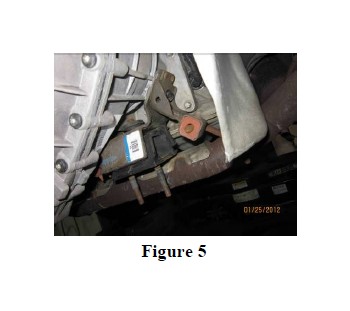
6. Temporarily remove the transmission mount from the transmission and the stock Y-Pipe assembly. The Y-Pipe will need to be supported while loosening the hardware. Once this is complete the Y-Pipe can be removed from the vehicle. Refer to Figure 5.
Installation of MBRP Inc. Competition Pipes:
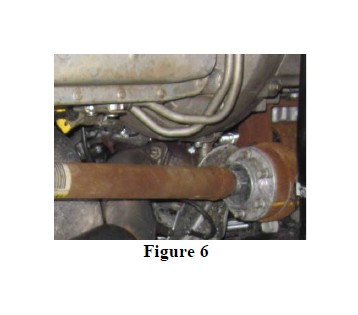
1. Attach the O2 sensors to the sensor bungs located on Pipe Assembly Driver Side & Pipe Assembly Passenger Side. Loosely secure the Pipe Assembly Driver Side to the turbo outlet using the existing flange nuts. Refer to Figure 6.
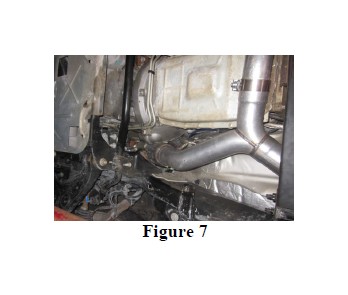
2. Slide the 3” Clamp onto the Pipe Assembly Driver Side. Join the Pipe Assembly Passenger Side loosely to the Pipe Assembly Driver Side and to the turbo outlet. Use the existing flange nuts to loosely secure. Refer to Figure 7.
3. Reinstall the transmission mount to the transmission; install the hanger from the Pipe Assembly Driver Side into the left side of the transmission mount. The right side is not required with the new Y-Pipe.
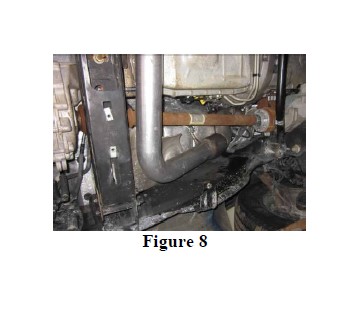
4. Reattach the O2 sensors to the stock plugs. Make sure there is clearance around the wires and that they will not interfere with any moving parts. Refer to Figure 8.
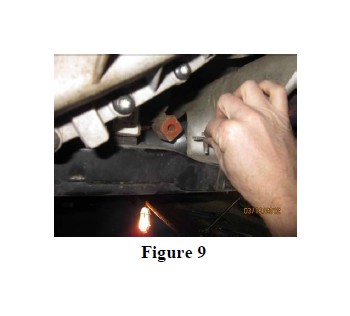
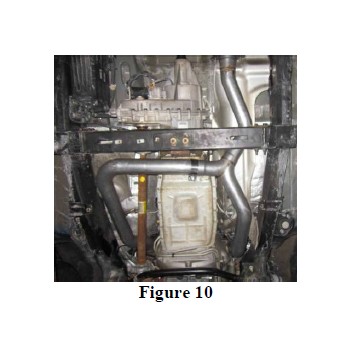
5. Re-install the transmission cross member and skid shield reusing the original hardware. Refer to Figures 9-10.
6. The exhaust can then be reattached using the existing hardware from the stock exhaust. Check along the full length of the exhaust system to ensure there is adequate clearance for fuel lines, brake lines, and any wiring, etc. Carefully tighten both flanges to the turbo to ensuring they are tightened evenly.
7. Continue working rear-ward tightening remaining clamps and flanges to secure the system. If any interference is detected, relocate or adjust to provide adequate clearance.
Congratulations! You are ready to begin experiencing the improved power, sound and driving experience of your MBRP Inc. performance exhaust system. We know you will enjoy your purchase.
