 FREE 1 to 3-Day Delivery on Orders $119+ Details
How to Install McGard Tailgate Lock on your F-150
Installation Instructions
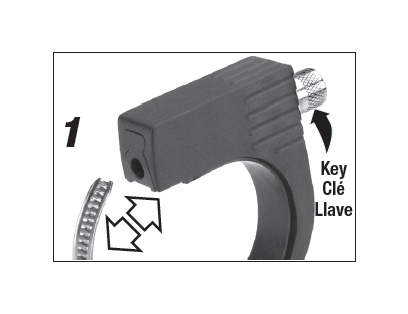
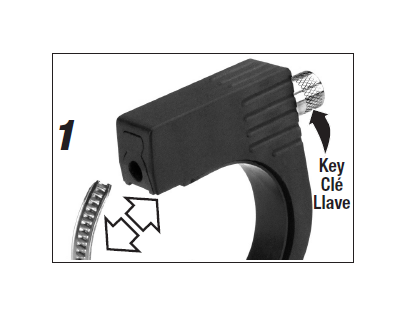
1 Place key into lock housing and
engage lock bolt pattern. Turn the key
counter clockwise until end of metal
strap is separated from lock housing.
Remove and discard the two molded
sleeves from the strap. These sleeves are not required for this application.
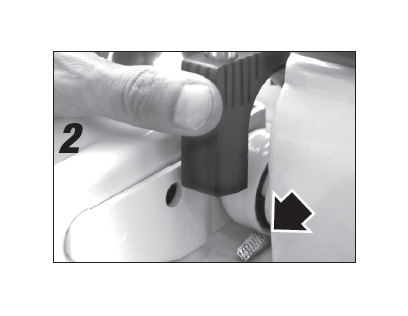
2 With key still inserted into lock
housing, loop free end of metal strap/
liner behind and under the right side
hinge cup of tailgate.
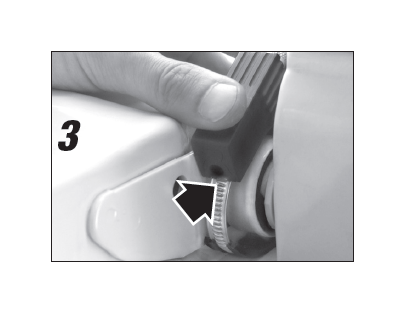
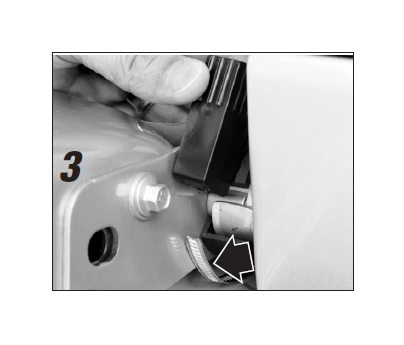
3 Tip lock up so that the key hole is facing the bed of the truck. Re-insert free end of metal strap into lock and hold. Turn key several times clockwise, by hand, until the metal strap re-engages the lock screw.
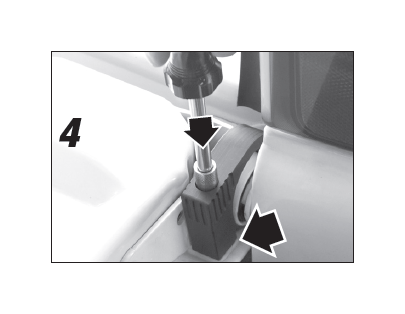
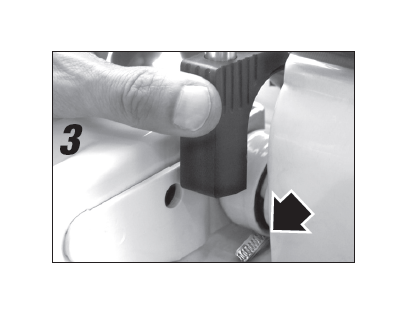
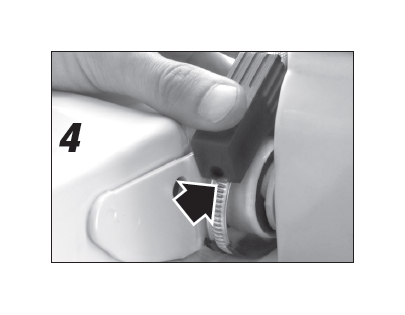
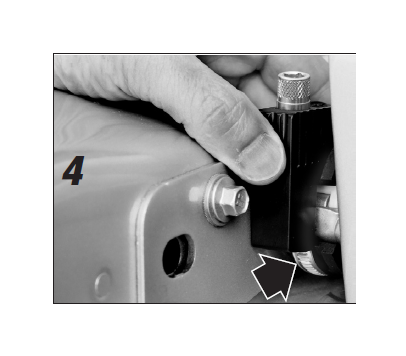
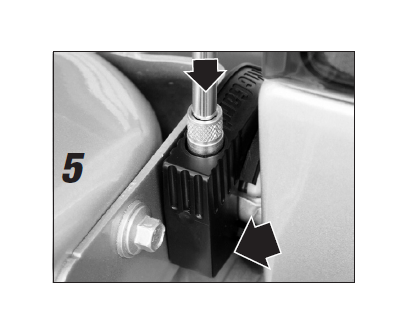
4 Tip the lock down until the key and key hole are upright. Position the lock so that it is against the tailgate, as far to the left as possible, with the bottom of the lock housing resting on the lip of the tailgate. While holding the lock in place, use a ¼” square drive (screw driver handle or ratchet) to turn the key clockwise until the lock is tightened snugly (approximately 40 in-lbs). Do not overtighten lock.
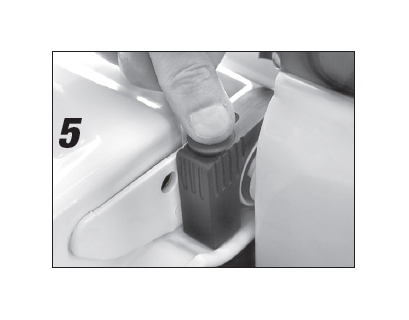
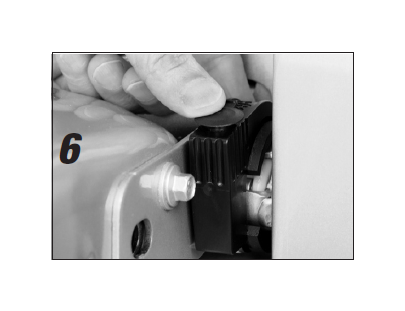
5 Remove the key, insert plastic dust plug and close the tailgate, checking the fit while closing. Your tailgate is now protected from theft and the McGard lock never needs to be removed to open and close your tailgate.
Store the key in a safe place. Complete the enclosed lock registration card and return to McGard in the envelope provided or register online at cs.mcgard.com.
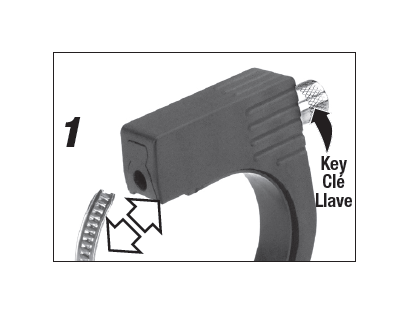
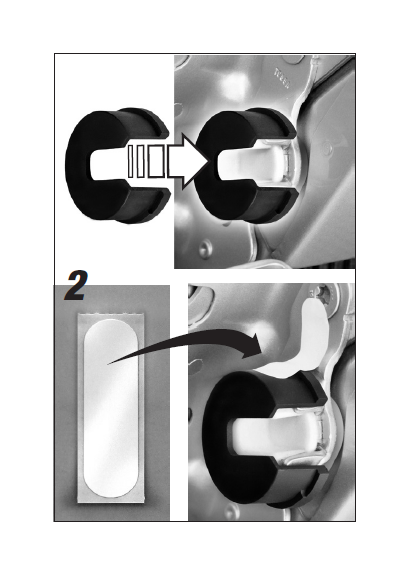
1 Place key into lock housing and engage lock bolt pattern. Turn the key counter clockwise until end of metal strap is separated from lock housing. Remove and separate the two molded sleeves from the strap. Set aside for use in step 2.
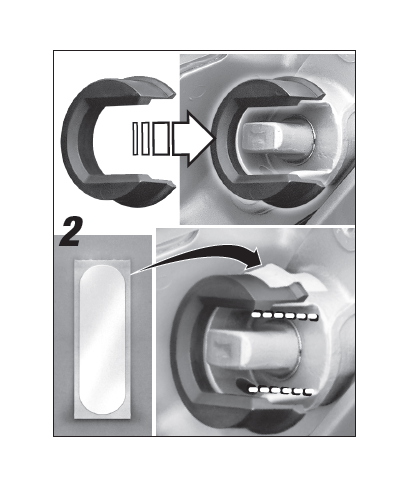
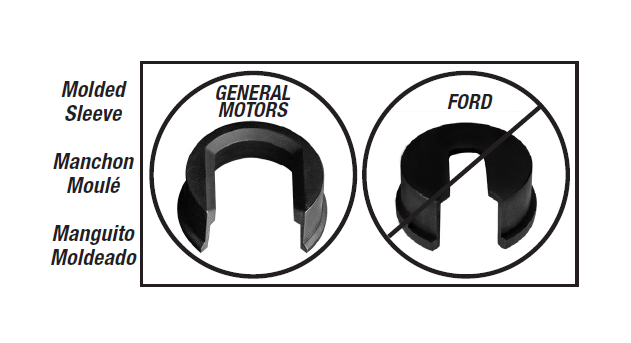
2 Carefully remove right hand side of tailgate from hinge cup. See vehicles owner manual for instructions. With the tailgate in a secure position, place the molded sleeve (use molded sleeve for General Motors as shown below) onto the right hinge cup as shown in photo 2, making sure that the two openings align. Use the adhesive strip (included) to temporarily hold sleeve in place on the hinge cup during tailgate re-installation. Re-install the tailgate to the open position. Remove adhesive strip and discard.
3 With key still inserted into lock housing, loop free end of metal strap/liner behind and under the right side hinge cup/sleeve.
4 Tip lock up so that the key hole is facing the bed of the truck. Re-insert free end of metal strap into lock and hold. Turn key several times clockwise, by hand, until the metal strap re-engages the lock screw.

5 Tip the lock down until the key and key hole are upright. Position the lock on molded sleeve to the left of the raised lip portion. While holding the lock in place, use a ¼” square drive (screw driver handle or ratchet) to turn the key clockwise until the lock is tightened snugly (approximately 40 in-lbs). Do not overtighten lock.
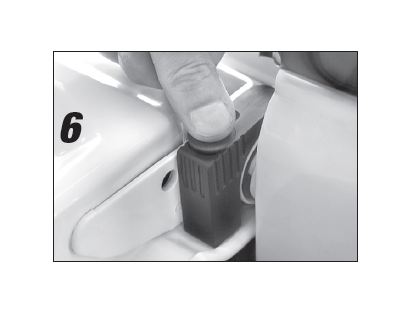
6 Remove the key, insert plastic dust plug and close the tailgate, checking the fit while closing. Your tailgate is now protected from theft and the McGard lock never needs to be removed to open and close your tailgate.
Store the key in a safe place.
Complete the enclosed lock registration
card and return to McGard in the
envelope provided or register online at
cs.mcgard.com.
1 Place key into lock housing and engage lock bolt pattern. Turn the key counter clockwise until end of metal strap is separated from lock housing. Remove and separate the two molded sleeves from the strap. Set aside for use in step 2.
2 Carefully remove right hand side of tailgate from hinge cup. See vehicles owner manual for instructions. With the tailgate in a secure position, place the molded sleeve (use molded sleeve for Ford as shown below) onto the right hinge cup as shown in photo 2, making sure that the two openings align. Use the adhesive strip (included) to temporarily hold sleeve in place on the hinge cup during tailgate re-installation. Re-install the tailgate to the open position. Remove adhesive strip and discard.
3 With key still inserted into lock housing, loop free end of metal strap/liner behind and under the right hinge cup or molded sleeve.
4 Re-insert free end of metal strap into lock and hold. Turn key several times clockwise, by hand, until the metal strap re-engages the lock screw.
5 Tip the lock down until the key and key hole are upright. Position the lock on the molded sleeve, to the left of the raised lip portion. While holding the lock in place, use a ¼” square drive (screwdriver handle or ratchet) to turn the key clockwise until the lock is tightened snugly (approximately 40 in-lb). Do not overtighten lock.
6 Remove the key, insert plastic dust plug and close the tailgate, checking the fit while closing. Your tailgate is now protected from theft and the McGard lock never needs to be removed to open and close your tailgate.
Store the key in a safe place. Complete the enclosed lock registration card and return to McGard in the envelope provided or register online at cs.mcgard.com.
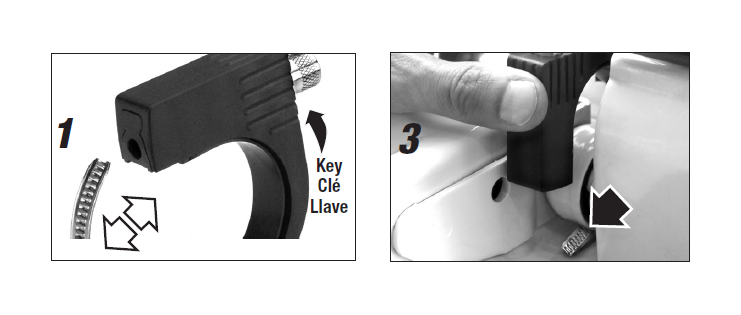
1 Place key into lock housing and engage lock bolt pattern. Turn the key counter clockwise until end of metal strap is separated from lock housing. Remove and discard the two molded sleeves from the strap. These sleeves are not required for this application.
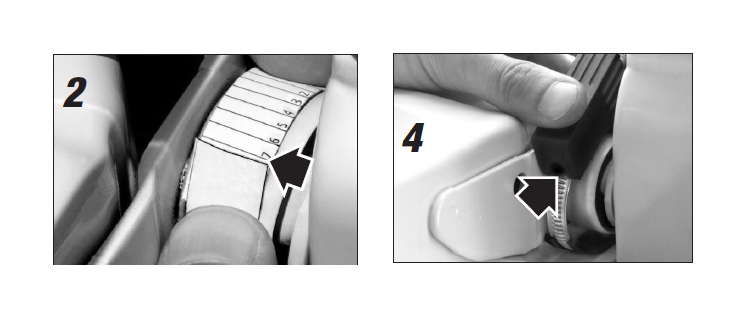
2 Measure the right tailgate hinge cup to verify if the lock’s liner needs to be trimmed prior to lock installation. Remove the measuring strip located at bottom of this instruction sheet by cutting with scissors along dotted line. Open tailgate and tightly wrap paper measuring strip around the right hinge cup, noting the length (circumference) indicated by the number on the strip. If the ends of the measuring strip do not overlap, no trimming is needed. If trimming of the liner is needed, slide liner off of metal strap but leave it attached to lock housing.
Trim the length of the liner to the corresponding number determined above using scissors or a utility knife. Re-install liner by sliding it back over the metal strap.
3 With key still inserted into lock housing, loop free end of metal strap/liner behind and under the right hinge cup/sleeve.
4 Tip lock up so that the key hole is facing the bed of the truck. Re-insert free end of metal strap into lock and hold. Turn key several times clockwise, by hand, until the metal strap re-engages the lock screw.
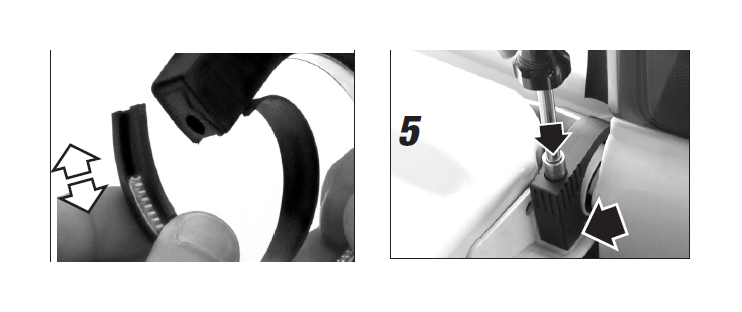
5 Tip the lock down until the key and key hole are upright. Position the lock so that it is against the tailgate, as far to the left as possible, with the bottom of the lock housing resting on the lip of the tailgate. While holding the lock in place, use a ¼” square drive (screw driver handle or ratchet) to turn the key clockwise until the lock is tightened snugly (approximately 40 in-lbs). Do not overtighten lock.
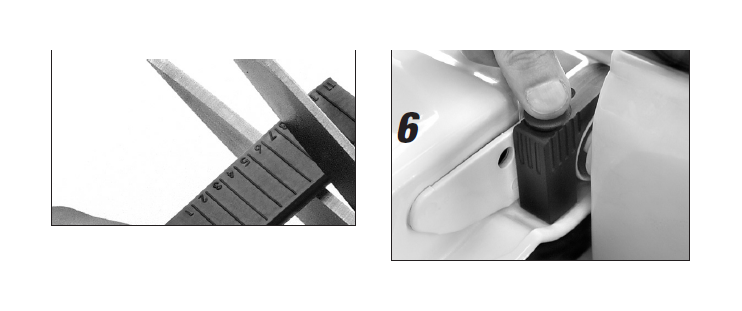
6 Remove the key, insert plastic dust plug and close the tailgate, checking the fit while closing. Your tailgate is now protected from theft and the McGard lock never needs to be removed to open and close your tailgate. Store the key in a safe place.
Complete the enclosed lock registration card and return to McGard in the envelope provided or register online at cs.mcgard.com.
