FREE 1 to 3-Day Delivery on Orders $119+ Details
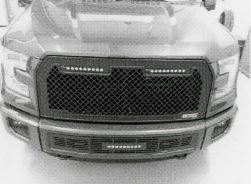
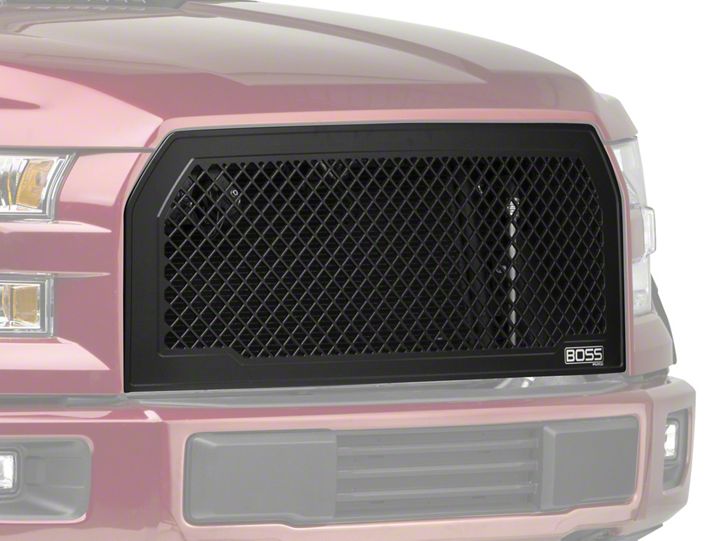
How To Install a Putco Boss Upper Grille On Your 2015-2016 Ford F-150
Installation Time
3 hours
Tools Required
- 8mm & 10mm Wrench
- 7/16" Wrench
- Pliers
- Flat Head Screw Driver
Shop Parts in this Guide
2015 Ford F150 Boss Grille Installation Instructions
Please read all instructions before installation and to check to see that all parts are included.
KIT CONTENTS:
| Description | Qty. |
|---|---|
| Boss Grille | 1 |
| 1/4" - 20 Bolt | 12 |
| 1/4" - 20 Nylock Nut | 12 |
| 1/4" Washer | 24 |
| 3/8" Washer | 4 |
| Upper Bracket | 1 |
| Left Bracket | 1 |
| Right Bracket | 1 |
| Only for Lighted Grille (below) | |
| 10" Luminix Light | 2 |
| Wiring Harness | 1 |
| Switch | 1 |
| Light Bar Instructions | 1 |
For Lighted grilles, refer to Wiring Installation on Light Bar Installation Instructions for
wiring instruction. Verify that wiring does not get wired through fins behind grille, as these open and close. Wire in an alternative path.
Insert Grille Installation
1. Remove Grille from packaging. Check to see if all parts from above table of kit contents are included.
2. With a flat-head screwdriver, remove(10) retaining clips to remove plastic cover. Keep clips and cover. (locations shown above).
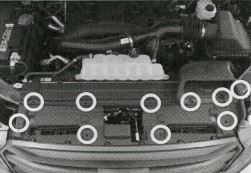
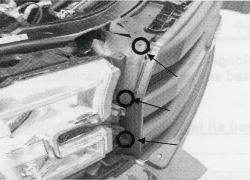
3. Remove and keep the top (4) grille screws with 10mm wrench (location shown by circles) and (2) plastic tree clips with screwdriver (location shown by squares).
4. Pull out plastic cover around headlight. Passenger side is shown. Repeat on driver side.
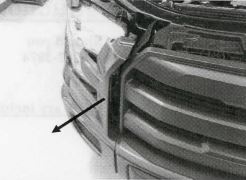
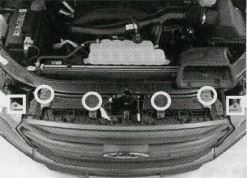
5. On side of grille, use a flat-headed screwdriver to pull out (total 6) tree clips that hold on rubber shield. (keep clips) Passenger side location is shown above. Repeat on driver side
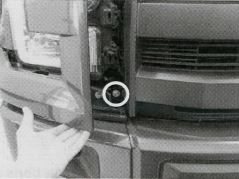
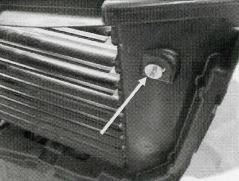
6. Remove and keep (total 2) 8mm bolts securing lower grille to truck. Passenger side location is shown above. Repeat on driver side.
7. Unclip (2) electrical plugs on the top side of the factory grille. Locations shown above.

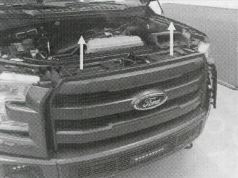
8. Remove factory grille assembly by pulling grille straight up and out.
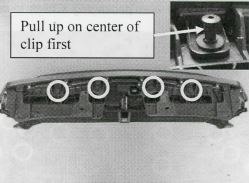
9. Once factory grille assembly is removed from truck; remove and keep (4) plastic clips on top of grille assembly. Use flat-head screwdriver to pry up center of clip first and pull clip out.
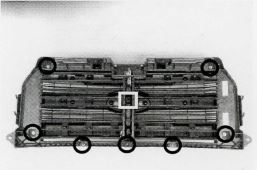
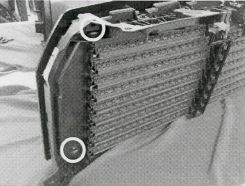
10. On back side of factory grille assembly, remove (7) 10mm nuts (shown by circles) and (1) 7mm bolt (shown by square). Front side of grille can be set aside, it will not be used.
11. If any of factory hardware remains in the back side of the factory grille assembly. remove using a pliers and l Omm wrench. Place back side of factroy grille assembly aside for later installation.
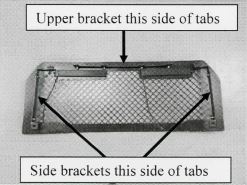
12. Install the (3) supplied brackets to the Putco grille using supplied hardware. Side brackets go on inside of tabs and upper bracket go on top side of brackets. Do not fully tighten hardware.
13. Attach Putco grille to factory back side grille assembly that was set aside on Step 11. Insert upper clips removed in Step 9. (shown by circles) Place supplied 7/16" washers between clip and upper grille bracket.

14. Bolt side brackets to the factory back side grille assembly using supplied hardware. Tighten bolts. Driver side is shown. Repeat on passenger side.
15. Install grille assembly in truck. Once grille is in, snap light covers back in place and close hood. Some adjustment my be required. Reopen hood and unclip light covers. Tighten all hardware, reinstall all factory clips and bolts.