 FREE 1 to 3-Day Delivery on Orders $119+ Details
How to Install Putco Luminix High Power LED Fog Lamps - Pair on your F-150
Installation Time
1 hours
Tools Required
- Flathead Screwdriver
- Philips Head Screwdriver

Shop Parts in this Guide
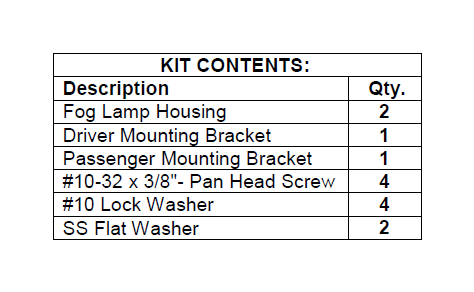
Please read all instructions before installation and to check to see that all parts are included.
Fog Lamp Installation
1. Remove Fog Lamps from packaging. Check to see if all parts from above table of kit contents are included.
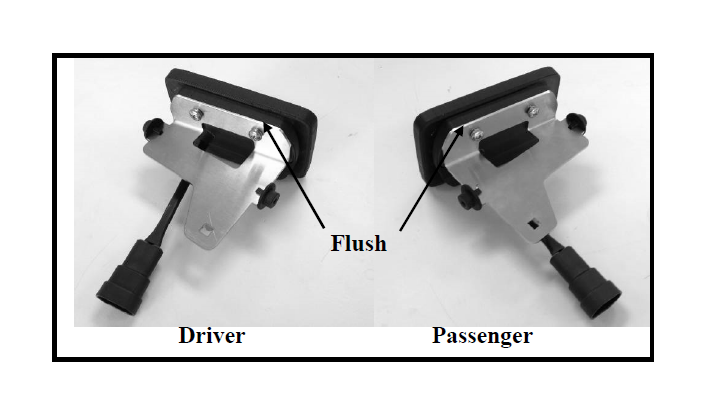
2. Install driver and passenger brackets on to fog lamp housing using supplied hardware. Verify that top edge of bracket is flush with edge of fog lamp housing. (Shown Above) Tighten hardware with Phillips Screwdriver.
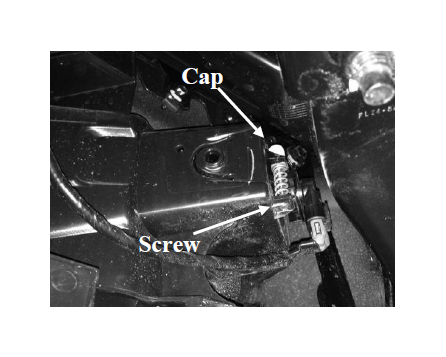
3. Under front bumper of the truck, unplug wiring harness from bulb, remove white cap. Then, remove factory adjustment screw using Phillips Screwdriver. (Spring will come off when screw is removed) Set parts aside, they will be used later for install.
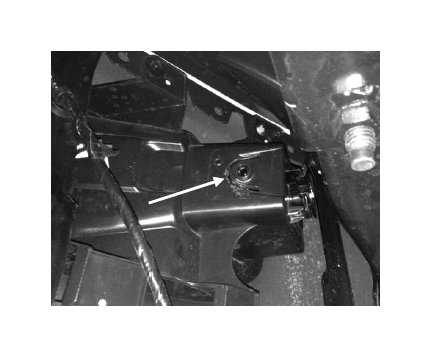
4. Use Flathead screwdriver to pry out clips on each side of factory fog light housing. While prying on clips pull factory fog lamp out of housing from the front of truck.
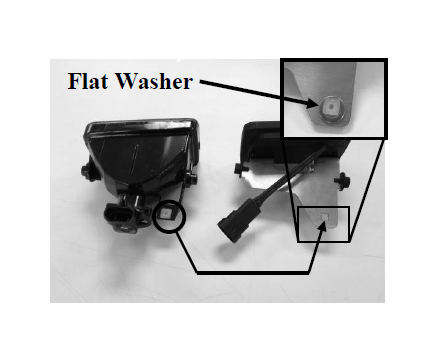
5. Relocate plastic screw nut from factory fog lamp to square hole in fog lamp assembly from Step 2 as shown above. Place flat washer between plastic screw nut and SS bracket (Flat part of plastic nut goes toward bottom of assembled light)
6. On fog lamp assembly verify that logo is right-side up. Then, firmly install fog lamp assembly into factory fog lamp housing until both clips snap into place.
7. Reinstall screw, spring, and cap in opposite order of Step 3. Adjust to factory location using Phillips Screwdriver. Plug fog lamp into factory harness and Enjoy! Verify the plug is fully engaged and does not pull apart.
