 FREE 1 to 3-Day Delivery on Orders $119+ Details
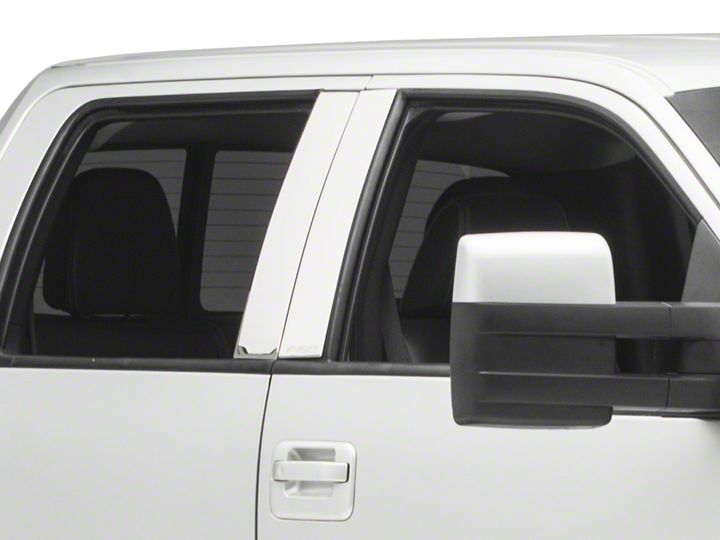
How to Install Putco Stainless Steel Pillar Posts Classic - F150 Logo on your F-150
Shop Parts in this Guide
KIT CONTENTS:
| Description | Qty |
|---|---|
| Regular Cab Kit | 4 |
| Super Cab & Super Crew Kit | 4 |
Bucket Installation
1. Clean and dry the vehicle thoroughly.
2. The vehicle surface temperature must be a minimum of 15°C (60°F).
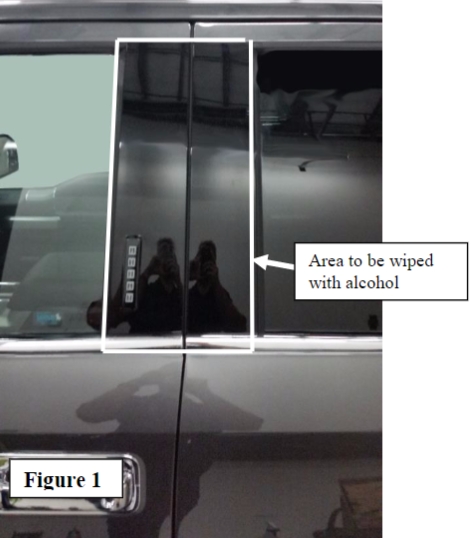
3. Apply rubbing alcohol to the clean towel and wipe down the entire boxed area shown in Figure 1.
This will ensure proper adhesion to the vehicle. (Crew Cab driver side shown)
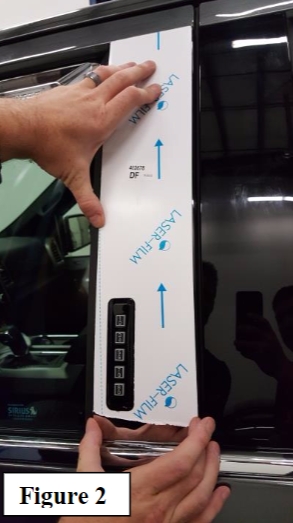
4. Without removing the red backing, place the Driver Front pillar trim against the pillar as shown in Figure 2. Note how the keypad is centered in the hole and the pillar trim has about a 1/16" of the underlying pillar on either side framing it in.
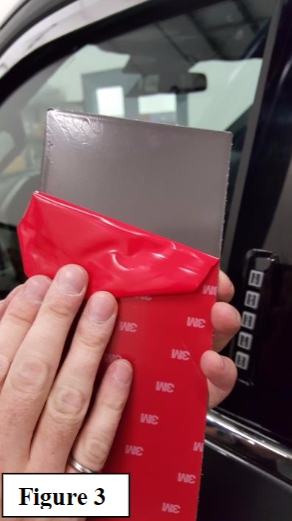
5. Pull the top 3" of the red backing off of the part and to the side as shown in Figure 3. Place the pillar trim back on the post to realign. IMPORTANT: Do not to allow the adhesive surface of the panel to touch the vehicle prior to being in the correct location. To prevent premature adhesion, place your fingers behind the part while aligning as shown in Figure 4.
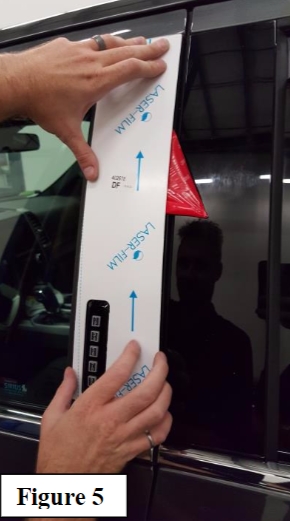
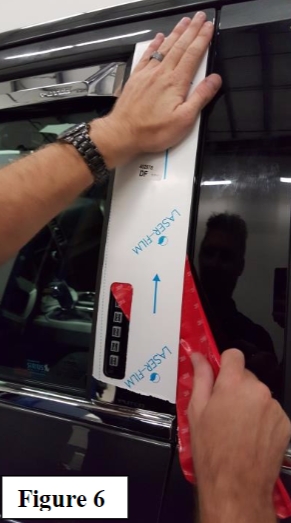
6. Once the part is aligned, gently press the exposed adhesive part onto the vehicle, while maintaining alignment. Slowly pull the remaining red protective film downward until the film has been completely removed. Press the panel firmly onto the vehicle for 30 seconds to ensure proper adhesion. Refer to Figures 5 and 6.
7. Repeat steps 3 - 6 for each pillar.
8. Lastly, remove the white protective film to expose the finished material.
