 FREE 1 to 3-Day Delivery on Orders $119+ Details
How to Install Roush Coil Cover Black Kit on your F-150
Installation Time
20 minutes
Tools Required
- Ratchet
- 8 mm Deep Socket
- 12 mm Socket
- 7 mm Socket
- Trim Removal Tool (Optional)
Installation Instructions
P/N: 422050 (R1115-COILKITBLK)
422051 (R1116-COILKITR)
PREPARING ENGINE FOR COIL COVER INSTALLATION
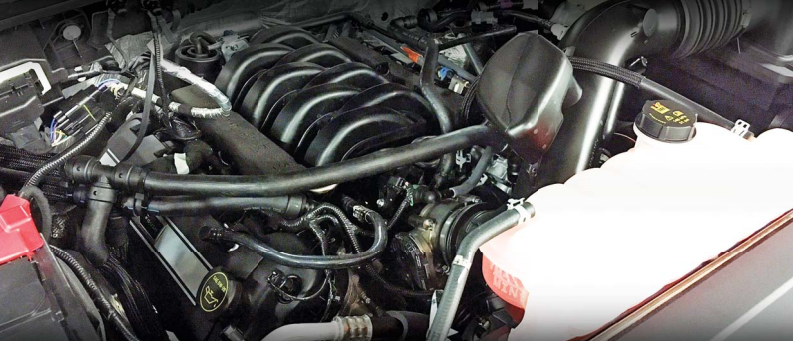
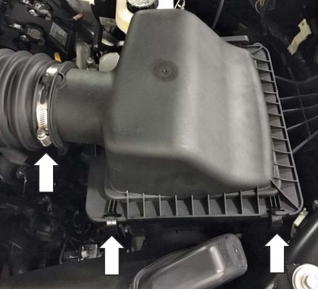
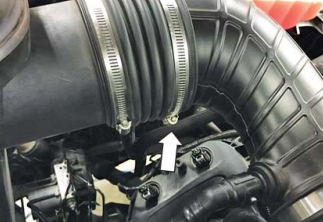
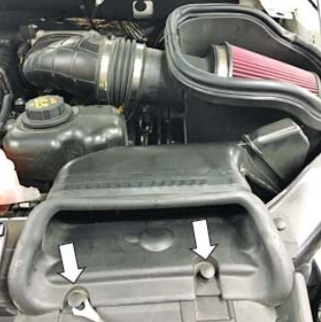
1. Remove the air fi lter housing as follows.
a. OE induction: Remove the clamp with a 7 mm socket, unclip two (2) plastic clips from housing and remove.
ROUSH induction: Loosen the hose clamp with a 8 mm socket.
b. Remove the two (2) plastic fasteners that secure the housing. Pull fi rmly up on the air fi lter housing until it comes free and maneuver it off of the clean air tube.
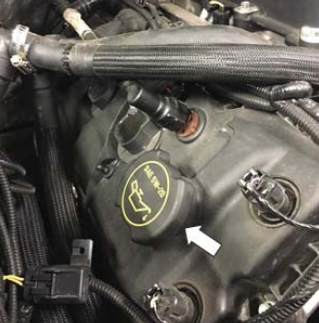
2. Remove the oil fi ll cap on the passenger side of the engine.
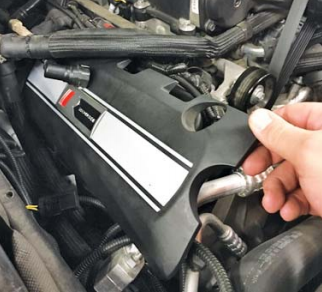
3. Remove the PCV hoses on both sides of the engine by pushing the small gray tabs counterclockwise and then pulling up on the elbows.
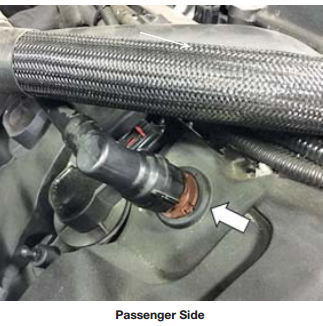
Passenger Side
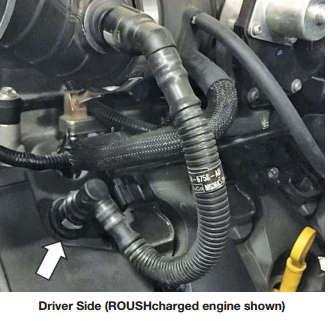
Driver Side (ROUSHcharged engine shown)
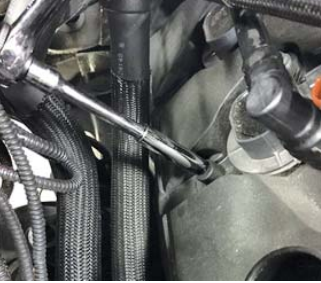
4. Locate the factory-installed stud on the passenger side valve cover. This stud secures a wiring loom. Pull the plastic connector up and off the stud and remove the stud from the valve cover with a 12 mm socket.

5. Install six (6) self-tapping ball studs (P/N 40100080006-P) [three (3) on each side] into the existing holes on the valve covers. The driver side is shown, the hole pattern is the same on the passenger side.
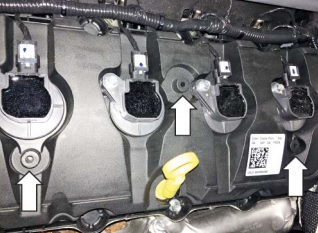
a. Begin by hand-threading the stud into the hole.
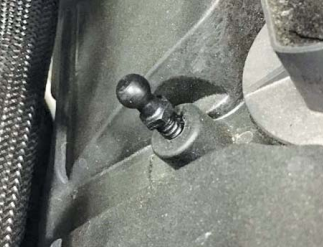
b. Use a 8 mm deep socket to install the ball studs until fully seated. Do not overtighten.
PREPARING COIL COVERS
1. Press rubber grommets (P/N GCS -1105) into the three (3) holes on the underside of each coil cover. Be sure that the grommets are fully inserted and sitting fl ush.
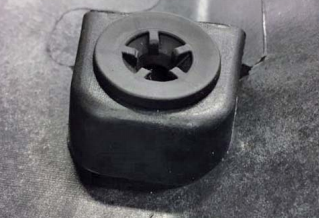
After Proper Installation
Complete Grommet Installation
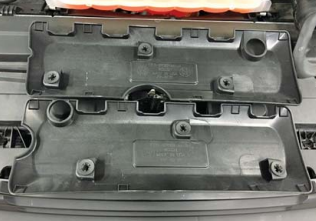
COIL COVER INSTALLATION
1. On the passenger side, place the coil cover under all wiring looms, plastic PCV hoses and any other items that cross the valve cover.
2. Once the cover is in position, press down fi rmly to engage the ball studs into the grommets.
3. Use the same procedure to install the coil cover on the driver side.
REASSEMBLY
After the coil cover installation is complete,
1. Reconnect the PCV lines.
2. Install the oil fi ller cap.
3. Reinstall the air fi lter housing by reversing the removal steps.
Congratulations!!! You have completed the installation of the ROUSH Performance Products, 2011 F-150 5.0L Coyote Coil Covers. It is recommended that you save all parts removed from the vehicle during the installation of this kit.
