 FREE 1 to 3-Day Delivery on Orders $119+ Details
How to Install Stainless Works 3 in. S-Tube Turbo Cat-Back Exhaust - Split Rear Exit - on your F-150
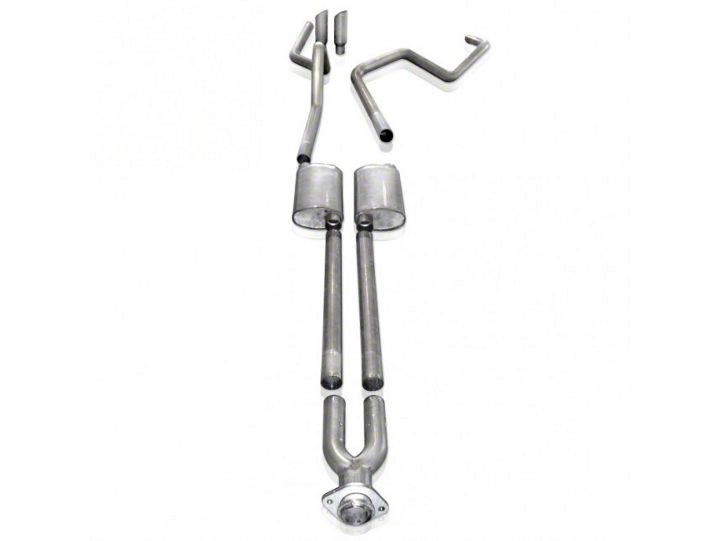
Shop Parts in this Guide
- Stainless Works S-Tube Turbo Dual Exhaust System; Factory Connect; Rear Exit (11-14 5.0L F-150)
- Stainless Works S-Tube Turbo Dual Exhaust System; Factory Connect; Same Side Exit (11-14 5.0L F-150)
- Stainless Works True Dual Smooth Tube Dual Exhaust System; Performance Connect; Same Side Exit (11-14 5.0L F-150)
- Stainless Works True Dual Smooth Tube Dual Exhaust System; Performance Connect; Rear Exit (11-14 5.0L F-150)
1. Disconnect the battery before starting work on the exhaust system for your vehicle.
Reconnect the battery when the job is completed.
2. Your exhaust system can be installed by a weekend warrior but the use of a lift is
recommended for ease of installation. If using a jack, the vehicle must be placed on a
level hard surface and jack stands are required for safety reasons.
DISASSEMBLY
1. Raise and support vehicle.
2. Disconnect battery.
3. Unbolt (2) bolts at factory connection point after catalytic converters and remove the
old exhaust system.
ASSEMBLY – Steps 4 and 5 below are not needed when installing true duals to Stainless Works Headers
4. Install gasket (G917B-S) supplied on flanged pipe (resonator delete pipe) and install
using supplied 3/8” bolts washers, nuts.
5. Install Y-pipe using 3” clamp.
6. Install muffler inlets using (2) 3” clamps.
7. Install (1) 3” hanger welded to clamp on passenger side smooth tube muffler, and the driver side smooth tube muffler using (1) 3” clamp. See picture of assembled hanger below:
FOR SYSTEMS WITH TAILPIPES EXITING UNDER RIGHT SIDE
8. Install front and rear hangers onto tailpipes and install tailpipes to mufflers using (2)
3” clamps. See picture on next page for same hanger used on both style catback
tailpipes.
9. Install tips using (2) 3” clamps.
FOR SYSTEMS WITH TAILPIPES EXITING UNDER BUMPER
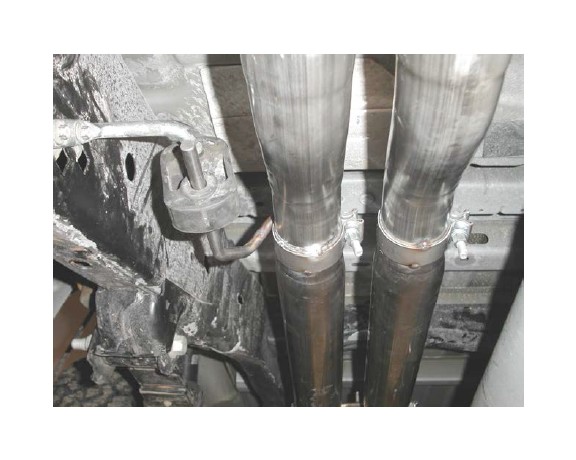
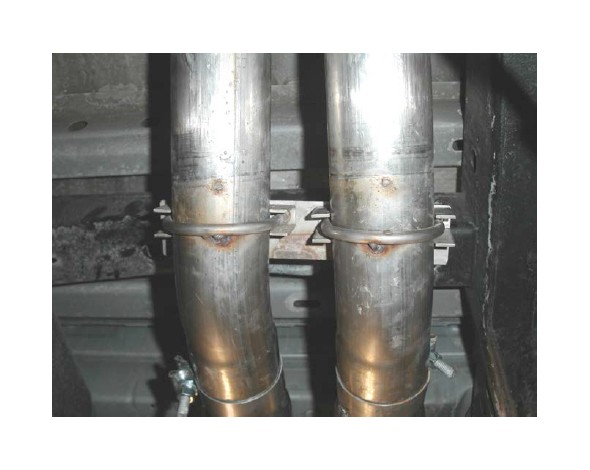
10. Install hanger to front tail pipes using (2) 3” saddle clamps with hanger and install to mufflers using (2) 3” clamps. See picture below for hangers behind mufflers. Picture
is the same for both style catback tailpipes:
11. Install rear tail pipes using (2) 3” clamps.
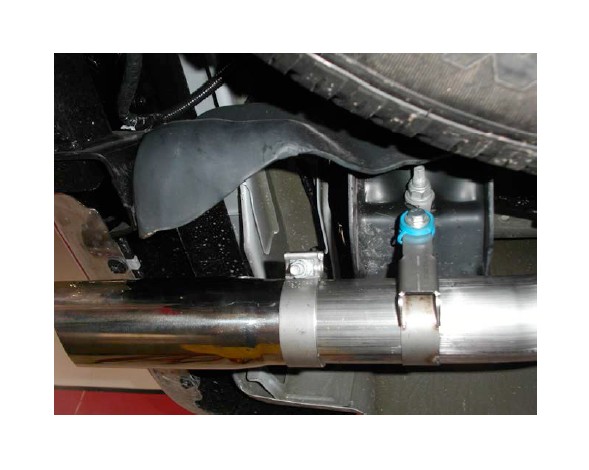
12. Loosen rear spring shackle bolts (14mm) and install rear hangers for rear tailpipes.
13. Install clamp hangers on to tails and using blue grommets and bolts connect to upper hangers. See picture of left rear hanger installed below:
14. Install tips using (2) 3” hangers.
ALL CATBACKS
15. Adjust and tighten system and hangers (For under bumper systems, also retighten
spring shackle bolts.)
16. Be sure to have adequate clearance around all wires, hoses and lines. If anything is in contact with the exhaust system, it will melt. Make sure to have at least ½” of
clearance and wrap any suspect areas with DEI thermal barrier wrap.
17. Lower vehicle and reconnect battery.
18. After double checking for clearance and making sure all lines, wires and hoses are
secured, drive the car for 10-20 miles and re-check all clamps and clearances. Your
system may be tack welded at the joints/ clamps to reduce shifting of the system
during heating and cooling cycles. Make certain to disconnect the battery before
performing any welding.
