FREE 1 to 3-Day Delivery on Orders $119+ Details
How to Install T-REX Billet Series 2-Piece Upper Grille Cutout - Black on your F-150
Installation Time
1 hours
Tools Required
- 8mm, 10mm Socket and Ratchet
- Jigsaw
- Phillips Screwdriver
- Die Grinder & Sanding Wheel
- 1/8” Drill Bit & Drill Motor
- Masking Tape

Shop Parts in this Guide
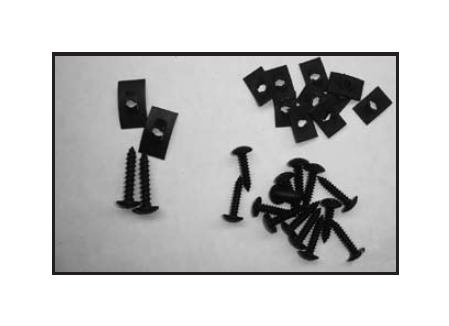
PARTS LIST
(14) #8 - 3/4” Screws
(14) #8 Nut Plates
(2) #10 - 1” Screws
(2) #10 Nut Plates
(2) Billet Grilles
Step 1
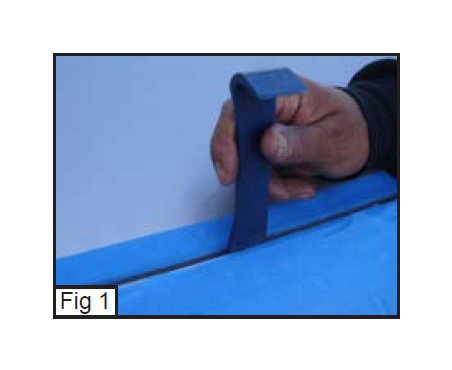
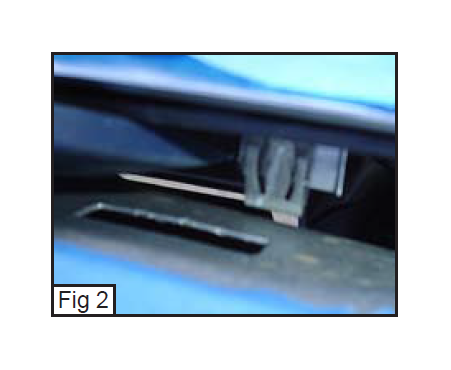
PLEASE READ AND UNDERSTAND ALL INSTRUCTIONS BEFORE ATTEMPTING INSTALLATION. The first step of the installation is to remove the factory grille shell from the vehicle. There are a dozen 10mm nuts holding the grille shell to the bottom of the hood and a black bracket at the lower part of the grille shell that need to be removed. Use a thin plastic pry bar or putty knife to pry the factory grill from the hood (Fig 1), there are several latches with clips anlong the top of the grill that will pop loose (Fig 2). Start prying at the corner and move along the grille as the latches pop loose. Use masking tape under the prybar, putty knife to prevent scratches to the paint of the vehicle.
Step 2
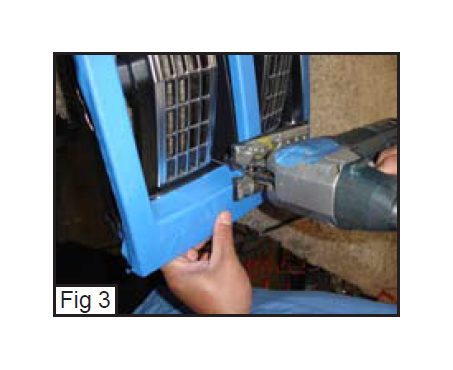
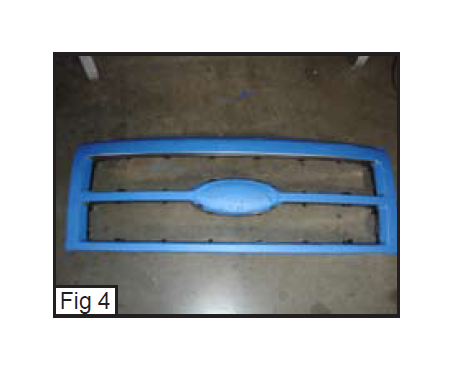
Once you have the grille shell removed use masking tape to cover the front of it to prevent any scratches during installation. The center of the two grille shell openings need to be removed. Cut across the to vertical bars and along the sides of the grille shell openings with a jigsaw (Fig 3). Leave a little (1/2”) of the material. Once the grille is cut it should look like (Fig 4).
Step 3
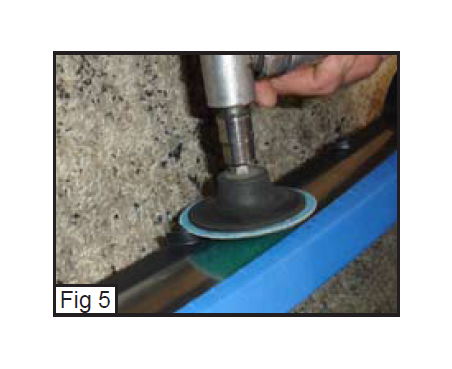
Next use the die grinder to smooth out where the cuts were made. Go around the entire inside of the grille shell and grind it smooth (Fig 5).
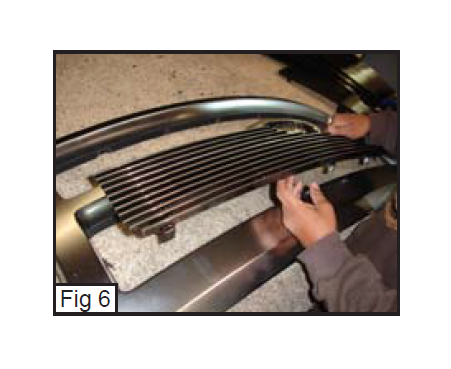
Step 4
Once the inside of the grille shell is smooth, lay the billet grille into the opening. (Fig 6)
Step 5
While holding the billet grille in the grille shell, turn the grille over so you can work on the backside. Make sure the billet if flush with the front side of the grille shell and use a couple pairs of vise grips to hold the tabs on the billet grille to the grille shell, this will keep the billet flush while you install it.
Step 6
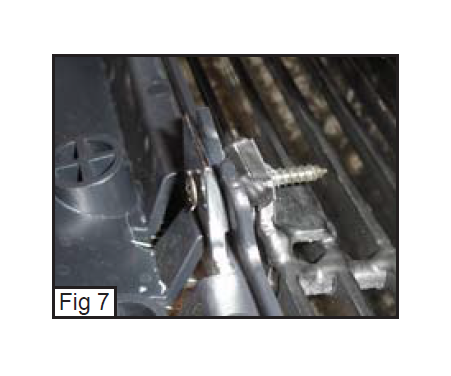
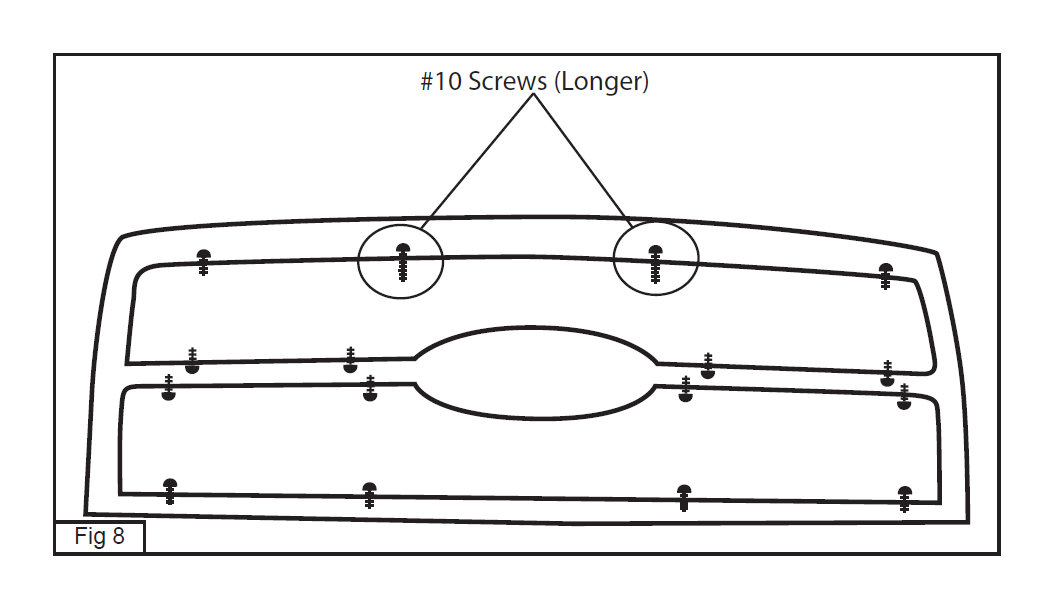
Drill a 1/8” hole through the brackets on the billet and the grille shell. Install the screws through the brackets and the grille shell making sure they install inward toward the center of the grille in the top opening (this is so the hood will close without the screws interfering) and put a flat nut on the back then tighten (Fig 7). On the bottom opening make sure the screws insert from the center of the grille outward through the grille shell (Fig 8) and install a flat nut. Make sure all the screws are tight, reinstall the grille shell on the vehicle along with the hardware. Installation complete.