FREE 1 to 3-Day Delivery on Orders $119+ Details
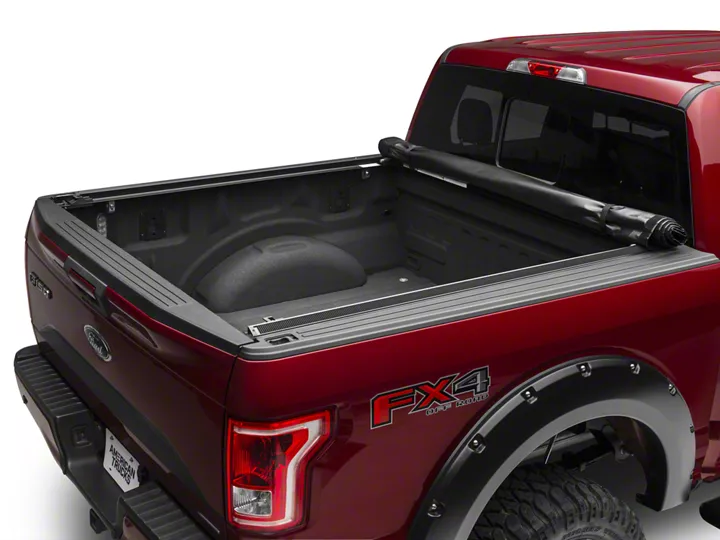
How to Install Truxedo Lo Pro Soft Roll-Up Tonneau Cover (15-17 All) on your Ford F-150
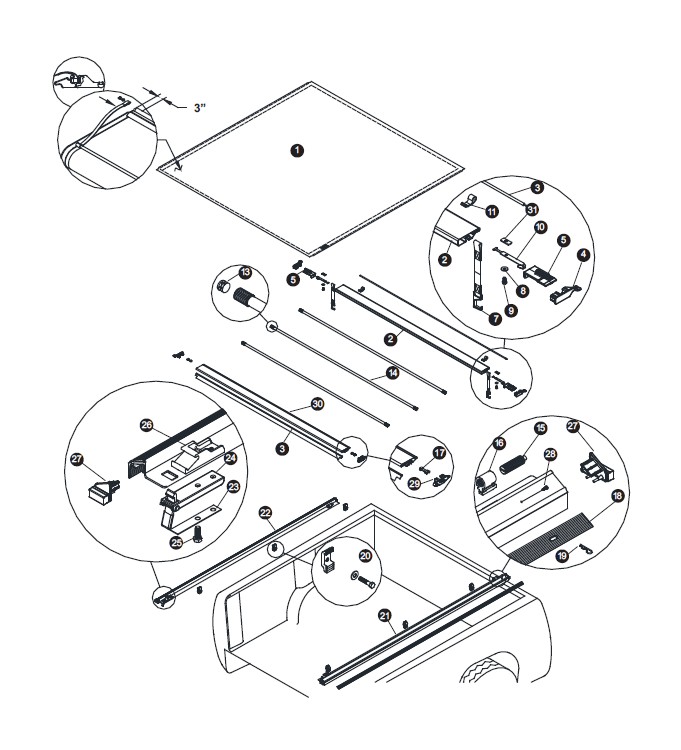
Shop Parts in this Guide
SAFETY INSTRUCTIONS
1. Do not place objects on or against cover or framework.
2. Do not tie cargo to TruXedo® framework.
3. Never allow children or pets to occupy pickup box while cover is closed.
4. Cover is not airtight. Special care is required to keep cargo clean and dry.
5. Fabric cover won’t prevent theft of contents inside truck box.
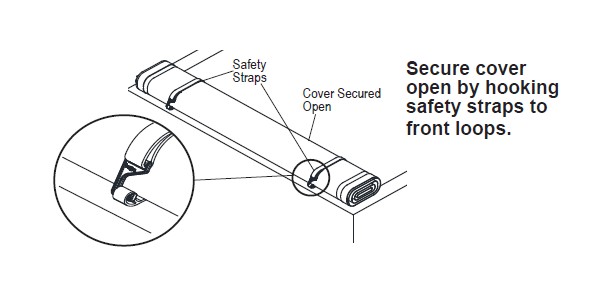
6. Cover must be rolled fully open and secured with safety straps when towing vehicle backwards.

STEP 1: Attach the TruXedo rails to the truck’s vertical inside flange as shown in Detail A. To get the correct TruXedo rail alignment from front to back, See Detail-B. Compress the rear D-seal against the closed tailgate and hold. Attach clamps starting at the tailgate. Evenly space 3 clamps along each TruXedo rail, leaving approximately 8” on each end.
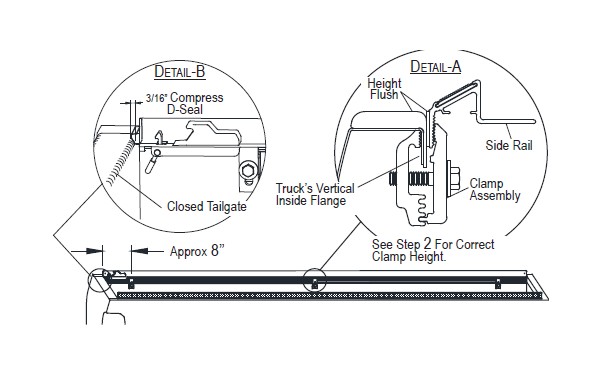
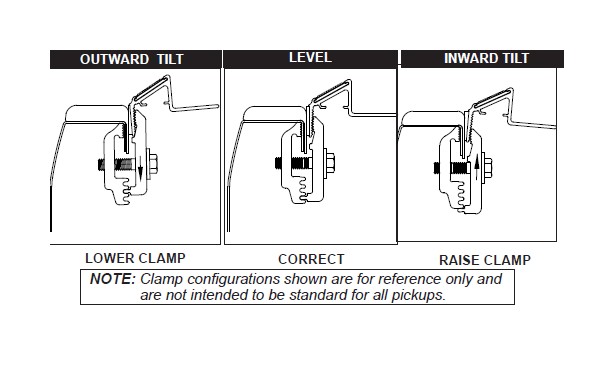
STEP 2: For optimum latching performance and cover fit, side rails must be level. To adjust rails, loosen screws and reposition male clamps higher or lower. Tighten all clamps.
WARNING: Tighten clamps securely on side rails before driving vehicle.
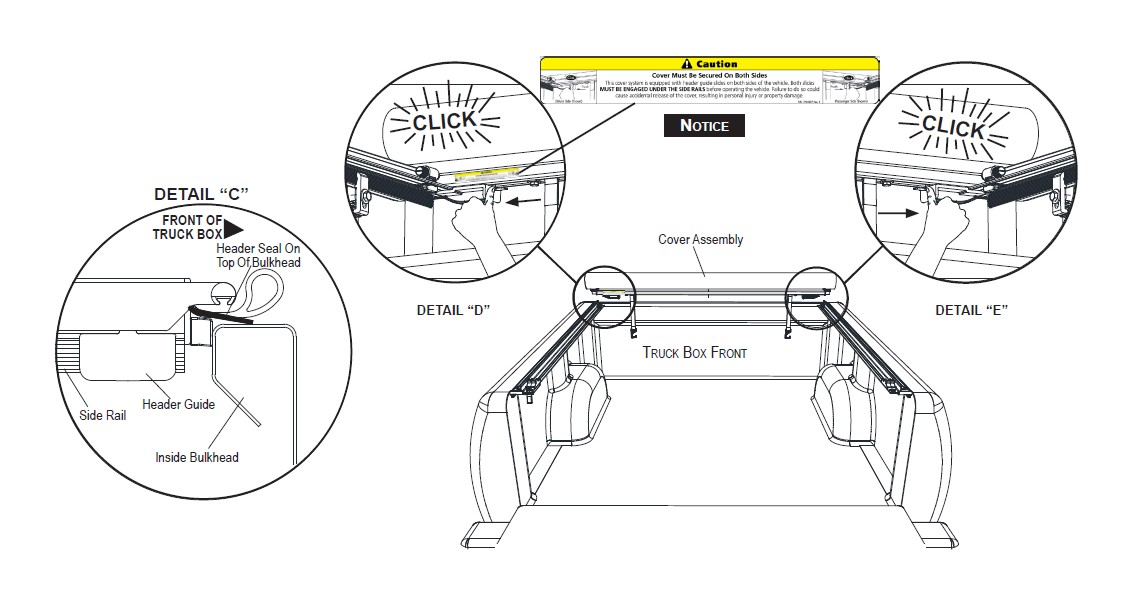
STEP 3: Set cover assembly behind cab with header seal on top of of bulkhead. See detail C.
STEP 4: Push header guides into place under side rail. A click sound will indicate a secure attachment. See detail D & E below.
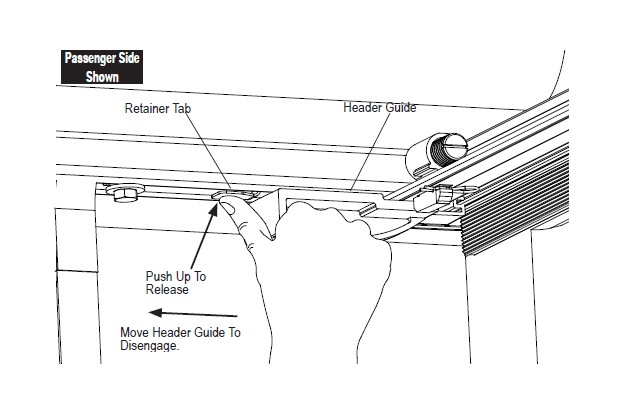
HOW TO REMOVE COVER ASSEMBLY
STEP 5: If you want to remove cover assembly push up on retainer tab with thumb and pull header guide over retainer until it stops. Do this for both passenger and driver side. Then lift cover assembly off of side rails.
LATCHING & UNLATCHING COVER
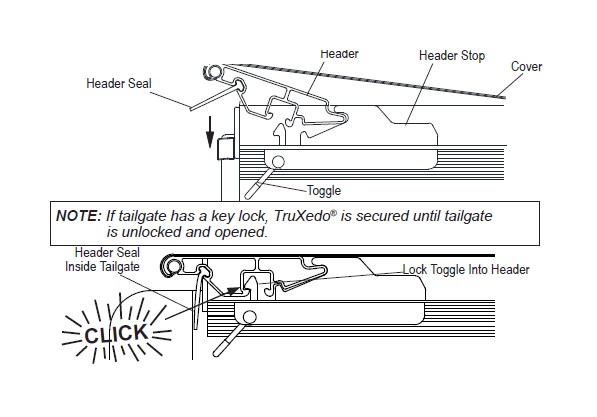
STEP 6: Always close cover before closing tailgate. Unroll cover toward tailgate and rest bows on side rails. Rotate header into header stops and press down to lock toggle into header.
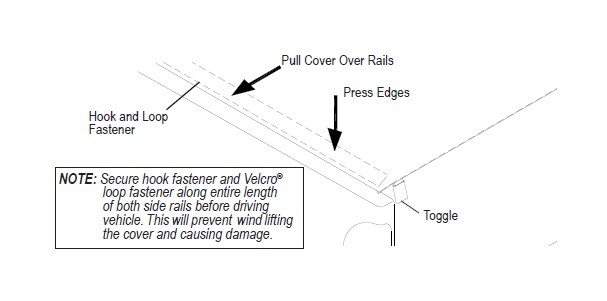
STEP 7: Secure hook fastener and Velcro® loop fastener strips on one side of rail, by pressing along full length of rail. Pull cover tight across pickup bed, and secure fasteners on opposite side rail.
STEP 8: To release cover, Trigger pull rear release toggle. Start rolling cover toward cab making sure both sides of cover roll evenly. For best results leave unrolled portion of cover attached to the hook fastener and Velcro® loop fasteners while opening.
COVER TENSION ADJUSTMENT
• Spring plunger compensates for material expansion & contraction caused by temperature changes.
• Check cover tension after installation, seasonally, and after extreme temperature changes.
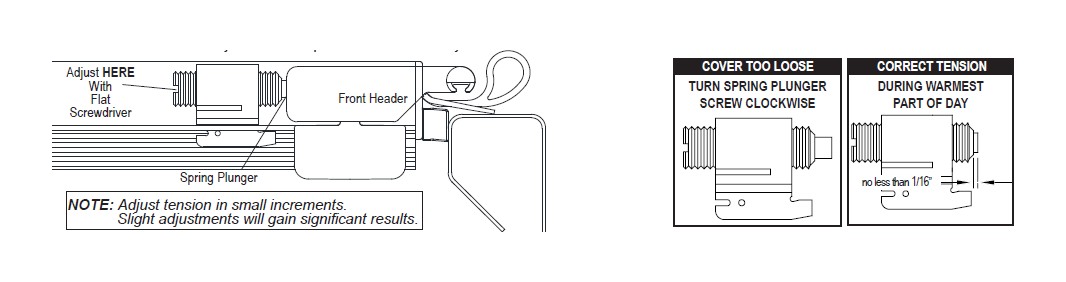
• For best performance, adjust tension regularly to protect your cover against wind wear.
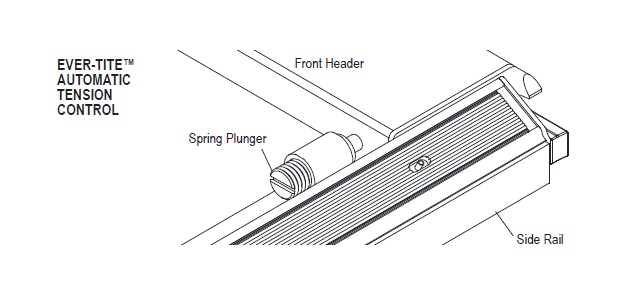
STEP 9: Set tension during warmest part of day. With cover closed, release hook and loop fastener from both side rails near cab. Check compression of both spring plungers against the front header per diagram. Roll cover open and make adjustments. Close cover and re-check adjustment. Repeat until satisfactory tension has been achieved.
TROUBLE SHOOTING
HEADER WILL NOT LATCH:
Check side rails to make sure they are level. See Step 2.
Make sure the header seal is not caught between side rail & header.
Check position of side rails on pickup box, they may be positioned too low. See Step 1.
Make sure cover has proper tension. See Step 9.
FABRIC COVER IS TOO TIGHT OR TOO LOOSE: See Step 9 to adjust tension.
* VELCRO® is a registered trademark of the Velcro companies.