FREE 1 to 3-Day Delivery on Orders $119+ Details
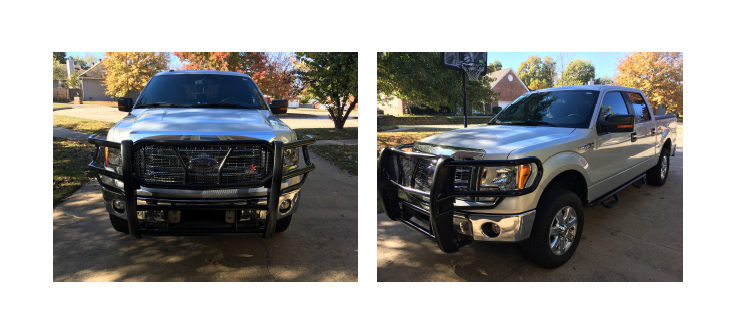
How to Install Westin HDX Brush Guard - Black on your F-150
Installation Time
2 hours
Tools Required
- 7/16” socket
- 13/16 socket
- 5/8” box wrench or socket
- Ratchet
- Ratchet extension
- Torque wrench - optional
- Safety glasses

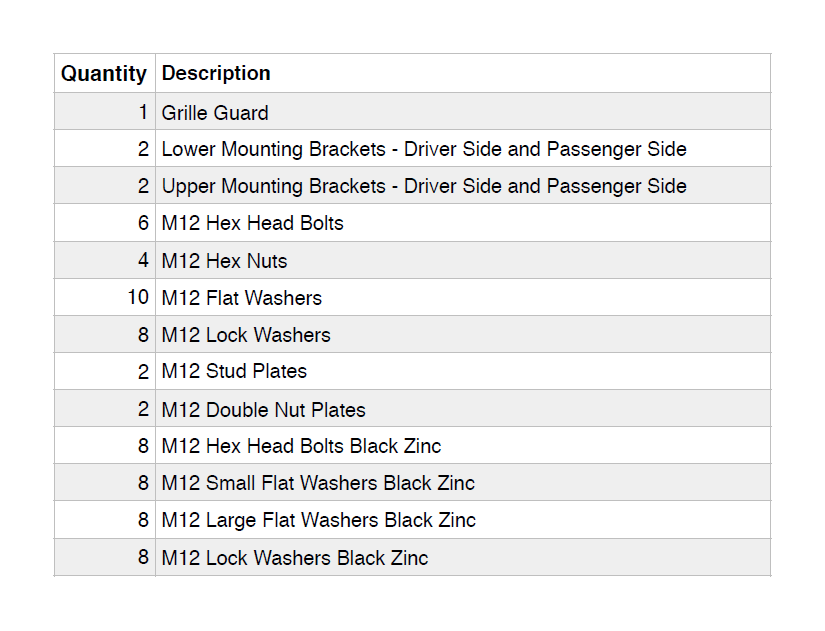
Shop Parts in this Guide
Parts list included

1. Park vehicle, turn off engine and engage the parking brake
2. Be sure to wear safety glasses for the entire install as loose debris and dirt on
the underside of the vehicle can dislodge and fall into your eyes
3. Lay out all parts from shipping box and organize what you need.

4. Remove front license plate, if applicable, and bracket - The bracket pops out of
the bumper when you flex the four corners of the bracket so it can release
5. Remove the front valance from below the front bumper to gain access to the
bolts for the tow hooks
For this step you will use the 7/16” socket and wrench. There is one bolt per side and the valance just drops down.
6. Remove tow hooks
You will need the 5/8” box wrench for this step. There are two bolts per tow hook. The front bolt is easily accessible and the rear bolt is more difficult to reach. You will need the 5/8” box wrench for the rear bolt.
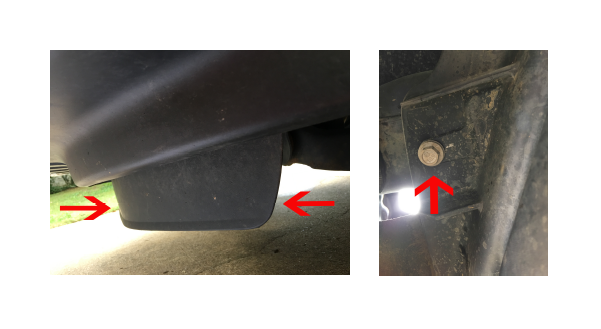
7. For the next step, remove the factory plastic bumper inserts on the front of the
bumper to gain access to the the work area behind the bumper
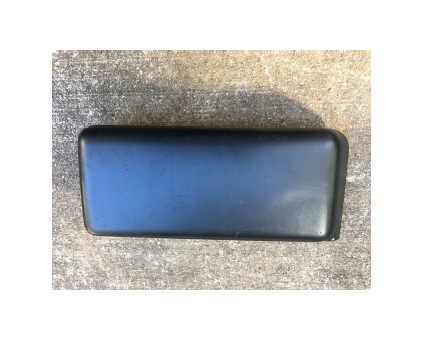
They look like this and pop off with a little encouragement from a pair of pliers from the back side of the retainer clip.
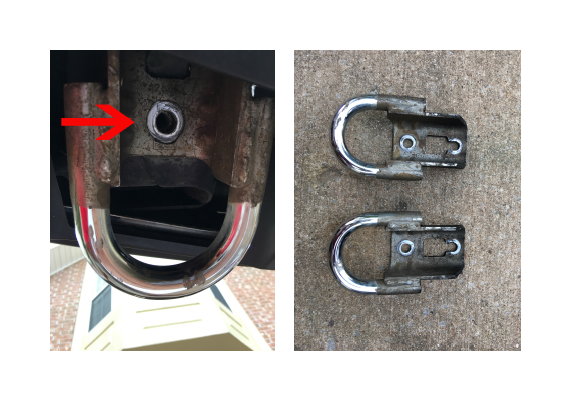
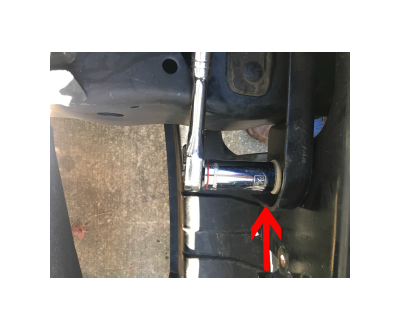
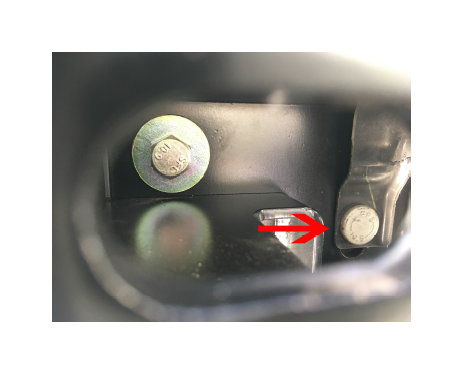
8. Before mounting the lower mounting brackets, you will want to insert the M12
stud plates in the intended holes for the lower mounting brackets to be held in
place.
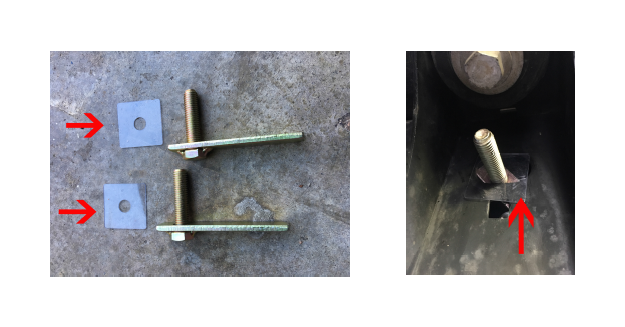
This is what the hole looks like directly above the mounting holes for the tow hooks.
You will also want to secure the bolts with the provided plastic retainers.
9. Slide the lower bracket in place. Each bracket is marked with a D or a P for the
correct mounting side.
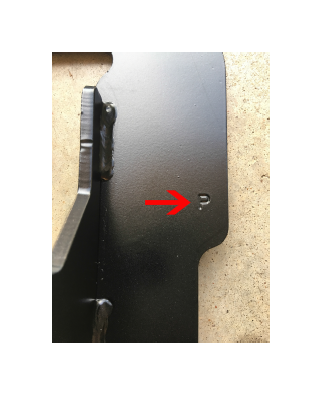
I was able to fish this part in without cutting the front valance. It takes patience, but you can do it!
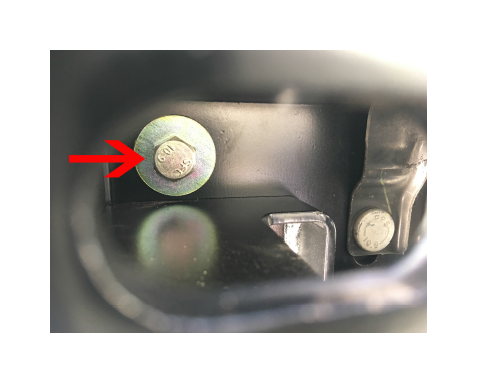
10. Once you have the lower plate in place, bolt it in using the existing tow hook
bolts and do not over tighten.
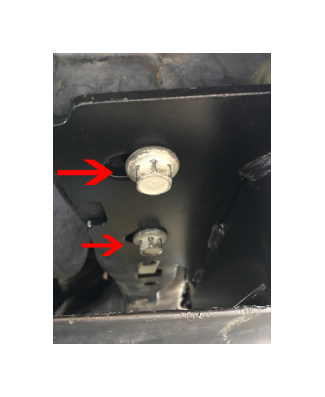
This is what it should look like.
11. Bolt on the top M12 stud plate bolt next using the supplied M12 flat washer,
M12 lock washer and M12 nut.

This is what it should look like. Be sure not to over tighten the bolt.
12. Next, unbolt the bolt directly behind the front plastic inserts, using the 13/16
socket, you removed and pull the sheet metal back to slip the upper mounting
bracket in place.
You may want to use a cheater bar depending on how much torque is on the bolt to free it. DO NOT REMOVE THE BOLT, JUST THE NUT. You will reuse the nut.
13. Line up the appropriate upper mounting bracket to the correct side and slide it in between the plies of metal that you pulled apart from the nut removal in the previous step.
14. Feed the existing bolt back through the upper mounting bracket and thread the original nut back onto the bolt.
The arrow points to the original bolt used in the last two steps.
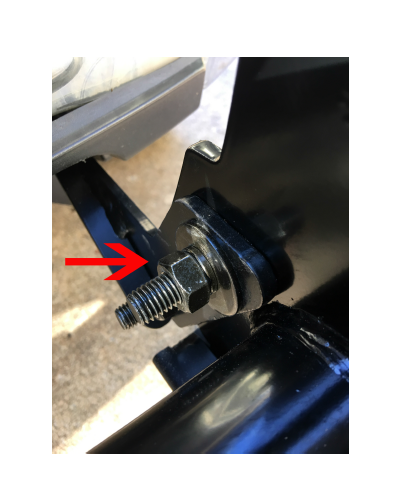
15. Next, use one M12 hex head bolts, two M12 flat washers, one M12 lock washer and one M12 nut to fasten the other end of the upper bracket to the frame.
The arrow point to the bolt used in this step.
16. Ok, this is the really fun part, you will need assistance in lifting the brush guard in place and bolting it to the mounting brackets. You will use the black zinc hardware for all the M12 hex head bolts, M12 flat washers, M12 lock washers and M12 nuts for the following steps.
17. You can start on the front of the brush guard or on the sides of the brush guard when attaching it to the mounting brackets. Either way, the next attachment point is lined up and ready for the remaining hardware.
18. Bolt the sides of the brush guard to the lower mounting brackets with the M12 black zinc hardware.
Use the M12 black zinc nuts, flat washers, lock washers and hex head nuts for this step and do not over tighten anything.
19. Lastly, bolt the front of the brush guard to the upper mounting brackets with the same M12 hardware.

This is what it should look like.
That’s it! You’re all set, now it’s time to go show off your new brush guard!