FREE 1 to 3-Day Delivery on Orders $119+ Details
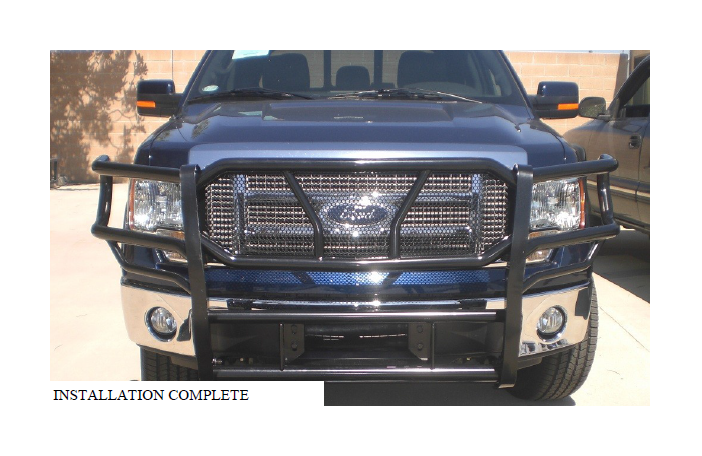
How to Install Westin HDX Brush Guard - Stainless Steel on your F-150

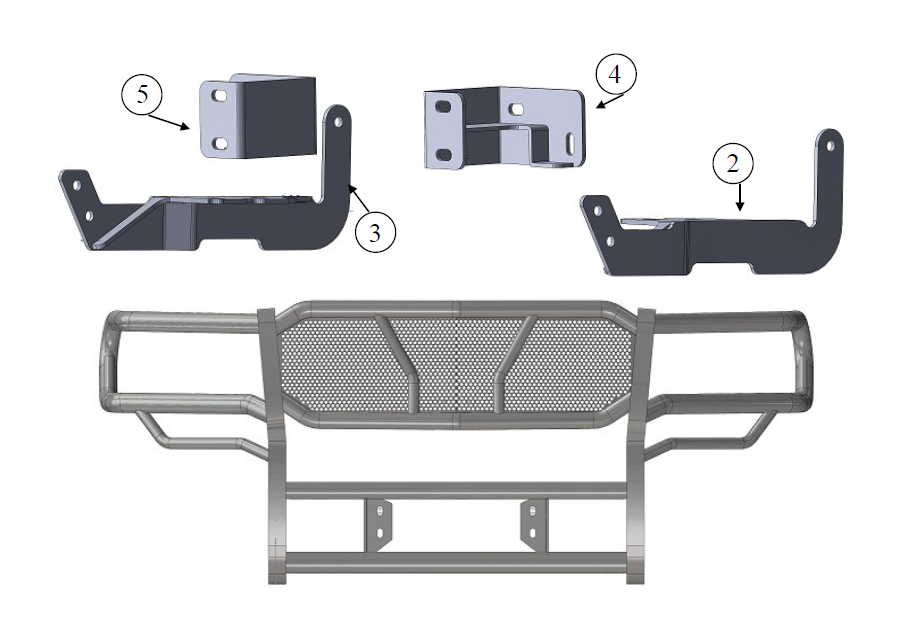
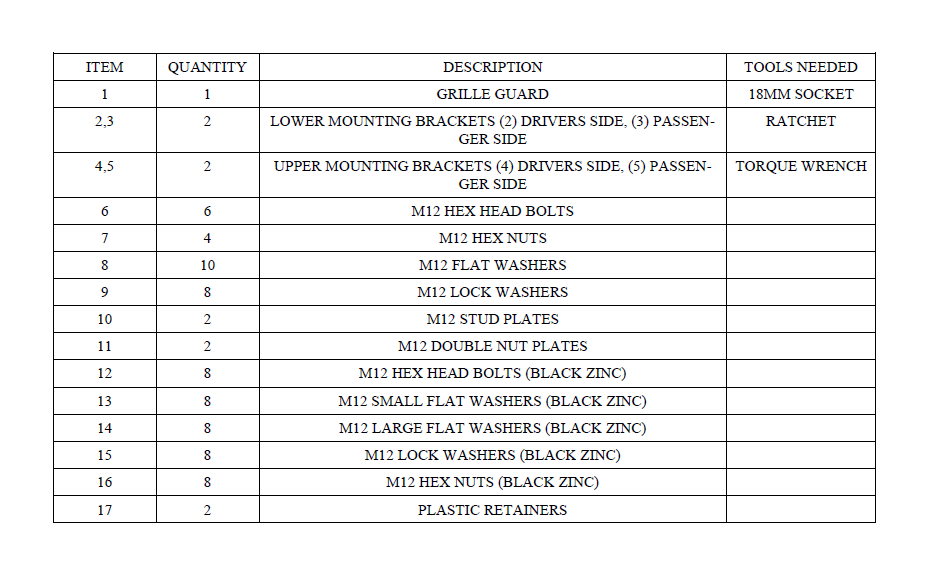
Shop Parts in this Guide
1. Remove all contents from box, verify all parts listed are present and free from damage. Carefully read and understand all instructions before attempting installation.
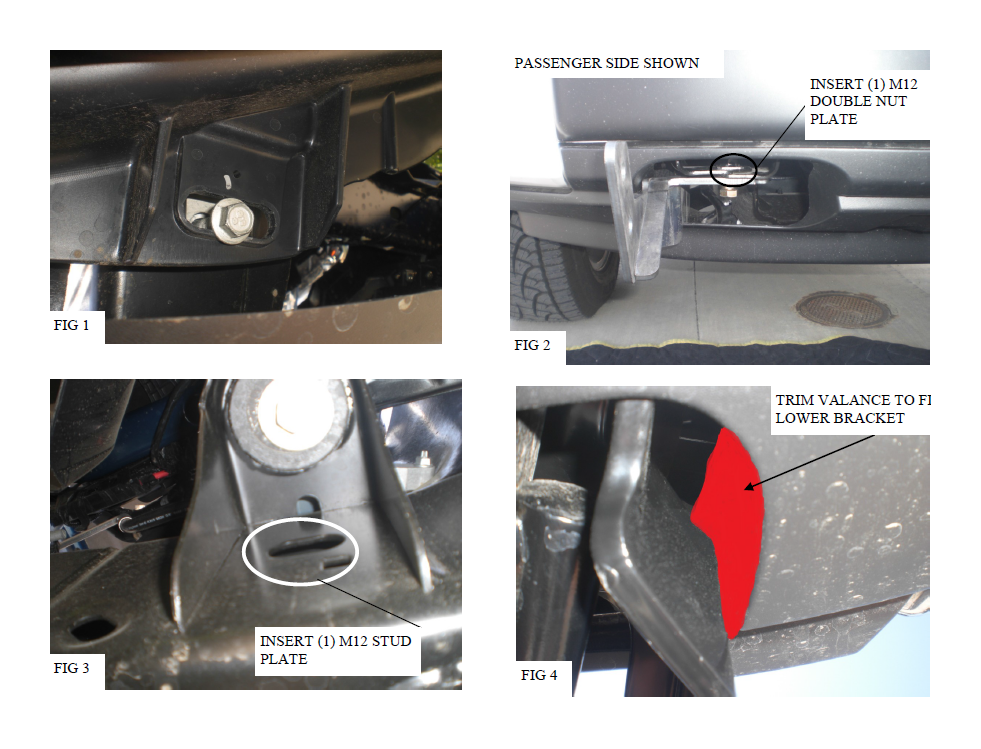
2. Starting from underneath the front of the vehicle, remove the factory air dam (FIG 1) and place it aside. Remove the factory tow hooks if so equipped.
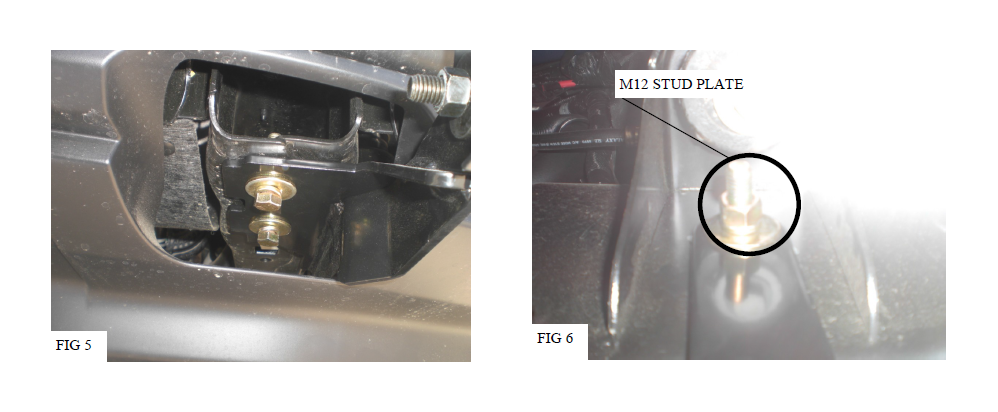
3. Place (1) M12 double nut plate , were the factory nut plate to mount the tow hooks is located (FIG 2), next take (1) M12 stud plate and insert it into the frame slot shown in FIG 3 thread a plastic retainer on the stud to prevent it from falling into the frame. Take the drivers side lower mounting bracket and place it through the rear of the bumper through the tow hook pocket NOTE: the tow hook pocket must be trimmed in order to allow proper clearance (FIG 4). Align the drivers side mounting bracket with the previously installed double nut plate and stud plate, attach the lower mounting bracket to the double nut plate using (2) M12 hex head bolts (2) M12 lock washers, and (2) M12 flat washers (FIG 5). NOTE : if the truck is equipped with tow hooks they may be reinstalled, place the tow hooks over the lower mounting bracket and install as they were removed. Attach the lower mounting bracket to the stud plate using (1) M12 flat washer, (1) M12 lock washer, and (1) M12 Hex nut. (FIG 6) Do not fully tighten at this time. Repeat this step for the passenger side
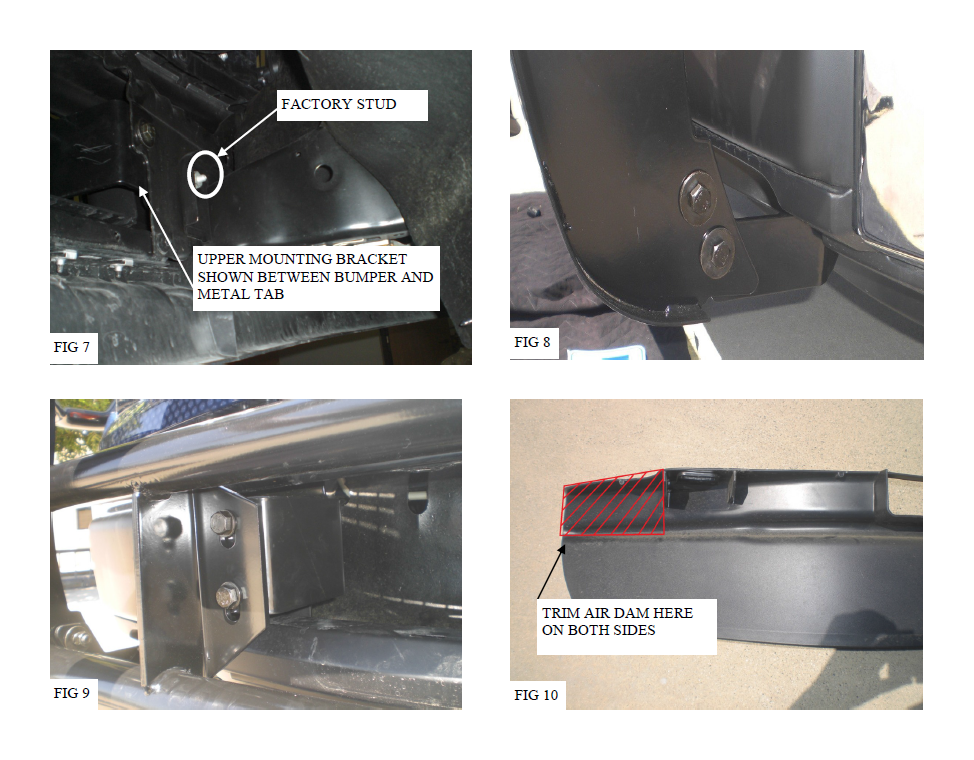
4. Move to the middle of the bumper and locate the factory bumper stud, remove this stud and take the drivers side upper mounting bracket/ the upper mounting bracket must be placed between the bumper and the metal tab behind the bumper (FIG 7). Once placed between the bumper and the metal tab, re install the factory bumper stud. Attach the upper mounting bracket to the existing hole in the bumper using (1) M12 hex head bolt (2) M12 flat washers, (1) M12 lock washer, and (1) M12 hex nut. Do not fully tighten at this time. Repeat this step for the passenger side. (FIG 7)
5. With assistance take the grille guard and align it with the installed mounting brackets, attach the grille guard to the lower mounting brackets using (4) M12 hex head bolts (black zinc), (8) M12 small flat washers (black zinc), (4) M12 lock washers (black zinc), and (4) M12 hex nuts (black zinc) (FIG 8). Attach the grille guard to the upper mounting brackets using (4) M12 hex head bolts (black zinc), (8) M12 large flat washers (black zinc), (4) M12 lock washers (black zinc), and (4) M12 hex nuts (black zinc) (FIG 9). Do not fully tighten at this time.
6. Take the air dam that was removed in step 2 and trim it to fit (FIG 10) , then re install the air dam
7. Align and adjust grille guards as needed then fully tighten all hardware at this time. Torque all M12 fasteners to 55 ft lbs
CARE INSTRUCTIONS
REGULAR WAXING IS RECOMMENDED. DO NOT USE ANY TYPE OF POLISH OR WAX THAT MAY CONTAIN ABRASIVES
STAINLESS STEEL PRODUCTS CAN BE CLEANED WITH MILD SOAP AND WATER. STAINLESS STEEL POLISH SHOULD BE USED TO POLISH SMALL SCRATCHES.
GLOSS BLACK FINISHES SHOULD BE CLEANED WITH MILD SOAP AND WATER