FREE 1 to 3-Day Delivery on Orders $119+ Details
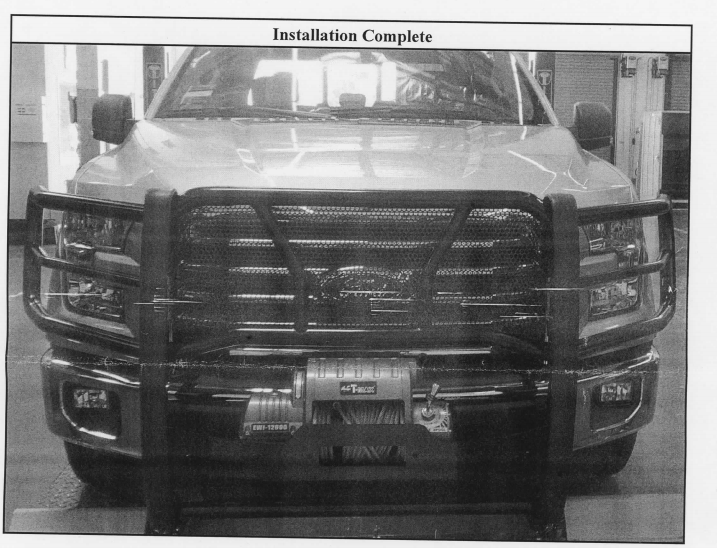
How to Install Westin HDX Winch Mount Brush Guard - Stainless Steel on your F-150
Tools Required
- RATCHET
- UTILITY KNIFE
- 18MM SOCKET
- lSMM SOCKET
- 14MM SOCKET
- PRY TOOL
- ALLEN WRENCH
- TORQUE WRENCH
- SOCKET EXTENS.
1. Remove contents from box, verify if all parts listed are present and undamaged. Carefully read and understand all instructions before attempting installation. (Note: There is no need to remove front bumper to install grille guard assembly.)
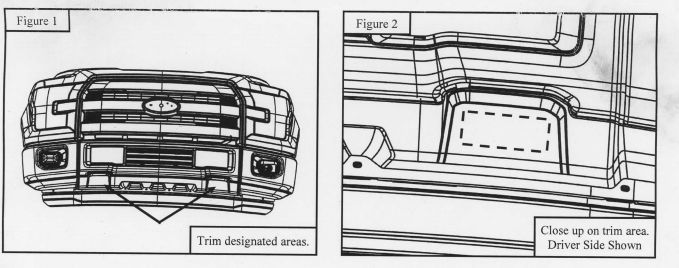
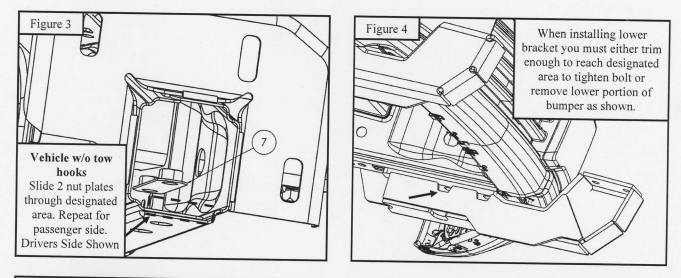
2. For vehicles without factory tow hooks trim the plastic in the areas in Figure 1 and 2. Repeat for the passenger side.
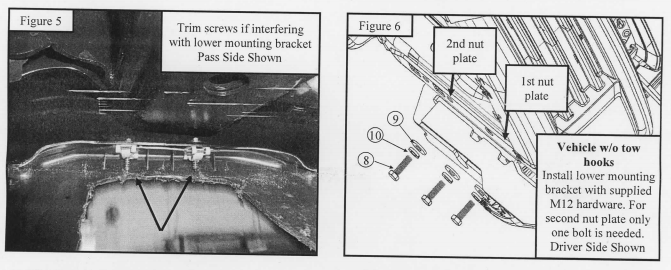
3. For vehicles without factory tow hooks slip 2 double nut plates into each frame rail and line up with existing holes, see Figure 3. Guide them and align with holes shown in Figure 6 with a magnet or screw driver. (Note: The rear nut plate will only need to be installed with one bolt.)
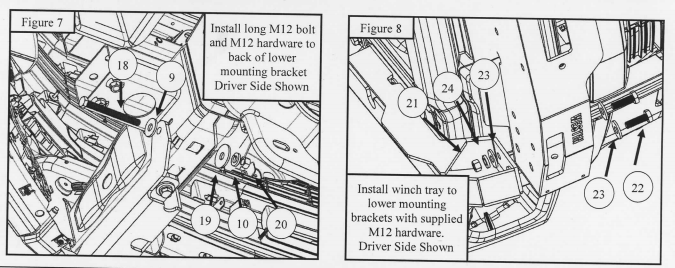
4. For vehicles withoutfact01y tow hooks Loosely install the Lower Mounting Brackets using the supplied M12 hardware as shown in Figure 6. Trim screws if they interfere with lower mounting bracket see Figure 5. (Note: The plastic valance which was trimmed in step 2 may need to be trimmed further to access a bolt with the ratchet when installing the lower mounting bracket, or the lower valance may be removed, see Figure 4.)
5. For vehicles with factory tow hooks remove tow hooks and slip in 1 double nut plate into frame rail. Loosely install Lower Mounting Brackets to factory nut plates and supplied nut plate using supplied Ml 2 hardware as shown in Figure 6. Trim screws if they interfere with lower mounting bracket see Figure 5. (Note: The nut plate will only need to be installed with one bolt and see Figure 4.)
6. Loosely install long Ml2 bolt and Ml2 hardware to the back of the lower mounting bracket. Use large diameter washer with nut and smaller diameter with bolt, see Figure 7.
7. Loosely install winch tray to lower mounting bracket using supplied Ml2 black zinc hardware, see Figure 8.
8. Align and adjust as needed, then torque Ml2 hardware to 50-55 ft-lbs.
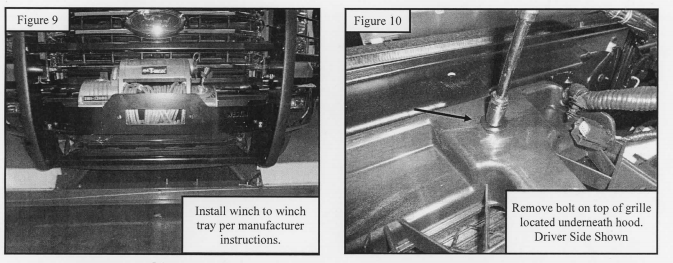
9. Install winch to winch tray per manufacturers instructions.
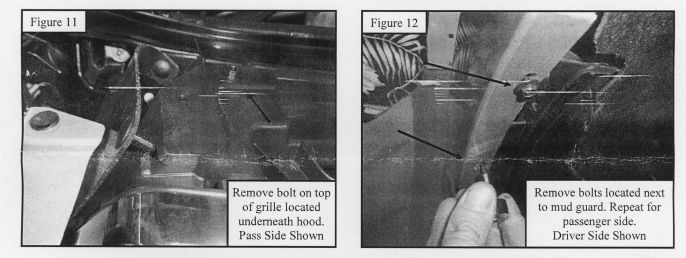
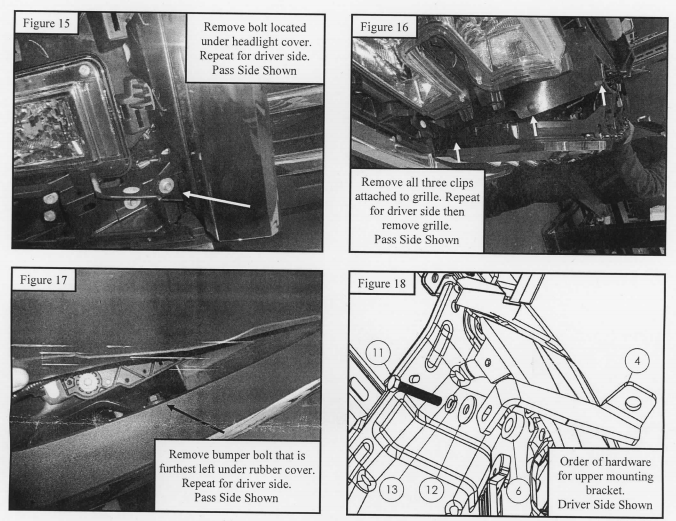
10. Remove all factory hardware and clips attached to grille, then remove grill. See Figures 10-16.
11. Remove factory bumper bolt see Figure 17. Install upper mounting bracket using supplied M8 hardware, tighten to 15 ft-lbs. See Figure 18.
12. Reinstall grille and headlight covers in the reverse order of the install instructions.
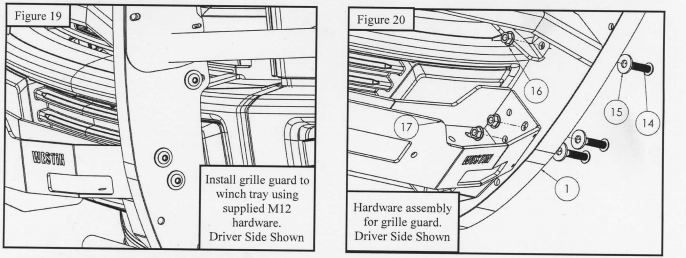
13. With assistance hold the Grille Guard up to the previously installed winch tray and upper mounting brackets. Loosely attach the Grille Guard to the brackets and winch tray using the supplied Ml2 hardware, see Figure 19 and 20.
14. Align and adjust the Grille Guard as necessary. Tighten and torque M12 hardware to 50-55 ft-lbs .