 FREE 1 to 3-Day Delivery on Orders $149+ Details
2005+ V6 Mustang Lower Billet Grille Installation Guide
Installation Time
1 hours
Tools Required
- Small regular flat screwdriver
- Long flat screwdriver
- Phillips head screwdriver
- 5/16 inch socket and ratchet
- 5/16 inch open end wrench.
- The first step would be to remove the grille from the box and make sure it is not damaged or missing parts. If there are any problems, stop here and call American Muscle before proceeding.
- Next you need to get the grille ready for installation. Remove the machine screws, washers, attachment hooks, flange brackets and locknuts out of the parts package.
- In my installation, theJhooks were too long. I had to cut off approximately 1/2 inch and re-bend and re-drill in order for theJhooks to work correctly. However this may not be the case for your installation.
- Place a machine screw into the hole in the front of the grille pushing it all the way through the mounting hole. See Photo Below
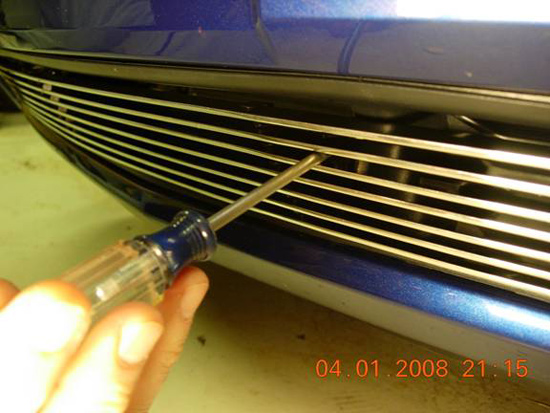
5. When you have it through, place one of the attachment hooks on the end and then a washer and lastly the locking nut.
6. Repeat this step for secondJhook. Note this step is done before trying to mount the grille to the car. When all the attachment hooks are installed on the grille, ask a friend to help you hold the grille in place.
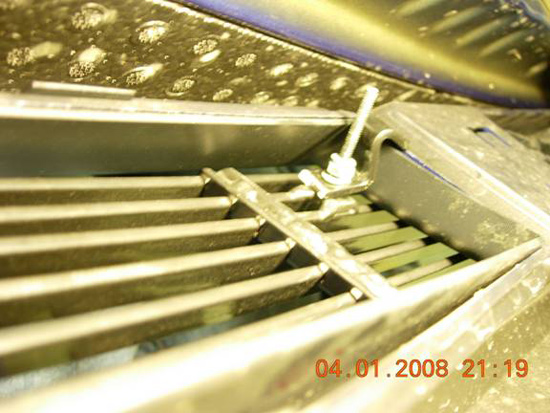
7. To get the hooks pushed through the middle portion of the grille, use your long screwdriver to get them pushed through and hooked onto the backside of the grille. The two J hooks need to be pointing towards the side of the car. See Photo Below
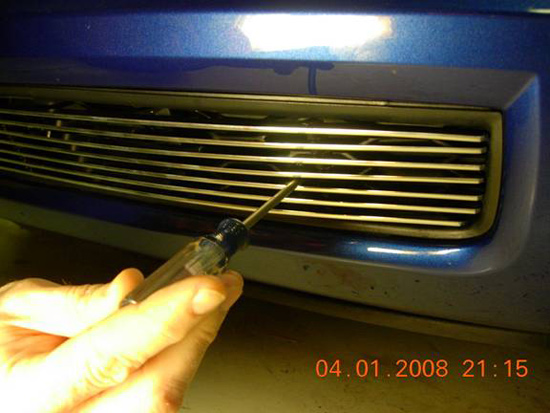
8. When you have the 2Jhooks in place, take your Phillips screwdriver and the ratchet with the 5/16 inch socket on it to tighten each machine screw. See Photo Below.
9. This step is best done with help having one person on the outside using the screwdriver and the other holding the ratchet in place.
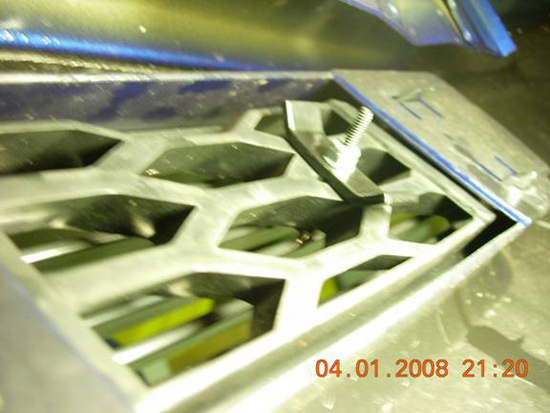
10. The next step is to place the other machine screw in the outer grille-mounting hole. From the backside of the bumper, you need to place the flange bracket over the honeycomb and add the washer and locknut.
11. Repeat for the other side of the grille. Tighten each side until snug.
DO NOT OVER TIGHTEN!
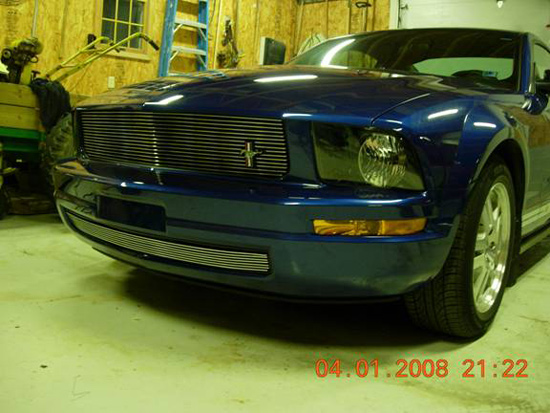
Finished Installation
Installation instructions provided by AmericanMuscle customer Sam Vastano
