 FREE 1 to 3-Day Delivery on Orders $149+ Details
Roush Quarter Window Louvers (2005-2009 Mustang) - Installation Instructions
Installation Time
60 minutes
Tools Required
- 5/64in Hex Wrench
- Soft Cloth
- Rubbing Alcohol
- Roll of Masking Tape
- Torque Gage (N-m)
- (OPTIONAL) Dupont 2319 Plastic Prep
- (OPTIONAL) Dupont 2330S or equivalent Adhesion Promoter (for paint)
- (OPTIONAL) 3M 4298 Adhesion Promoter (for double-sided tape)
Paint Prep/Pre-Installation:
1. Wipe each part with plastic prep (Dupont® 2319 or equivalent).
2. Wipe entire part with tack cloth.
3. Clean quarter glass and painted surface around quarter window with rubbing alcohol.
4. Thoroughly clean qtr. window area prior starting installation.
Installation
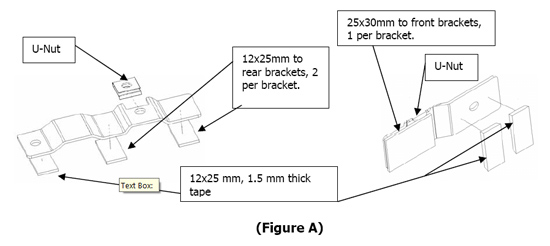
1. Attach supplied tape to brackets by removing white paper covering and positioning to bracket surface. Once positioned correctly, apply pressure to secure. Next install U-Nut to complete bracket assembly (see Figure A).
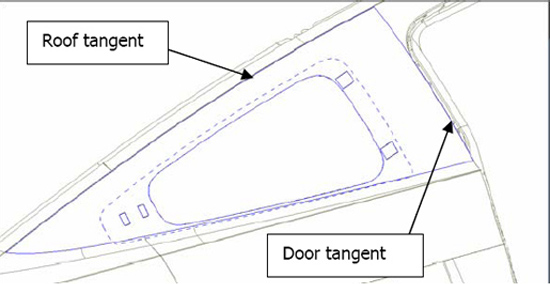
2. Attach bracket template to vehicle by first aligning top roof tangent and door pillar tangent (Figure B). Refer to alignment marks on Template.
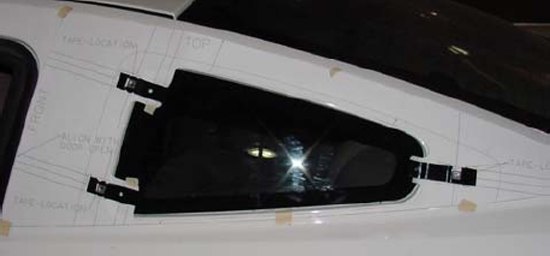
3. Once template is located and taped down, remove red covering from tape on bracket assemblies and attached to vehicle. Align holes of bracket with hole locations on template; use bracket extension lines on template for further alignment aid (Figure C).
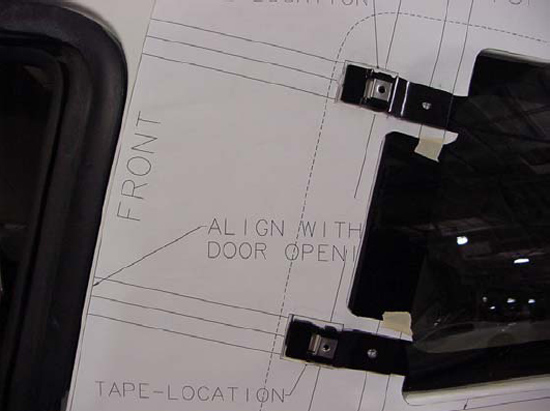
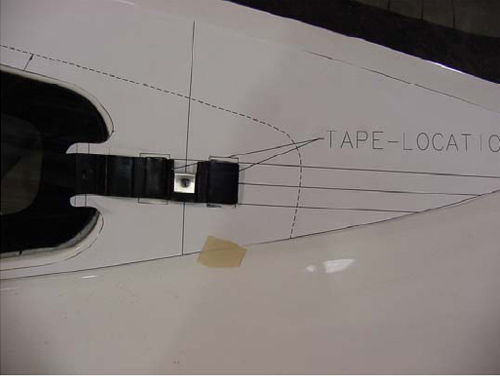
Figure C
4. Once brackets are positioned correctly to the template, apply pressure to brackets to thoroughly adhere the tape.
5. Allow tape to cure for one hour before installing louvers.
6. Remove louver template.
7. Position Louver onto brackets and into position.
8. Insert supplied screw into Louver and thread into bracket u-nuts (1 - 1.5 N-m Torque).
9. Repeat installation procedure for opposite quarter window louver.
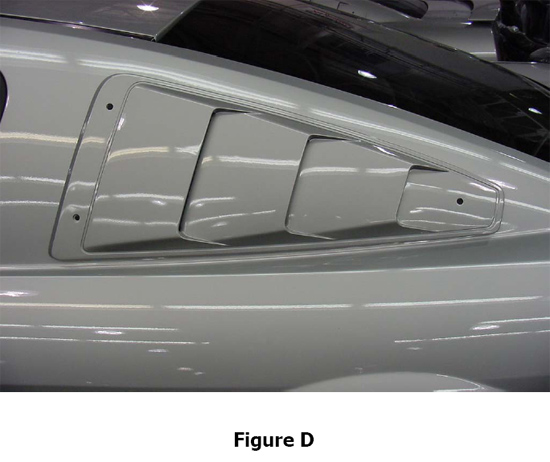
10. Quarter window louver installation is complete (see Figure D).
11. If items are missing or for any questions regarding the installation of this kit, please contact Roush Performance toll free at 1-800-59-ROUSH.
Installation instructions provided by Roush Performance
