 FREE 1 to 3-Day Delivery on Orders $149+ Details
Cervini Speedster Cover Installation Guide (2005-2010)
Installation
- Align the supplied template with the edges of the side interior panel and tape it to the top of the panel as shown in Fig A.
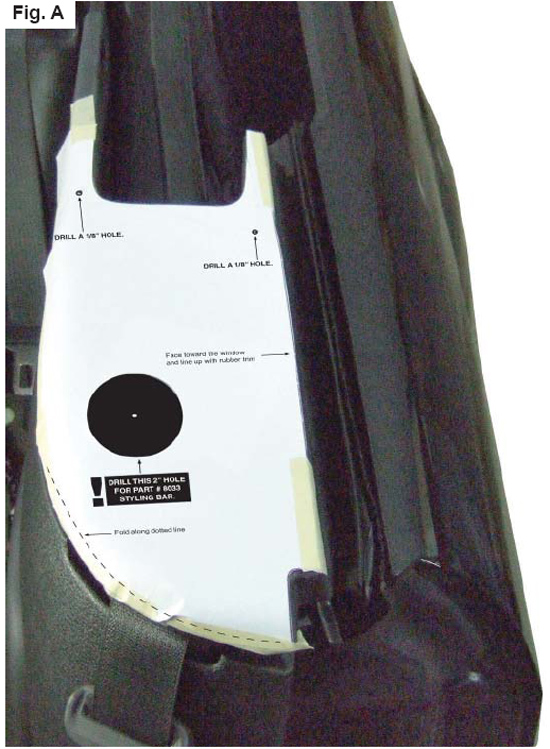
2. Drill a 1/8” hole in the two smaller marked circles. (The large circle in the middle of the template is for Cervini’s Styling Bar part # 8033.) Use the same template to repeat the procedure to the other side.
3. Remove the top of the side interior panel and install the snap buttons, rivets, and back up washers as shown in Fig B. Important: place the o-ring on top of the rivet when installing, this will ensure that the rivets are crimped down tightly.

4. Reinstall the top of the side interior panels and place each speedster cover on the car to test fit them.
5. Insert the seatbelt brace into one of the seatbelt buckles in the center of the back seat.
6. Install the threaded knob through the center of the speedster cover and into the speed nut that is already installed on the speedster cover. Snap the center piece to the bottom front of the speedster covers.
7. Align the seatbelt brace with the notch in the center piece and install the threaded knob through the speedster cover and into the seatbelt brace.
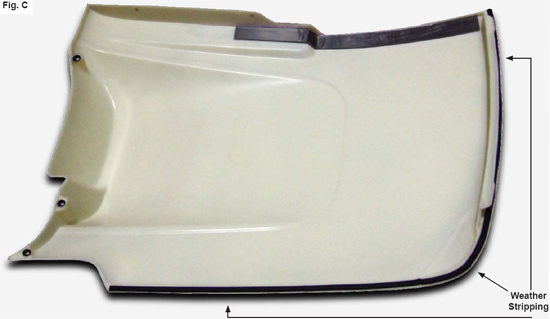
8. Once the speedster covers have been painted install the weather-stripping even with the outer edge as shown in Fig C.
9. To remove any mold release contaminants, clean the back of the part first. Using 2 new clean rags, saturate the first rag with plastic prep cleaner* and begin cleaning. Then use the second rag to remove the prep cleaner. Continuously fold both rags to their clean sides during the process. Use 3 sets of new rags throughout the process. This prevents mold release contaminants from transferring to the painted surface.
10. Repeat step one on the front of the part.
11. Rinse the part with water. Apply a generous amount of Ajax® or sand fix* to a red scuff pad* (3M Scotch Brite Brand) and scrub the surface to be painted THOROUGHLY (especially where the 2-sided tape is installed, on the back side of the part, and all the hard to reach areas). Then rinse with water and dry. The scrubbed surface should be dull. If any shiny spots show, repeat the process on those areas.
12. Using another set of clean new rags, again clean the surface to be painted with plastic prep cleaner.
13. Spray the surface to be painted with adhesion promoter* including the areas where the 2-sided tape is installed (follow the instructions on the can for application and drying time).
14. Apply 3 to 4 coats of urethane primer* with flex additive* (follow the instructions on the can for application and drying time).
15. Wet sand primer with 600 grit sandpaper. Be careful not to sand through the primer. If you do, you MUST clean those areas with plastic prep cleaner, apply adhesion promoter and prime. Once the primer has dried, wet sand the areas that were touched up. Your surface is now ready for paint.
* These items can be purchased at any auto body supply store.
Installation instructions provided by Cervini's Auto Designs
