 FREE 1 to 3-Day Delivery on Orders $149+ Details
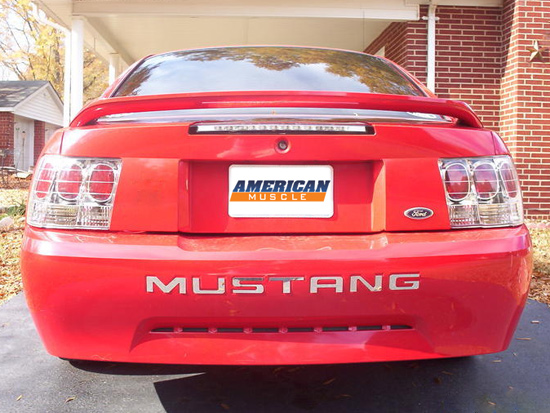
Mustang Euro Taillight Installation Guide ('99-'04)
Installation Time
2 hours
Tools Required
- Door panel remover
- Pliers
- Ratchet
- 7/16" deep socket
- Rubbing Alcohol and Paper Towels
- Clear Silicone Sealant and Caulk Gun
- Small Screwdriver
Installation
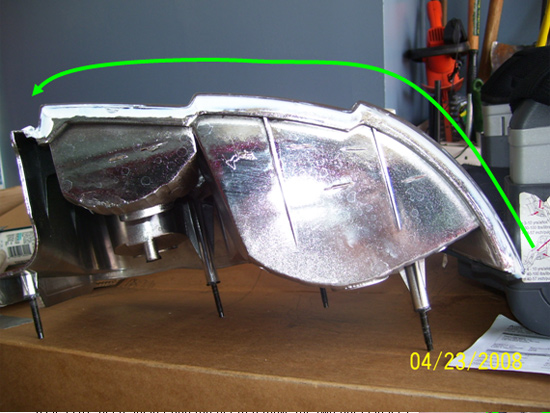
1. Unpack the tail lights from the package and remove labels and caps. Inspect for damage. Keep them on the foam to avoid scratches until they are ready to be installed.
Note:AmericanMuscle recommends sealing your Taillights with silicone RTV sealant before installing them to prevent the possibility of moisture condensation on the inside.
2. Cut the tip of the sealant to 1/8 inch bead width, use a small screwdriver down tip to poke hole in caulk liner. Put the caulk into the caulk gun and pump the handle until caulk is out. Pump a few more times to purge air.
3. It is a good idea to clean the surface that you will be applying the silicone sealant to. Using some rubbing alcohol and a paper towel clean the seams that you will be sealing. Allow the rubbing alcohol to dry before you start to apply silicone caulking. Note: the seam is where the two half's of the plastic housing come together.
4. Starting at one side/edge of the seam apply caulk with at least 1/8 inch bead. More may be necessary in larger crevices. Spread the bead into the crack with your fingers. Clean excess from you and housing with damp rags.

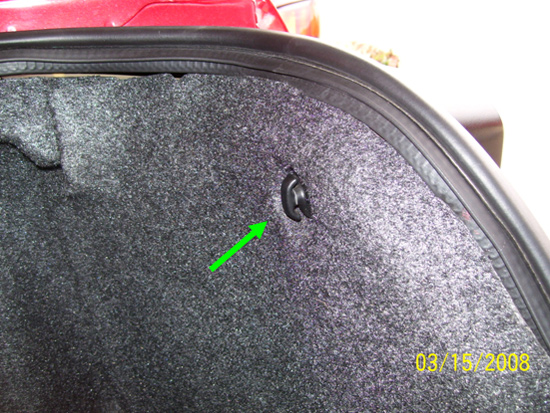
5. While waiting for the caulk to dry, you can start removing the plastic fasteners on left and right side in trunk. Use pliers if the fasteners are tight.
6. Using the door panel remover pry off the four retaining clips around the lock area.
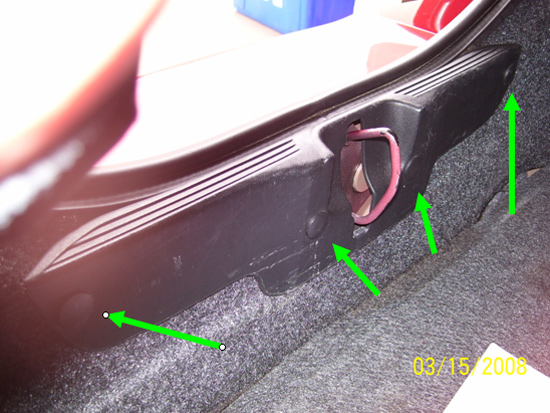
7. Remove the top plastic fasteners on top of the trunk by the hydraulic lift on both left and right sides.
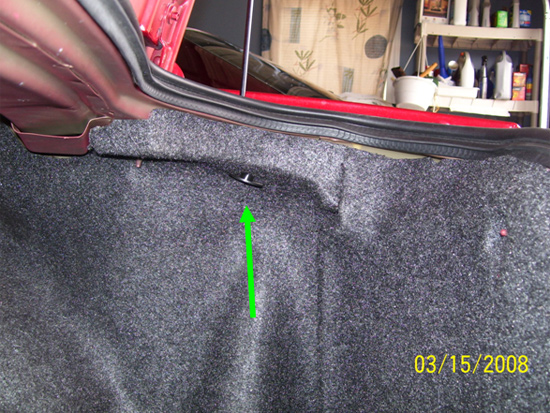
8. Remove the carpeted cover under this plastic panel. Be careful not to bend it!
9. Work the side cover around the bolt on top where you removed the fasteners in step 8. This need to be done to get access to inside nuts.
10. Use 7/16" deep socket and ratchet to remove the two nuts closet to you. Then pull side cover back to remove the two interior nuts. Nuts will have a sealant on them. Remove this and reseal later.
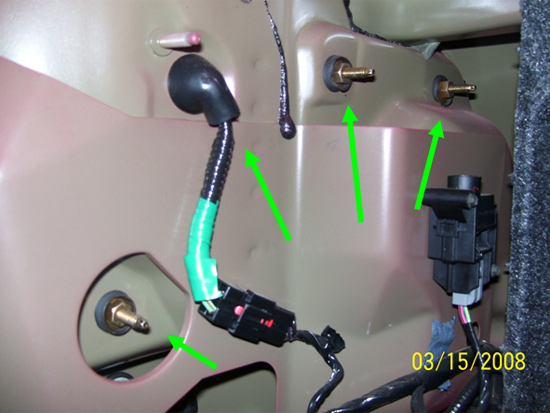
11. Apply pressure to the studs to free the lights, then pull the lights from the vehicle just enough to access the bulbs. Clean this area if desired since it will most likely be very dirty.
12. Now disconnect the bulbs from the housing by turning them. Just make note of which bulb goes where.
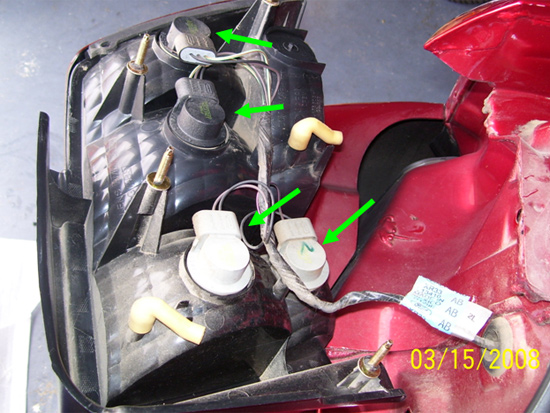
13. After you have removed the bulbs from the stock taillights you can install the bulbs back into the new Euro Style taillights in the correct places.
14. Install the new Euro taillight into position. Donottighten just yet. Repeat steps 10-14 for other side.
15. Before tighten up the bolts ask someone to help you test that all the functions of the taillights are working correctly. If all functions check out okay then re-tighten the nuts and reseal them with the silicone sealant.
16. Replace all the covers and clips back into their original positions by reversing steps 5 through 8.
17. Finally take some pics for your album.
Installation instructions provided by AmericanMuscle customer Nam Nguyen

