 FREE 1 to 3-Day Delivery on Orders $119+ Details
Best Sellers


BBK Liquid-Filled Fuel Pressure Gauge ('86-'93) - Installation Instructions
Installation Time
60 minutes
Tools Required
- Open- end wrench sizes 9mm, 11mm, 13mm (or 1/2in)
- Flashlight
- 1/4in I.D. clear tubing approx. two feet long
- A large straight pin (like found in a sewing kit)
- An empty coffee can or large mouth jar
- A fem/fem 90 degree brass elbow with 1/4inch NPT threads on both ends
Shop Parts in this Guide
Installation
1. Park on a level spot, set the hand brake and open the hood. Disconnect the battery at the negative terminal. Allow the engine to cool completely (Strongly advised).
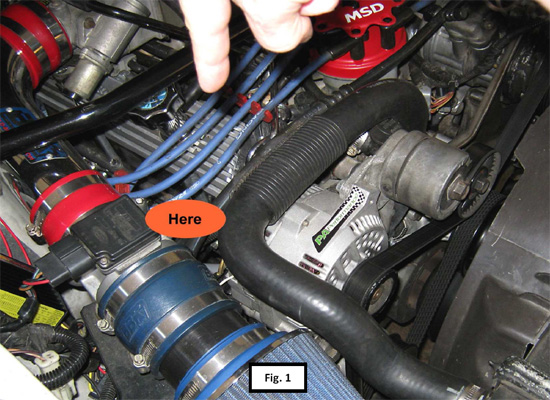
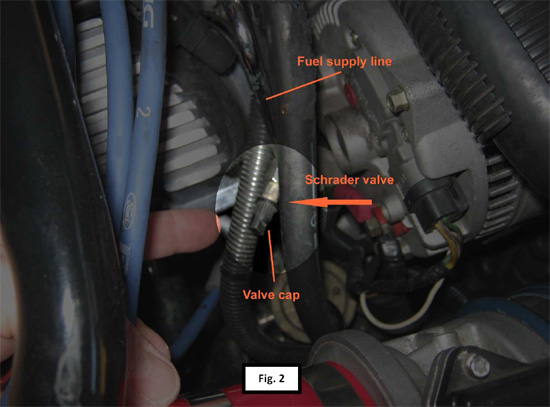
2. Locate the fuel supply line pressure release (Schrader) valve: I found this on the metal fuel line; passenger side of the engine down near the #1 spark plug. Depending on the type and year of your vehicle, it may be toward the firewall or elsewhere on one of the fuel rails. See Figs 1 and 2
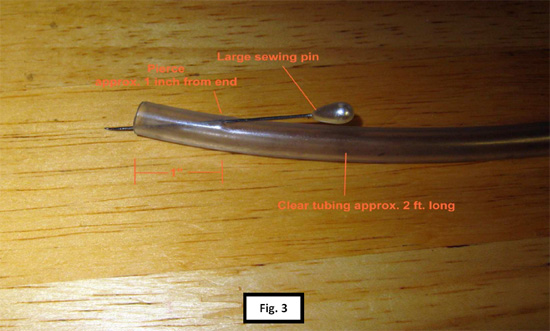
3. Release fuel pressure-In order to relieve the pressure in the line safely, you need a way to control the small amount of fuel (about 1/2 cup) that will come out as the line pressure drops. Use the straight pin and clear tubing to make a simple drain tube (as shown in Fig. 3) which will allow you to open the valve and direct the fuel into the empty coffee can or other jar. Then push the drain tube over the end of the valve approx. 1/2 in. with the sewing pin’s point in line with the center stem of the valve. See Fig. 4
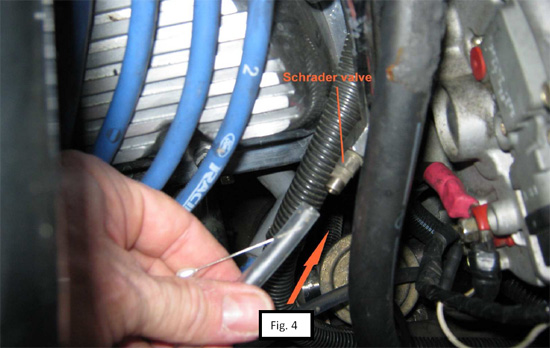
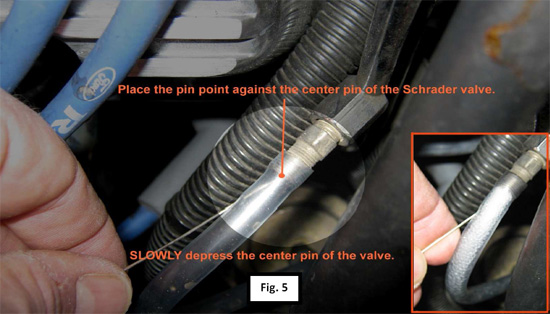
4. Align the pin’s point with the center stem of the Schrader valve. I used a flashlight to see through the tubing and better locate the center of the valve. Slowly depress the valve stem with a steady, firm pressure. When the fuel stops flowing, remove the drain tube from the end of the valve. (Fig. 5)
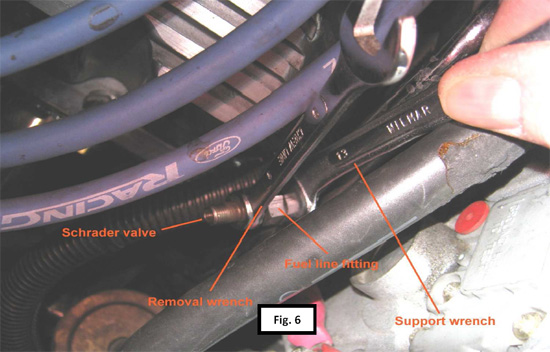
5. Remove the Schrader valve-Using the 13mm (or 1/2in.) open end wrench as a support for the fuel supply line fitting, remove the valve with the 9mm wrench. (See Fig. 6).
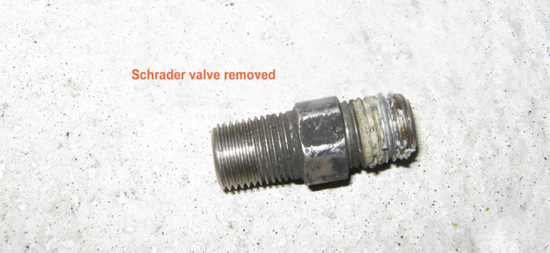
NOTE:Take special care to not allow the fuel line to bend or the fitting to turn, the metal is thin and can easily crack where the fitting is attached; use a support wrench to avoid damage. Once removed, set the Schrader valve aside, it will no longer be needed for this project.
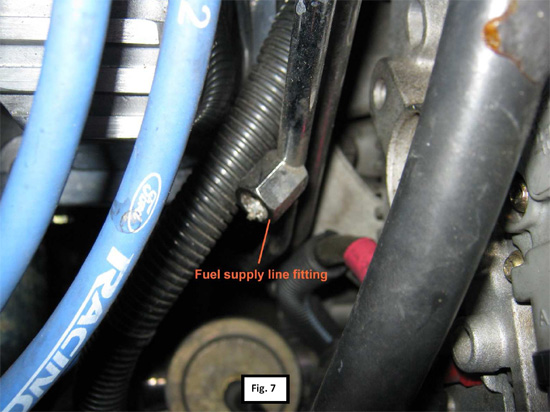
6. If there is any sealant or other residue on the threads of the fuel line fitting, take care so that it doesn’t get into the fuel system. I used tweezers, a toothpick and a cotton swab to pull out the gunk that was left behind. Definitely do not want that clogging up the injectors! (See Fig. 7)
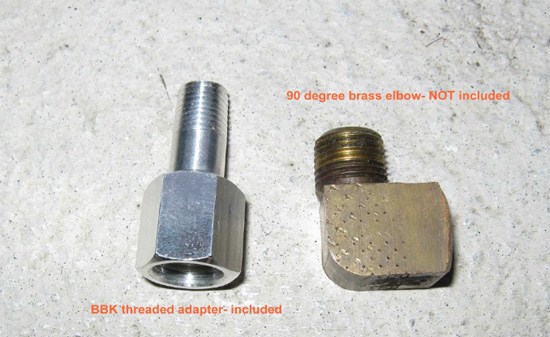
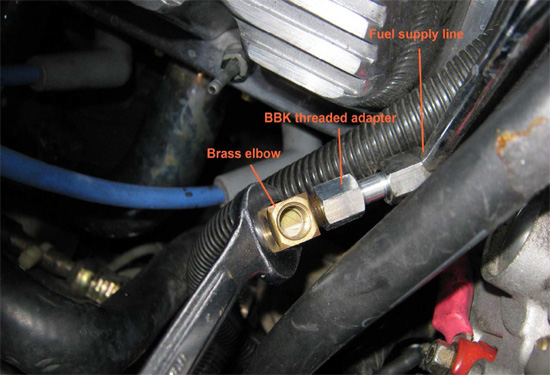
7. Install the adapters and gauge-To attach the supplied thread adapter to the fuel line fitting, turn it by hand until seated butdo not tighten yet.If using one or more other fittings (like the brass elbow), install them in the same fashion. Use an 11mm support wrench to brace the fuel line fitting (as in Fig. 6) and a 13mm wrench to tighten the BBK adapter allowing the other fitting(s) to turn with it, once a snug fit is achieved move on to the next fitting. Make note of the position of the fittings opening for final orientation. (Fig. 8)
IMPORTANT NOTE:The tapered NPT threads of the BBK adapter and brass fitting are self-sealing; therefore, they do not usually require any sealant or pipe tape. This type of thread can be tightened more to accommodate the proper positioning, but you must never loosen or ‘back-off’ on it or a leak will result.
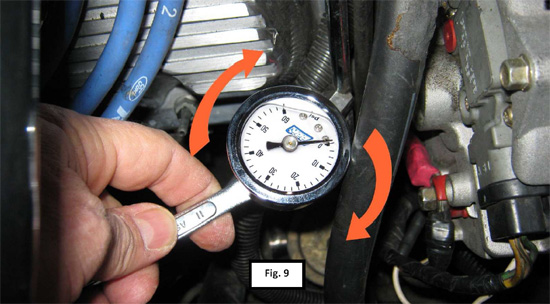
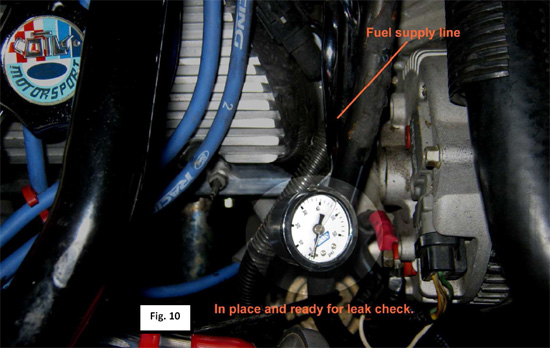
8. With the adapter(s) in position, install the BBK gauge finger tight at first, then using the 11mm wrench on the square boss at the back of the gauge to tighten into final position. (Figs 9 and 10)
9. Pressurize the system and leak check-Reconnect the battery, clear the tools from the engine bay. Turn the ignition to the ‘on’ position, you may briefly hear the fuel pump prime the system, but do not start the car. Check the gauge for a pressure reading and the fittings visually for leaks. I used a flashlight to get a good look before the next step.
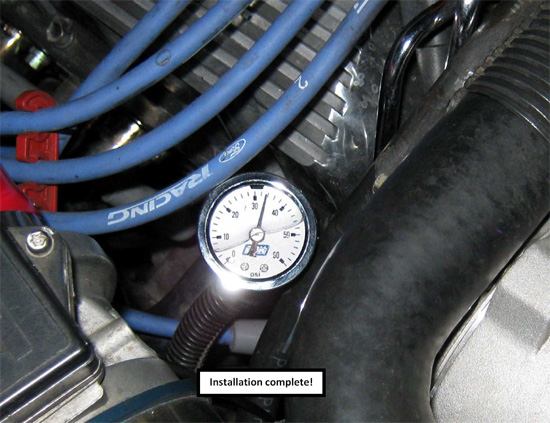
10. Start the car and check for leaks again-Once the engine is running, carefully check again for any fuel leaks. If a leak forms turn the engine off, tighten the fitting a little more, wipe area dry, then start the engine again. Repeat this until there are no leaks. Take it slow at this point; only tighten a little at a time. REMEMBER: This type of thread can be tightened more to accommodate the proper positioning, but you must never loosen or ‘back-off’ on it or a leak will result. I eventually tightened the assembly one additional rotation before all the fittings were sealed.
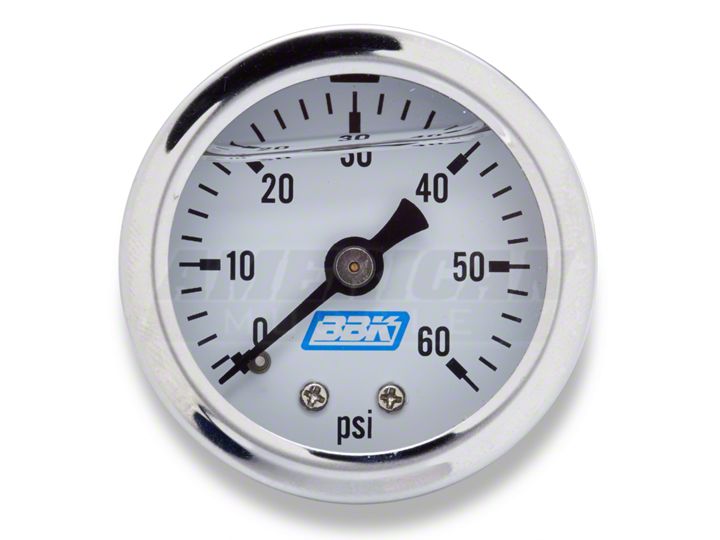
11. The BBK Fuel Pressure Gauge is a simple tool that is a necessity for any kind of fine tuning or modification of the fuel injection system. The gauge itself is liquid filled to reduce vibrations, making it easy to read with the engine running. On a stock set up like mine, it allows me to get base-line information for diagnostics and when used with an adjustable fuel pressure regulator, this gauge offers terrific engine tuning capability. So, if ‘information is power’, then this is one powerful little gauge!
Installation instructions provided by AmericanMuscle customer Curt Calfee 2.9.10
