 FREE 1 to 3-Day Delivery on Orders $149+ Details
How to Install a Ford Racing 85mm Cold Air Intake for 2005-2009 Mustang GT
Tools Required
- Safety Glasses
- 8mm box wrench
- 15mm box wrench
- 10mm socket and 6+ extension
- T-20 torx driver
- Flat head screwdriver
- 8mm nut driver (for hose clamps)
- 10mm deep socket (for front nut)
- 15mm deep socket (for front stud)
Installation
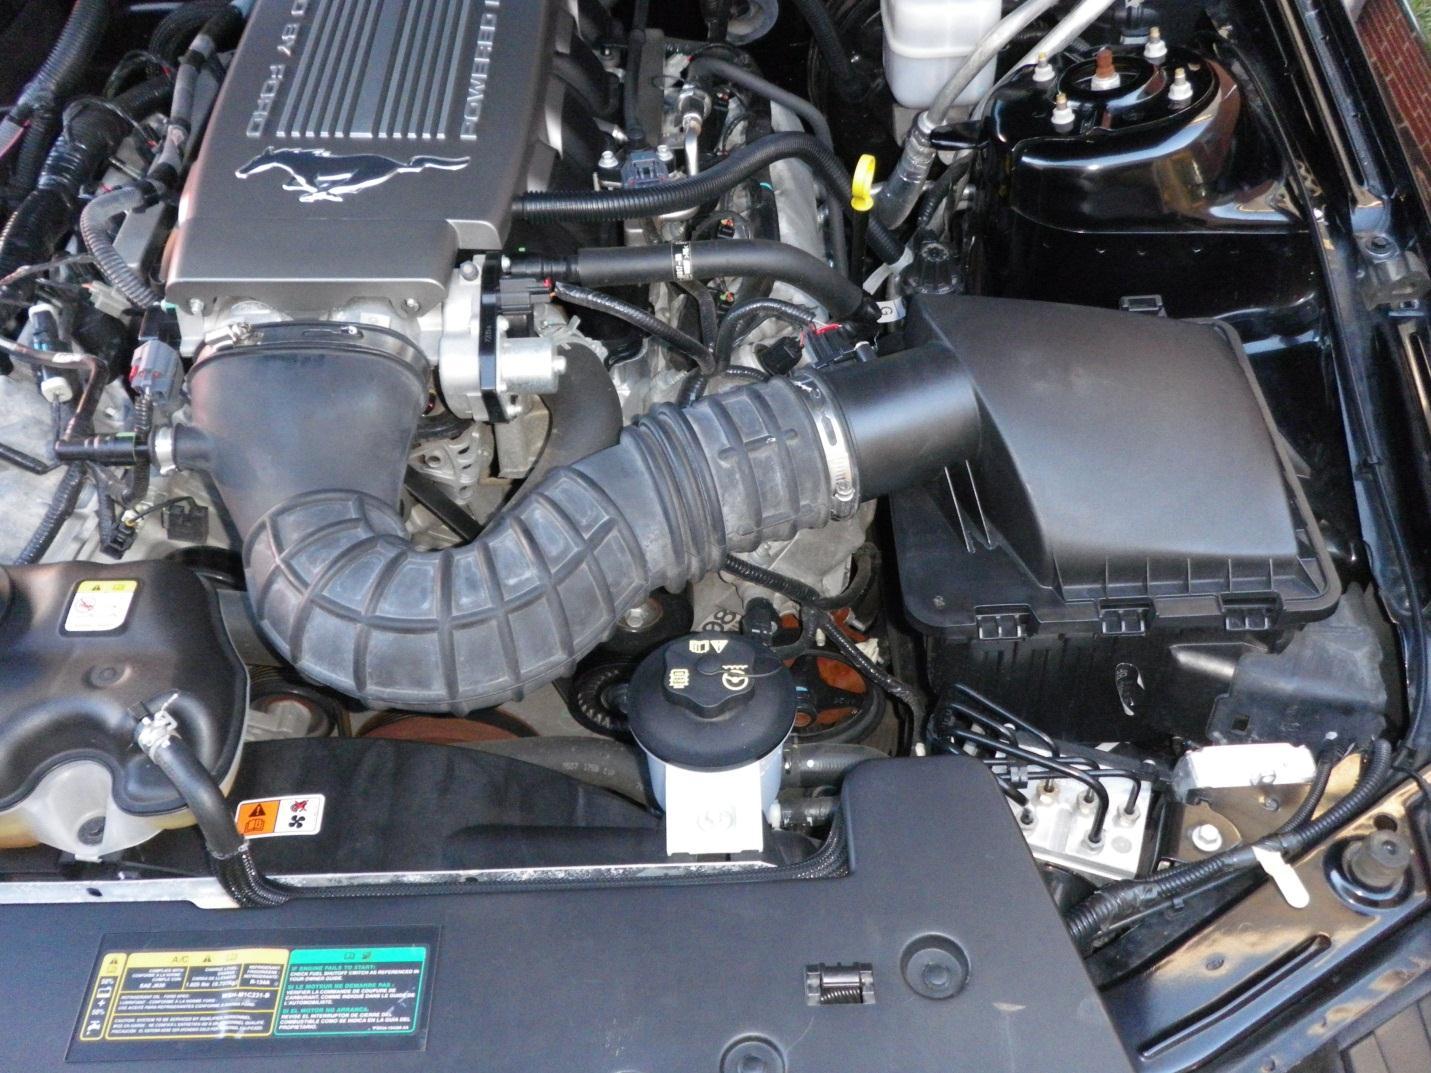
Before (stock air intake)
Installation
Before (stock air intake)
The following are instructions for installing the Ford Racing CAI from American Muscle. This is a fairly straight forward installation and requires minimal tools.
Removal of existing air intake:
1. Disconnect the battery. 8mm box wrench works best for this. You may need to pry it off with a screwdriver.
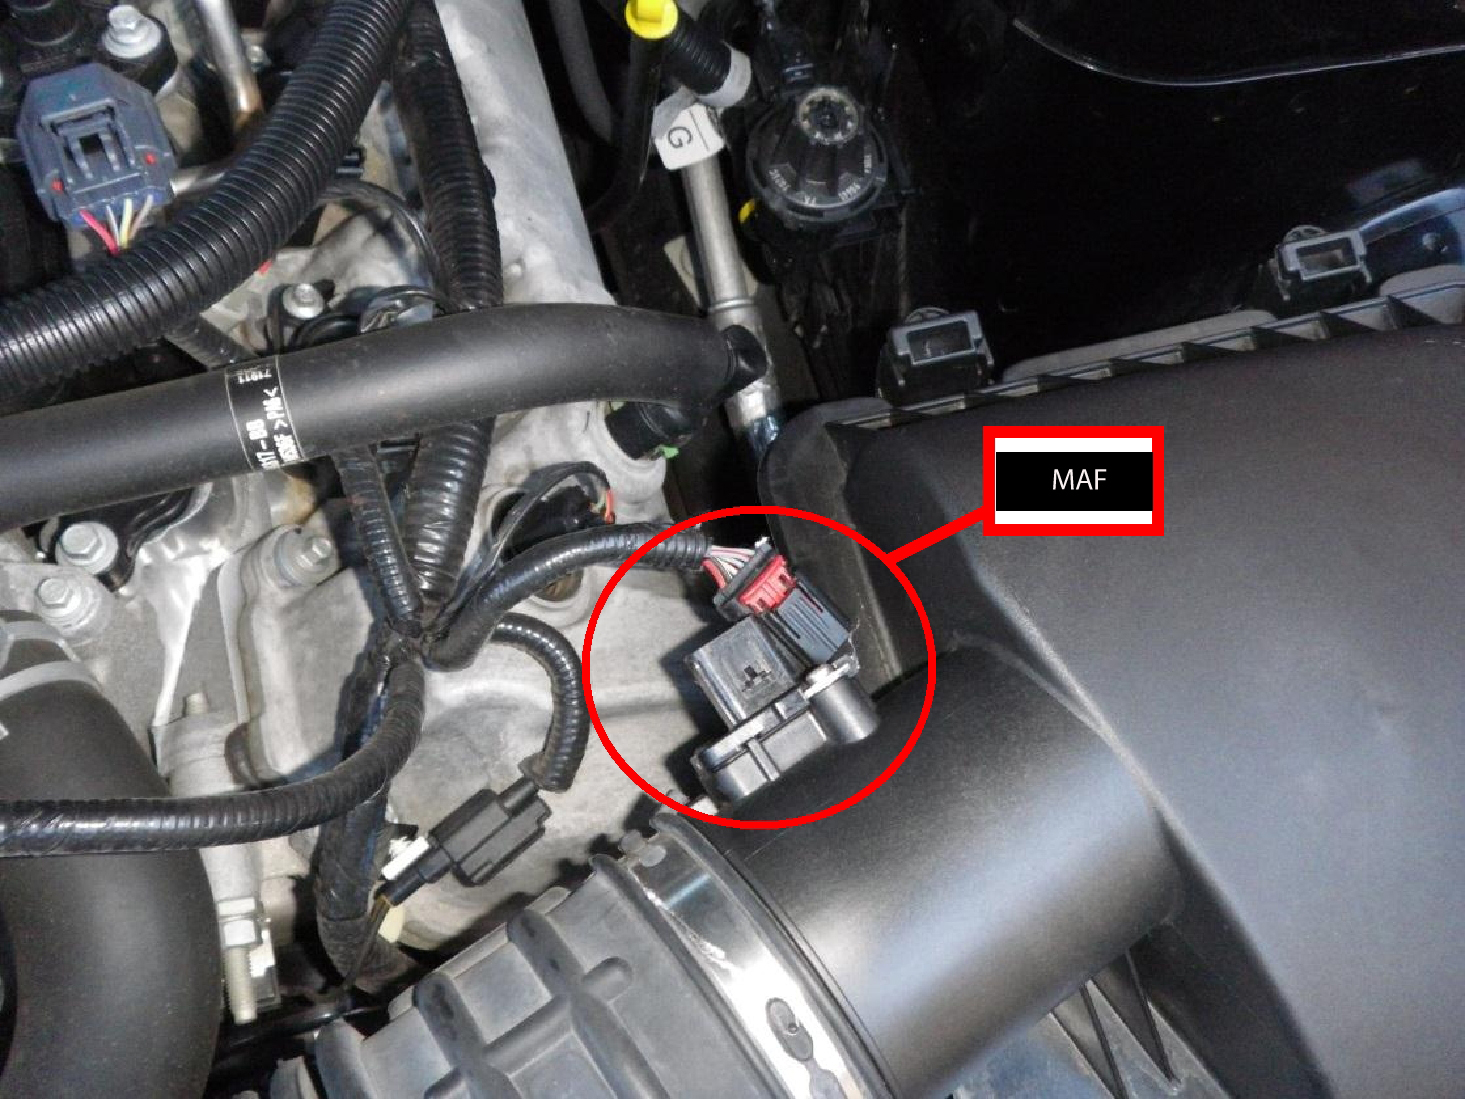
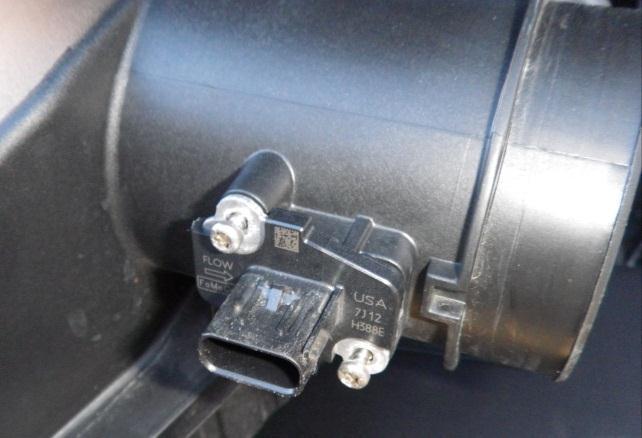
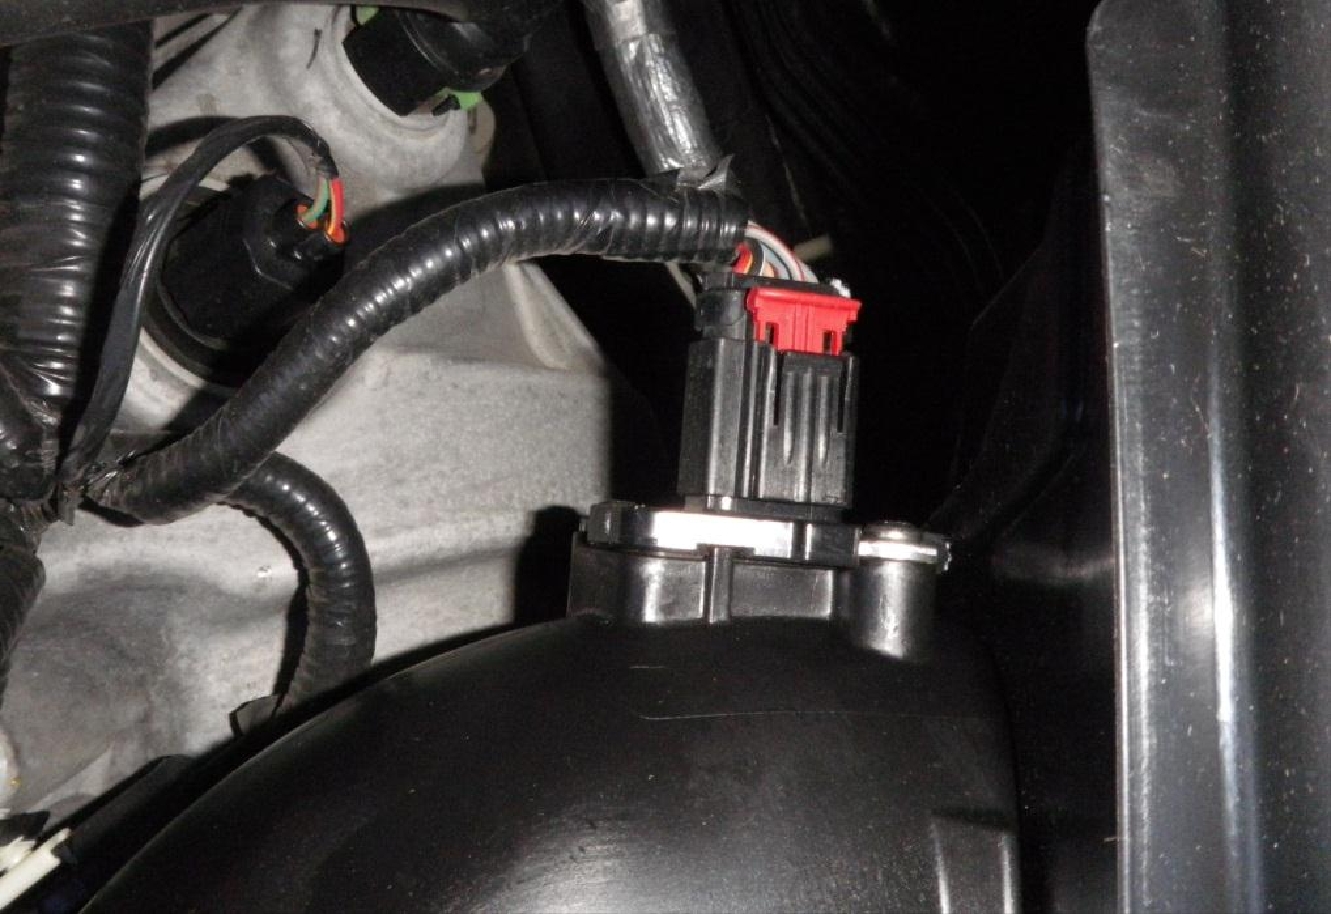
2. Unplug the MAF (mass air-flow) cable from the sensor. This is located near the airbox. There is a release button.
The following are instructions for installing the Ford Racing CAI from American Muscle. This is a fairly straight forward installation and requires minimal tools.
Removal of existing air intake:
1. Disconnect the battery. 8mm box wrench works best for this. You may need to pry it off with a screwdriver.
2. Unplug the MAF (mass air-flow) cable from the sensor. This is located near the airbox. There is a release button.
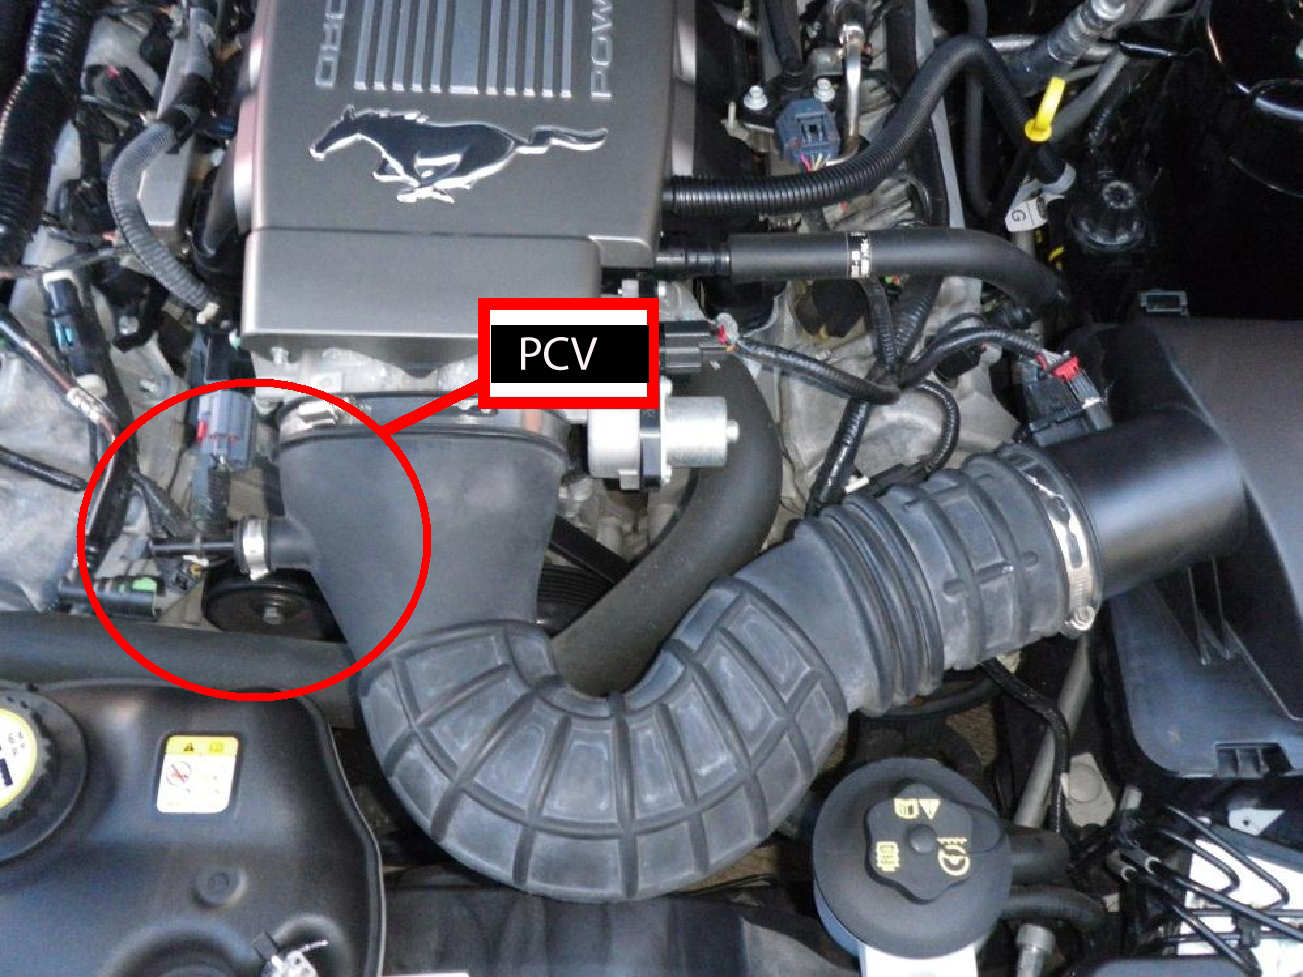
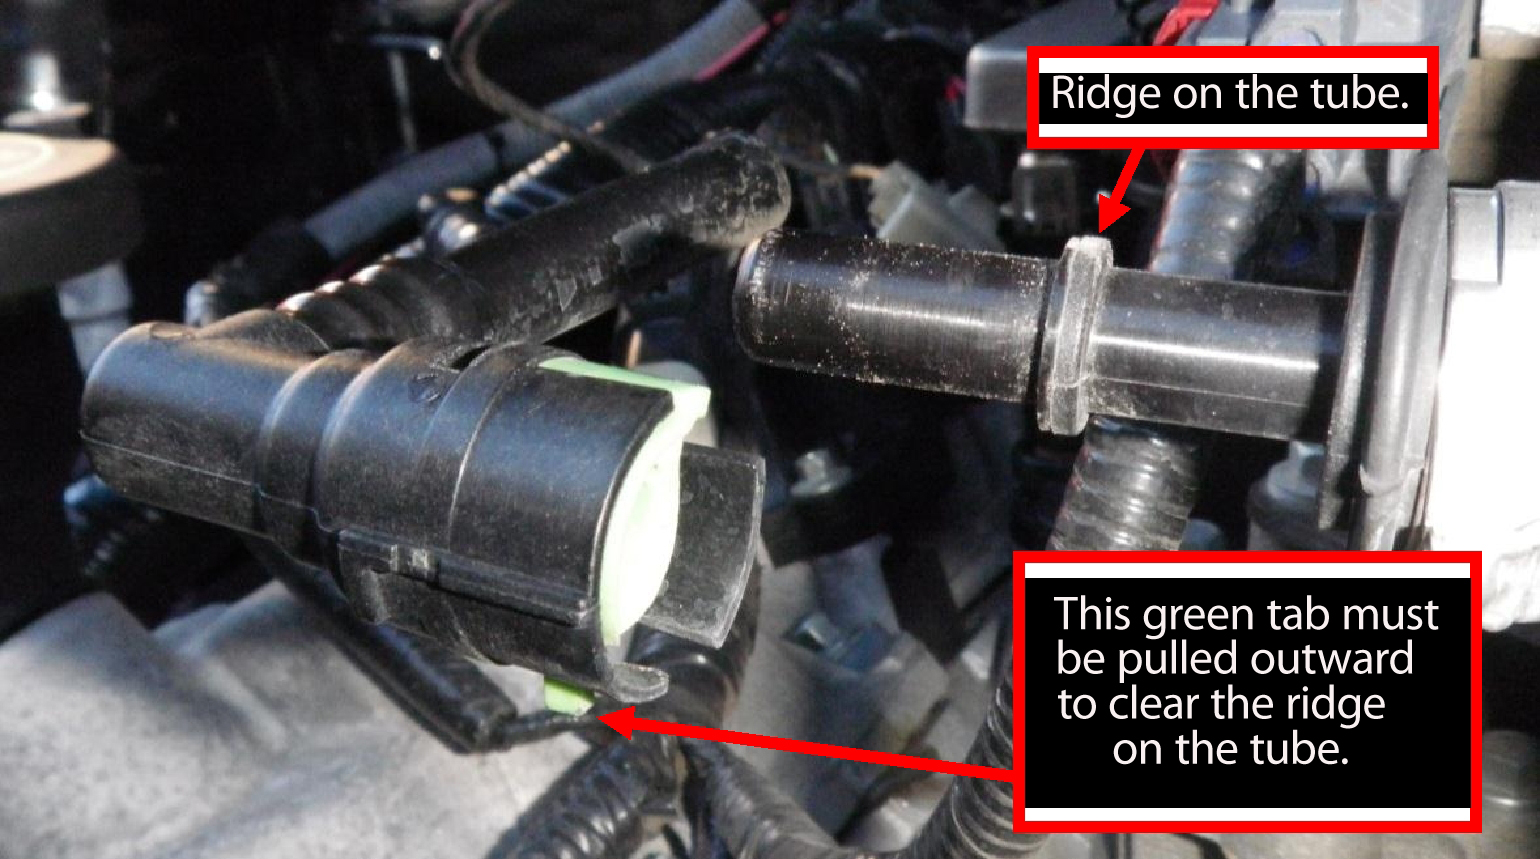
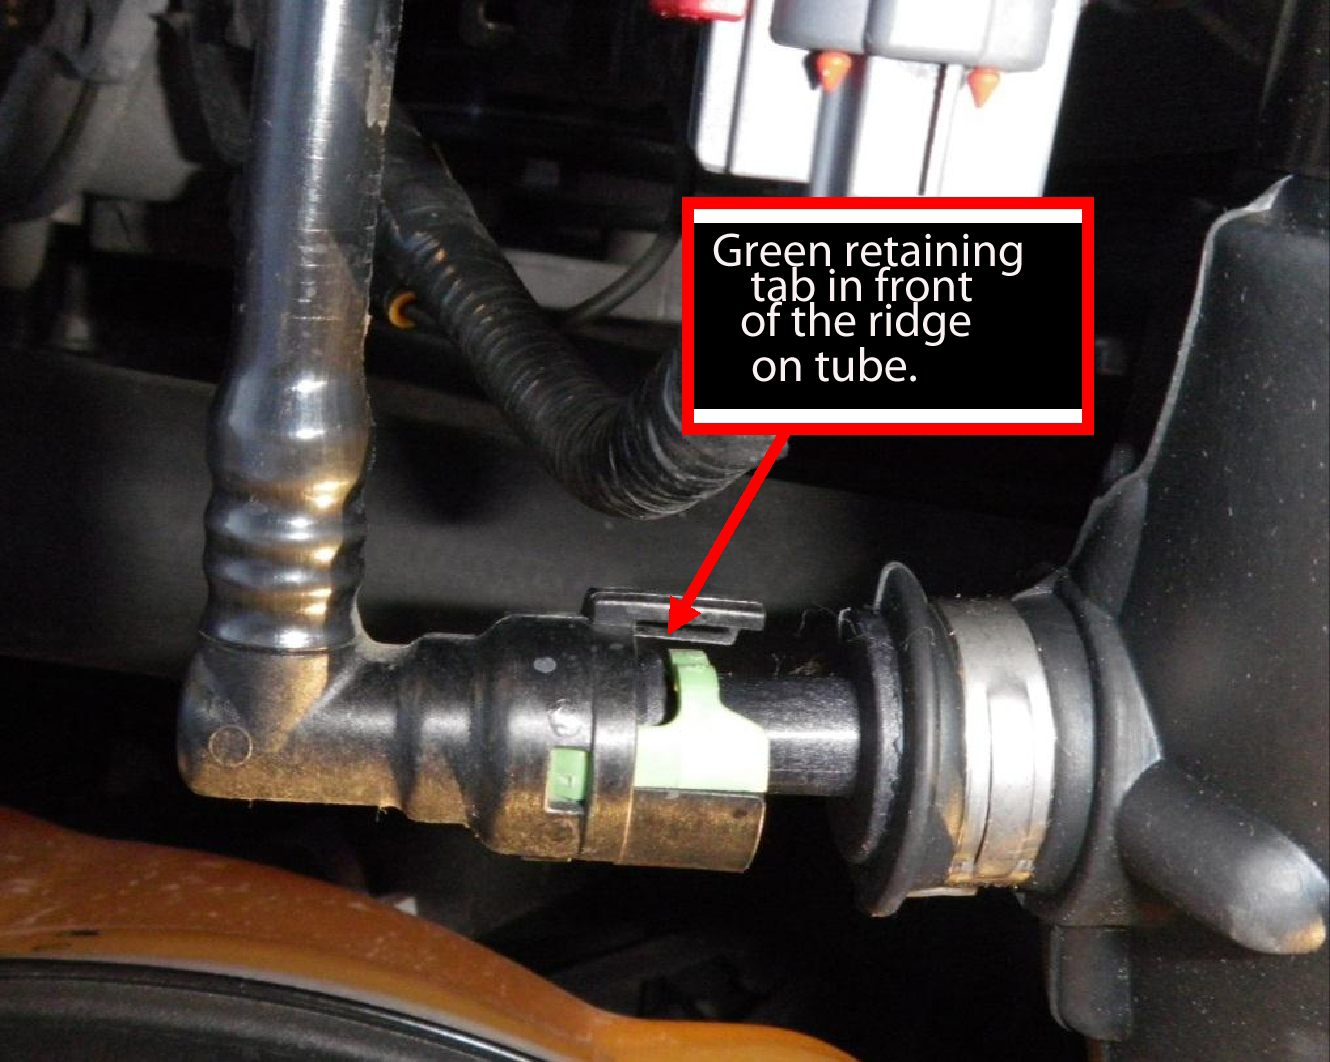
3. Disconnect the PCV line. There is a green tab that must be pulled out to release the tube. The green tab is on the bottom of the fitting. You can see a ridge on the PCV tube coming from the clean air tube. The green tab has to clear this
3. Disconnect the PCV line. There is a green tab that must be pulled out to release the tube. The green tab is on the bottom of the fitting. You can see a ridge on the PCV tube coming from the clean air tube. The green tab has to clear this
4. Loosen the hose clamps on the clean air tube between the airbox and throttle body. Once loose, remove the clean air tube. If you are working in a dirty area, stuff a clean rag into the throttle body to prevent dirt from getting in there.
5. Remove the airbox retaining bolt on driver side of box. The 10mm socket with extension is helpful here. Keep this bolt, it is needed for reassembly.

6. Remove the MAF from the old airbox. A T-20 torx driver is required here. Keep these screws with the old box. New screws (machine thread) are provided for the new airbox. I also recommend carefully cleaning the gasket with a clean dry rag. You do not want air leaking here.
6. Remove the MAF from the old airbox. A T-20 torx driver is required here. Keep these screws with the old box. New screws (machine thread) are provided for the new airbox. I also recommend carefully cleaning the gasket with a clean dry rag. You do not want air leaking here.
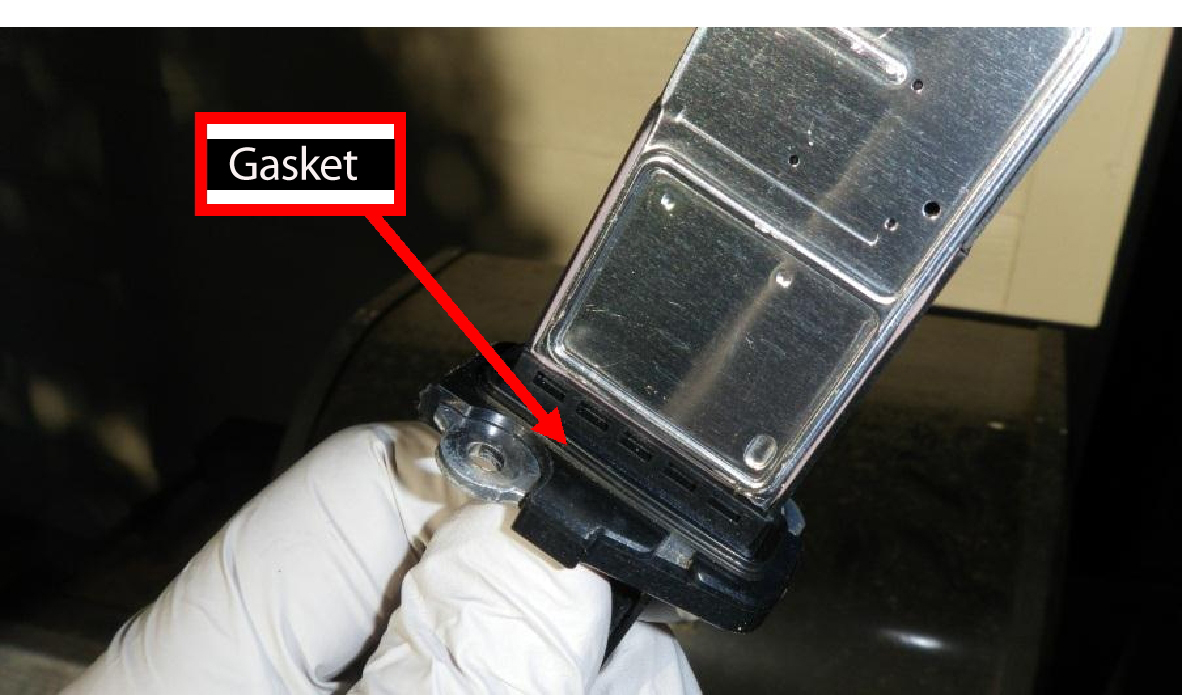
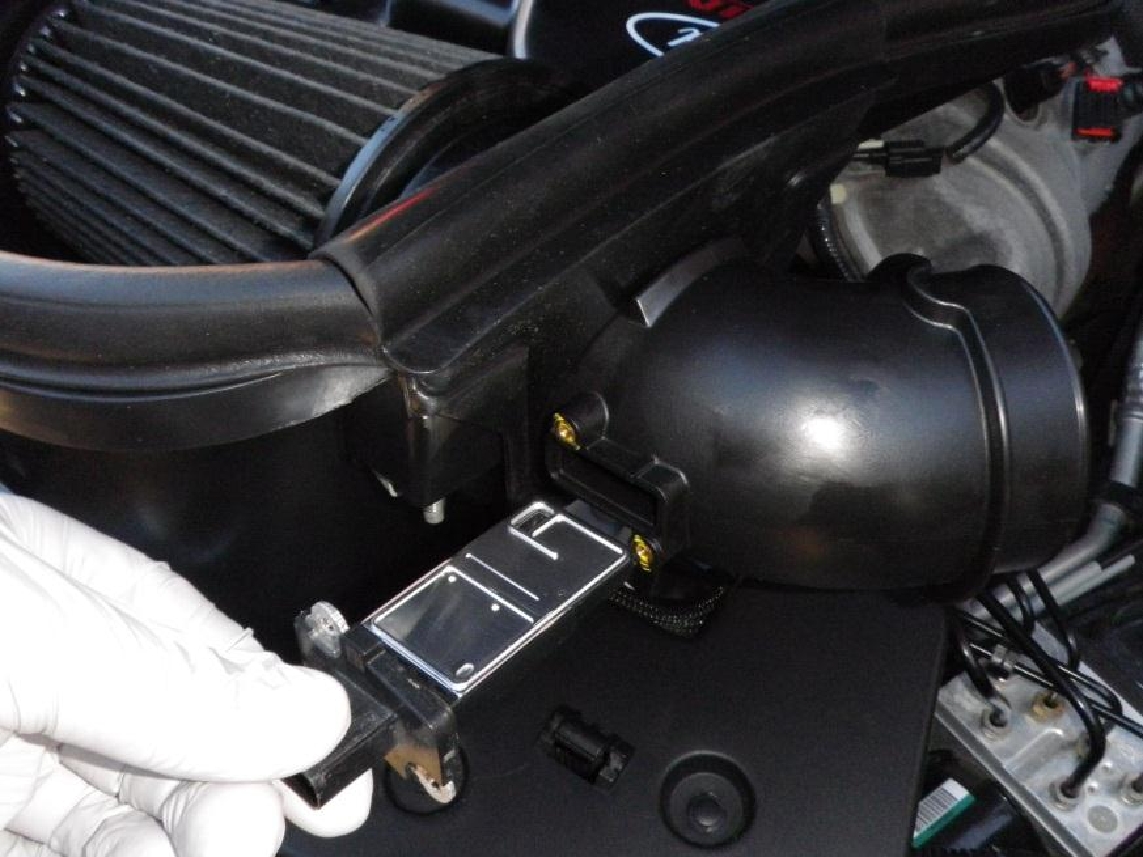
7. Install MAF into new airbox with the screws provided. They already have thread locker on them.
7. Install MAF into new airbox with the screws provided. They already have thread locker on them.
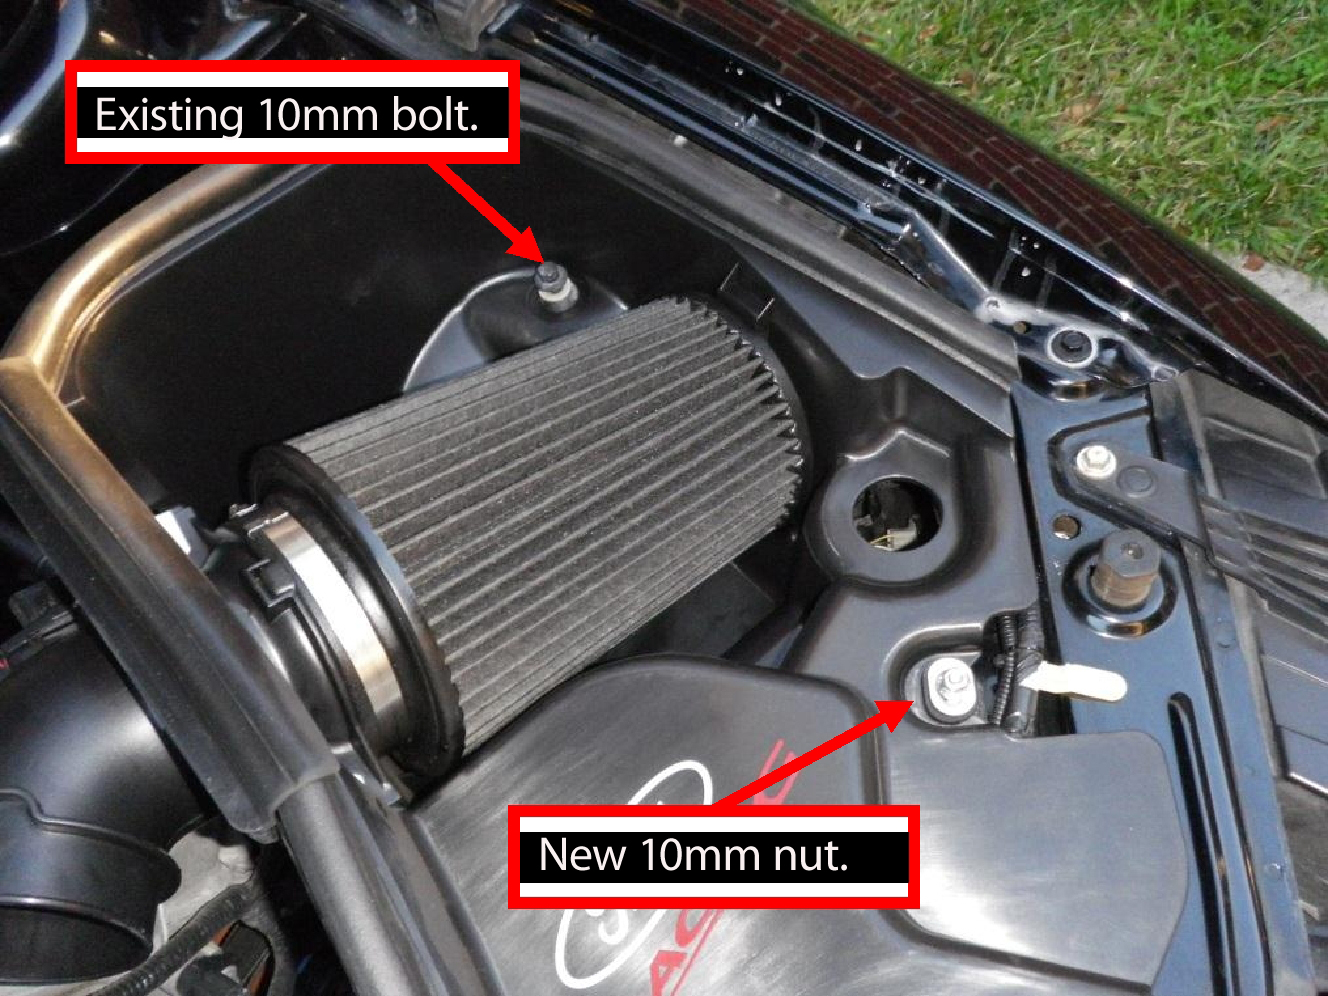
8. Remove the 10mm bolt from the ABS bracket. If your car does not have ABS, install the included U-Nut in this location. Keep this bolt with your old airbox.
8. Remove the 10mm bolt from the ABS bracket. If your car does not have ABS, install the included U-Nut in this location. Keep this bolt with your old airbox.
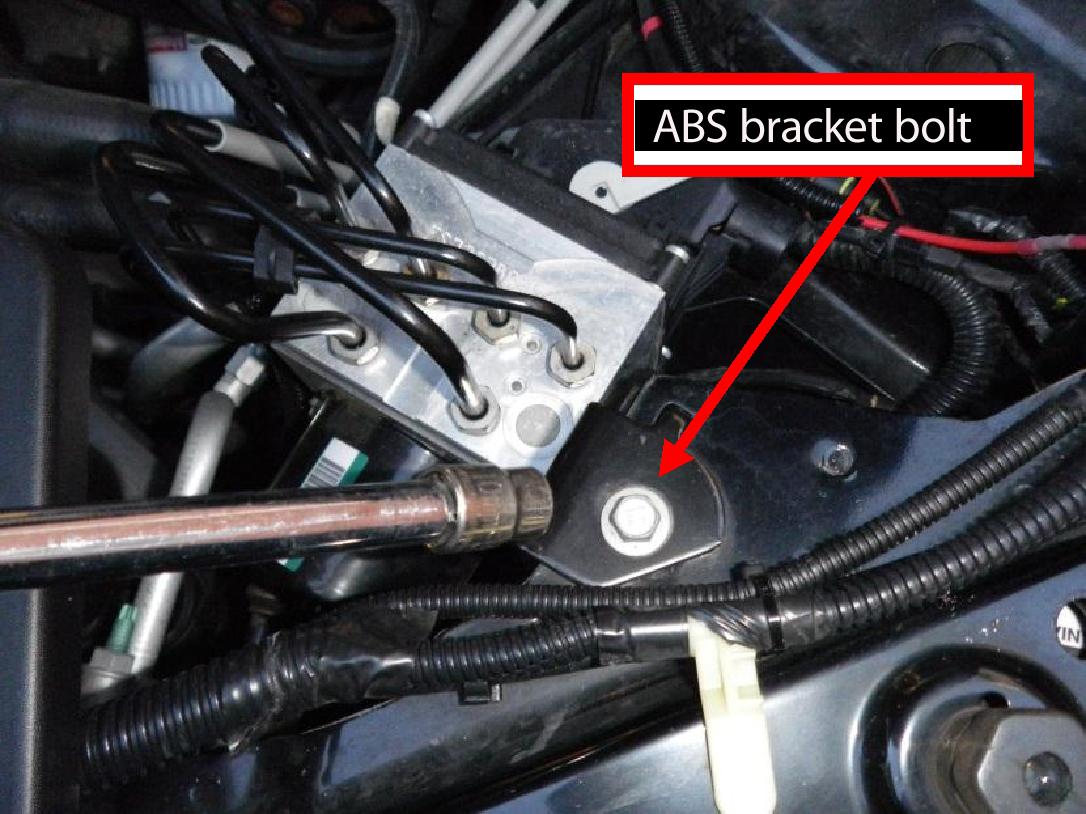
9. Install the provided stud in this location. You will need a 15mm wrench for this. A 15mm deep socket speeds up the install.
9. Install the provided stud in this location. You will need a 15mm wrench for this. A 15mm deep socket speeds up the install.
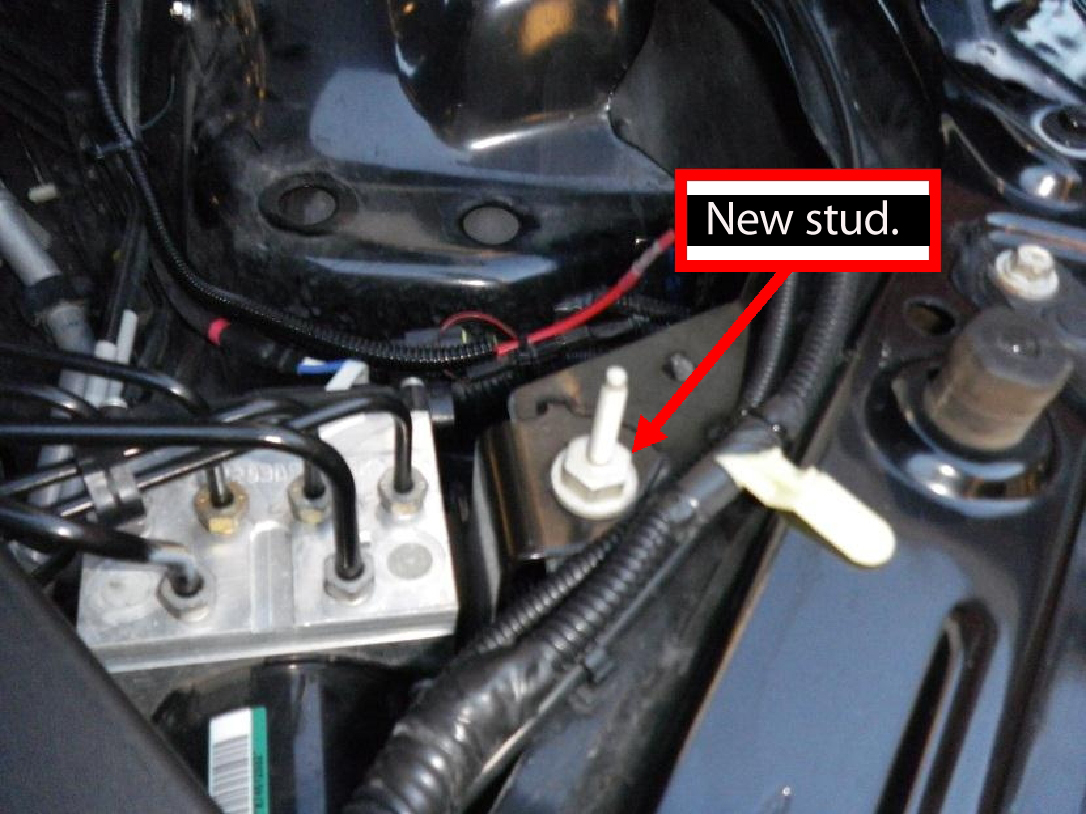
10. Place new CAI airbox in this location. Carefully align the stud and the two rubber bumpers on the bottom into the respective holes. Everything should line up with minimal force. Once in place, install the provided nut on the stud. 10mm deep socket is helpful here. Also, install your existing 10mm airbox retaining bolt.
10. Place new CAI airbox in this location. Carefully align the stud and the two rubber bumpers on the bottom into the respective holes. Everything should line up with minimal force. Once in place, install the provided nut on the stud. 10mm deep socket is helpful here. Also, install your existing 10mm airbox retaining bolt.
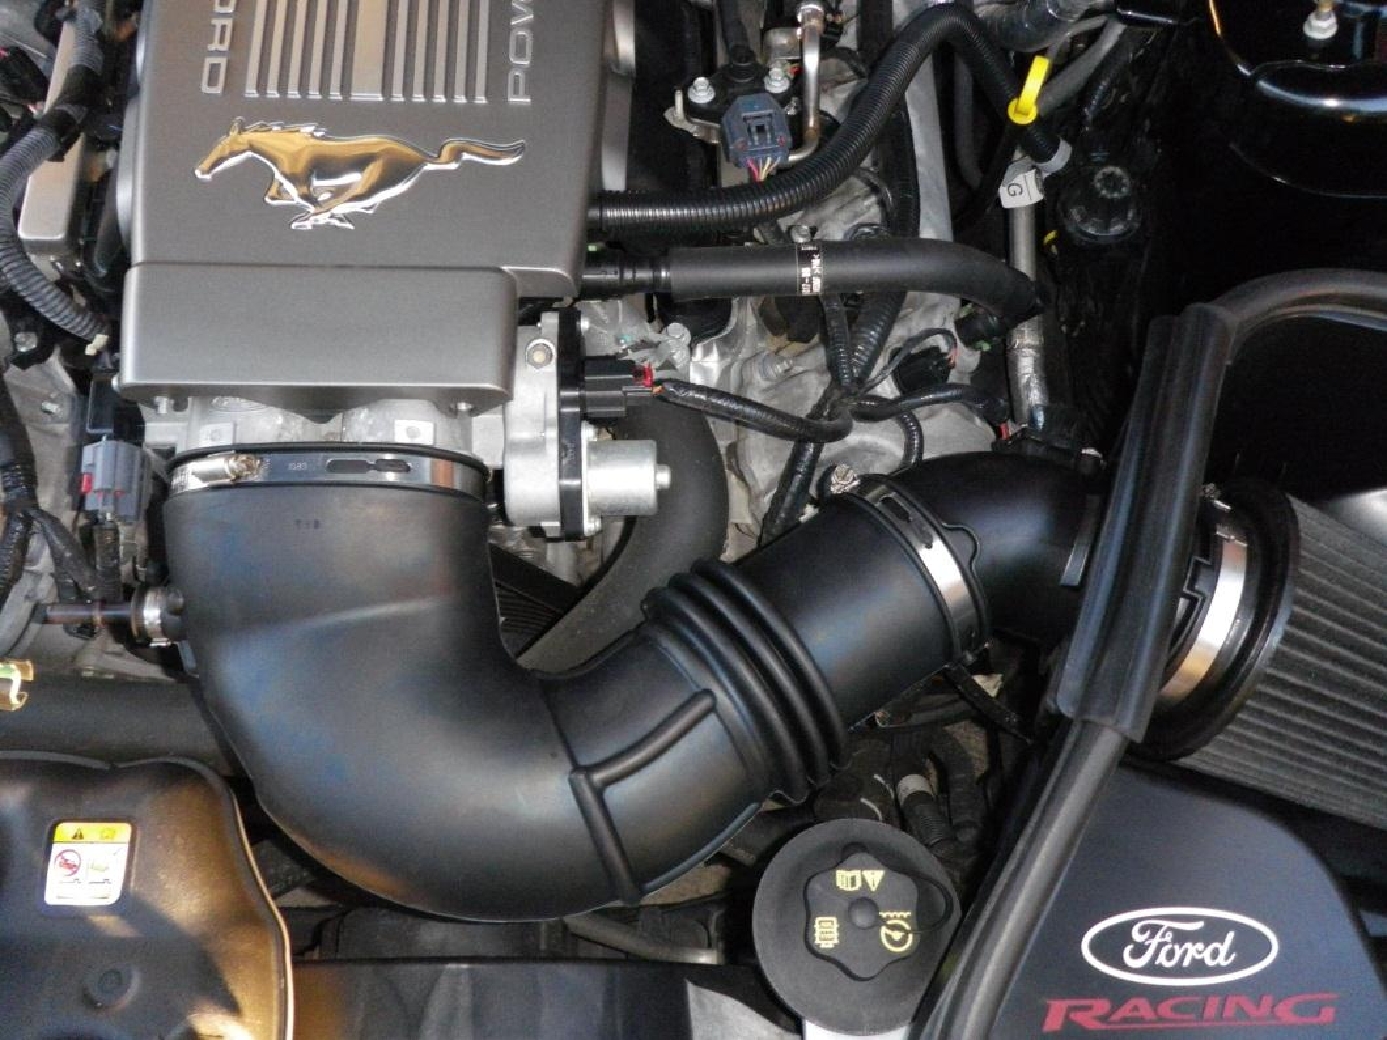
11. Install new clean air tube. Be sure it is fully seated on the airbox tube and throttle body. Tighten the hose clamps.
11. Install new clean air tube. Be sure it is fully seated on the airbox tube and throttle body. Tighten the hose clamps.
12. Reconnect the PCV line. Be careful not to damage the green retaining tab on the PCV fitting. The green retaining tab has to go over the ridge on the PCV tube.
12. Reconnect the PCV line. Be careful not to damage the green retaining tab on the PCV fitting. The green retaining tab has to go over the ridge on the PCV tube.
13. Install the included rubber plug into the airbox. This is to access to the headlight adjustment screw.
14. This completes the hardware installation. Now you need to update the software in the computer. This is best done with the SCT programmer and Bama custom tunes from American Muscle.
15. There are instructions included with the SCT/Bama programmer. It is a simple process. Plug the programmer into the OBDII port under your dash. Follow the onscreen instructions.
16. Enjoy the new found power.
