 FREE 1 to 3-Day Delivery on Orders $149+ Details
H & R Super Sport Spring Installation Guide '96-'04
Installation Time
6 hours
Tools Required
- Pair of gloves
- 10mm socket
- 15, 18, 19, 21mm deep well sockets
- 1/2 inch socket
- 13/16 inch socket
- Extensions for socket wrench
- Socket wrench (3/8 inch and 1/2 inch)
- Large Breaker Bar
- 4 Jack stands
- 1 Hydraulic Floor Jack
- Pliers
- Hammer
- Zip-ties, wire coat-hanger
- Red Loctite
- PB Blaster or WD-40 (helps with loosening bolts)
- Torque Wrench (not necessary but helps with accuracy)
Installation
Installation - Rear Springs:
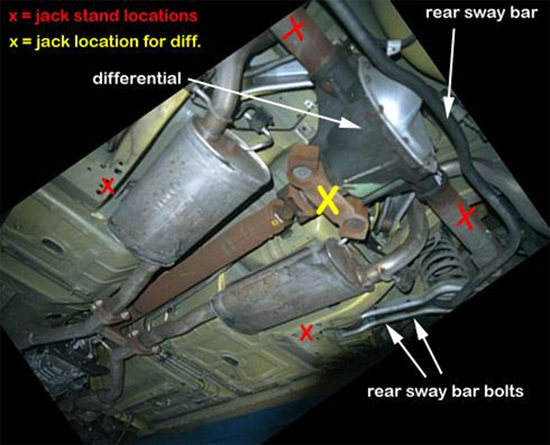
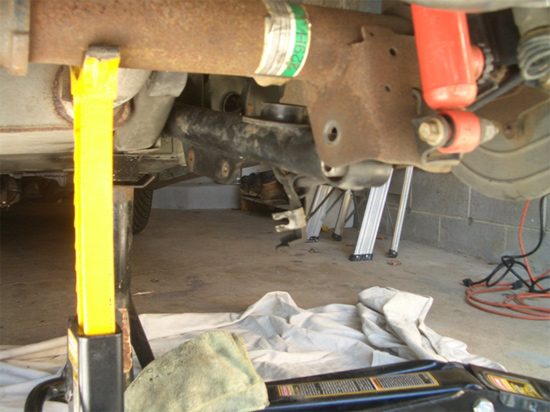
1. Jack up the rear of the car, supporting it with jack stands on the rear subframes. Remove wheels. Then, jack up on thedogbone(little metal plate in front of differential) about 5 inches, making sure that the car does not come off the jackstands that are secured under the rear subframes, and support each axle with jack stands. NOTE: you're jacking up the rear end but the car's body cannot rise, just the differential. This secures the axles and makes sure that they don't twist and bind when you remove the lower control arm bolt.
2. Now that your stang is properly secured, it’s time to remove the sway bar. There are two bolts for each end of the bar with clips. Remove the bolts/clips with a 1/2 inch socket, put that aside and don't lose them.
3. Now pick a side, and only perform one side at a time! Locate the 13/16 inch bolt that secures the lower control arm to the axle housing.
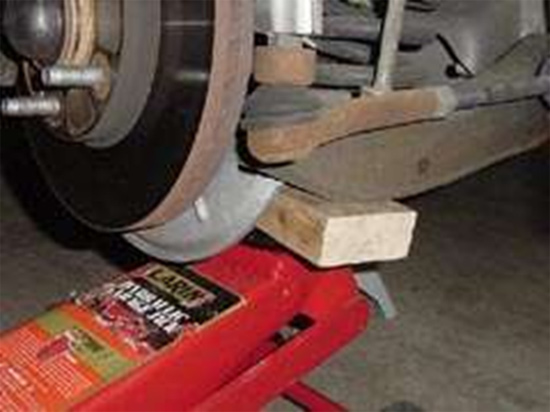
Important:place your jack under the control arm and raise the jack just enough to put solid tension on the LCA (jack in the middle of the LCA). Now remove the bolt securing the housing and LCA. This bolt will be hard to break (hopefully you already sprayed it with PB Blaster), but get a breaker bar out and put some "American Muscle" into it, you'll get it. Once the bolt is removed, SLOWLY lower the jack down, letting all the tension off the spring, and remove the spring.
4. Transfer the stock isolators (or new ones if you bought them) onto the new spring.Important: note how the spring was sitting on the LCA when you removed it (there should be markings on the LCA’s if you didn’t already note the spring’s position)! The bottom pigtail-end should be facing thedriver’sside of the car forbothsides, ensuring proper seating of the springs. The last thing you want is a sagging rear end, so make SURE you get this right. Place the spring back onto the LCA, jack the LCA up until even with the housing/LCA bolt hole,use Red loctite on the bolts threads, and torque that bolt back down to 111ft/lbs.
5. Repeat from step 3 on other side.
6. Re-install the rear sway bar, and torque the bolts down to 41 ft/lbs. Wheels back on and lower her down. Half way home!
7. Done With the Rear Springs!
Installation - Front Springs:
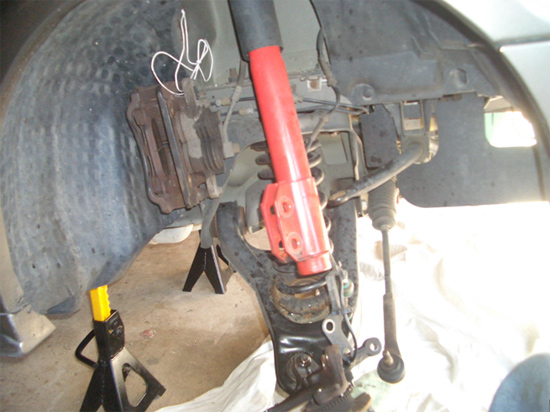
1. Loosen front wheel lug nuts, jack up the car and secure it with jack stands on the front subframes, and remove the front wheels. Now pick a side and work only on that side
2. Locate the two bolts on the back of the brake caliper which hold the caliper in place with the rotor. There is also one bolt below and above these two bolts that you are removing, DO NOT remove these. Now, remove the caliper bolts with a 15mm socket, carefully pull the caliper off, and use a coat hanger or zip ties to hang the caliper up in the fender well (you’ll see the space, you might need to get creative). Just make sure the caliper is clear of the strut.
3. Next, remove the brake hoses from the small bracket behind the strut. Removing them from the bracket will give the hose some slack for when you disconnect the strut. You do not want to bend or twist these lines, so be careful, and let them hang down. You may be able to go on without this step if your very careful.
4. Raise the front control arm (also called A-arm) about 5 inches with a floor jack, preloading the suspension. Next, unbolt the front sway bar with a 15mm deep well socket or open ended wrench, removing the nut and bushing.
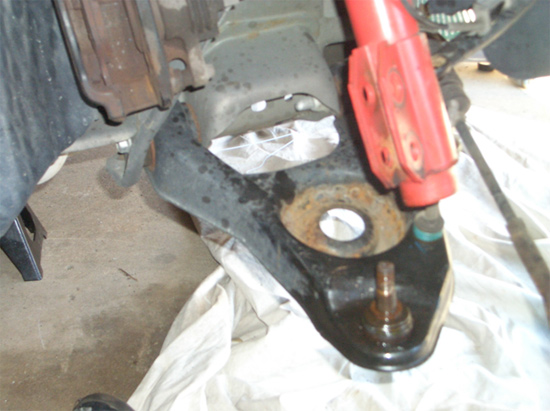
5. Now locate the tie-rod end. There will be a cotter pin which goes through a castle nut that secures the tie-rod end in place. Straighten the cotter pin out (it helps spraying this with WD-40) and pull it out of the castle nut. It takes some maneuvering but it will pull out. Remove the 19mm castle nut and then hit the top of the tie-rod end with a hammer. Give the top a few stern blows with a hammer and the tie-rod end will pop loose, let it hang down.
6. The next step is to remove the two large bolts holding the strut to the spindle. These can be tough, get 18 & 21mm deep well sockets and a breaker bar (after thoroughly spraying them with PB Blaster) and break them loose. Once they are loose the spindle should now swing around, only being held on by the Ball Joint. Be careful not to bend or twist the abs brake line, If you must remove the sensor on the spindle with a torx bit or 1/4 inch socket to be sure that the abs line will not twist or bend, save yourself the trouble and do it.
7. Important:Now SLOWLY lower the jack, making sure the spindle and control arm lowers as the jack is lowering. You will hear a loud POP! as the strut lowers, this is the sway bar coming off of the sway bar end. Make sure the jack and control arm lowertogether!! Now with all the components hanging down, use a prybar and pull the spring out (you might need to press down on the A-arm with your foot a bit, its ok).
8. Transfer the stock (or new) isolators onto the new spring. Using WD-40 helps for installing the bottom isolator that fits over the spring coils.
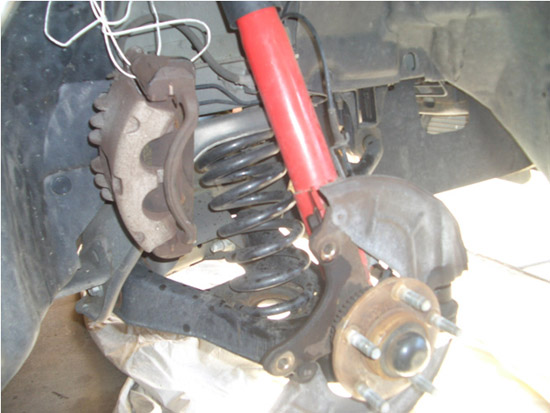
9. Place the new spring into the front control arm with the bottom pigtail-end sitting between the two little holes in the A-arm (should be exactly how the stock springs were sitting). Now slowly jack up the control arm and guide the spindle back into the strut and bolt the strut down, both bolts to 110 ft/lbs. Make sure as your jacking up you also guide the sway bar end link back into the sway bar, because it will not line up if you don’t push forward on it.
10. Reinstall the sway bar with its bushing on top, and bolt down the 15mm nut to 14 ft/lbs. Then, reinstall the tie rod end to the tie rod and bolt down the 19mm castle nut to 41 ft/lbs, and then slide the cotter pin back through and twist to secure it.
11. Now find your brake calipers and slide them back over your rotors. Bolt the two 15mm caliper bolts down to 85 ft/lbs. Place all brake lines and fittings back where they were and now Repeat process from Step 2 on other side.
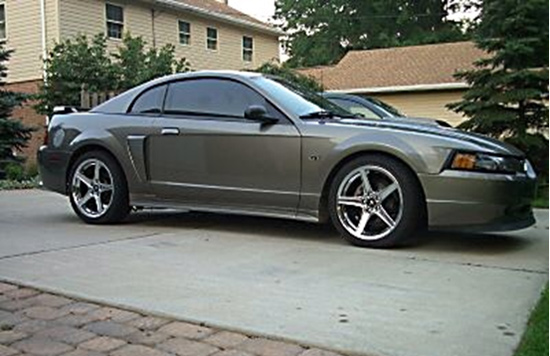
12. Go over all nuts, bolts, fittings, brackets, lines, and of course, the springs. Make sure everything is seated correctly, and the springs are sitting in the right position (though I hope you already did that). Put wheels back on and tighten loosely, lower your stang, and tighten the wheels all the way. I know your excited, but don't forget about the small stuff!Don't forget to get an alignment!Hope it went smoothly, enjoy your new look!
Installation instructions provided by AmericanMuscle customer Stephen Boom

