 FREE 1 to 3-Day Delivery on Orders $149+ Details
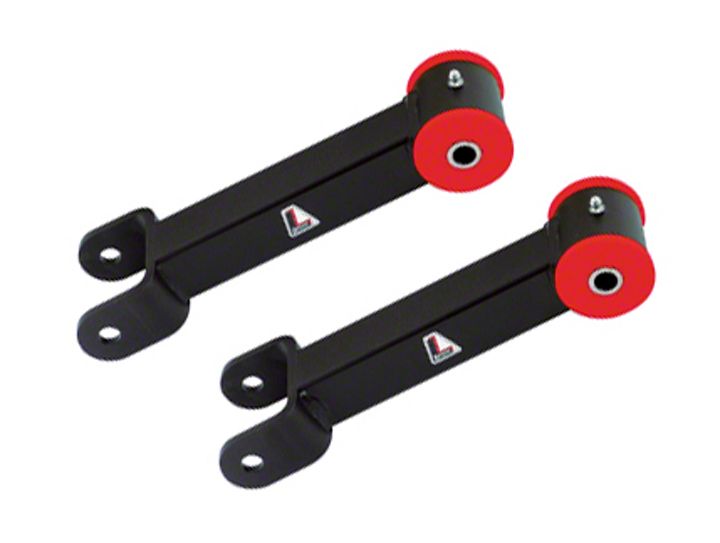
How to install Lakewood Rear Upper Control Arms on your Mustang
Shop Parts in this Guide
Installation
Features:
- Heavy gauge steel eliminates flex for increased traction
- Completely bolt-on, no welding required
- Polyurethane bushings for positive suspension control and stability
- Legal for NHRA Stock Eliminator Classes
IMPORTANT!
Read this instruction sheet completely so that you thoroughly understand it and are familiar with the procedure before attempting installation.
WORK SAFELY!
Installation of these control arms requires working underneath vehicle.
USE EXTREME CARE AND CAUTION WHEN WORKING UNDERNEATH VEHICLE.
Never get near or under vehicle until you are confident that it is safely supported and will not move or fall from its raised position.
DO NOT USE A BUMPER JACK.
PREPARATION FOR INSTALLATION
1. Place vehicle on a solid level surface to ensure safe installation
2. Place wheel blocks in front of and behind both front wheels to prevent movement in either direction.
3. Raise rear of vehicle and support flat area of chassis in front of lower control arm attaching point using approved automotive support stands having adequate load capacity. DO NOT put support stands under the axle housing. Note: Raise vehicle high enough to allow adequate clearance for coil spring removal.
CAUTION: DO NOT BEGIN THIS INSTALLATION UNTIL YOU ARE CONFIDENT THAT VEHICLE IS SECURE AND SAFELY SUPPORTED!
CONTROL ARM ASSEMBLY
1. Install grease fittings (supplied) into each end of control arm by driving fittings into drilled hole of bushing eyelet using a hammer and either a 9/32” or 7mm socket. Use care not to damage fittings (see illustration).
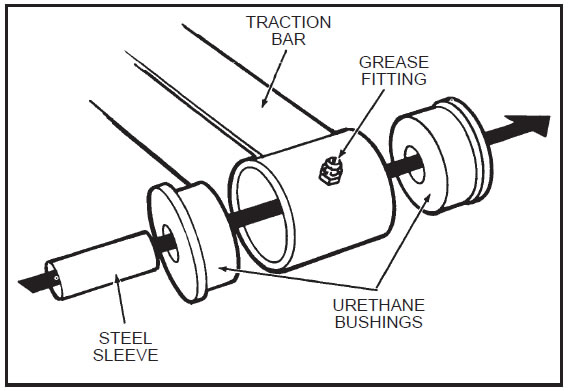
2. Apply lubricant (supplied) to polyurethane bushings and steel sleeves, then install into eyelet ends as shown.
CONTROL ARM INSTALLATION
NOTE We recommend working on only one side at a time.
1. Remove both rear wheels.
2. Apply penetrating oil or rust release lubricant to front and rear mounting bolts of upper control arms.
3. Raise axle housing up approximately 2" (a hydraulic floor jack is recommended for this procedure).
4. Using an 18mm hex socket and wrench, remove upper control arm. DO NOT discard the bolts and nuts, they will be reused.
5. Install the control arm to chassis and axle housing brackets using the stock factory mounting bolts and nuts previously removed.
Note: Clean and lubricate axle and chassis control arm mounting brackets with a good quality chassis grease to ease installation.
6. Tighten front and rear control arm mounting bolts to 80 ft./lb. torque.
7. Follow the same above procedure for installation of Lakewood Control Arm on other side of vehicle.
8. Lubricate control arm bushings with a good quality chassis grease.
9. Install wheels and properly tighten lug nuts to wheel manufacturers specifications.
10. Carefully remove support stands and lower vehicle to ground.
THIS COMPLETES THE INSTALLATION. YOU CAN NOWTEST DRIVE THE VEHICLE.
IMPORTANT!
Periodically check to make sure that all mounting hardware is securely tightened. Use a good quality chassis grease to keep bushings and sleeves properly lubricated.
