 FREE 1 to 3-Day Delivery on Orders $149+ Details
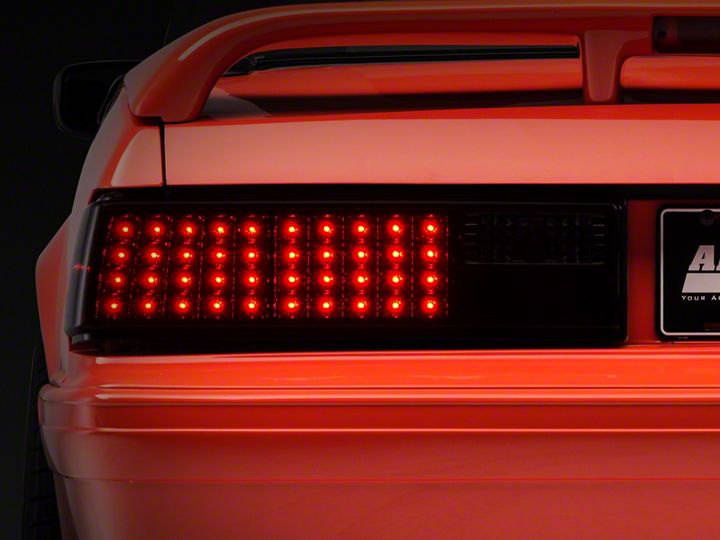
How to Install LED Tail Lights on Your 1987-1993 Mustang
Shop Parts in this Guide
Installation
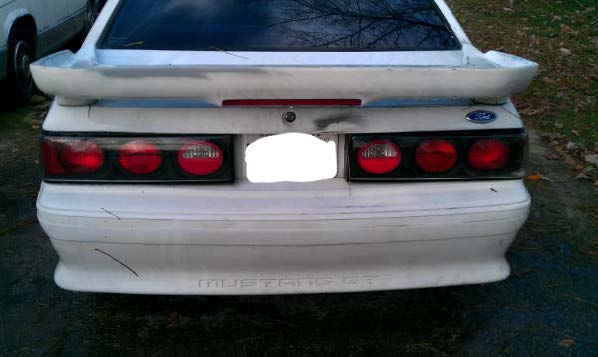
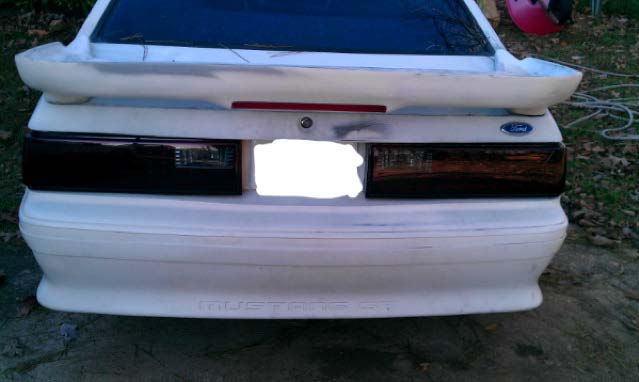
Before:
Installation Instructions:
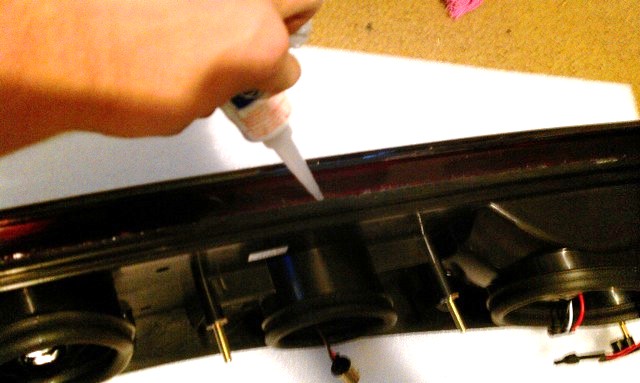
1. Seal the new tail lights with RTV Silicone and let dry for 24 hours as recommended on silicone. Seal bottom and top of lights as shown below.
2. Disconnect the negative battery terminal.
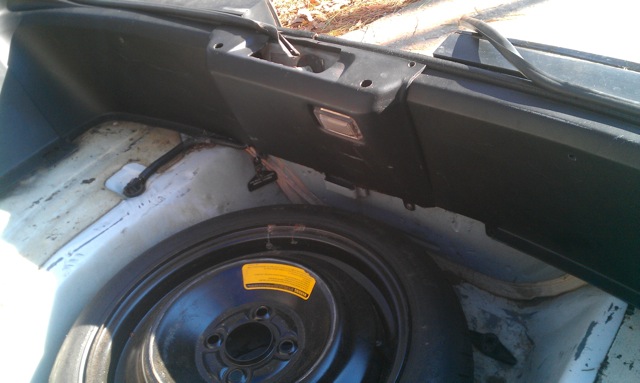
3. Open the trunk, pull back the hatch carpet and remove the spare tire cover.
4. Remove the plastic interior pieces to get to the back of the old taillights. You need a Phillips head screwdriver to remove the (10) screws that hold them on. The image below shows the interior panels to be removed.
5. Remove the clip for the hatch light attached to the back side of the plastic interior pieces, see image below.

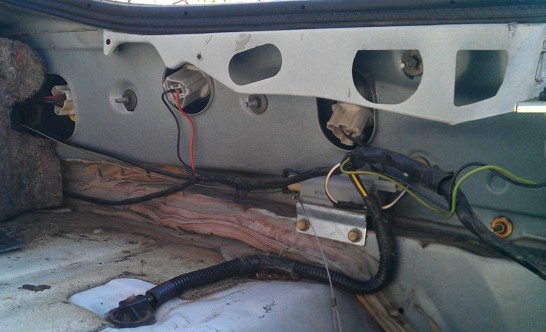
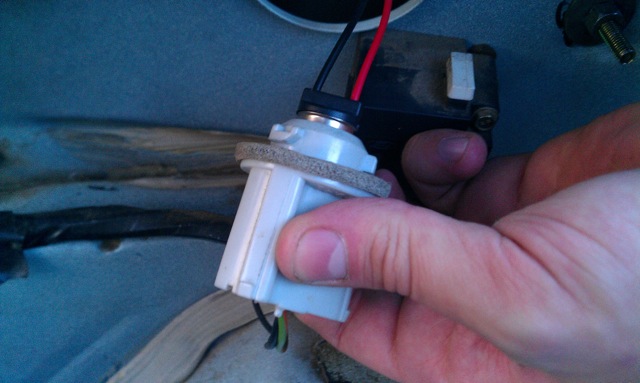
6. Remove the light bulb sockets from the back of old tail lights; they just turn and pull out, see image below.
7. You need to remove three of the four light bulbs, leaving the reverse bulb still in its socket.
1. Remove the side marker bulb by just pulling it out of socket.
2. Remove the (2) brake light bulbs: (1) has a round socket and (1) has a metal tab.
8. There are (6) 7/16 nuts on the back of each taillight that need to be removed: (2) vertical on each end (4 total) and (2) horizontal in the center which are shown in the image below.

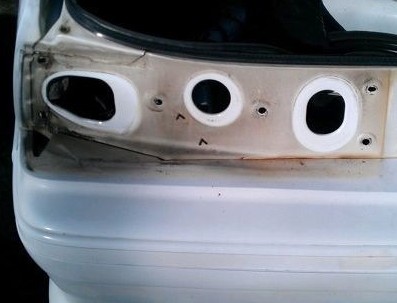
9. Remove the old taillight and clean the dirt from underneath before installing new taillights.
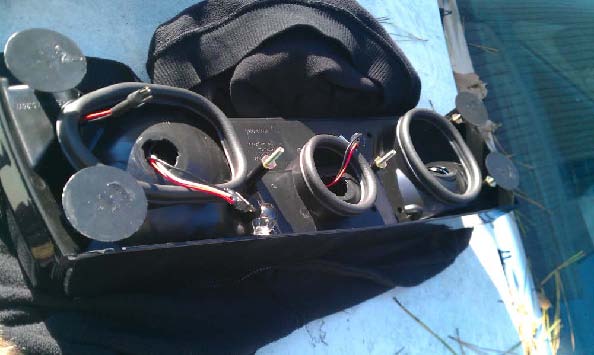
10. To install the new tail lights, remove the plastic covers on the bolts on the back of new tail lights.
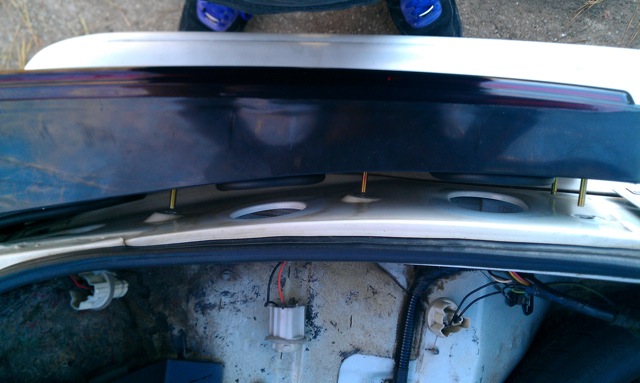
11. Match up the holes on the back of the car to the new taillights as shown in the picture below and push them in place. Reinstall the (6) nuts onto the new taillights being sure not to over tighten the nuts.
12. Now it’s time to plug in the LEDs. NOTE: Make sure not put the wires in backwards because you will blow fuses! You just plug them in like regular light bulbs.
13. For the side marker socket, match up the red wire on the new side marker LED with the brown wire on the side marker socket, push it in and then install into proper location on the taillight.
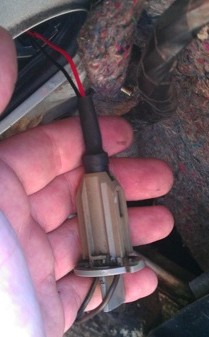
14. The brake light socket held in with the metal tab connects with the red, black and white LED wires. Match up the red wire on the LED with the red wire on the cars socket and push it in as shown in picture below. Then install into proper location on taillight.

15. The round brake light socket will connect with the black and red LED wire plug. Again, match up the red of the LED wire to the red wire of the cars socket. Then install into the proper location on the taillight.
16. Install the reverse light bulbs still in the cars socket into the new taillight location and turn to lock it in.
17. Reconnect the negative battery terminal.
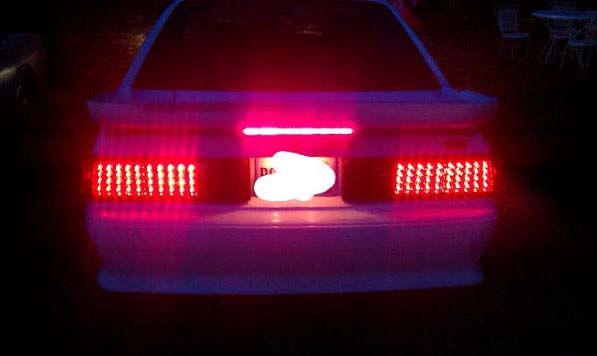
18. Check to ensure the taillights work properly.
19. Reinstall the hatch light.
20. Reinstall the plastic interior pieces and the (10) screws that secure the panels.
21. Reinstall your spare tire cover and fit the carpeting back into place.
Enjoy your new LED tail lights!
Installation Instructions written by AmericanMuscle customer Cameron Whitmire 12.27.11

