FREE 1 to 3-Day Delivery on Orders $149+ Details
How to install a Maximum Motorsports Strut Tower Brace on your 2003-2004 Mustang

Shop Parts in this Guide
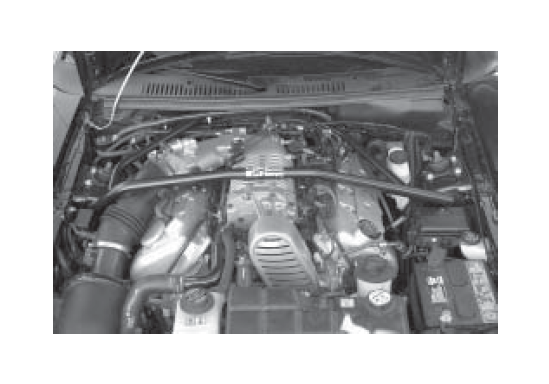
The MM strut Tower Brace attaches to each strut tower and to the firewall.
Read all instructions before beginning work. Following instructions in the proper sequence will ensure the best and easiest installation.
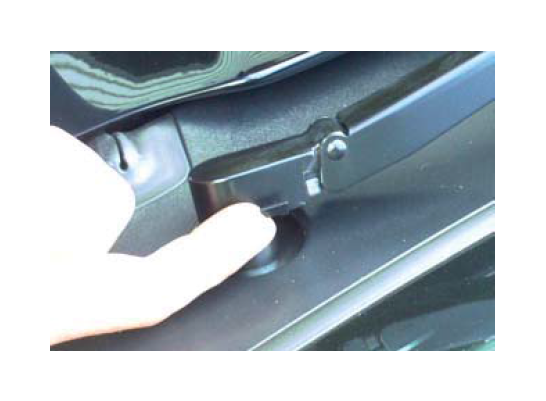
1. Remove the windshield wiper arms. Lift the arm and pull on the release tab.
2. Raise the hood.
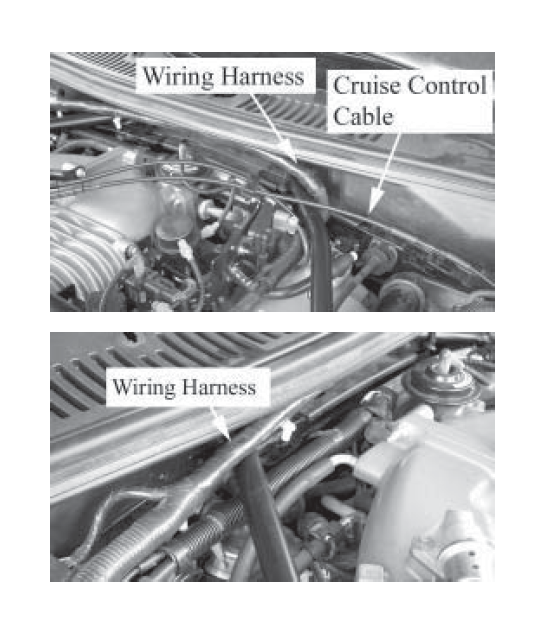
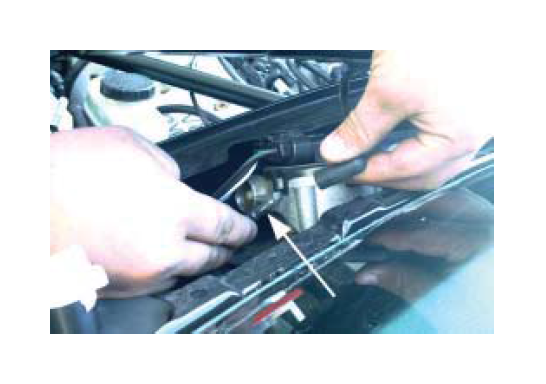
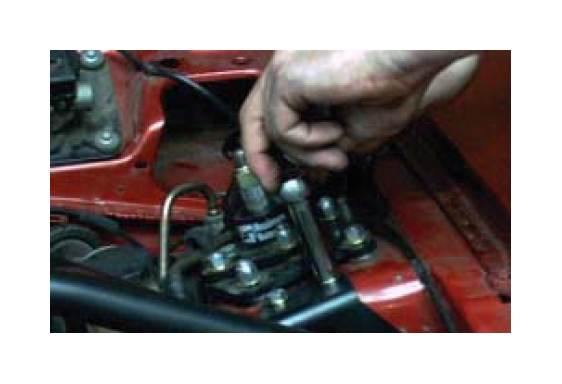
3. Unclip the wiring harness and the cruise control cable from the pinch weld seam at the firewall.
4. Set the MM Strut Tower Brace into position. The brace will settle into position on the strut towers and the firewall when it is positioned evenly side to side. This will prepare you for Steps 5 & 6- checking clearances and marking the plastic firewall cover for trimming.
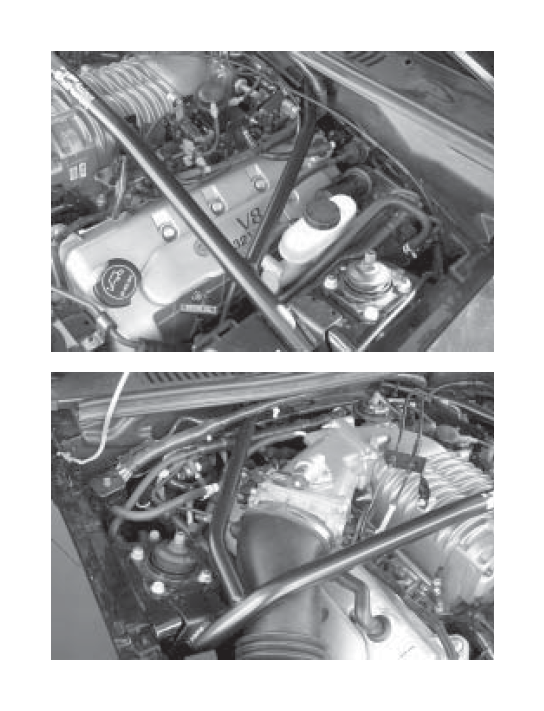
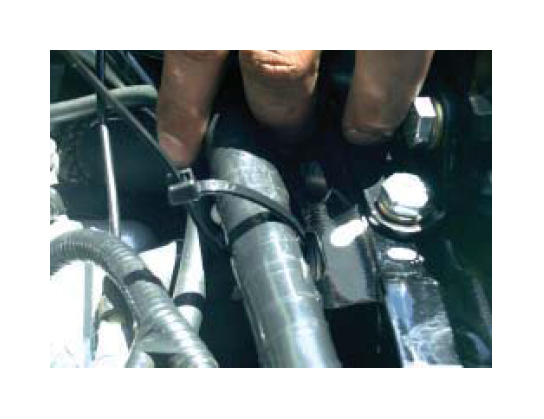
Note: The firewall mounting pads must be routed underneath the wiring harness and the cruise control cable as shown in the photos below.
5. Check for clearance around the air inlet tube. If necessary, shift the brace towards the passenger side to provide clearance.
6. Be sure that both firewall mounts of the brace are held down against the firewall pinchweld. Mark the position of the firewall mounts on the plastic firewall cover. The cover will be trimmed in Step 9.
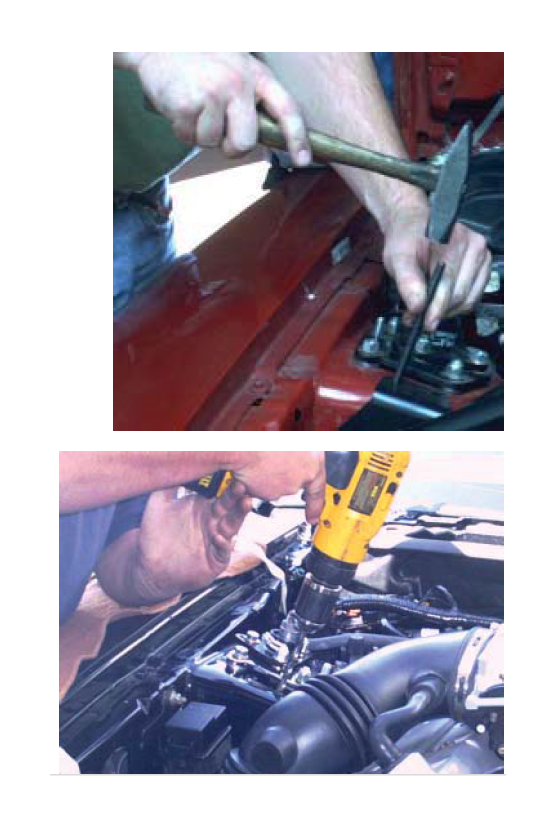
7. Remove the Strut Tower Brace.
8. Remove the alarm siren (if so equipped) from the firewall. Remove the hood seal from the cowl. Then remove the plastic firewall cover. It is held on with several small sheet metal screws.
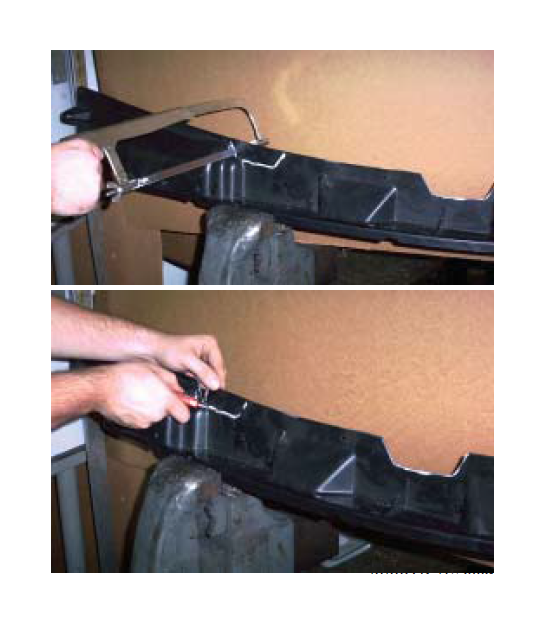
9. Cut out the portion of the plastic firewall cover you marked. Tip: use a hacksaw on the vertical cuts. Use a utility knife to score the plastic on the horizontal cut, then bend and break the plastic on the scored line.
10. Put the plastic firewall cover back into position on the firewall. Set the Strut Tower Brace back into position and check that it is notched correctly.
11. Jack the front of the car up and set it securely on stands.
12. Position the Strut Tower Brace. Hold the brace downwards and rearwards. Mark the position of one hole on the passenger side strut tower top. Remove the Strut Tower Brace for drilling.
13. Center punch the mark. Drill a 1/8" pilot hole. Drill out to 5/16". Deburr the hole.
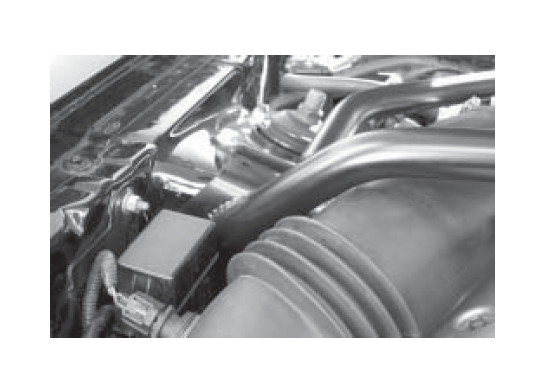
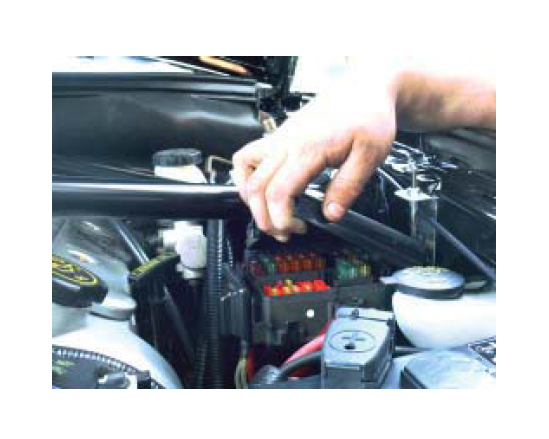
14. Set the Strut Tower Brace back into place. Insert a 5/16" x 1” long bolt into the hole to hold the brace in position. Hold it both downwards and rearwards. Mark the positions of all of the other holes on both strut towers. Unclip the relay box from the inner fender panel to provide access for marking and drilling the hole. Remove the Strut Tower Brace before drilling.
15. Center punch each mark. Drill a 1/8" pilot hole. Drill out to 5/16". Deburr the holes.
16. Remove the plastic firewall cover.
17. Remove the 5/16” bolt securing the ‘A’ pillar applique. It is located above the door hinge. The door must be open to access the bolt. Do this on both the Driver and Passenger sides of the car.
18. DO NOT remove the applique. Gently move it away just enough to open a small gap for removal of the plastic cowl at the base of the windshield.
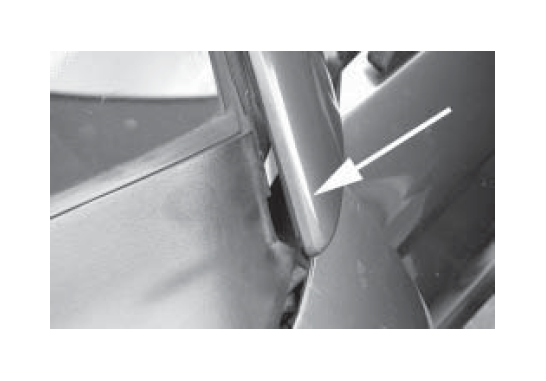
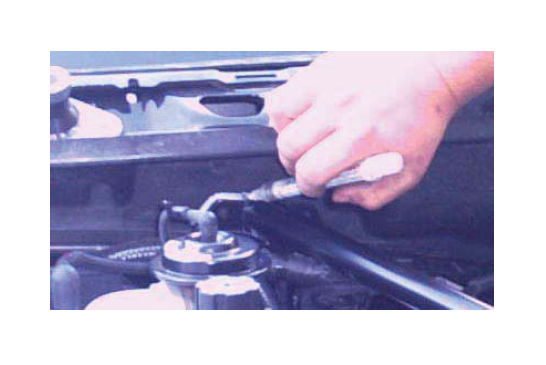
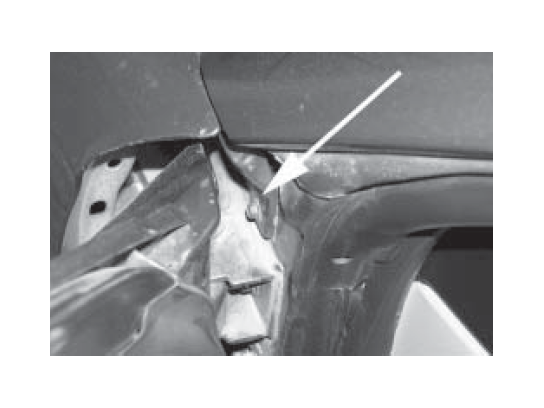
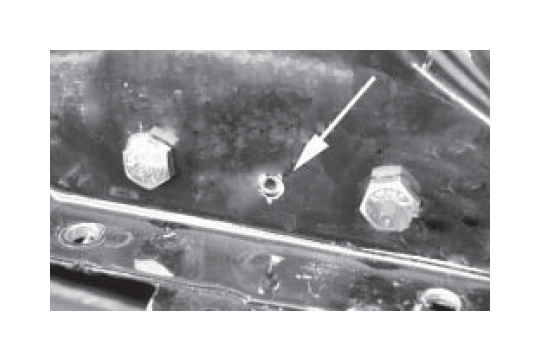
19. Remove the plastic cowl cover at the base of the windshield. It is held on with clips. Remove it by gently prying it upwards. When it is loose, disconnect the hose to the windshield washer nozzles (pointed to below).
20. Place the Strut Tower Brace back into position. Place flat washers under the heads of (6) 5/16" x 1” long bolts. Place the bolts through each of the holes at the strut towers. This is for positioning only. Do not install the nuts.
21. Hold the brace down and rearwards. Mark the position of the 8 holes at the firewall.
22. Remove the 6 bolts at the strut towers. Remove the Strut Tower Brace.
23. Drill the holes at the firewall. Start with a 1/8" pilot bit. Drill out to 5/16". Deburr the holes. Note: Hold the hood vertical when drilling downwards into the pinchweld. That will provide clearance for the drill motor. Tip: Remove the hood or hold it upright by using a rope or strap to tie the hood to the steering wheel.
24. Install the 5/16-18 bolts in the nutplate. Thread them through so that they protrude on the flat side of the nutplate. It is not necessary to thread the bolts all the way in.
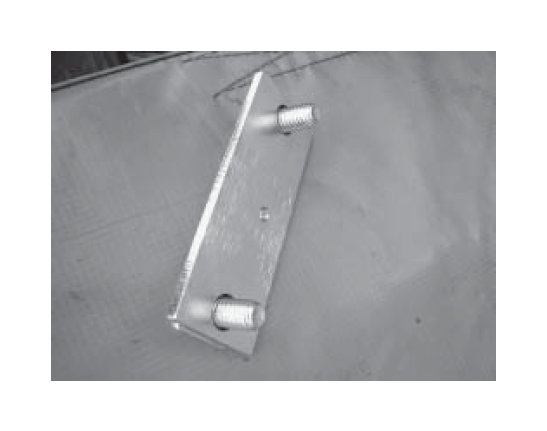
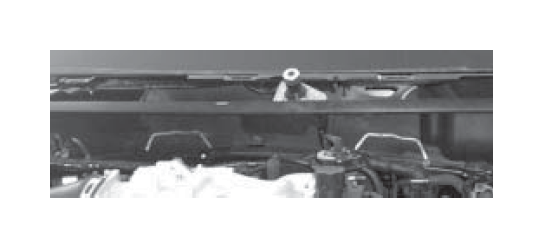
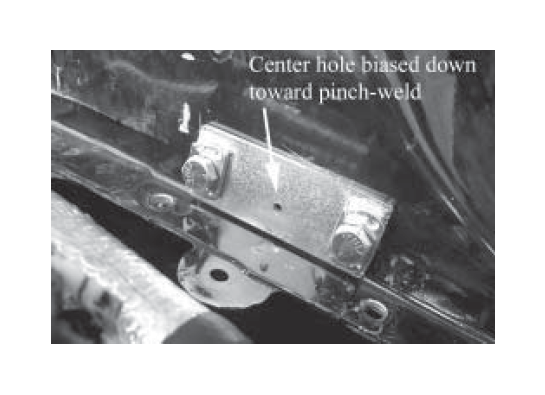
25. Line up the nutplate on the 5/16" holes drilled in the firewall in Step 19. Use the bolts installed in the previous step as guide pins. Make sure that the small hole in the plate is biased downward.
26. Using the nutplate as a template, mark the location of the small hole using a scribe or punch.
27. Remove the nutplate from the firewall.
28. Drill a 1/8" pilot hole on your mark.
29. Drill the hole out to 3/16".
30. Deburr the hole.
31. Remove the 5/16-18 bolts from the nutplates.
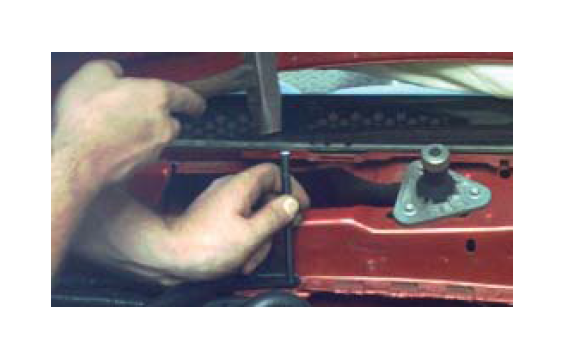
32. Install the nutplates behind the firewall. The flat side should be against the firewall, with the nuts toward the rear of the car. Make sure the small hole lines up with the 3/16" hole drilled in Step 27. Thread the 5/16-18 bolts into the nutplate to keep it from rotating when the sheetmetal screw is installed.
Tip: On the Driver’s Side, tape the nutplate to a screwdriver to help hold it in position behind the firewall while installing the bolts.

33. Install the #8 sheet metal screw into the small hole in the nutplate. Remove the 5/16-18 bolts.
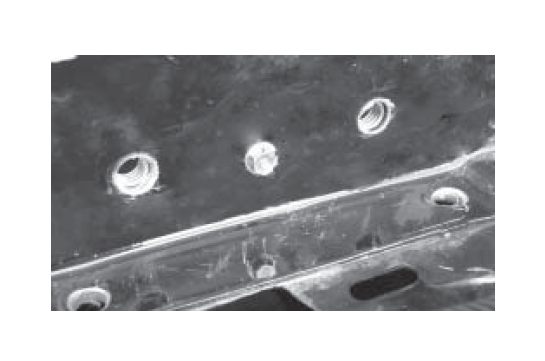
Note: This will secure the nutplate to the firewall, making future removal and reinstallation of the Strut Tower Brace significantly easier. The head of the sheet metal screw should line up with the hole at the back of the strut tower brace mounting pad.
34. Set the Strut Tower Brace back into position.
35. Insert all of the attachment bolts into position and start the nuts before tightening any bolt.
36. Tighten the 5/16” x 3/4” long bolts into the nutplates at the firewall.
37. Tighten the 5/16” x 1” long bolts at the pinchweld.
38. Tighten the 5/616” x 1” long bolts at the strut towers.
39. Reconnect the hose for the windshield washer nozzles. Reinstall the plastic cowl cover at the base of the windshield by gently snapping it back into position on its clips. Make sure the outer edge of the plastic cowl cover slips past the ‘A’ pillar applique and into its correct position. Reinstall the ‘A’ pillar applique bolts previously removed in Step 17.
40. Reinstall the plastic firewall cover. Put the passenger side into position first, making sure to place it into proper position underneath the ground strap. Secure with the retaining screws.
41. Reinstall the rubber weather stripping.
42. Reinstall the alarm siren.
43. Carefully lower the car to the ground.
44. Use the supplied zip ties to attach the wiring harness to the pinchweld seam.
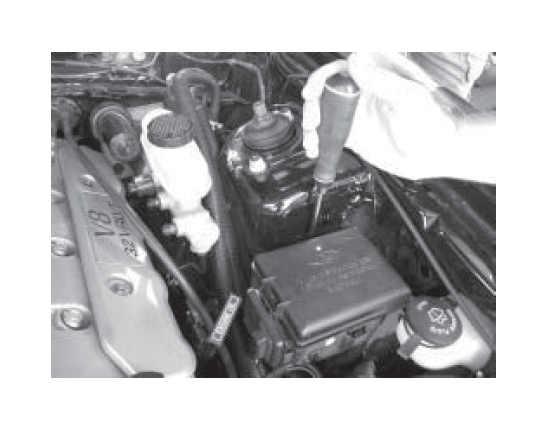
Note: Access to the fuse box-- The cover can still be opened by bending the cover around the strut brace main tube as you lift the cover.
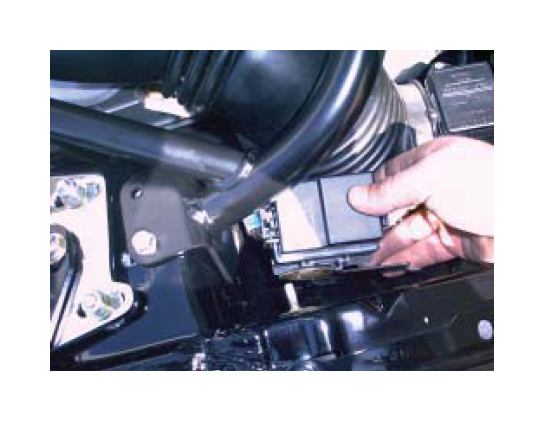
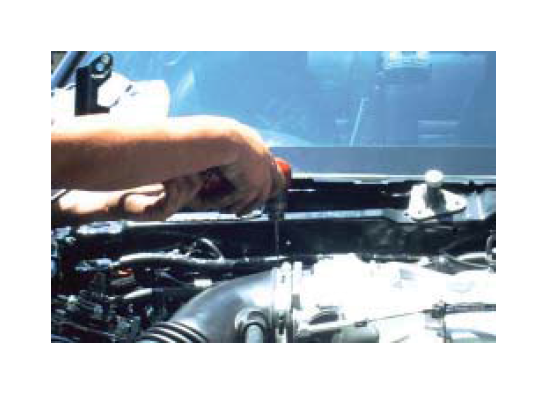
Note: If the fuse box cover cannot be opened, reposition the fuse box by moving it forward. This can easily be done by slipping a screwdriver between the front of the strut tower and the rear of the metal fuse box mounting tabs (these are attached to the strut tower). Gently pry the tabs forward. This will move the fuse box slightly forward.