 FREE 1 to 3-Day Delivery on Orders $149+ Details
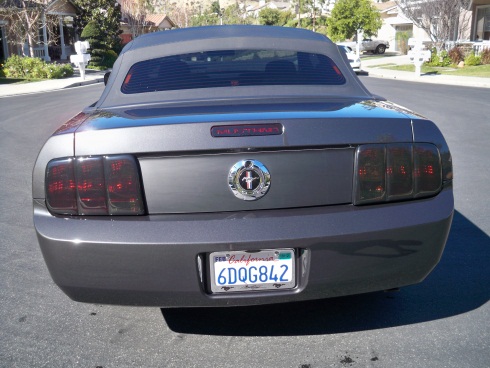
How to Install a GT500 Style Rear Spoiler on Your 2005-2009 Mustang
Installation Time
2 hours
Tools Required
- Electric drill
- ¼ and ½ inch drill bits
- Star screwdriver
- Painters/masking tape

Shop Parts in this Guide
Installation
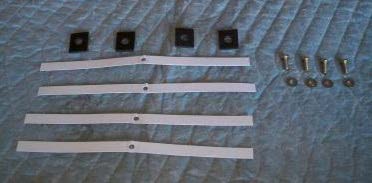
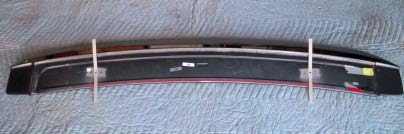
Package Contents:
- Painted Spoiler
- (4) Screws with washers
- (4) Self-adhesive foam pads
- (4) Paper alignment strips
NOTE: These instructions cover the install of the GT500 style spoiler on a mustang that does not have a spoiler fitted. Certain steps may appear unnecessary, but they will help with the ease of installation. We included them to make sure that fitting was 100% and we had no extra holes etc. The instructions cover installation with either 2 or 4 screws.
Installation Instructions:
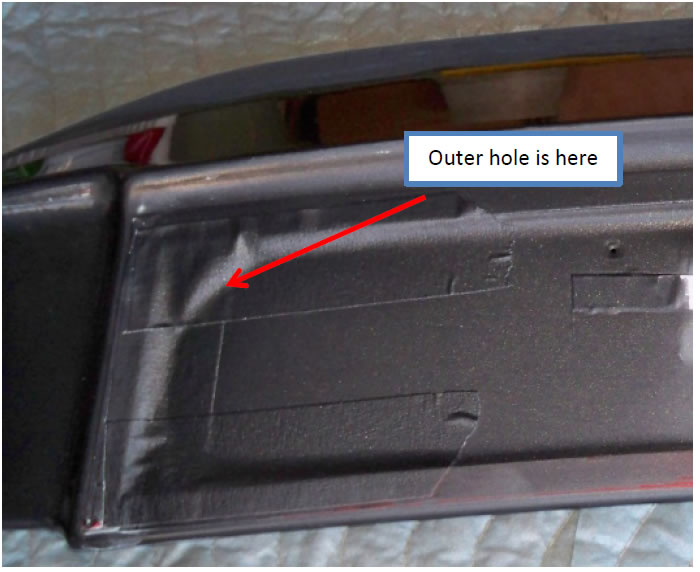
1. If you plan to mount using all (4) holes, carefully remove the painters tape covering them. The second set of mounting holes is close to the edges of the spoiler. Make sure not to remove the backing on the mounting tape.
2. Remove the backing from the alignment strips and place them on the spoiler. Make sure that the holes are aligned with the threaded nuts in the spoiler. Easiest way to ensure alignment is to use one of the supplied screws.
3. Place the spoiler on the trunk lid and align it.
4. While holding the spoiler firmly in place, have someone tape the alignment strips to the trunk lid
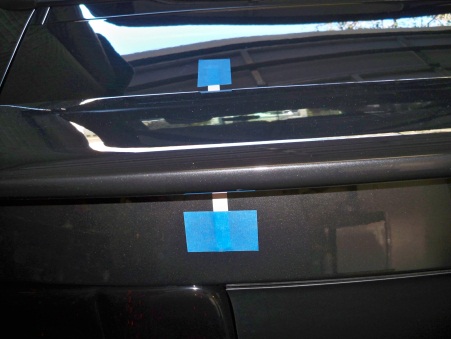
5. Carefully remove the spoiler, leaving behind the alignment strips.
6. Add an additional piece of tape to both sides of the holes in the alignment strips. This will help hold them securely in place as you drill the holes in the trunk lid.
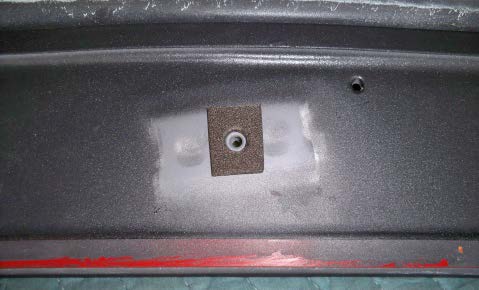
7. Drill a ¼” hole at each of the marked points. It is easier if you drill a small pilot hole first followed by the ¼ inch hole.
8. There is a double thickness of metal on the trunk lid where the outer mounting holes in the spoiler are placed. If mounting using all (4) mount screws, use the ½” bit to drill through the inner metal layer on the outer holes. This will allow you to easily insert the screws.
9. Test fit the spoiler to make sure all the holes line up and it sits correctly on the trunk lid. If there are any problems, you can enlarge the holes to allow for an accurate fit.
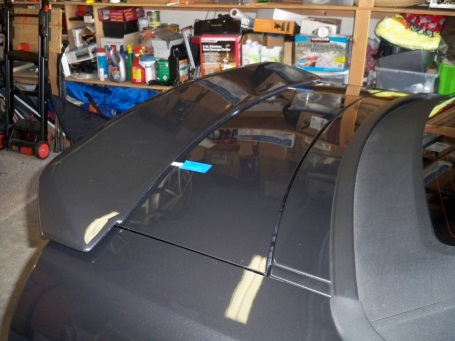
10. Once you are satisfied with the fit, remove the spoiler from the trunk lid.
11. (Optional) Use the primer/paint to seal the metal where you have drilled to inhibit rust.
12. Remove the backing from the small foam pads and apply them to the (4) holes in the spoiler.
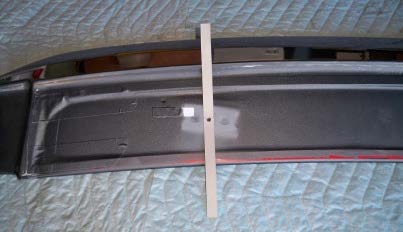
13. Insert the (4) wooden rods into the screw holes in the spoiler. These will act as guides to make sure the holes align accurately as you place the spoiler on the trunk. The rods are a way to make installation easier and are not required.
14. Remove the backing from the adhesive strips on the spoiler.
15. Place the spoiler on the trunk with the wooden rods through the drilled holes. This can be done with the trunk either open or closed. We found it easier with the trunk closed.
16. Open the trunk and replace each rod with a screw. Lightly tighten each screw.
17. Once all screws are in place, tighten them securely.
18. Close the trunk and press down firmly on the spoiler to ensure that the adhesive tape is secured.
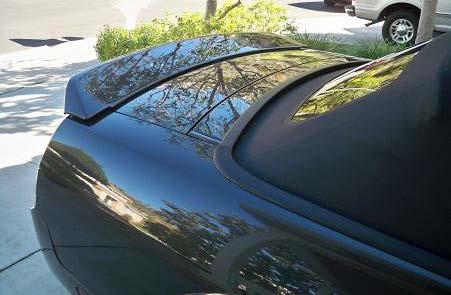
19. tep back and admire the finished product!
Installation Instructions written by AmericanMuscle customer Gary Petzer 3.21.12

