FREE 1 to 3-Day Delivery on Orders $119+ Details
Best Sellers


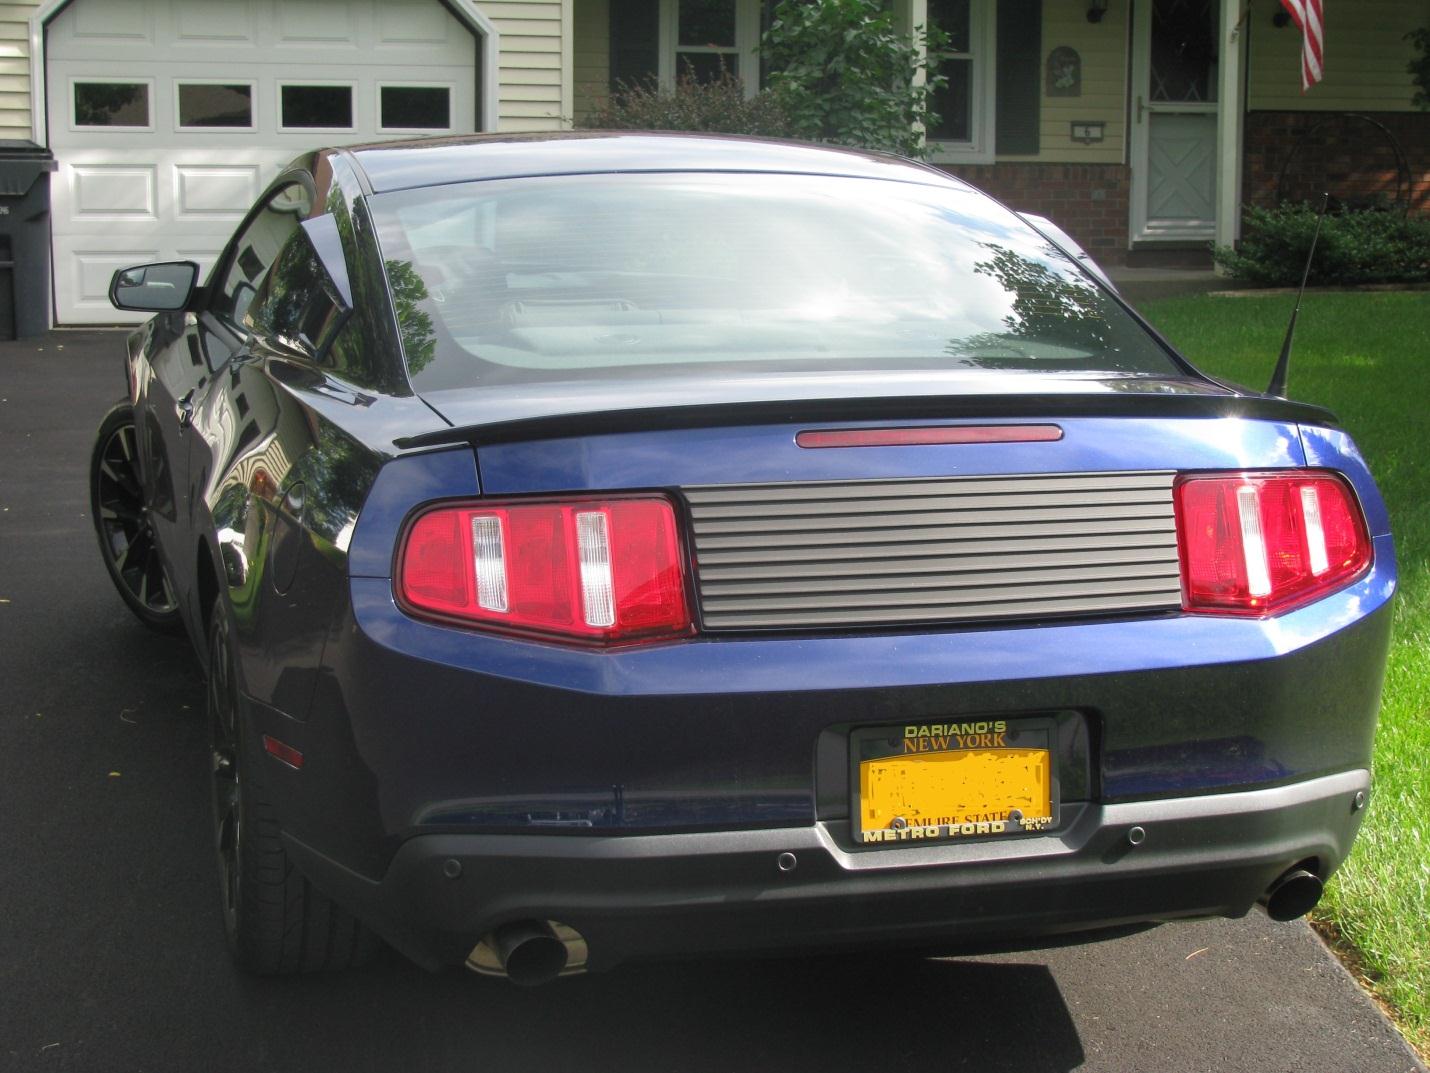
How to install a One-Touch Turn Signal Kit on your 2010-2012 Mustang
Installation
NOTE:
- To make connections using the wire nuts, you will take the two (2) wires you wish to connect and twist the stripped ends together. Then simply “screw” the wire nut on over the connection.
- Using quick splice connections, you will slide the wire from the harness bundle into the quick splice connector.
The module wire is then inserted into the open end of the quick splice connector. To close the connector, use a pair of pliers to squeeze it shut, ensuring the metal tang is flush with the top of the connector. Make sure to check the clip that holds the connector shut.
InstallationInstructions:
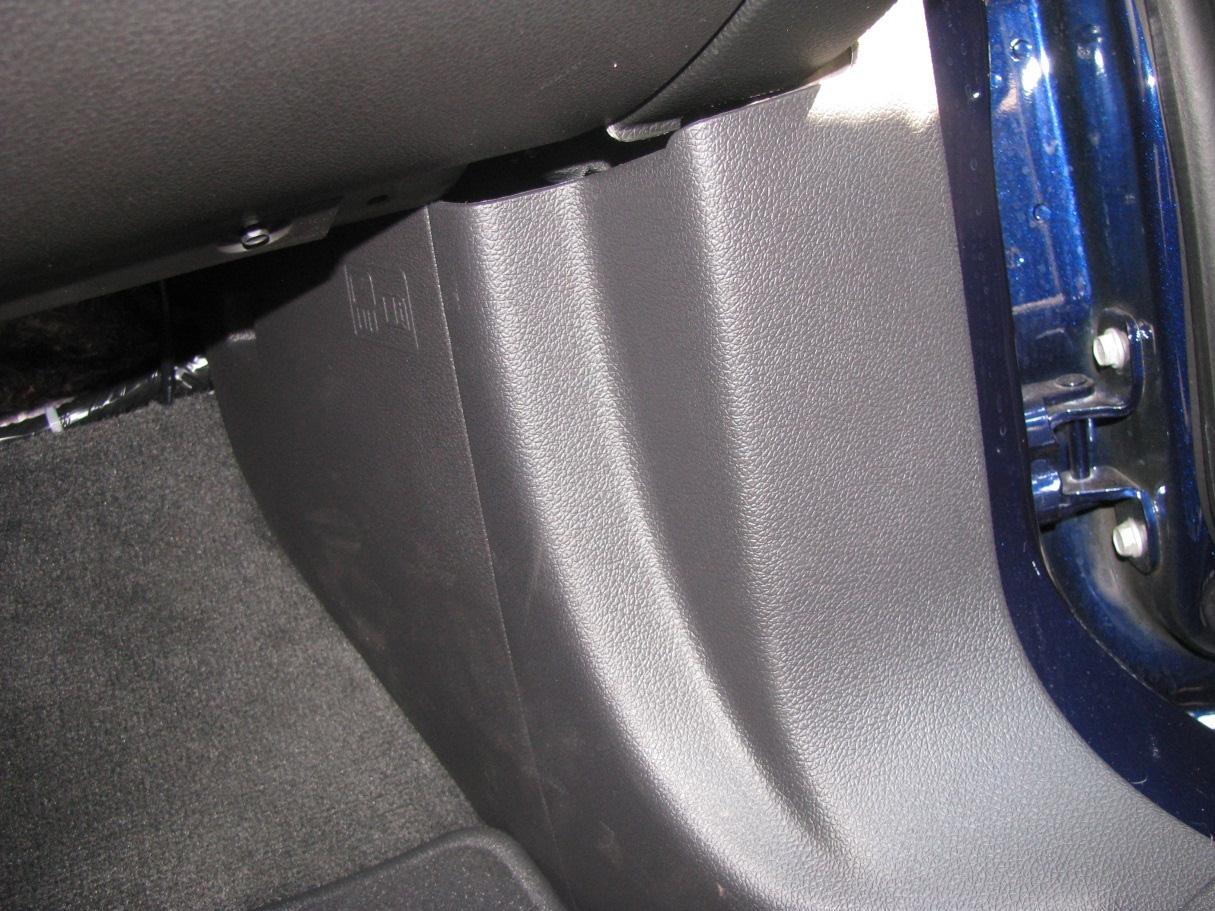
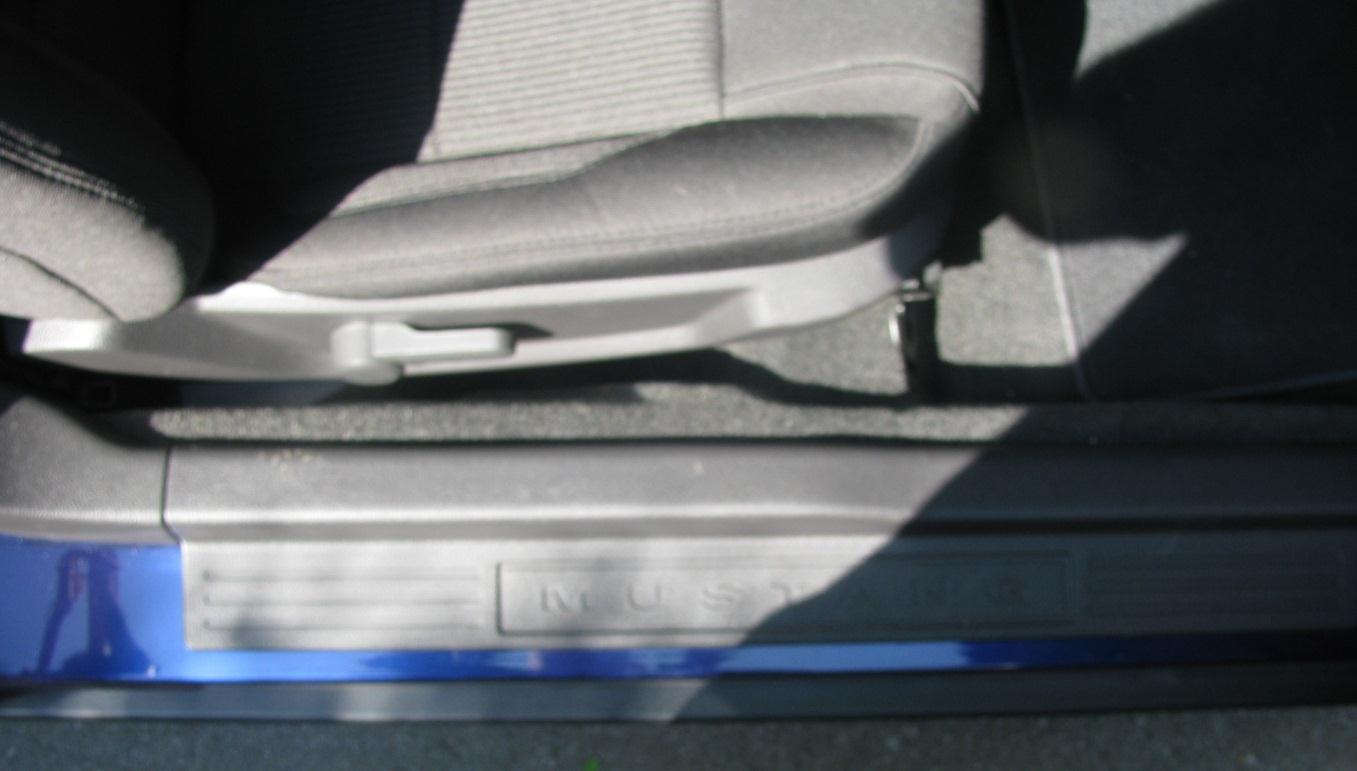
1. Ensure that your vehicle is off before starting the installation. Remove the passenger door sill panel. To do this, simply pull it off. It is easiest to start at one end of the panel and work your way to the other. A panel popper will make this easier but is not necessary.
2. Once the door sill panel is removed the passenger kick panel can be removed. Again, this can be pulled off with little effort. Removing this panel exposes the Smart Junction Box (SJB).
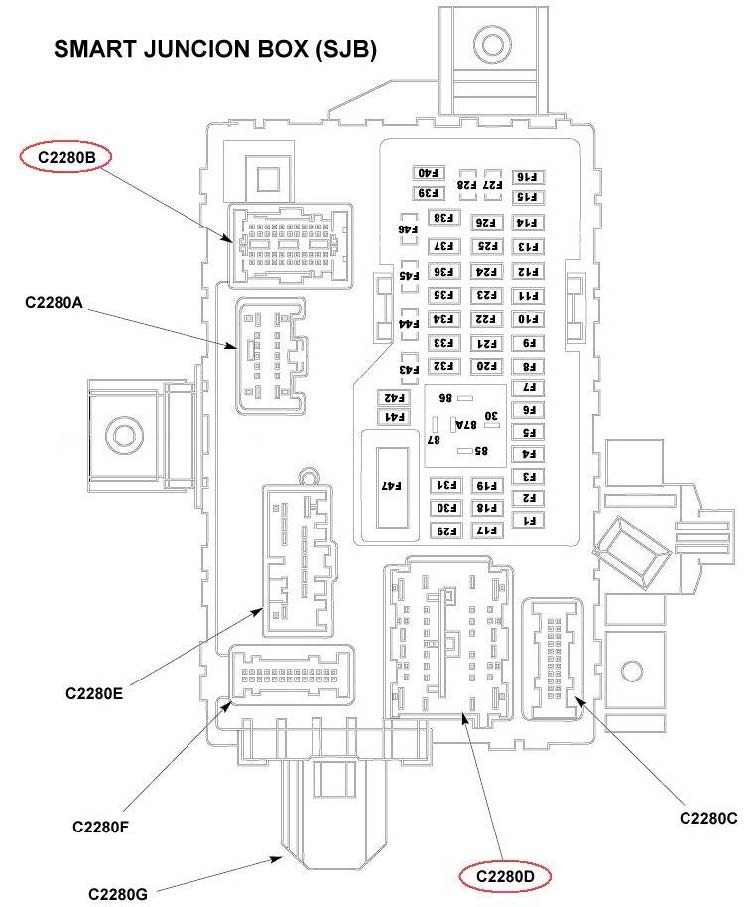
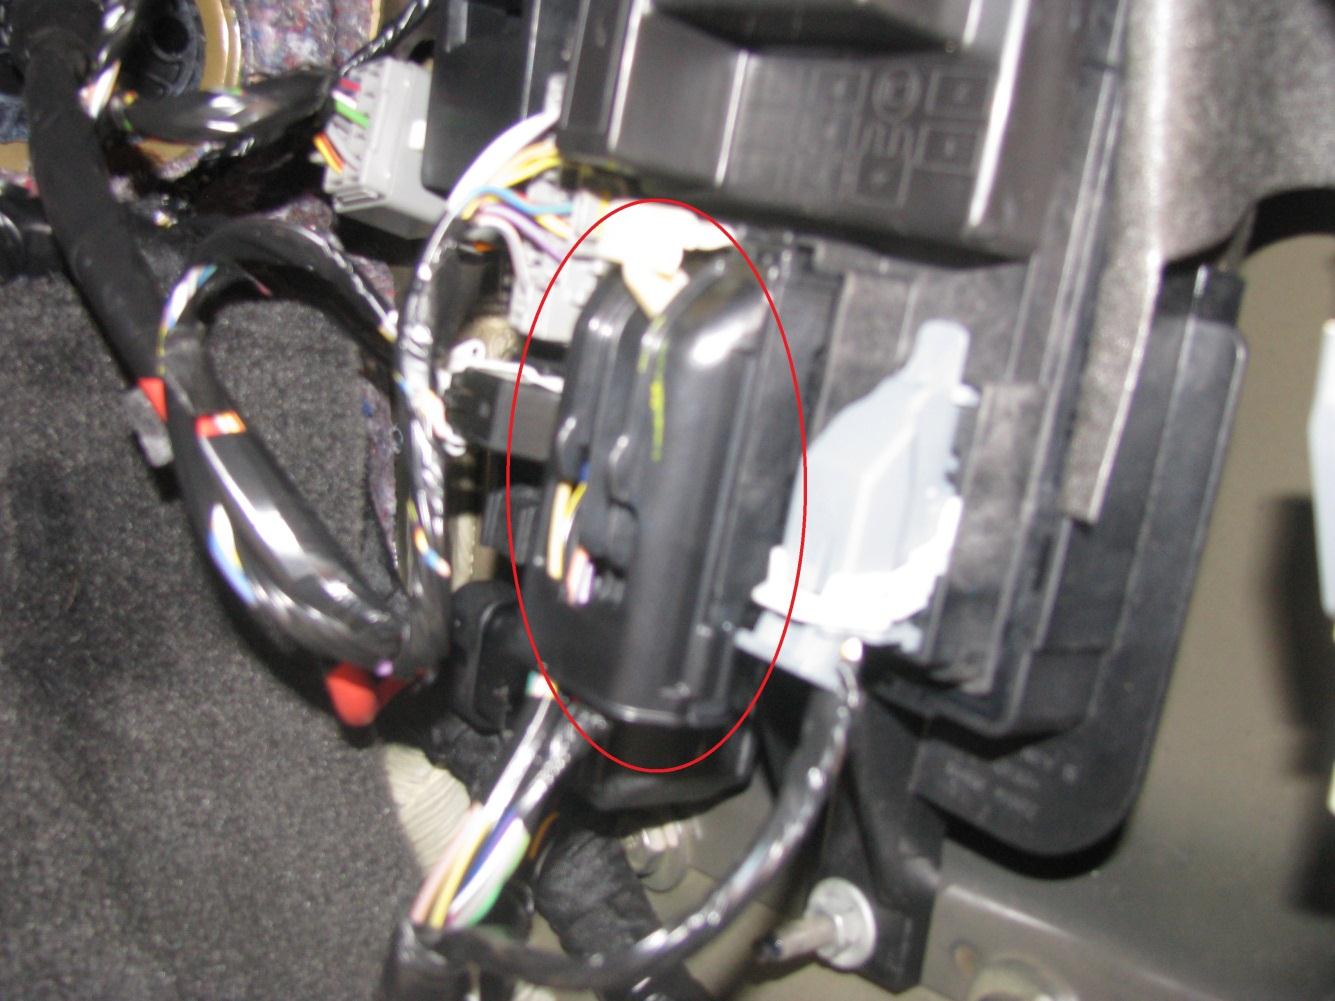
3. Now that the Smart Junction Box is exposed, pull back the cover to expose the connectors and harness bundles plugged into the box. Locate the connector C2280b which is circled below for reference. Unplug this connector and the adjacent connector as their harnesses are taped together.NOTE:In the included instructions, the connector is shown in the bottom right of the SJB. In actuality, the diagram is upside down and the connector will be on the top right.
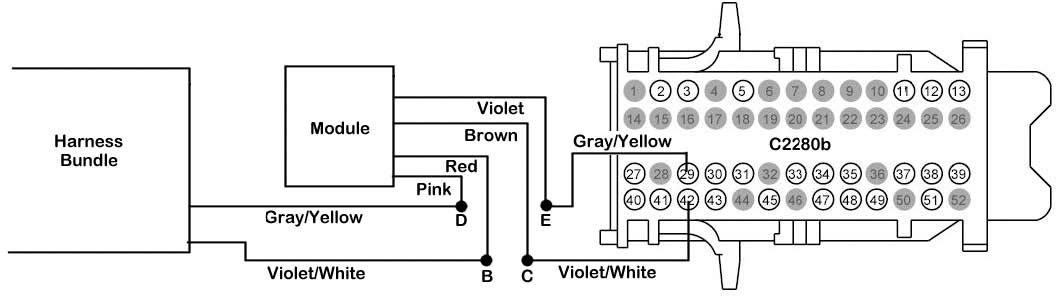
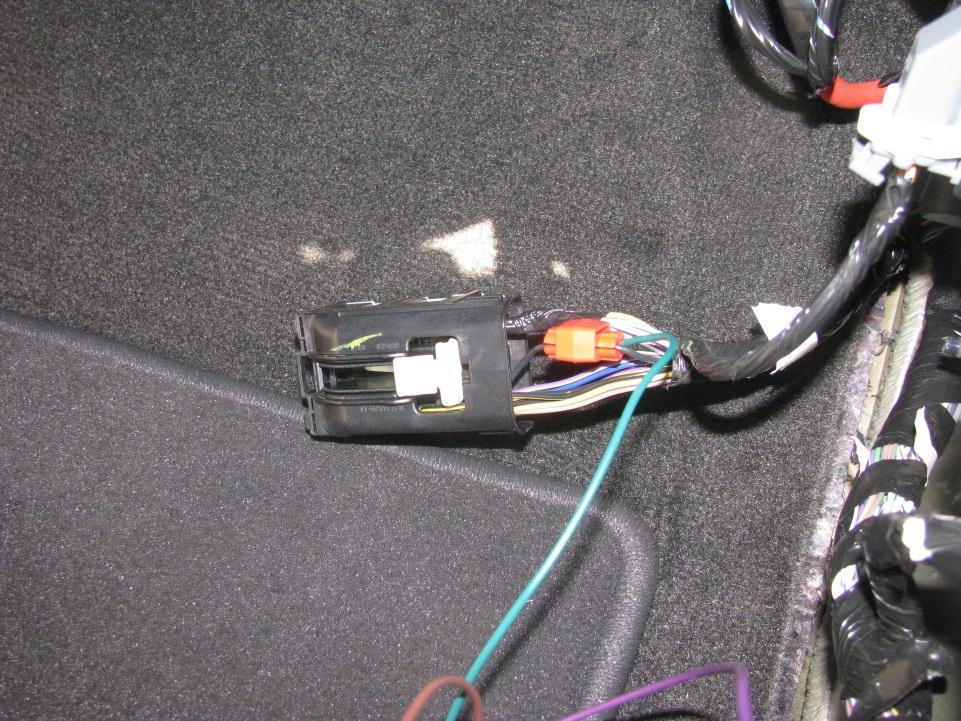
4. Unwrap or cut back the tape around the harness bundle of connector C2280B to expose the bundle of wires.
This is where you will be making the majority of the connections with the One Touch Signals module.
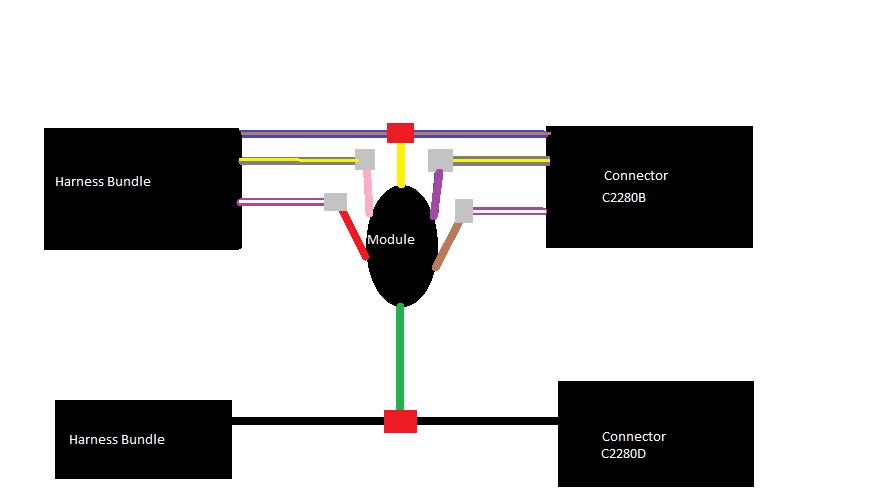
a) Locate the Blue/Brown (blue wire with a brown stripe) harness wire. Using a quick splice connector, connect the blue/brown harness wire and the yellow module wire.
b) Locate the Violet/White (violet wire with a white stripe) harness wire and cut it roughly two (2) inches from the connector and strip about ½” from each end of the wire. Connect the red module wire to the violet/white wire coming from the harness bundle using a wire nut.
c) Using a wire nut, connect the violet/white wire coming from the connector to the brown module wire.
d) Locate the Gray/Yellow (gray wire with a yellow stripe) harness wire and cut it roughly two (2) inches from the connector and strip about ½” from each end of the wire. Connect the pink module wire to the gray/yellow wire coming from the harness bundle using a wire nut.
e) Using a wire nut, connect the gray/yellow wire coming from the connector to the violet module wire.
5. Locate and unplug connector C2280d which is circle below for reference.NOTE: In the included instructions, the connector is shown in the top middle of the diagram. In actuality, it will be on the bottom middle.
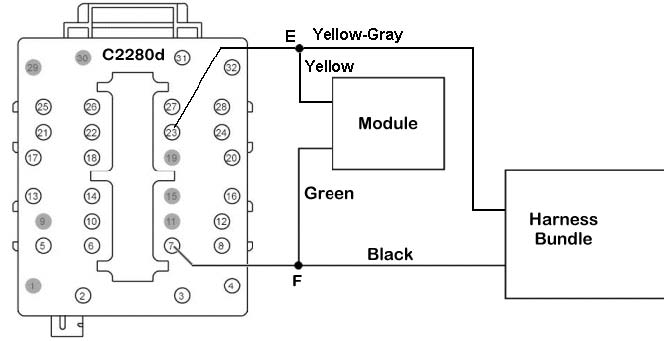
6. Unplug connector C2280d and unwrap or cut back the tape.
7. Locate the black harness wire (may be black/white). Connect the green module wire to the black (or black/white) harness wire using a quick splice connection.
8. Everything can now be plugged back in and tested. If the module is functioning properly, the installation can be cleaned up with the provided zip ties or electrical tape.
9. Replace the passenger side kick panel.
10. Replace the passenger side door sill.
ProgrammingyourOneTouchTurnSignals:
Start your vehicle and leave it in park for automatic transmission or neutral for manual transmission.
Tap the right signal five (5) times inside of three (3) seconds. Two (2) seconds later the signal will flash once.
Hold down the right signal for the amount of flashes desired. The signals can be programmed from two (2) to eight
(8) flashes.
Release the turn signal after the desired number of flashes; hold down for the entire last flash or you will end up
with your last flash not completing your full sequential flashes (1‐2‐3). Two (2) seconds later the signal will flash your new programmed number.
Your signals will still function as they always did. In addition to normal functioning, you can tap the signal for one touch mode. If you tap the lever quickly and release it, your signals will flash for the programmed amount of time and quit on their own.