 FREE 1 to 3-Day Delivery on Orders $149+ Details
Pypes 409 Stainless Steel Off-Road X-Pipe ('99-'04 GT) - Installation Instructions
Installation Time
2 hours
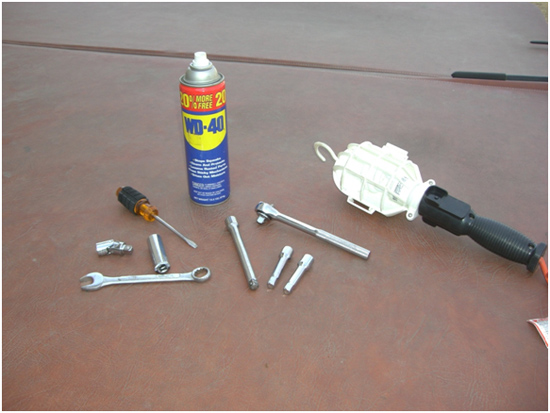
Tools Required
- 5/8 Wrench or Ratchet
- Long Screwdriver
- 3/8" Drive Ratchet
- Long Extension(s)
- Swivel Head Attachment
- 15mm Deep Socket
- Adjustable Light
- WD-40 (to loosen bolts)
Installation
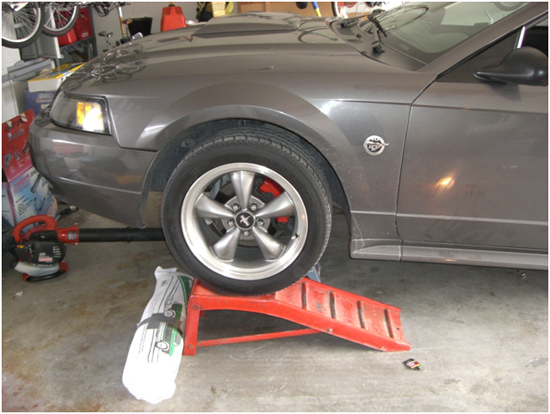
1. Securely raise the car with enough room to work safely under it. Make sure to apply the emergency brake and put blocks behind rear tires.
2. Disconnect the car's battery. (You will be working near the car's starter).
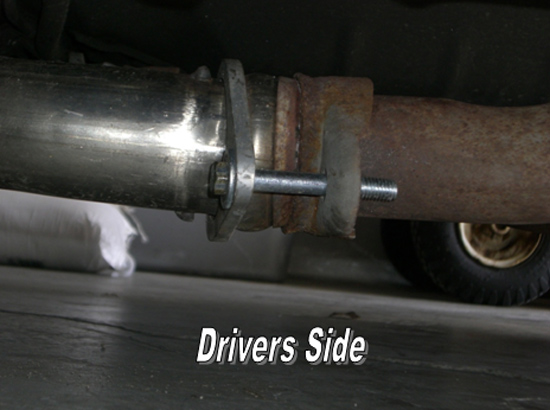
3. Remove the nuts from the exhaust manifold using a 15mm socket with long extension on the driver side. While on the passenger side, you will need to use the swivel attachment. It is recommended that you use WD-40 or something similar to help loosen the bolts. Depending on the length of your extension it may be necessary to use more than one.
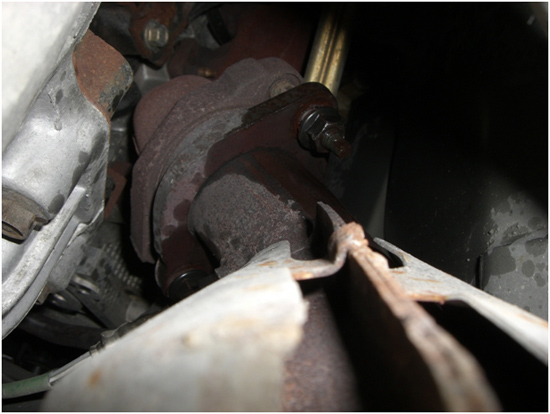
4. Now that you have the front bolts loose, move to the back of the car and remove the mid-pipe from the cat-back. A 15 mm socket will work here as well.
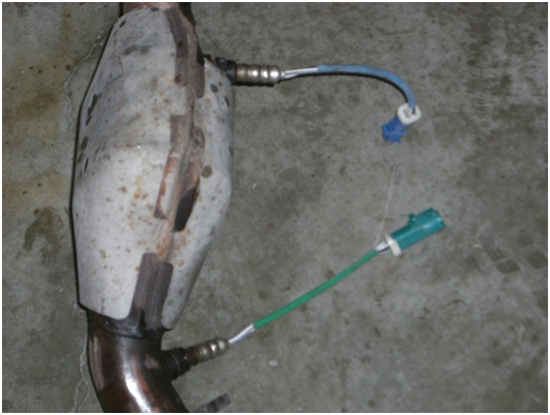
5. At this point, your mid-pipe should want to drop down on its own. The only thing that will be holding it in place is your O2 sensors. Carefully remove the O2 sensors using a screwdriver or your hand, if possible. The front green O2 sensors may be a little hard to remove. This is where I found using a screw driver to be extremely handy. Your hand should do the trick on the rear blue sensors, as they are easy to reach.
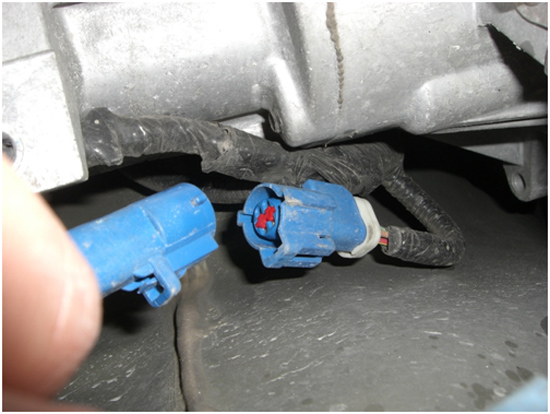
6. Now that the mid-pipe is off the car, you will now need to swap out the 02 sensors and install them into the new X-pipe. Be sure to keep the O2 sensors in the same locations that you removed them from the old mid-pipe. Green ones in the front, blue in the back. Picture is taken from a backwards view.
7. Now is the time to start installing your new X-pipe. You can loosely install the passenger side down pipe; do not tighten. You can also reattach the front O2 sensor at this point, green to green. The driver side down pipe may also be installed. Do not tighten this part completely either. Also reconnect the O2 sensor.
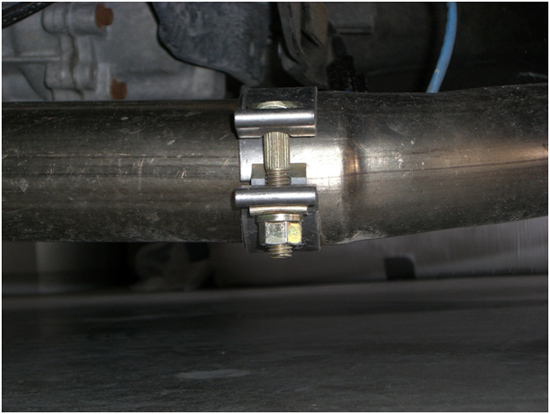
8. Once your down pipes are in place, you may install your new X-Pipe. I found it easy to hook the X-Pipe into the down piping first, before connecting to the existing cat-back. You can snug up the U-brackets on the X-Pipe.
9. Now reattach the rear O2 sensors, blue to blue.
Note:On the 2004 models, you will need to use O2 extensions. You will want to run the extensions over the transmission cross member to keep them away from the heat displaced by the exhaust.
10. Next, reconnect the existing cat-back to the X-Pipe.
11. With everything in place, check the entire exhaust system for clearance against the body and moving parts. Reposition the exhaust where needed, so that everything fits correctly.
12. Now you can start tightening the bolts. Starting at the exhaust manifold, tighten the bolts from front to back.
13. Reconnect the battery. Start the vehicle, inspect for any exhaust leaks. Double check all fasteners adjust as necessary.
Installation instructions provided by AmericanMuscle customer Cody Horrocks 2.23.09
