FREE 1 to 3-Day Delivery on Orders $149+ Details
How to Install Cervini's Functional Ram Air Kit for Concept Hood on you 2005-2009 Mustang GT and V6
Installation Time
1 hours
Tools Required
- Ratchet with 10mm socket, 7/16” socket, & 3” extension
- Grinder with cutting wheel
- Scissors
- Masking tape or painter’s tape
- Cordless drill with 1/8”, ½”, & 3/8” drill bits
- Closed End 10mm Wrench
- 5/64” or 2mm Allen Wrench
- Phillips Screwdriver
- Caulk, gasket maker, or some form of WATERPROOF Sealant
- 2nd person to help holding Air diversion plate and adhering 3M Tape.
Contents:
• 1 - Air Diversion Plate (Main Piece, approximately 3-4’ long)
• 1 - 90 degree Adaptor Elbow
• 1 - Billet Aluminum Grate/Screen
• 1 - Roll Double-sided “3M” tape
• 7 - Small Hex Screws (5/64”/2mm)
• 4 - Small Black Phillips Screws
• 25 - Small Self-Tapping Phillips Screws
• 1 - 7/16” Bolt and Nut
• 2 - Washers
***Be sure to check for all required contents and proper fitment before installing or painting.***
Installation Instructions:
1. Clean bottom of Hood. Use soap and water ONLY other chemical cleaners may counter-act the adhesion of the 3M Tape later in the install. Dry Thoroughly!
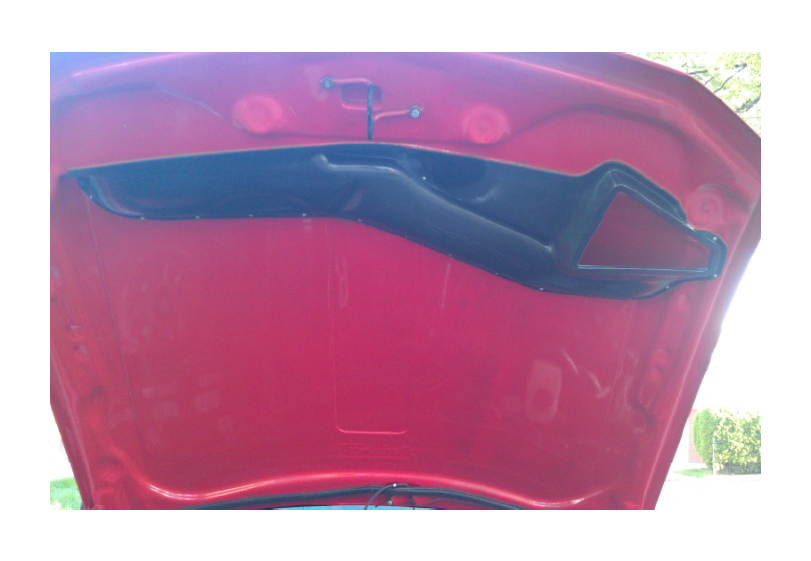
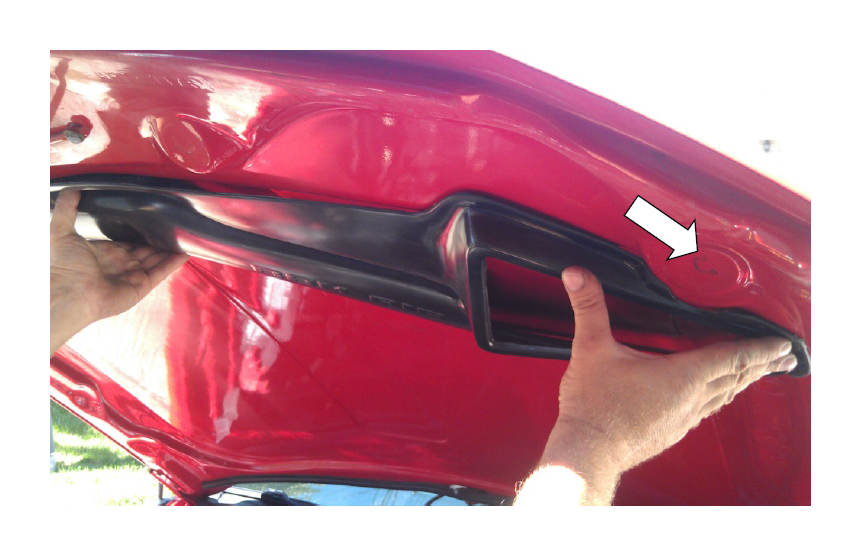
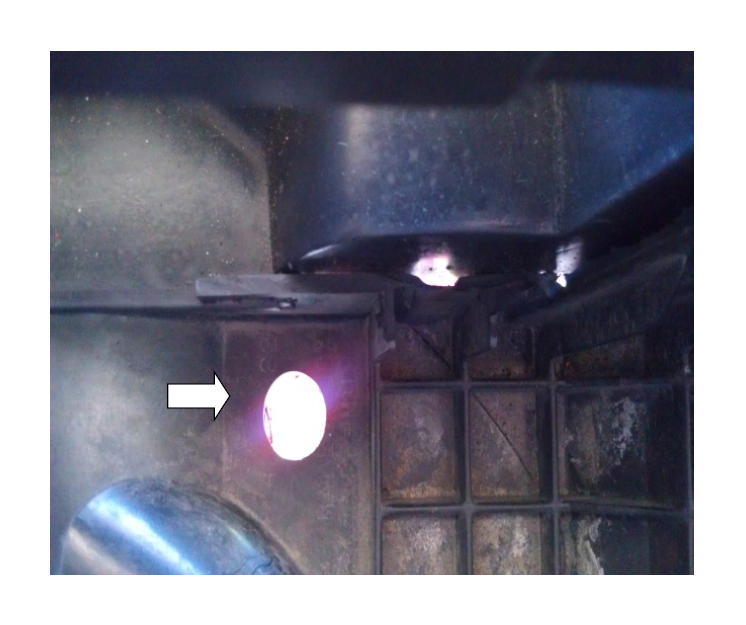
2. Check Fitment on Diversion Plate. Check to see the scoops line up with the manufactured indents in the diversion plate. Check to see that this kit will clear your radiator fluid reservoir and tube and also clearance on the top right corner of the hood where the Hood stopper rests.
Note: In Figure below, the white arrow shows the location of the hood stopper location.
3. Removal of Factory Air Box
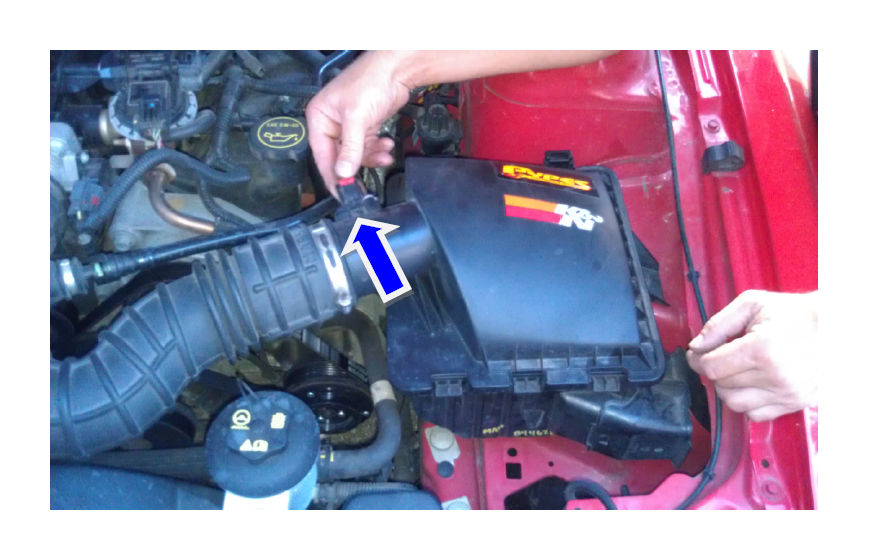
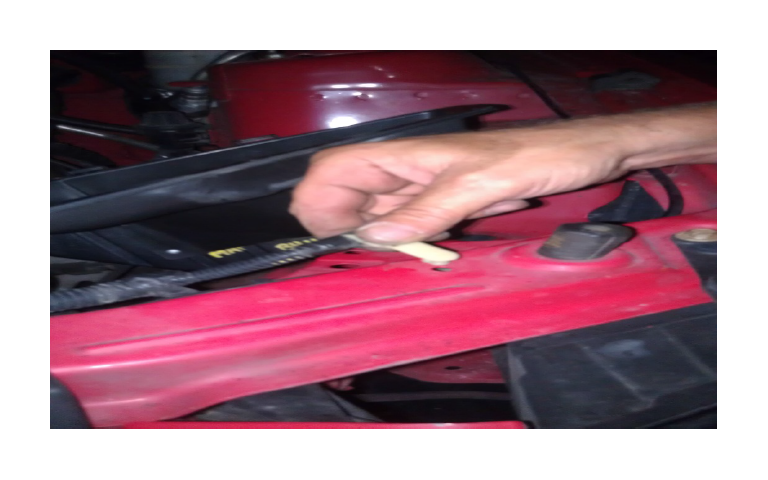
1. First CAREFULLY remove the Mass Air Flow Sensor (MAF) wiring pigtail by pulling the red tab up towards the wiring then remove the whole pigtail from the sensor.
Note: In the picture below, the blue arrow shows the direction to remove the MAF Sensor Wiring Pigtail.
2. Remove the top half of the Air box and position it out of the way.
3. Remove your air filter. Now is the perfect time to check how dirty your air filter is and think about getting a new one, or if you have a “Re-usable K&N High Flow Drop-In Filter”, to clean it with the K&N Recharge Kit.
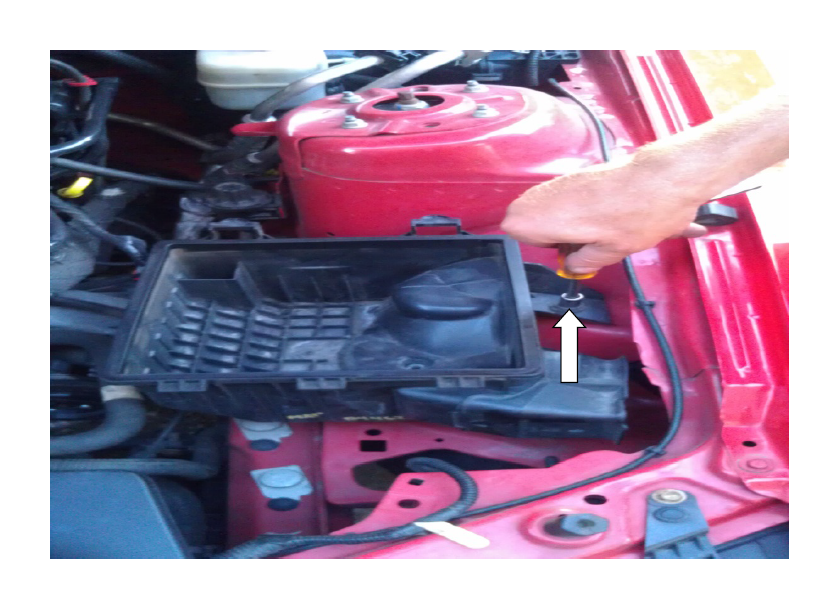
4. Now remove the single bolt holding in the air box with a ratchet with a 3“ extension and 10mm socket.
Note: In the picture below, the white arrow shows the location of the 10mm bolt to remove the air box.
5. Now that the air box is out remove the 2 rubber rests on the bottom of the box and the rubber sleeve on the intake hole (save the rubber rests, you’ll need to re-install these later.
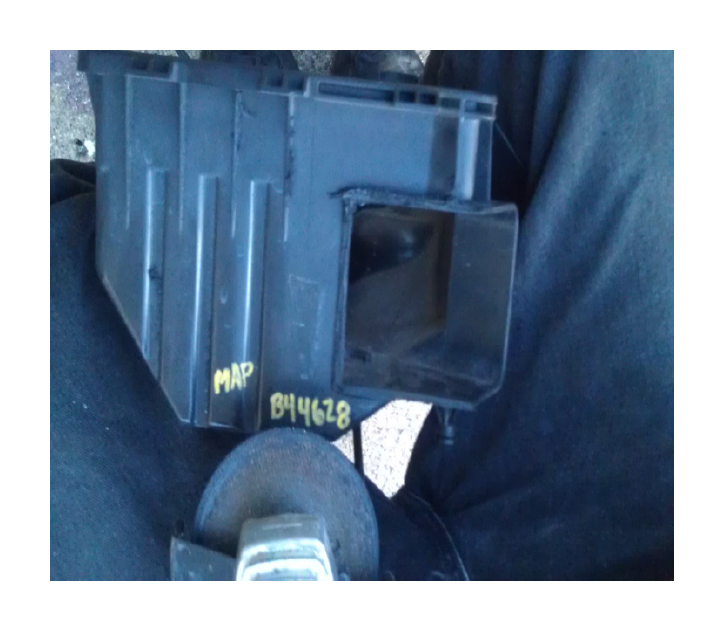
4. Modifying the stock air box to fit the 90 degree adaptor elbow.
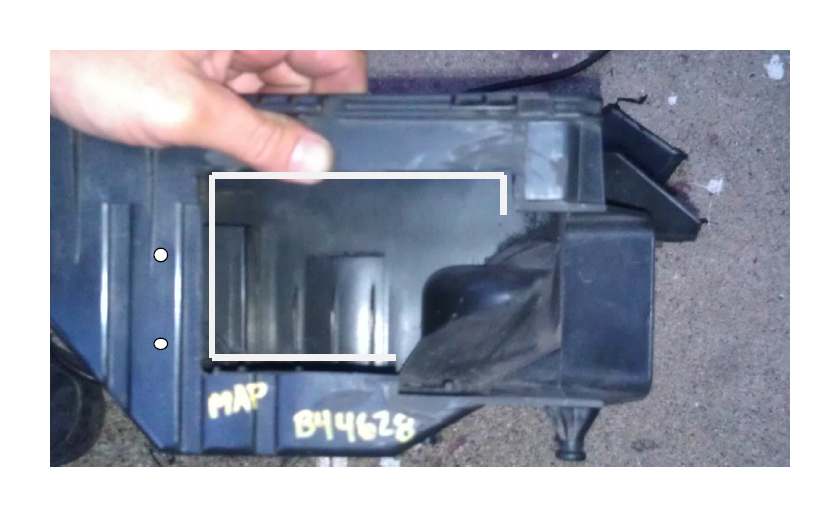
1. Using a grinder with cutting wheel, lay wheel flat on front of air box and cut into the air inlet hole as shown below. Note: In the picture below the white arrow shows wheel flat with box. White box shows piece cut out.

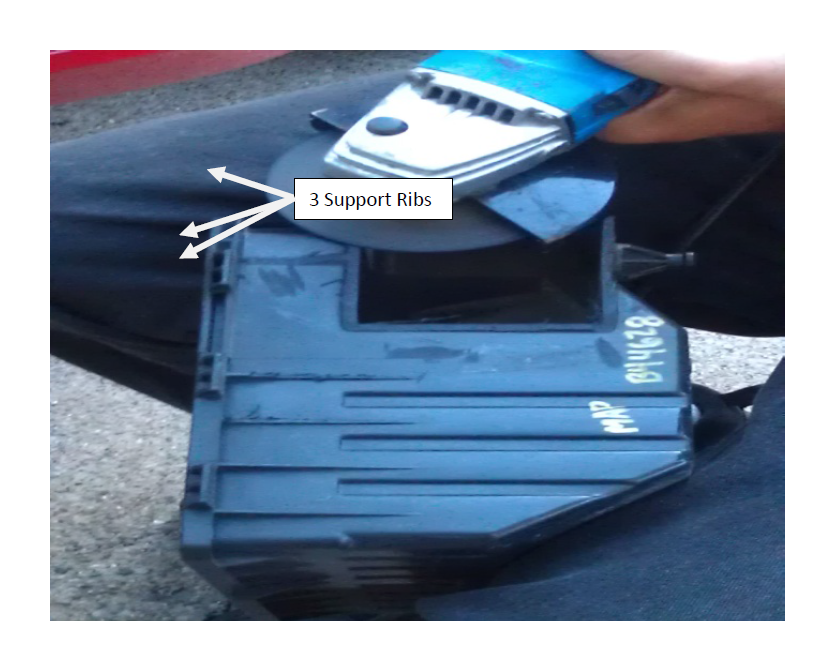
2. Using a grinder level out the first 3 support ribs and any bumps left over from cutting in the step before as shown below.
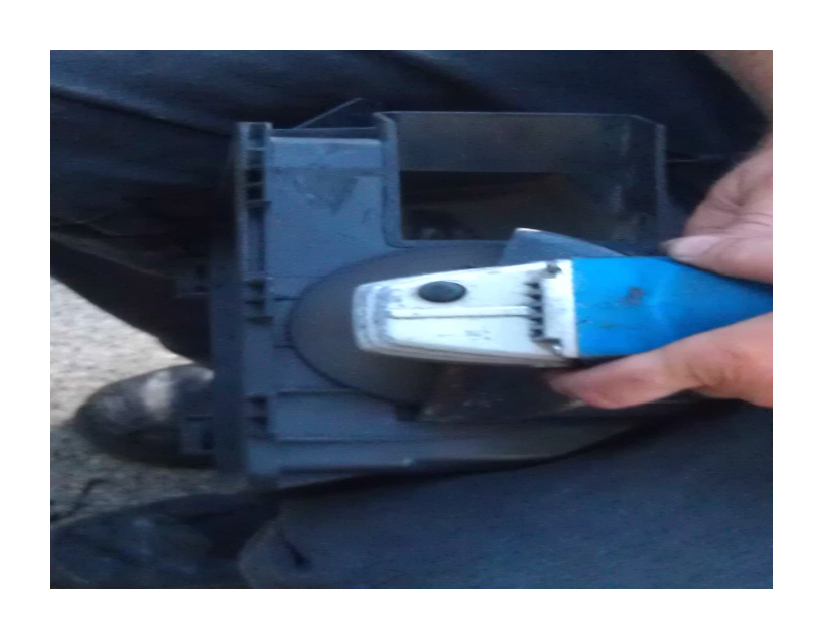
3. Next cut out the given Template and tape it to the air box.
4. Use a cordless drill with 3/8” drill bit to drill the 3 marked holes on template.
3 Support Ribs
5. Install 1/8” bit to drill and drill the 2 marked holes on template.
6. Using the grinder, cut the designated square out marked on template. Note: in the picture below, the white lines show the air box after the square and holes have been cut from box using template.
5. Connecting the Elbow and air box
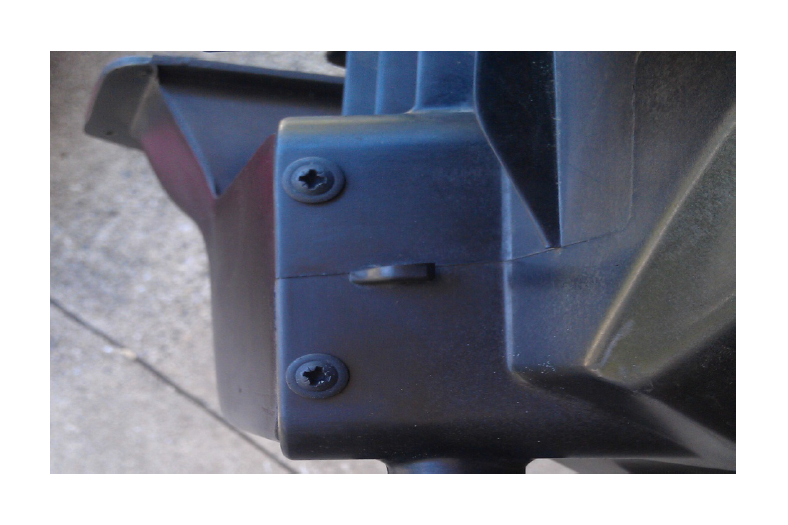
1. Fit 90 Degree Adaptor Elbow into modified hole in air box.
2. Using Phillips screw driver install 2 black Phillips screws into 2-1/8” pre-drilled holes through the adaptor and into the front of the air box. Note: the white arrow in the picture below show the 2 black screws connecting the two pieces.

3. Now that the two pieces are connected, drill 2 more 1/8” holes on the side of the air box where the 2 meet and connect them using 2 black Phillips screws.
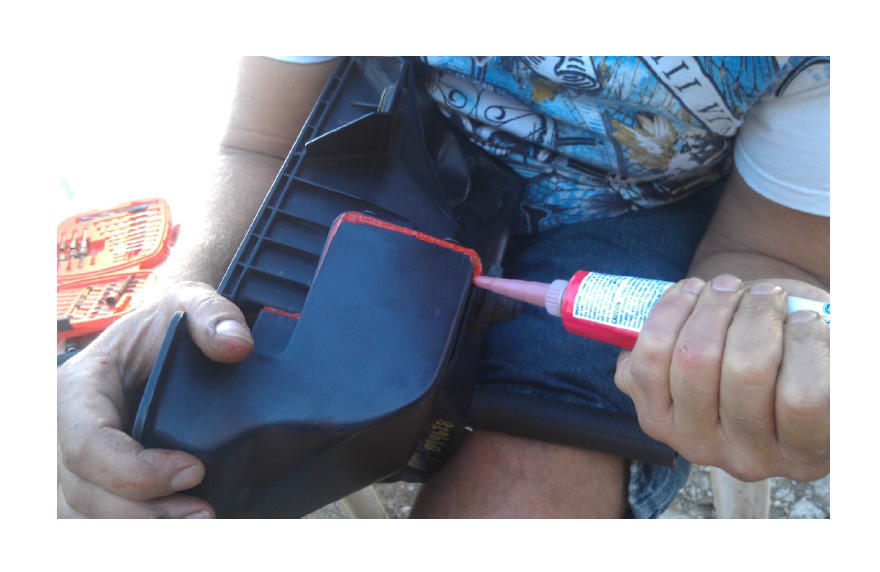
4. Use the sealer and seal around the entire edge where the two pieces are now 1 as shown below.
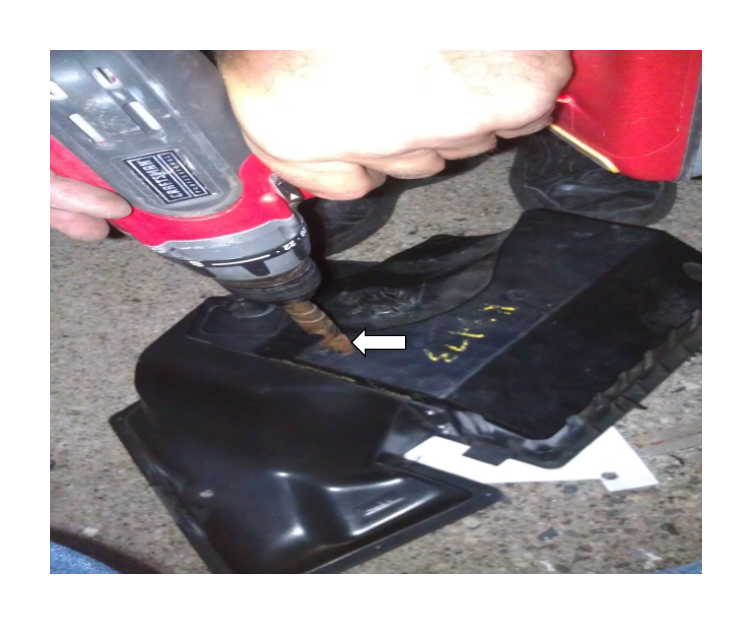
5. Using ½” drill bit, enlarge existing drain hole in bottom of factory air box to accommodate the excess water from the hood scoops when it rains. Note: the white arrow in the pictures below show the enlarged hole for water.
6. Re-install air-box.
1. Remove plastic clip holding wires routed along top of headlight housing and re-route just below so it is not damaged by new adaptor elbow.
2. Re-install 2 rubber rests to bottom of factory air box.
3. Fit box into Engine area (be sure rests set in designated holes)
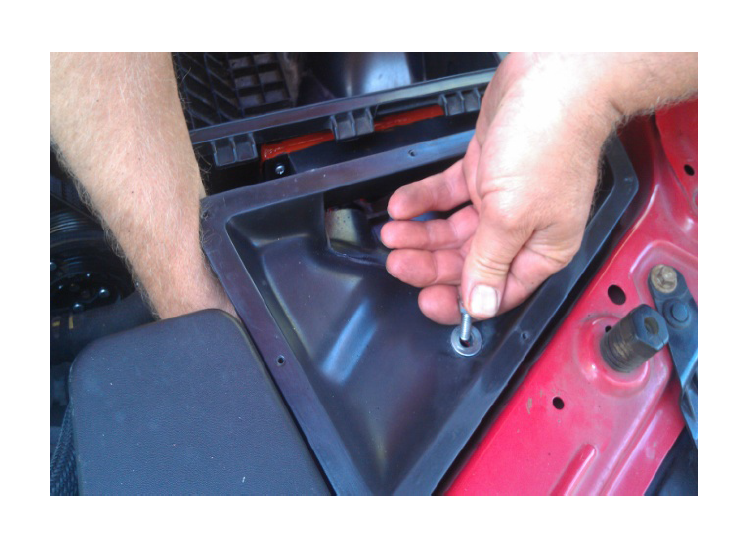
4. Re-install 10mm bolt originally removed from stock air box (found just above driver’s side wheel)
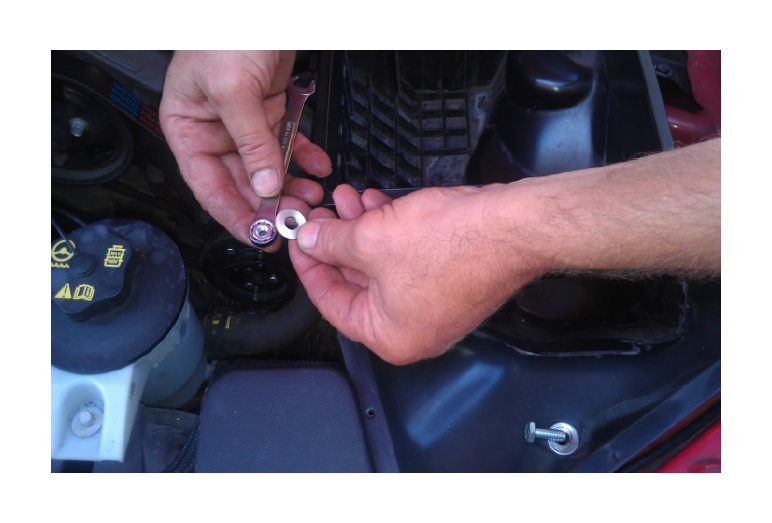
5. Place 7/16” bolt through washer and through hole in 90 degree adaptor elbow.
6. Place 7/16” nut and washer in closed end 7/16” wrench and carefully install to bottom of bolt from previous step. **Be careful not to strip threads on bolt.
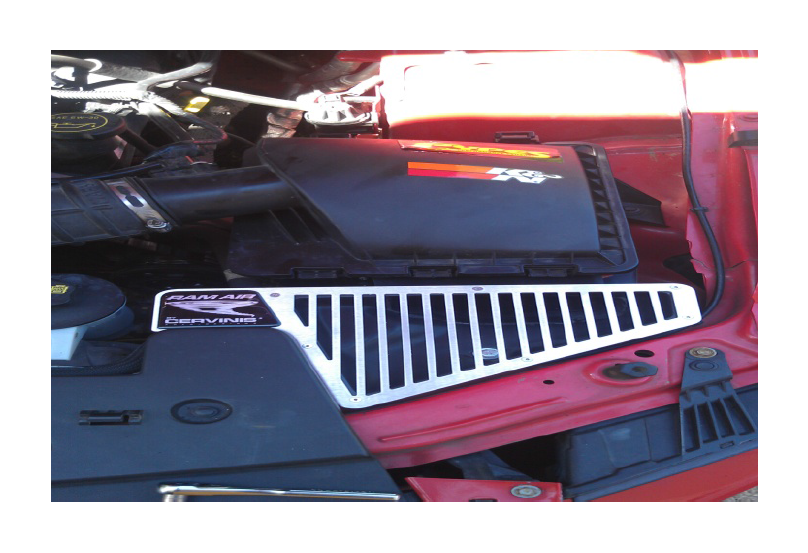
7. Place Billet Aluminum Grate on top of 90 degree adaptor elbow and install 7 Small Hex Head screws with 5/64” or 2mm Allen Wrench.
7. Install Air Diversion Plate
1. Be sure that lip of diversion plate which rests just below scoops is clean and apply 3M double-sided tape to entire lip. Note: White arrows in picture below shows the location of the 3M to be applied (the lip).
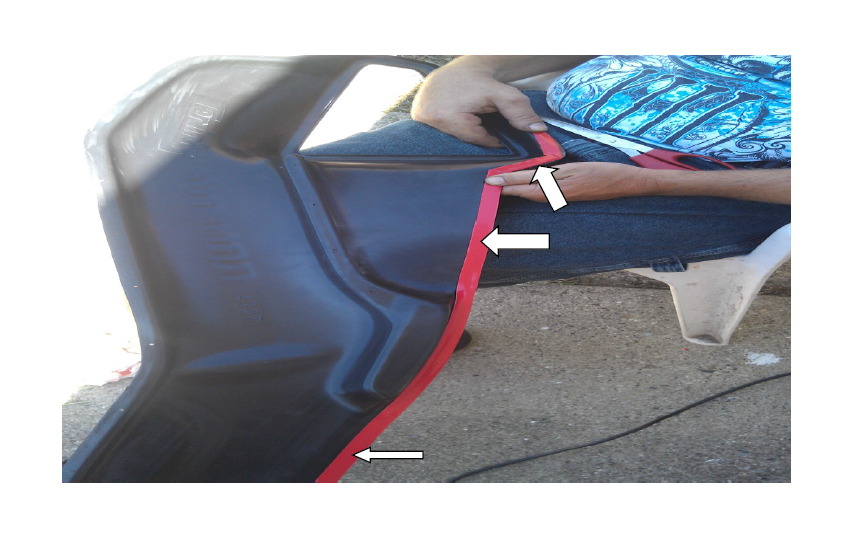
2. Remove red backing from 3M Tape and place Air diversion plate onto hood. DO NOT LET GO OR 3M WILL NOT WORK.
3. Have a helper tape diversion plate to hood to hold the weight of the plate.
4. Apply pressure to the areas with 3M tape for 5 minutes to ensure adhesion.
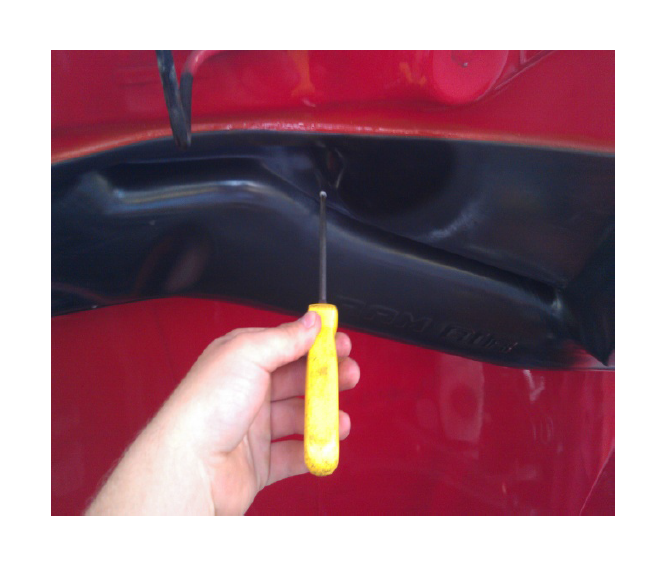
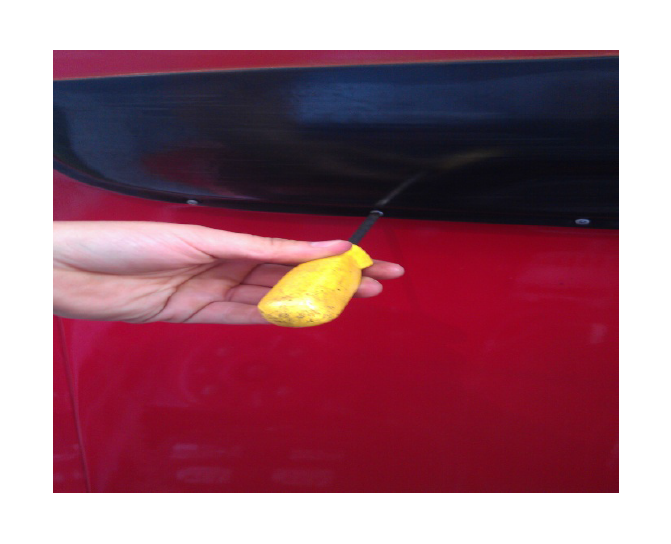
5. Using ONLY a Phillips screw driver install self tapping screws into holes in diversion plate and securing plate to hood. DO NOT USE DRILL. IT WILL STRIP THE HOLES IN THE FIBERGLASS. There should be 22 holes in the diversion plate to apply screws. Note: Pictures below shows installing screws into plate/hood with ONLY screw driver.
6. Apply sealer to lip of diversion plate where the 3M was placed to help the plate adhere to the hood.
8. Let harden and dry for 24 hours before popping the hood to ensure the sealer and 3M work to their full potential and you’ll have a good seal.