FREE 1 to 3-Day Delivery on Orders $149+ Details
How to Install a GT500/CS/BOSS Rear Diffuser on your 2010-2012 Mustang
Installation Time
3 hours
Tools Required
- Phillips Screw Driver – Half Inch Stubby (Required)
- Small Straight Slot Screw Driver (Required)
- Ratchet – 1 / 4 “ Drive (Required)
- 11 MM Socket – 1 / 4 “ Drive – Deep socket kind (Required)
- Push Pin Pliers (Highly Recommended)
- Old Blanket (Highly Recommended) – to lay down the valance on to prevent damage
- Needle Nose Pliers / Regular Pliers (optional)
- Zip Ties or 2 X 3/8 inch nut + bolt (optional)

Shop Parts in this Guide
Installation
Preparation:
- · Average Time Required: 2 to 3 hours
- · Place a blanket down in the area which you will be working in. This will prevent scratches on the rear fascia / valance.
- · Remove your License Plate ahead of time
- · Just in case they break, acquire get some extra push tabs from local auto store.
Recommended Tools:
- · Phillips Screw Driver – Half Inch Stubby (Required)
- · Small Straight Slot Screw Driver (Required)
- · Ratchet – 1 / 4 “ Drive (Required)
- · 11 MM Socket – 1 / 4 “ Drive – Deep socket kind (Required)
- · Push Pin Pliers (Highly Recommended)
- · Old Blanket (Highly Recommended) – to lay down the valance on to prevent damage
- · Needle Nose Pliers / Regular Pliers (optional)
- · Zip Ties or 2 X 3/8 inch nut bolt (optional)
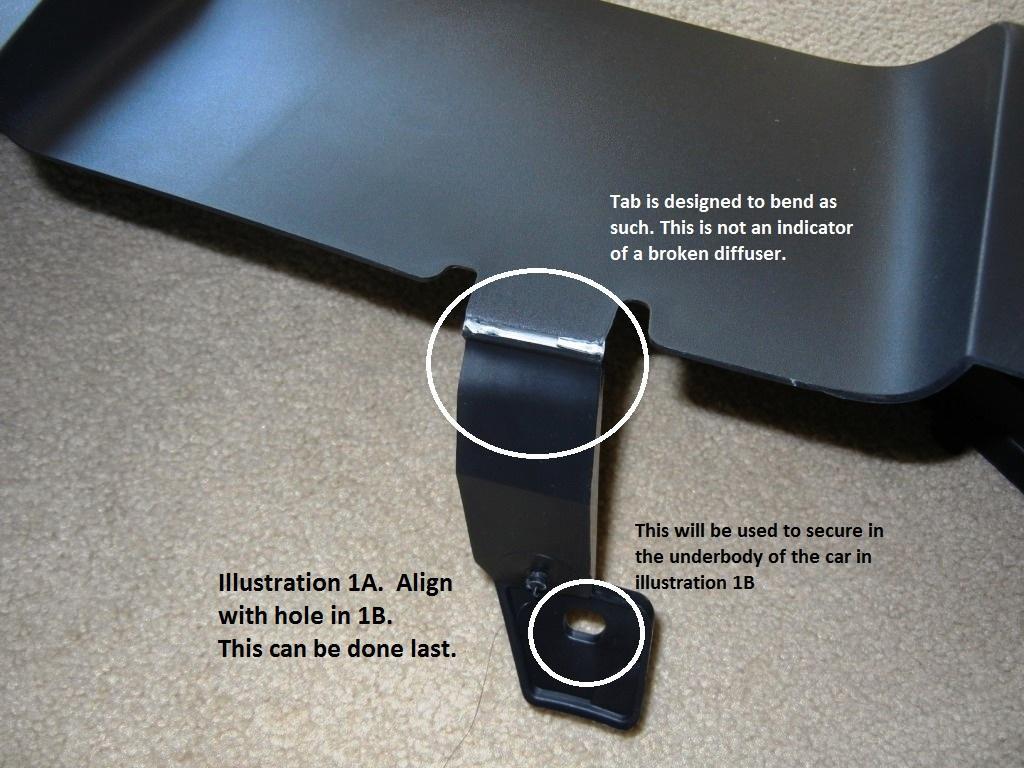
Preface Note: When the Rear Diffuser arrives make sure to inspect it for any damage. Make note that the tabs shown in Illustration 1A may look broken but is actually designed to bend in such manner. If this tab is broken off then contact American Muscle for a replacement. However, this tab is not critical to the installation as the stock diffuser does not have this tab. It is recommended though that these tabs be used in the installation process.

SAFETY – Please ensure you follow recommended safety guidelines during installation.
· Utilize Eye Protection such as safety glasses/goggles
· Ensure parking brake is engaged
· Chock wheels
· If working on a lift or ramp – follow the appropriate user manuals
· Ensure vehicle has had ample time to cool down
· Wear gloves as needed
Work Safely and Think Safety!
STEP 1 - REMOVAL OF REAR FASCIA / VALANCE / STOCK DIFFUSER
a. Open Trunk and Remove the Trunk Floor Carpet and Panel. Place aside in safe place.
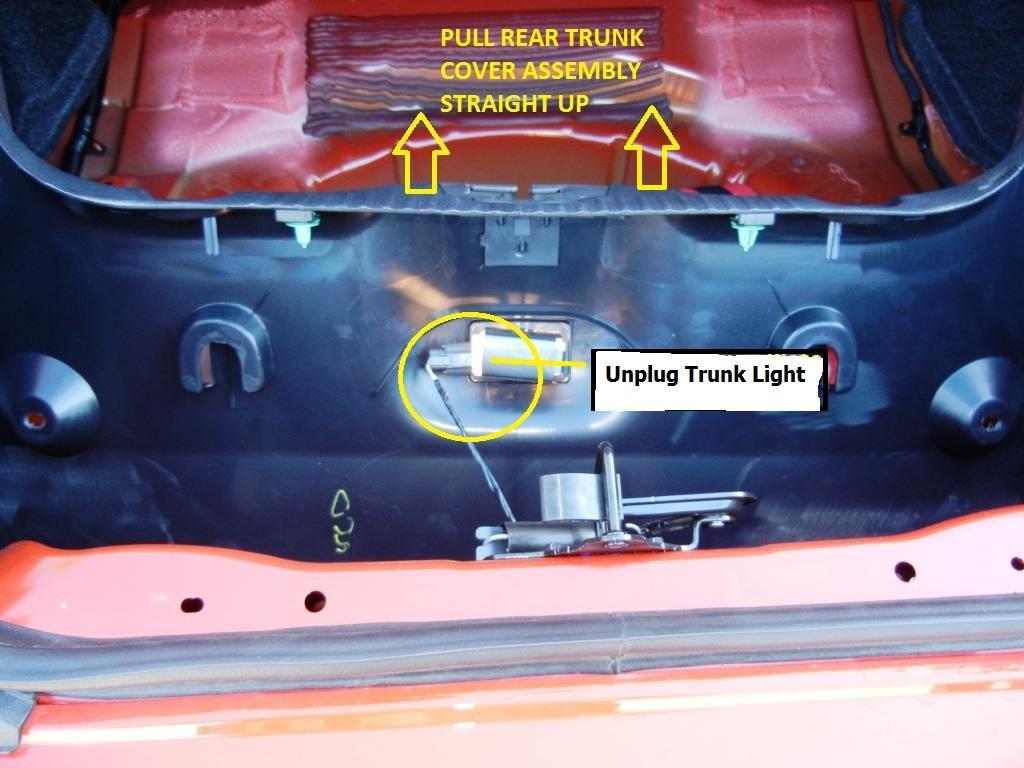
b. Remove the panel retainers located in the rear plastic panel of the rear trunk area. The top two are screw types and can be r emoved manually. The bottom two panel retainers are push pins (recommend the use of the push pin pliers). (FIGURE 1)

d. Detach the Trunk Light plug from the wiring harness once you are able to remove the panel. Remove and Place the panel in a safe location. (FIGURE 2)
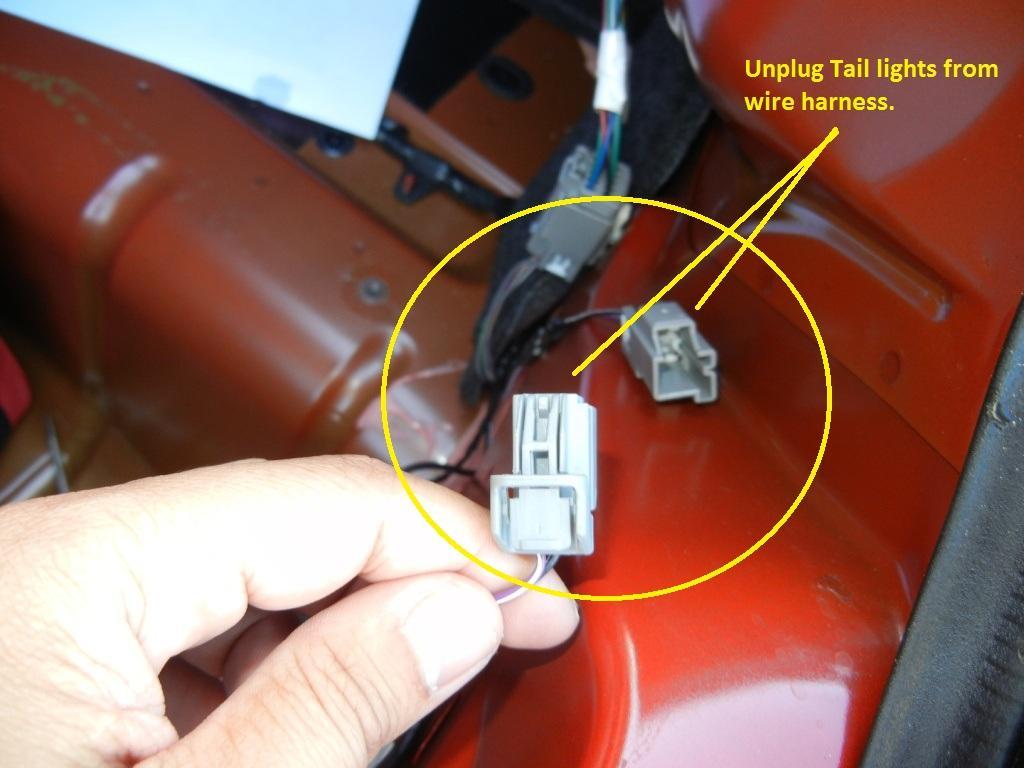
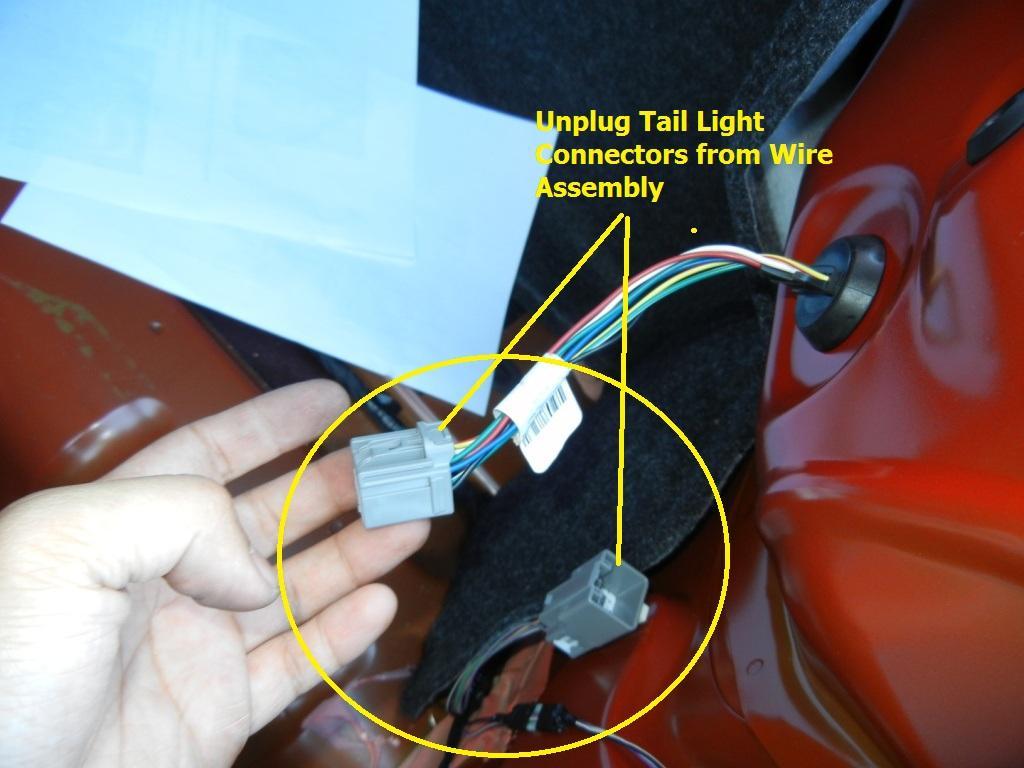
e. Disconnect the tail light connectors on both sides of the car from the wiring assembly. (FIGURE 3)
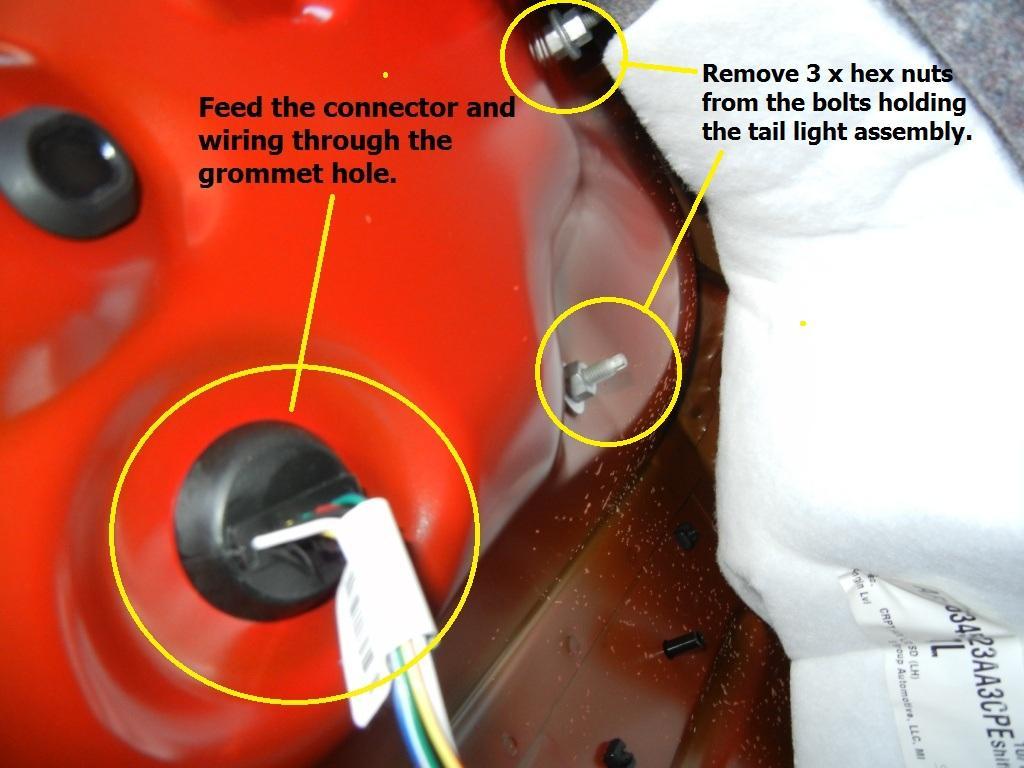
f. Using the Ratchet and 11mm Socket, remove the hex nuts from the bolts that are holding the rear tail light assembly. You may need to fold back some of the side carpeting to locate the third bolt and hex nut. Once you removed all the three hex nuts, push the rubber connector through the grommet hole and feed through hole. Do this for both tail lights (FIGURE 4). Remove the tail lights and place aside in a safe place.
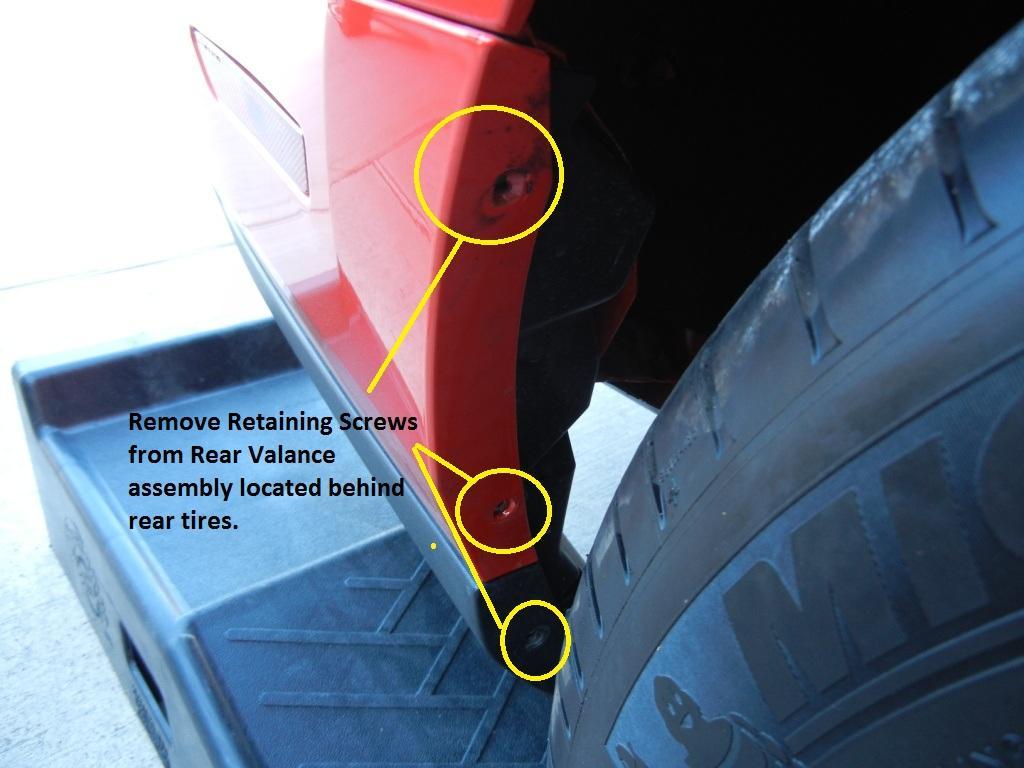
g. Move to the rear wheel well and locate three retaining screws just behind the rear tires. Using a stubby Phillips screw driver remove the three screws. Recommend using 1/2 inch or shorter as there is not much room between the side fascia and tire. (FIGURE 5)
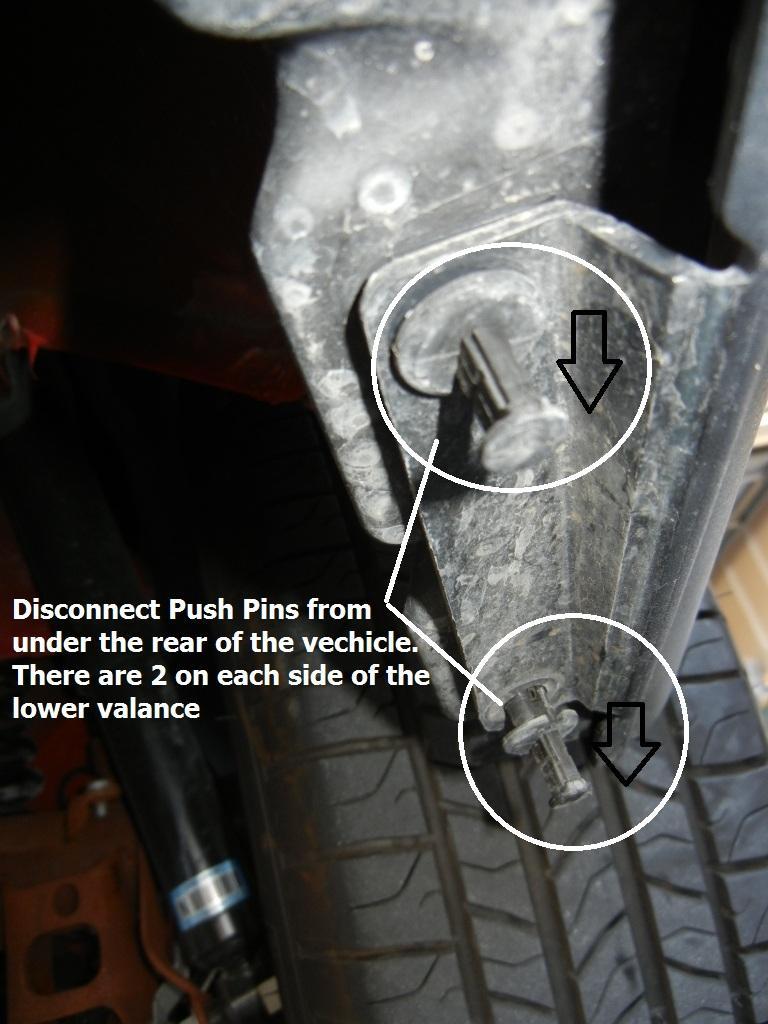
h. Just behind the rear tires, locate push pins underneath the vehicle. Remove these push pins using the push pin pliers. Do this for both sides of the vehicle and set the push pins aside. (FIGURE 6)
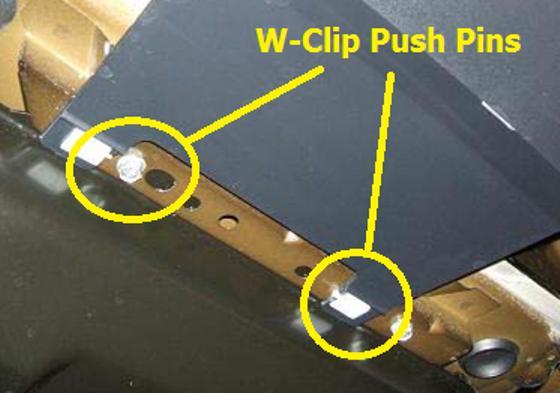
i. While under the vehicle locate the 2 bottom center W-Clip Fasters at the rear center of the valance. Remove these with a forked push pin tool. (Figure 7).
j. At this point, the fascia and valance can be pulled off from the body of the vehicle. It is recommended that this step is at tempted with an assistant. When pulling off the rear fascia and valance make sure it is over a soft covered area like a blanket to prevent any damage.
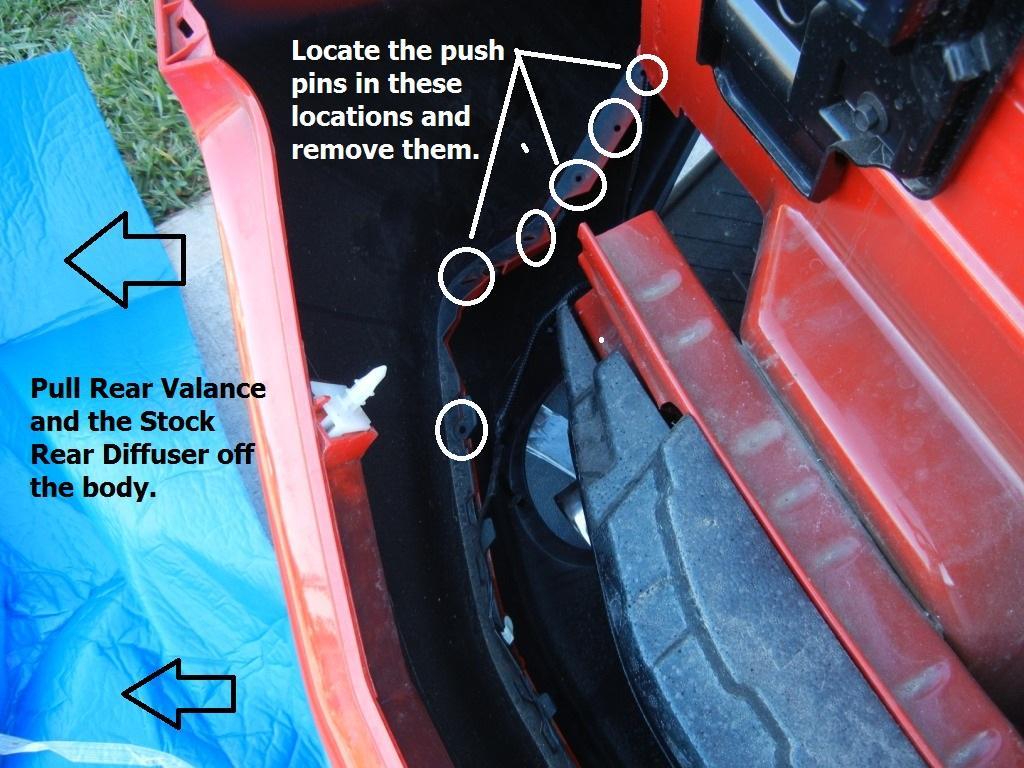
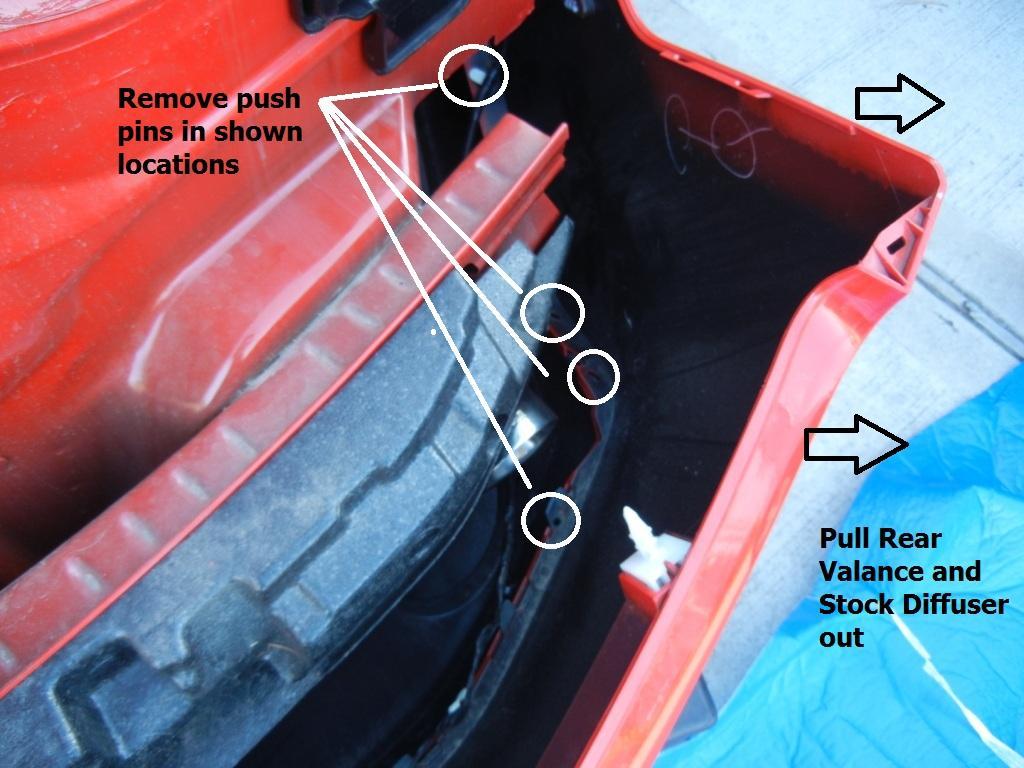
k. With one person on each side, carefully pull the sides from the rear wheel wells. Then carefully pull the rear valance from t he body of the car. Once disengaged, locate the push pins and begin removing them. You will notice three types of retaining pins to remove: Round Push Pins, Screws, and Tabbed push pins. Remove all three types. (FIGURES 8 & 9)
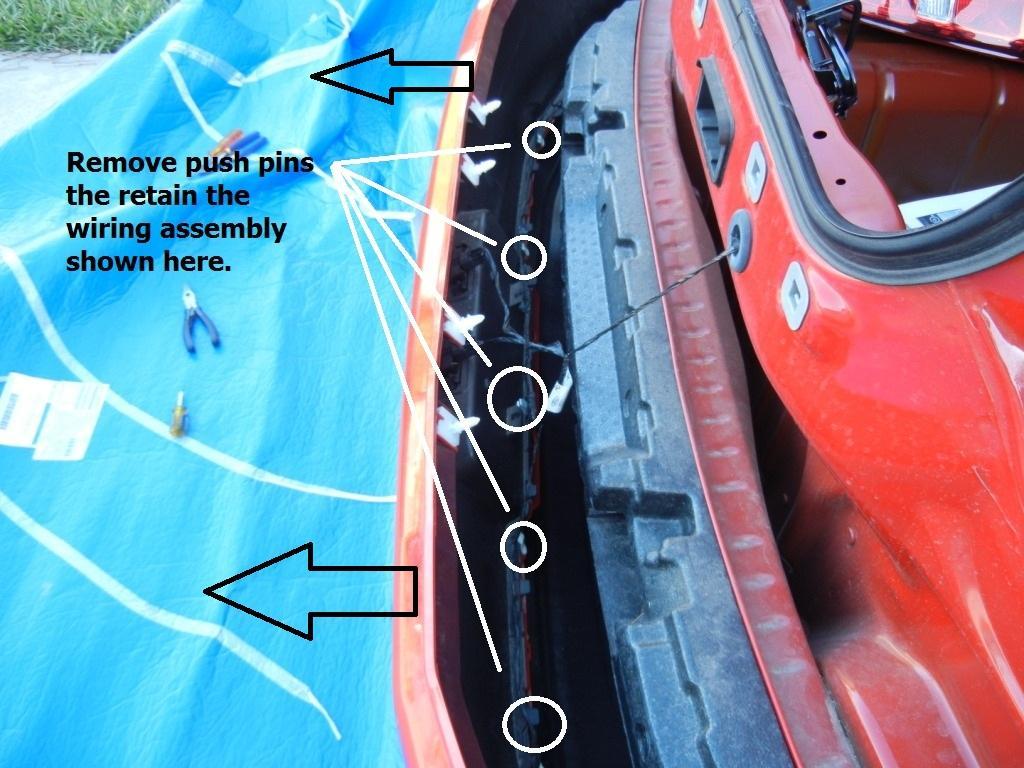
l. Once all the screws and tabs have been removed. Disconnect the wiring harness as needed. The removal of the wiring harness is not required however, but may make it easier to install the GT Style Rear Diffuser.
With the Stock Diffuser / Valance and Rear Fascia completely disconnected, simply pull off the stock diffuser (the black part) from the fascia and separate into the two pieces. Place the stock diffuser away in a safe place.
STEP 2 – INSTALLATION OF THE GT STYLE REAR DIFFUSER
a. Installation part is much easier than the disassembly portion as it is just a reversal of steps. Simply reattach the rear fascia only back into the body of the car by realigning the insert pins (colored white – they can be seen in FIGURE 9) back into the retaining holes. This will hold the rear fascia back into place.
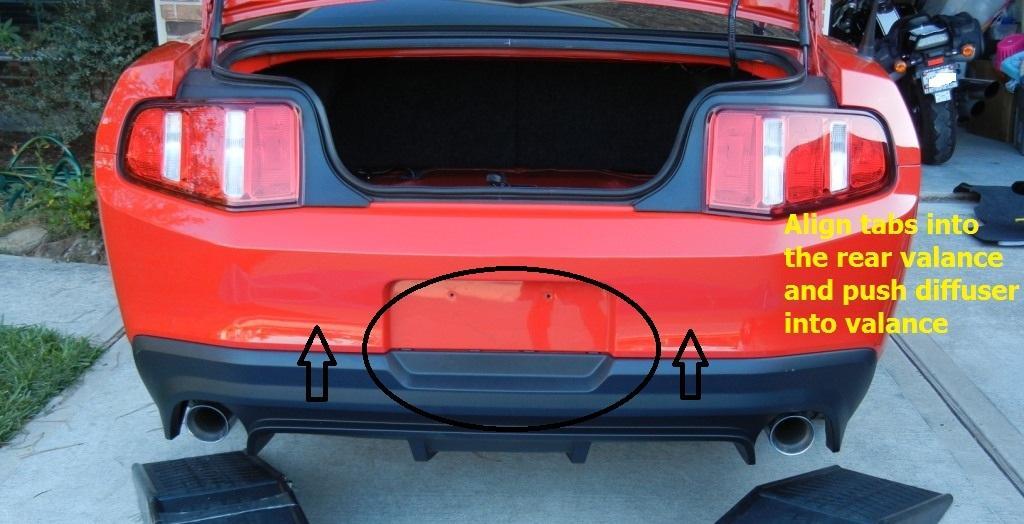
b. Next, take the GT Style Rear Diffuser and use the license plate area as a guide. Make sure all the tabs and tab holes are aligned. The GT Rear Diffuser should simply “POP” into place. This is much easier with an assistant as each person can work on each side.
c. Once the GT Style Rear Diffuser is attached to the rear fascia, carefully pull out both the fascia and diffuser together as one unit just enough to access the push pins area that holds the two units together. Using some sort of stand to hold the two together aids in keeping the units from separating again. In FIGURE 10, ramps were used as a base stand while the push pins were reinstalled.
d. Begin by replacing the round push pins back into the rear valance and the new diffuser. Next reinstall the screws. Lastly, replace the tabbed push pins with the wiring harness from FIGURE 8 & 9.
e. Plug in the license plate light connector.
f. Once the valance and diffuser are secured together, reinstall the entire unit back into the body of the vehicle by pressing it back into place.
Ensure all the tabs and holes are aligned.
g. Replace the W-Clips / Push Pins that were removed from FIGURE 7.
h. Replace the push pins that were removed from under the diffuser from FIGURE 6.
i. Replace the retaining screws located behind the rear wheels from FIGURE 5.
j. Reinstall the tail lights back into their location. Feed the wiring through the grommet hole. Replace the hex nuts
back into the three bolts on each tail light using the ratchet. k. Reconnect the trunk light.
l. Replace the rear trunk panel from FIGURE 2 and replace the push pins from FIGURE 1.
m. Replace the Trunk Floor Panel and Carpet.
n. Secure the Diffuser retaining tabs to the body of the car just underneath the rear valance. This is a recommended but not a required step. The tab can be secured using a bolt and nut combination or zip ties.


o. Inspect the all attachment points. p. Test that the rear tail lights are in full operation using the left and right turn signals, brake light, and hazards.
q. Check to ensure license plate light is operational.
r. Inspect the trunk light is operational.
CONGRATULATIONS – You have officially completed the install